Tag Archives: Heat embossing

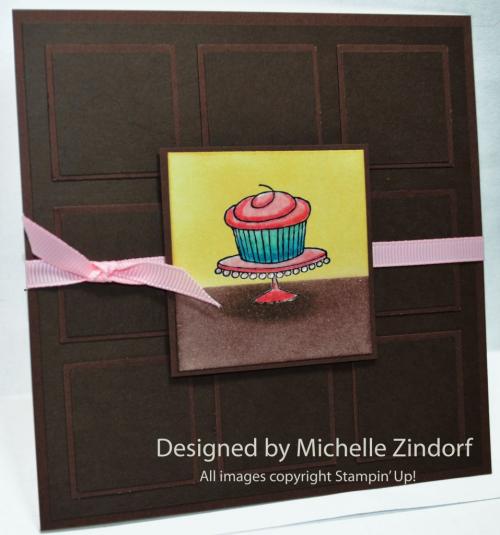
Chocolate Cupcake – Stampin’ Up! Card Tutorial #582

Hello There,

Happy Monday!

My mind must be on Chocolate today.  I’ve been dieting so no doubt, lol.

Today’s tutorial background looks like a big chocolate bar and it was created by layering chocolate colored squares.   The main image panel was created using the emboss resist technique.  I sure which you could see the shine on the cupcake.  It just didn’t show up in the pictures.

You can check out the complete tutorial below.

I’m off to take my beloved dog, Lucas to the vet.  I do believe he has an ear infection since he is shaking his head throughout the day.  Poor pup.

********************************************

I’ve added this card to my sales page where you will also find some great deals on retired stamp sets.  CLICK HERE TO CHECK IT OUT

********************************************

Now on with today’s tutorial. . . . .  . .

Project Supplies:

Stamps: Stampin’ Up!  Easy Events (item number 123225)

Card Stock: Stampin’ Up! Whisper White, Chocolate Chip and Early Espresso

Ink: Stampin’ Up! Craft Basic Black, Classic So Saffron, Early Espresso and Chcolate Chip

Accessories: Stampin’ Up! sponges, Versamarker, markers (Pool Party, Tempting Turquoise, Pink Pirouette and Regal Rose), clear embossing powder, heat gun, 1 3/8″ and 1 1/4″ square punches, Pretty in Pink ribbon, Stampin’ Dimensionals and a post it note

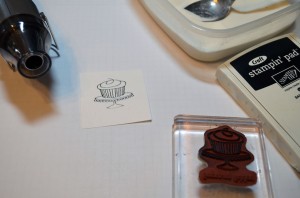
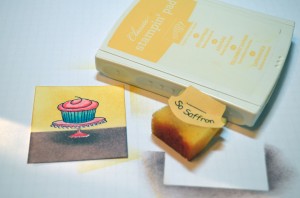
Stamped the cupcake from the Stampin’ Up! Easy Events set (item number 123225) using Craft Basic Black ink on a 2.25″ square piece of Whisper White card stock.

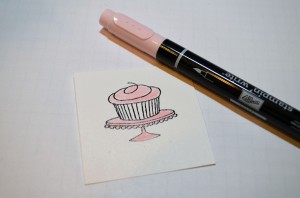
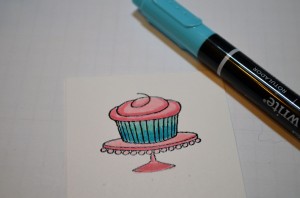
Colored the icing and cake stand Pink Pirouette.

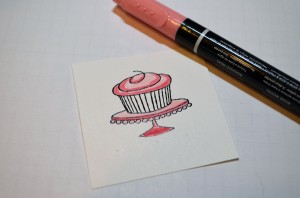
Added Regal Rose marker to the stand and icing and then blended the two colors together using the Pink Pirouette marker.

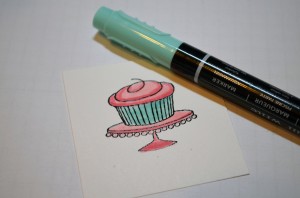
Colored the cupcake wrapper using a Pool Party Marker.

Added Tempting Turquoise marker to the wrapper and then blended the wrapper using the Pool Party marker.

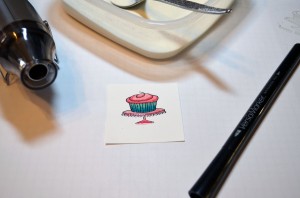
Colored over the image using a Versamarker and then heat embossed the image using clear embossing powder and a heat gun.

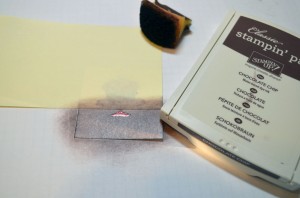
Masked the top of the card stock using a post it note and then sponged Chocolate Chip  in the unmasked area.

Sponged a bit of Early Espresso ink at the base of the stand to create a shadow.

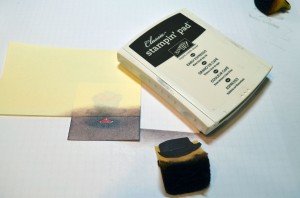
Removed the mask and sponged So Saffron ink at the top of the card stock.

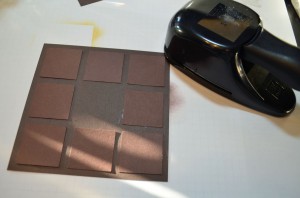
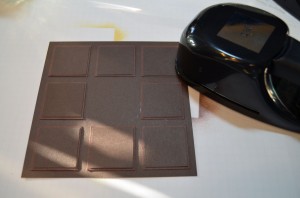
Cut a 5″ piece of Early Espresso card stock and punched 8 1 3/8″ squares from Chocolate Chip card stock.

Added eight 1 1/4″ punched Early Espresso squares on top of the Chocolate Chip squares.

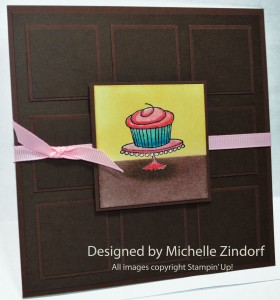
Added a 5.25″ Chocolate Chip panel and a 5.25″ x 10.5″ Whisper White card base (folded in half).   Also added Pretty in Pink ribbon and a 2 5/8″ square behind the main image panel and popped it up using Stampin’ Dimensionals.

Here is the finished card measuring 5.25″.

May your day be totally sweet!

Until my next post. . . . . .

Check out the awesome things happening at Stampin’ Up! below.  There are only 25 days left to take advantage of the free Sale-a-bration products.

Hugs,

Weight loss in 2013:  15 lbs

********************************

Stampin’ Up’s fabulous Spring Catalog Get your supplies to rock those Spring projects.

Sale-a-bration brochure showing the totally terrific stamps and things you can get for free with a $50 order.

***********************************************************

Michelle’s Free Stamp Program

Don’t miss out on my Customer’s free stamp set program. Check it out!  Along with a handmade thank you card from me for your $50 order you will receive a token for each $50 in product you ordered using me as your demonstrator.  After you have collected 10 tokens you will receive a free current stamp set of your choosing, a value of $39 or less.   Here is a link to my online shopping page that you can shop at 24/7 (from the comfort of your home, even in your pj’s) and the products will be shipped directly to your door step from Stampin’ Up.   CLICK HERE TO SHOP.   My free stamp set program will be an on going program.  :)

**************************************************

It’s the time of year us Stampin’ Up! Fans look forward to, it’s Sale-a-bration time!!!!  The best time of year to get your Stampin’ Up! products.  Why you ask?

Shop and receive a free Sale-a-bration product for every $50 you spend.  CLICK HERE TO CHECK OUT THE SALE-A-BRATION PRODUCTS! This is a long brocure so be sure to scan right when viewing. . . . .

CLICK HERE TO SHOP NOW

***********************************************************************

Join Stampin’ Up! during Sale-a-bration and chose $156.50 in product in your kit for just $99.  That’s 25% more product!   Start a business or just enjoy being a demonstrator to receive the 20% discount.

CLICK HERE TO LEARN MORE!

*************************************************

It’s a Magical Paper Escape Every Month!

Check this out, you can now get a monthly kit called Paper Pumpkin from Stampin’ Up! that includes exclusive stamps and everything you will need for a great project.  You can get more info on this great product at www.mypaperpumpkin.com They even have a try me kit!  You won’t want to miss out on even one of these kits. . . . . . .  Please select me as your demonstrator when placing your order.

********************************************

Have you checked out the great clearance rack at Stampin’ Up!  CLICK HERE


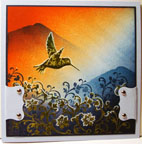
Shadowed Hummingbird – Stampin’ Up! Card Tutorial #577

Hello There,

I hope you had a suburb weekend.  Mine was very laid back, just the way I like it.  🙂

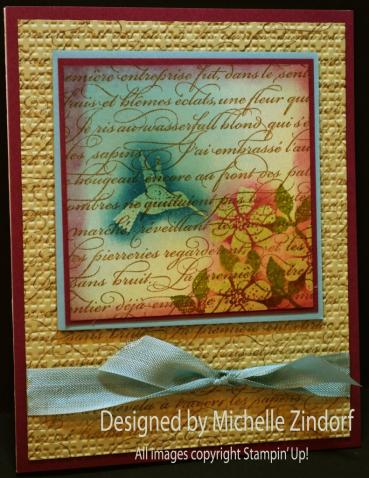
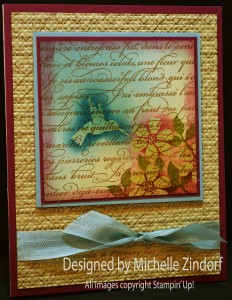
In today’s tutorial I thought I would use the emboss resist technique along with the beautiful Stampin’ Up! Sale-a-bration set, Bloomin’ Marvelous.  Remember, you can get this set for free with a $50 order.

I paired the Bloomin’ Marvelous set up with the En Francais background stamp.

I love how this card turned out.  Check out the tutorial below for instructions.

********************************************

I’ve added this card to my sales page where you will also find some great deals on retired stamp sets.  CLICK HERE TO CHECK IT OUT

********************************************

A few reminders of things you will want to check out. . . . . . . .here are some links:

Stampin’ Up’s fabulous Spring Catalog Get your supplies to rock those Spring projects.

Sale-a-bration brochure showing the totally terrific stamps and things you can get for free with a $50 order.

Paper Pumpkin Monthly Kits, hello, they are wonderful.

Stampin’ Up! Clearance Rack Hurry, you don’t want to miss out on these deals.

***********************************************************

Michelle’s Free Stamp Program

Don’t miss out on my Customer’s free stamp set program. Check it out!  Along with a handmade thank you card from me for your $50 order you will receive a token for each $50 in product you ordered using me as your demonstrator.  After you have collected 10 tokens you will receive a free current stamp set of your choosing, a value of $39 or less.   Here is a link to my online shopping page that you can shop at 24/7 (from the comfort of your home, even in your pj’s) and the products will be shipped directly to your door step from Stampin’ Up.   CLICK HERE TO SHOP.   My free stamp set program will be an on going program.  :)

*************************************************

Now on with today’s tutorial. . . . .  . .

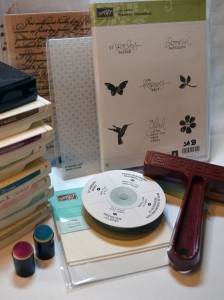
Project Supplies: Stampin’ Up!  Bloomin’ Marvelous (Sale-a-bration set) and En Francais Background Stamp

Stamps:  Card Stock: Stampin’ Up! Whisper White, Baja Breeze, River Rock and Rich Razzelberry

Ink: Stampin’ Up! Soft Suede, Rich Razzelberry, Old Olive, Island Indigo, Pretty in Pink, Baja Breeze and River Rock

Accessories: Stampin’ Up! sponge daubers, clear embossing powder, heat gun, Versmark Pad, Stampin’ Dimensionals, Baja Breeze Seam Binding, Brayer, Square Lattice Embossing Folder and Big Shot Machine

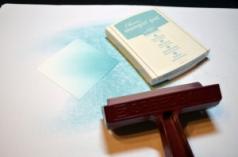
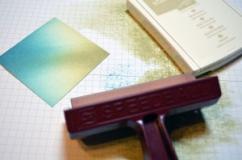
Brayered Baja Breeze ink at an angle starting off of the corner of a 3″ piece of Whisper White card stock.  Brayered River Rock ink starting off the opposite corner.

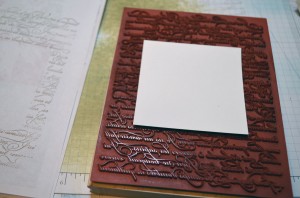
Loaded the En Francais background stamp with Soft Suede ink and put the main image panel on top of it.  Layered a piece of scrap paper on top of that and rubbed the back of the scrap paper.   I find this method easier than trying to stamp straight on a piece of paper that is smaller than my stamp.

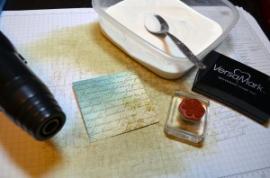
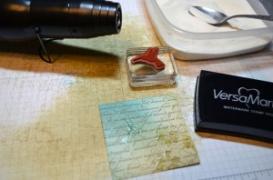
Dryed my card stock using my heat gun and the stamped the flower 3 times on the lower right corner and the hummingbird using Versamark Pad for ink.  Heat embossed the images using clear embossing powder and a heat gun.

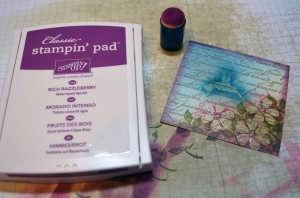
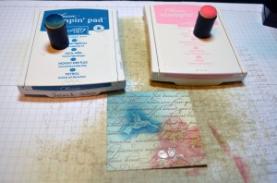
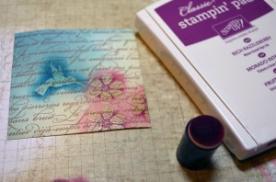
Sponged Island Indigo ink over the hummingbird and Pretty in Pink in over the flowers using sponge daubers.  Sponged Rich Razzelberry ink in the center of the flowers.

Stamped the leaves in the lower right corner using Old Olive ink and then wiped the ink off of the embossed images.

Sponged Rich Razzelberry ink around the edges of the card stock.

Cut a 5.25″ x 4″ piece of River Rock card stock and stamped the En Francais back ground stamp on it using Soft Suede ink.

Embossed the card stock using the Square Lattice Embossing Folder and Big Shot Machine.

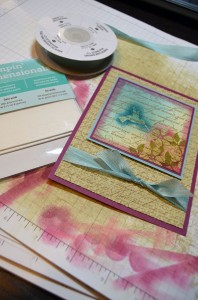
Added 2 Rich Razzelberry Panels,Baja Breeze panel, Baja Breeze seam binding ribbon and a Whisper White card base.  Popped my main image panel up using Stampin’ Dimensionals.

Here is the completed card measuring 4.25″ x 5.5″.

May you find peace in your soul today.

Until my next post. . . . . .

Check out the awesome things happening at Stampin’ Up! below.

Hugs,

*******************************************

Weight loss in 2013:  11.2 lbs

*************************************************

Digital Content Discs for One Dollar

From now until February 12 (or while supplies last) you can get your hands on any of these content discs for just $1. That’s not a typo–they’re just one buck. So indulge–it won’t break the bank.

Since the discs are on the Clearance Rack, they must be purchased via demonstrator or online order. Go get yours today.

********************************************************************

It’s the time of year us Stampin’ Up! Fans look forward to, it’s Sale-a-bration time!!!!  The best time of year to get your Stampin’ Up! products.  Why you ask?

Shop and receive a free Sale-a-bration product for every $50 you spend.  CLICK HERE TO CHECK OUT THE SALE-A-BRATION PRODUCTS! This is a long brocure so be sure to scan right when viewing. . . . .

CLICK HERE TO SHOP NOW

***********************************************************************

Join Stampin’ Up! during Sale-a-bration and chose $156.50 in product in your kit for just $99.  That’s 25% more product!   Start a business or just enjoy being a demonstrator to receive the 20% discount.

CLICK HERE TO LEARN MORE!

*************************************************

It’s a Magical Paper Escape Every Month!

Check this out, you can now get a monthly kit called Paper Pumpkin from Stampin’ Up! that includes exclusive stamps and everything you will need for a great project.  You can get more info on this great product at www.mypaperpumpkin.com They even have a try me kit!  You won’t want to miss out on even one of these kits. . . . . . .  Please select me as your demonstrator when placing your order.

Also. . . . . . .

There is now a great stamp kit, Dude Your Welcome,  for the men in your life.  Check it out!

[youtube]https://www.youtube.com/watch?v=ED18tTC7XG8[/youtube]

Guys don’t always have the easiest time expressing themselves, but with the Dude, You’re Welcome! kit, they’ll have

  • Four wood-mount stamps (double-mounted) with the perfect sentiment for every occasion
  • Twelve 4″ x 6″ postcards in four different (manly) colors
  • Twelve gray envelopes
  • A Basic Gray Classic Stampin’ Pad
  • An instructional guide (for the most novice stamper!)

Basically, the kit includes everything a dude needs to create the perfect manly card that any woman would adore, all packaged in an appropriately masculine box.

This set can be purchased now with item number 132807.  Great gift idea!

********************************************

Check out the brand new Spring Catalog and get all those supplies you need for your up coming projects.

CLICK HERE TO SHOP!

**********************************************************

Have you checked out the great clearance rack at Stampin’ Up!  CLICK HERE
 

Poppies – Tutorial #562

Hello There,

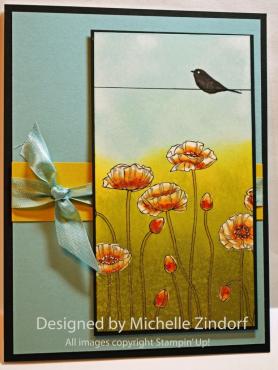
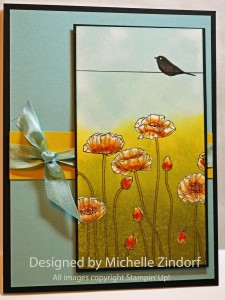
The sun is shining today and put me in the mood to stamp and color some flowers.   I pulled out the Beautiful Stampin’ Up! Stamp Pleasant Poppies (item #129499).  I used the emboss resist technique on this project in order to put the light poppies in front of a darker background.   I also left plenty of white showing in the flowers to give them that extra pop and to add a little more life to scene I added the bird from the Everything Eleanor set.

This card has been added to my sales page.  Click here to check it out.

****************************************

Now on with today’s tutorial. . . . .  . .

Project Supplies:

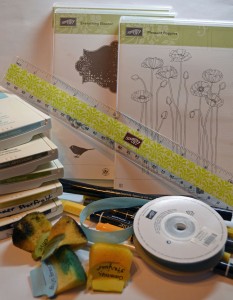
Stampin’ Up! Stamps: Pleasant Poppies (item#129499), Everything Eleanor (item#124164)

Card Stock: Stampin’ Up! Whisper White, Basic Black, Baja Breeze and Summer Starfruit

Ink: Stampin’ Up! Baja Breeze, Always Artichoke, Old Olive, Summer Starfruit, Basic Black

Accessories: Stampin’ Up! Sponges, Baja Breeze Seam Binding, White Gel Pen, So Saffron, More Mustard, Summer Starfruit and Basic Black markers, Ruler, Versamarker, Clear Embossing Powder and Heat Gun

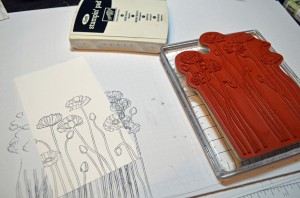
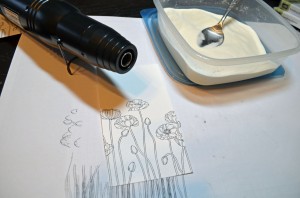
Started with a 3″ x 5.5″ Whisper White card stock and stamped the poppies on it using Craft Basic Black ink.

Heat embossed the image using clear embossing powder and a heat gun.

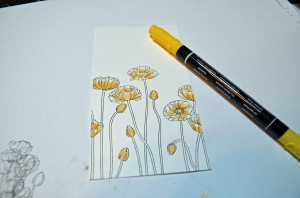
Added So Saffron marker to the flowers and buds leaving plenty of white showing at the edges of the petals.

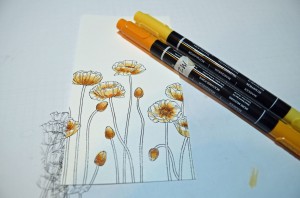
Added More Mustard marker at the base of the petals and then blended it in using a So Saffron marker.

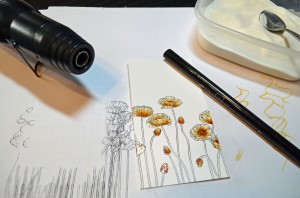
Colored over the flowers and buds using a Versamarker and the heat embossed the images using clear embossing powder and heat gun.  Now the flowers are protected and I can put my background ink in without it ruining the flowers.

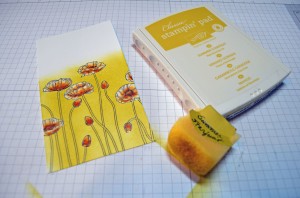
Sponged Summer Starfruit on the card stock.

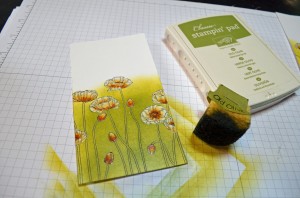
Sponge Old Olive ink on.

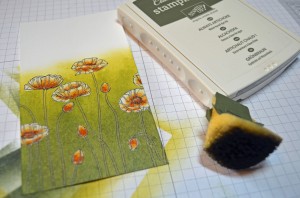
Sponged Always Artichoke ink at the bottom of the card stock.

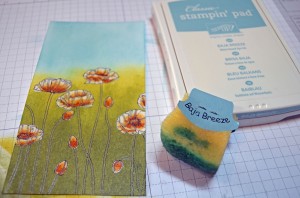
Sponged Baja Breeze ink at the top of the card stock for the sky.

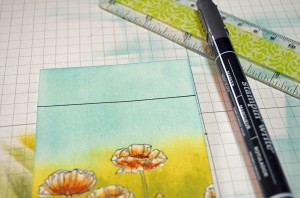
Added a Basic Black marker line across the top of the card stock using a Ruler.

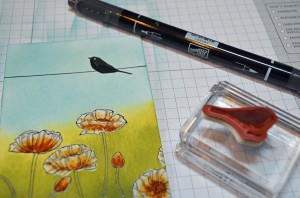
Stamped the bird from the Everything Eleanor set omitting the birds legs.  I omitted the birds legs by coloring the bird with Basic Black marker on the rubber and then stamping it.

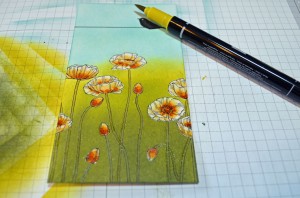
Colored the stems in with Summer Starfruit.

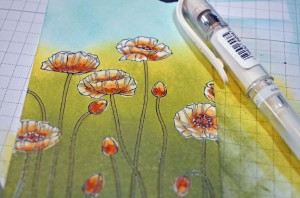
Added just a few white gel pen dots to the stamens in the middle of the flowers.

Added a Whisper White 5″ x 6.5″ card base, Basic Black ” x 6.5″ panel, 4.75″ x .25″ Baja Breeze panel, 3.25″ x 5.75″ Basic Black panel, 4.75″ x 1″ strip of Summer Starfruit and Baja Breeze seam binding.

Here is the finished card.

May your day be out of this world wonderful!

Check out the great deals at Stampin’ Up! below.

Until my next post. . . . . .

Hugs,

*************************************************

CLICK HERE TO SEE THE LATEST STAMPIN’ UP! PROMOTION AND TO SHOP NOW!


************************************************************

Check out the brand new Spring Catalog and get all those supplies you need for you up coming projects.

CLICK HERE TO SHOP!

**********************************************************

Have you checked out the great clearance rack at Stampin’ Up!  CLICK HERE
New items added!

***********************************************************

Michelle’s Free Stamp Program

Don’t miss out on my Customer free stamp set program. Check it out!  Along with a handmade thank you card from me for your order you will receive a token for each $50 in product you ordered using me as your demonstrator.  After you have collected 10 tokens you will receive a free current stamp set of your choosing, a value of $39 or less.   Here is a link to my online shopping page that you can shop at 24/7 (from the comfort of your home, even in your pj’s) and the products will be shipped directly to your door step from Stampin’ Up:   CLICK HERE TO SHOP.   My free stamp set program will be an on going program.  :)

***************************************************

CHECK OUT MY STAMPING EVENTS Click here to see my event calendar


Shaped Christmas Card – Tutorial #531

Hey There,

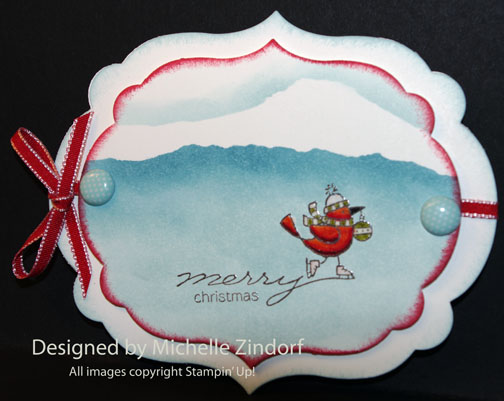
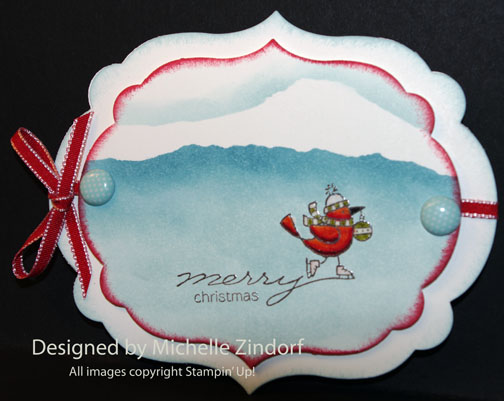
I have a tutorial today on how to make a shaped card using a die cut.   This card will easily fit into an A-2 envelope (quarter card).   My scene was put together using the emboss resist technique.  This technique allows you to put your background in over your main image.  🙂   Hope you hang out and give this card try.  It’s fun stepping outside the box and making a different shape than square or rectangle.

Here are a few Stampin’ Up Reminders before I start the project.

The new Stampin’ Up! Holiday Mini catalog is now in effect.  I love all of Stampin’ Up’s products, but the new mini catalog just blew me away (CLICK HERE TO VIEW THE HOLIDAY MINI CATALOG).  I especially love the coordinating products that you can get as a bundle at a discount.    Gotta love a discount, right?  Especially for those products to make your holiday gifts and cards.

Don’t miss out on my Customer free stamp set program. Check it out!  Along with a handmade thank you card from me for your order you will receive a token for each $50 in product you ordered using me as your demonstrator.  After you have collected 10 tokens you will receive a free current stamp set of your choosing, a value of $39 or less.   Here is a link to my online shopping page that you can shop at 24/7 (from the comfort of your home, even in your pj’s) and the products will be shipped directly to your door step from Stampin’ Up:   CLICK HERE TO SHOP.   My free stamp set program will be an on going program.  :)

Want a new annual catalog shipped to you?     I will be happy to send you one.  The catalog is free, but there is a $5 shipping charge.   Note, I will only sell or ship within the United States do to Stampin’ Up! policies.  Please contact me at [email protected].  Payment can be sent via Paypal or check.

You can join my Stampin’ Up! team and become a Stampin’ Up! Demonstrator now for the great new price of $99, CLICK HERE TO CHECK IT OUT.  Contact me whether you want to start your own business or just enjoy the 20% discount on products.

Want to purchase one of my original cards or some Stampin’ Up! retired sets CLICK HERE.

Now on with today’s tutorial. . . . .  . .

Supplies:

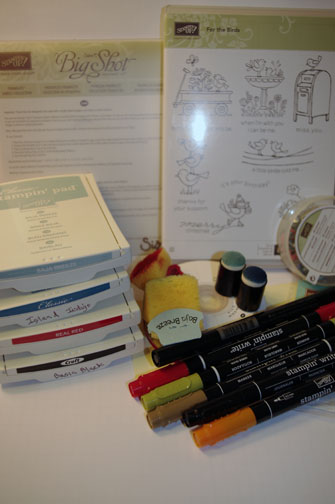
Stamps: Stampin’ Up! For the Birds

Card Stock: Stampin’ Up! Whisper White

Ink: Stampin’ Up! Baja Breeze, Island Indig, Real Red and Basic Black

Accessories: Stampin’ Up! Sponges, Sponge Daubers, Stampin’ Dimensionals, Versamark Marker, Clear Embossing Powder, Heat Gun, Post it Note, Printed Designer Brads, Labels Collection Framelits Die, Big Shot Machine, Real Red Ribbon, Markers (Pumpkin Pie, Real Red, Old Olive, Basic Black and Soft Suede).

Are you getting inspiration from this blog?   One way you can help support it is to order your Stampin’ Up products through me.   Click HERE to place an order and have your order delivered directly to your door step from Stampin’ Up!


Love the Framelits.  🙂

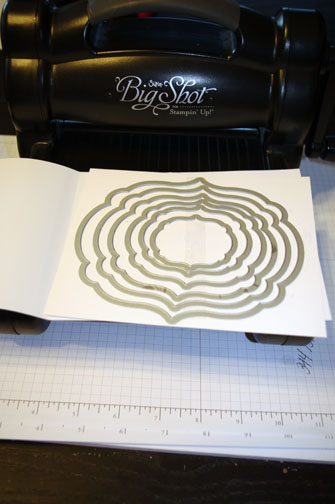
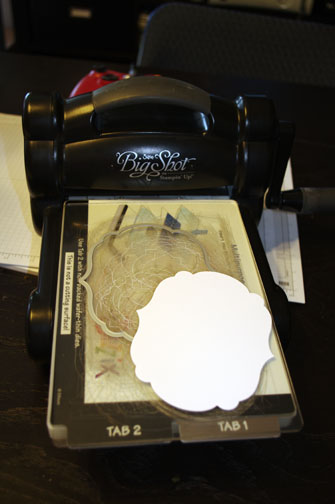
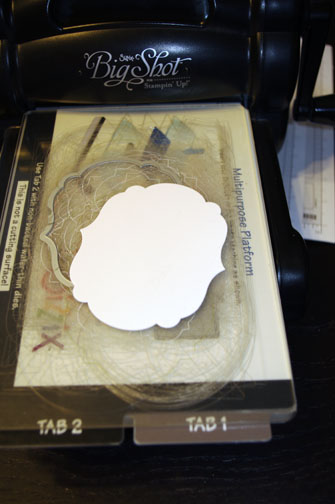
Die Cut the frame using the second to the largest framelit, Whisper White card stock and the Big Shot Machine.  This piece will be the front of my card.

Folded a Whisper White card stock and put the fold just below the edge of the framelit as shown below.

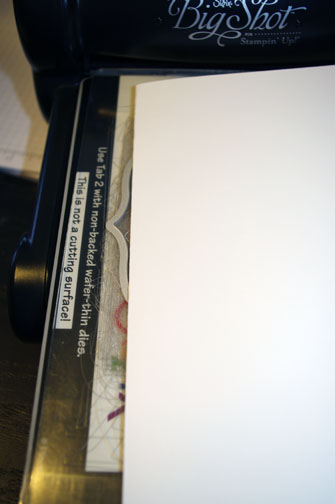
Run it through the big shot machine.  This piece of the card base.

Die cut another frame.  This time I used the 3rd to the largest Framelit, Whisper White and the Big Shot Machine.   This piece is for the main image panel.

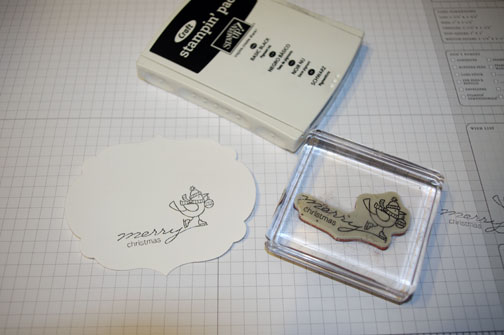
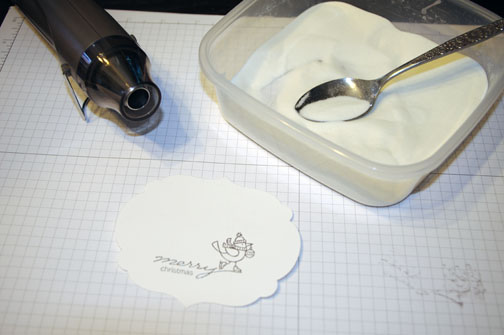
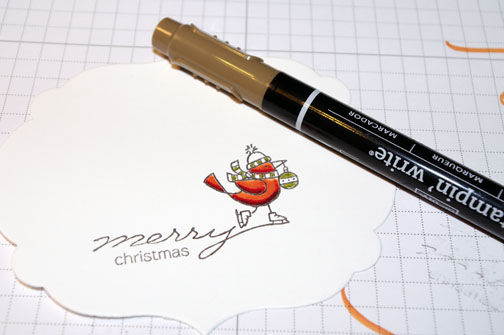
Stamped the image using Craft Basic Black ink on the main image panel.

Heat embossed the image using clear embossing powder and a heat gun.

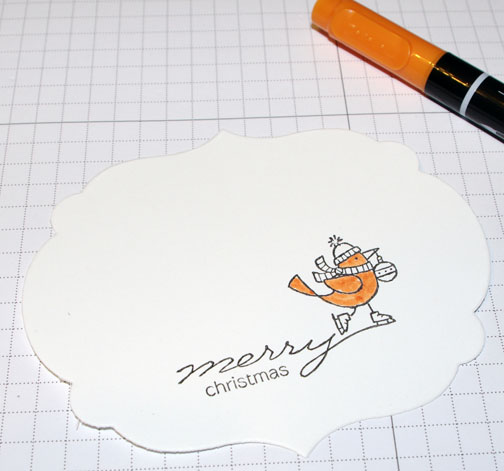
Colored the bird in with Pumpkin Pie marker.

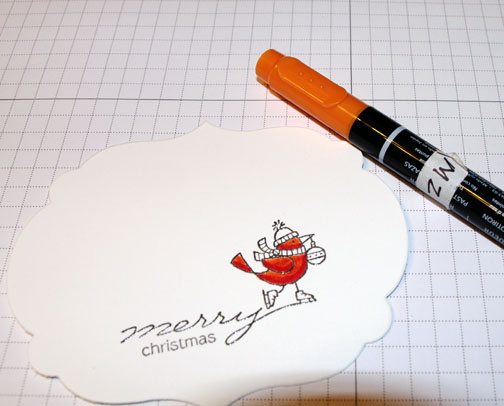
Added Real Red marker.

Blended the color together using the Pumpkin Pie marker.   Now there is a shadow at the bottom of the bird and it’s wing.

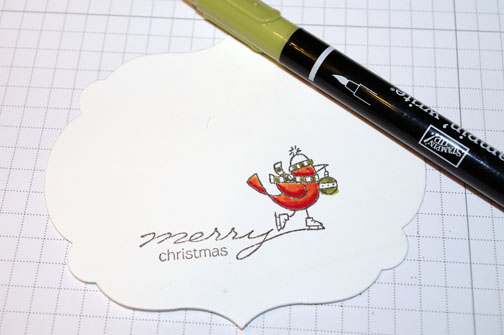
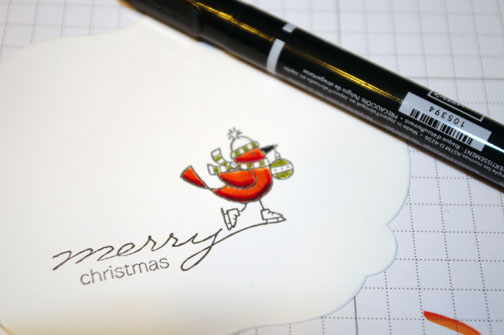
Added Old Olive marker to the hat, scarf and ornament.

Added a thin line to the bottom of the wing and belly using a Soft Suede marker.

Colored the beak in with Basic Black marker.

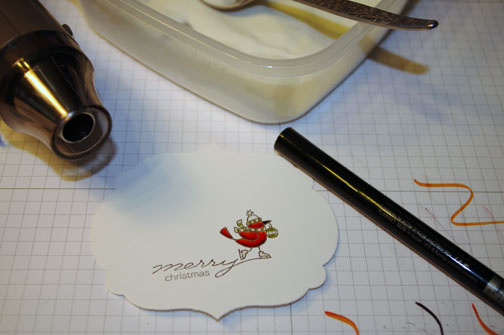
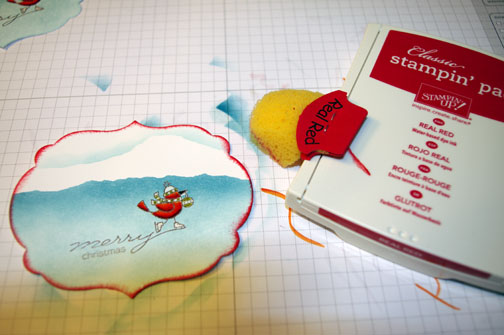
Colored in the image using a Versamarker.  Be sure to stay inside the embossed lines and start with the lightest part and work toward the darker parts.   Heat emboss the image using clear embossing powder and a heat gun.   Now the whole bird is embossed.

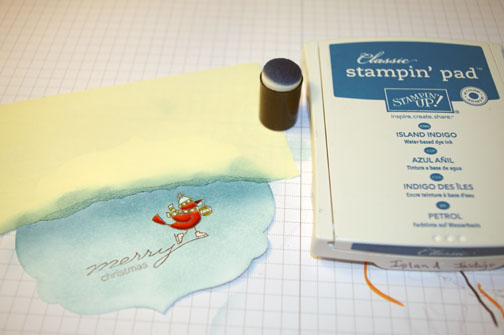
Ripped the sticky part of a post it note and masked the sky of the scene.

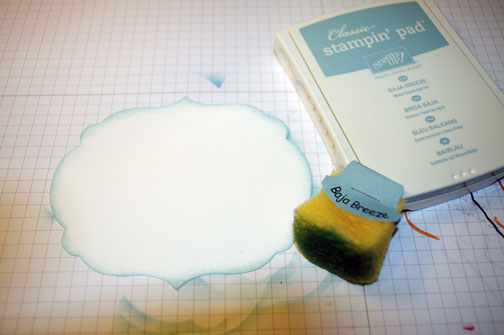
Sponged Baja Breeze ink on the unmasked area.

Sponged Island Indigo ink on the top of the unmasked area.

Removed the post it note mask and ripped a hill shape in the post it note.   Sponged Baja Breeze ink a the top of the post it note edge.

Removed the mask and sponged Real Red ink around the main image panel edge.

Sponged Baja Breeze ink around the edge of the card front panel.

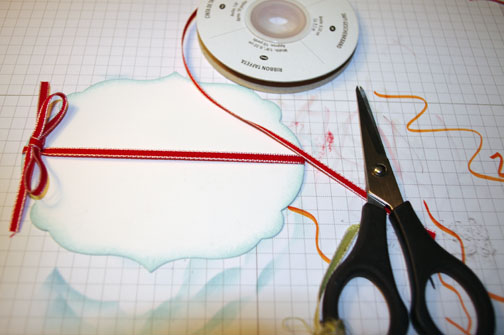
Added Real Red Ribbon.

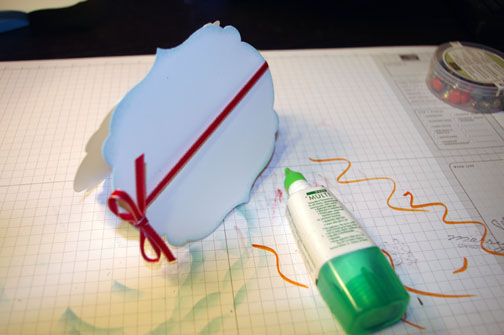
Adhered the card front to the card base lining up the die cut edges.

Added brads to the right and left sides of the main image panel.

Adhered the main image panel to the card front using Stampin’ Dimensionals.   Here is the finished card.  🙂

May your day be filled with love and laughter.

Until my next post. . . . .

Hugs,

Get ready for Brayer and Direct to Paper Workshops!  I am coming to the following locations, click the location name for more information.

Purcellville, Virginia

Orange, Massachusetts

Scottsdale, Arizona

Sacramento, California (Sold Out)

Staley, North Carolina

St. Petersburg, Florida

Newburge, Indiana

I hope you can make it to one of my workshops in 2012.  I have decided not to travel after this year, so be sure to catch one now!

Link to my Stampin’ Up website where you can order all of your must have Stampin’ Up products from me 24-7: https://michellezindorf.stampinup.net

Zebra Reflection – Tutorial #520

Hey There,

Whew!  Did that weekend ever go by quickly.   I feel like I spent the entire weekend picking up branches brought down by the thunder storm that rolled through with it’s 70 mile an hour winds and just generally trying to keep the dog, chickens and myself cool during this blasted heat wave.   Someone, please turn off the heat!

My project today is a hot one, using warm colors and the very fun Stampin’ Up set, Zoo Review.   This is an old workshop project of mine.   I usually don’t share my workshop projects here on my blog, in fact this is the first time I have.    This is one of my favorites and I’m no longer teaching this card so here it is.      You wouldn’t believe the stash of old workshop projects I have piled up.  I change the projects in my workshops frequently to keep the workshops fresh.   Maybe little by little I’ll share them here.

The tutorial that follows will show you how to get that reflection in the water for the zebra and for the mountains.  Hope you enjoy it.  If you do, let me hear from you.   I love reading your comments, suggestions and general chit chat.

Other card tutorials using the Zoo Review stamp set:

Here are a few Stampin’ Up Reminders before I start the project.

Check out what’s new at Stampin’ Up!  The brand new Annual Catalog has been released.   CLICK HERE TO LOOK AT THE CATALOG ONLINE. I got my order in and I’m ecstatic about the new products and, of course, the new stamps!    CLICK HERE TO PLACE AN ORDER. Contact me at [email protected] or 937-344-1312 with product questions.
Want a new annual catalog shipped to you?     I will be happy to send you one.  The catalog is free, but there is a $5 shipping charge.   Note, I will only sell or ship within the United States do to Stampin’ Up! policies.  Please contact me at [email protected].  Payment can be sent via Paypal or check.

You can join my Stampin’ Up! team and become a Stampin’ Up! Demonstrator now for the great new price of $99, CLICK HERE TO CHECK IT OUT.  Contact me whether you want to start your own business or just enjoy the 20% discount on products.
Want to purchase one of my original cards or some Stampin’ Up! retired sets CLICK HERE. I’ll be updating the sales page all this week.  So check back daily.

Now on with today’s tutorial. . . . .  . .

Supplies:

Stamps: Stampin’ Up! Zoo Review

Card Stock: Stampin’ Up! Whisper White, Basic Black and Old Olive

Ink: Stampin’ Up! Old Olive, More Mustard, Cajun Craze, Cherry Cobbler, Basic Black and Soft Suede

Accessories: Stampin’ Up! Sponges, Versamarker, Versamark Pad, Sahara Sand Marker, 4 Silver Brads, Decorative Label Punch, White Gel Pen, 1/2″ circle Punch, post it notes, Brayer, Clear Embossing Powder, Heat Gun and Heavy Window Sheet.

Are you getting inspiration from this blog?   One way you can help support it is to order your Stampin’ Up products through me.   Click HERE to place an order and have your order delivered directly to your door step from Stampin’ Up!


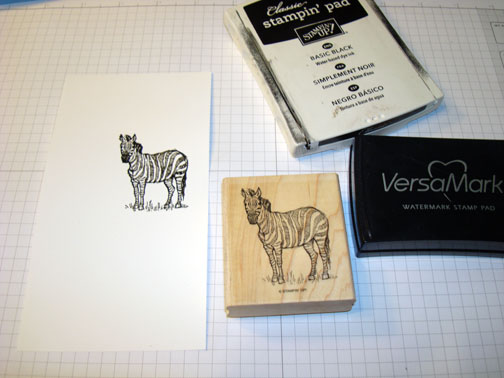
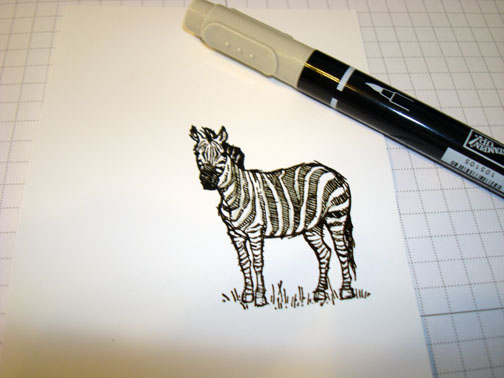
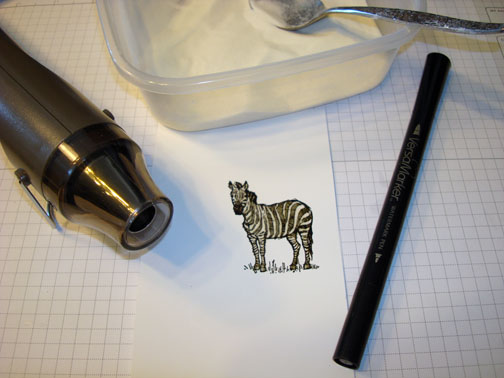
Loaded the Zebra stamp with Versamark and then Basic Black ink before stamping it on a 3.5″ x 6.5″ piece of Whisper White card stock.  Heat embossed the image using clear embossing powder and a heat gun.

Colored the dark stripes in with a Sahara Sand marker.


Colored over the zebra using a Versamarker and then heat embossed the image using clear embossing powder and a heat gun.  Now you image should be completely covered with embossing and will look like glass.

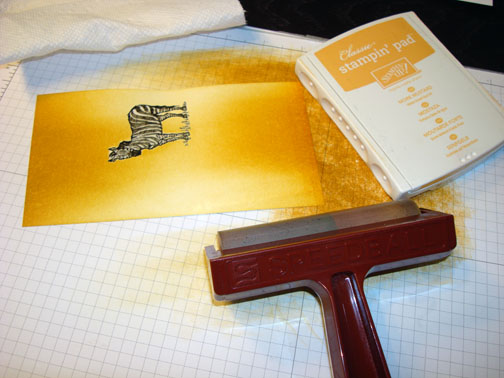
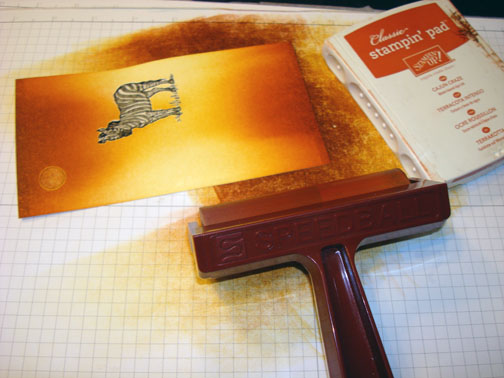
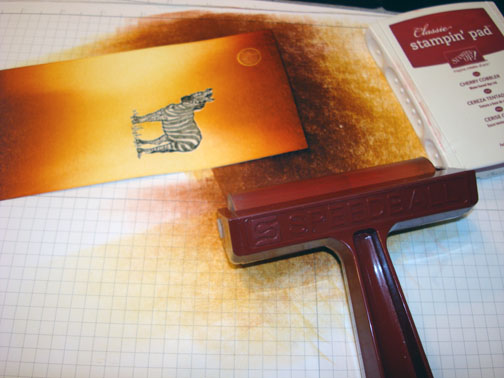
Brayer More Mustard ink at the top and bottom of the card stock.

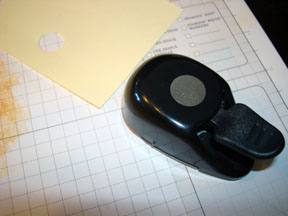
Punch a 1/2″ circle from a post it note and use it as the mask for your sun.

Brayer Cajun Craze ink at the top and bottom of the card stock.

Brayer Cherry Cobbler ink at the very top and bottom of the card stock.

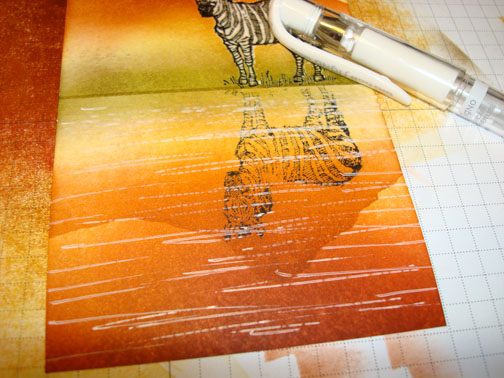
Stamp the zebra with Basic Black ink on a clear window sheet and then quickly turn it over onto the card stock (be sure to line up the zebra’s feet) and then brayer over the clear plastic sheet to transfer the zebra.   This creates the reflection.

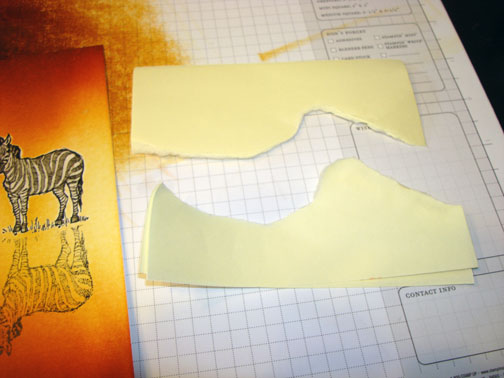
Now to create the mountains:  Take two post it notes and stick the sticky sides together, so the sticky is sticking to the other sticky (back to back).  This way when you tear the post it note to mask for the mountains you will have one for the top and one for the reflection.


Put the post it notes on the card stock.  Make sure the post it notes and the same distance from each of the zebras.

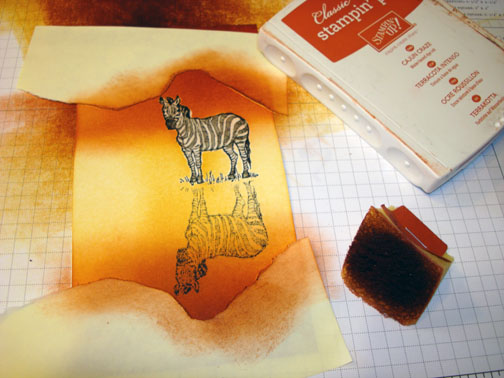
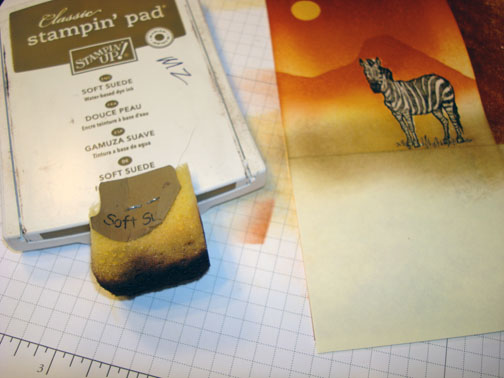
Sponge Cajun Craze ink in for the mountains on both the top and bottom.

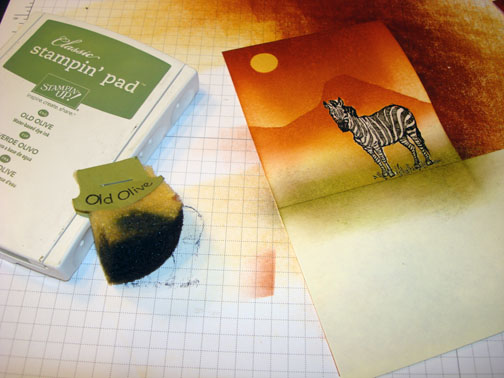
Take the masks off and put a straight post it note between the zebras.  Sponge Soft Suede ink and Old Olive ink at the post it note edge.  Then flip the post it note around and sponge the ground in on the reflective side (Soft Suede and Old Olive).  A little lighter on the reflective side.


Remove the mask and added White Gel Pen water lines to add some sparkle.

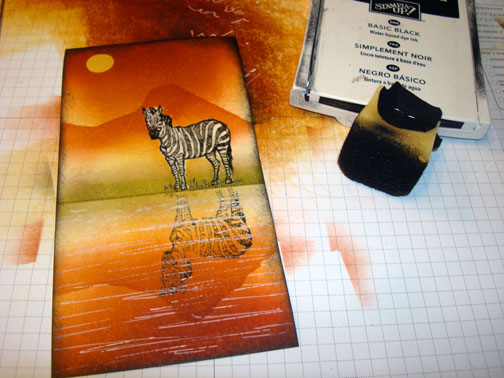
Sponge Basic Black ink around the edge of the card stock.

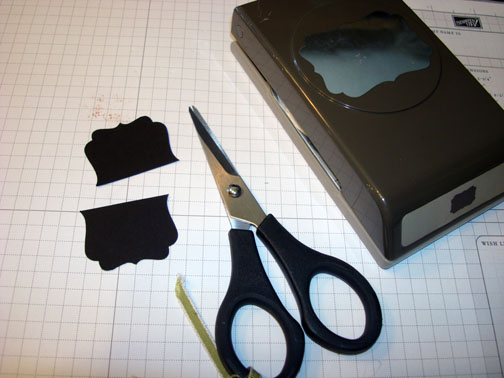
Punch a Decorative Label Punch from Basic Black card stock and cut it in half.

Add a 3.75″ x 8″ Basic Black panel and a 4″ x 9″ Old Olive Panel.  Add the two halves of the label and 4 silver brads.   Also add a 8″ x 9″ Whisper White Panel folded in half as the card base.

Here is the completed card.

May your day be one of pure delight!

Until my next post. . . . . .  .

Hugs,

Get ready for Brayer and Direct to Paper Workshops!  I am coming to the following locations, click the location name for more information.

Lawrence, Kansas

Elizabethtown, Kentucky

West Bend, Wisconsin

Purcellville, Virginia

Orange, Massachusetts

Scottsdale, Arizona

Sacramento, California

Staley, North Carolina

St. Petersburg, Florida

Newburge, Indiana

I hope you can make it to one of my workshops in 2012.  I have decided not to travel after this year, so be sure to catch one this year!

Link to my Stampin’ Up website where you can order all of your must have Stampin’ Up products from me 24-7: https://michellezindorf.stampinup.net


Embossed Ornaments – Tutorial #519

Hey There,

Are you stuck in the United States heat wave?   We are expecting temps to reach 105 degrees for the next couple of days here.  Now, I know that isn’t extremely hot for some of you in the USA, but it’s unusual here in Ohio in June.

I’m just trying to keep cool by thinking of Christmas.  So hence, the Christmas card project today.   Besides, I now have 2 Christmas cards done for this year, lol.

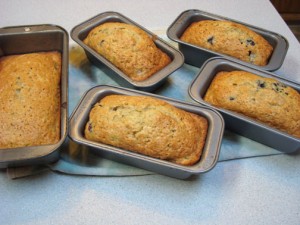
I think I have lost my mind.  I’ve been running the oven kicking out some Blueberry Zucchini Bread.   I’ll give the recipe for those of you who are interested at the end of this post.   It’s yummy!  Already, my garden is producing more veggies than Russ and I can eat, so I’m trying to do some baking and canning to stay ahead of the game.  This Blueberry Zucchini Bread is super moist and freezes well.

Here are a few Stampin’ Up Reminders before I start the project.

Check out what’s new at Stampin’ Up!  The brand new Annual Catalog has been released.   CLICK HERE TO LOOK AT THE CATALOG ONLINE. I got my order in and I’m ecstatic about the new products and, of course, the new stamps!    CLICK HERE TO PLACE AN ORDER. Contact me at [email protected] or 937-344-1312 with product questions.
Want a new annual catalog shipped to you?     I will be happy to send you one.  The catalog is free, but there is a $5 shipping charge.   Note, I will only sell or ship within the United States do to Stampin’ Up! policies.  Please contact me at [email protected].  Payment can be sent via Paypal or check.

You can join my Stampin’ Up! team and become a Stampin’ Up! Demonstrator now for the great new price of $99, CLICK HERE TO CHECK IT OUT.  Contact me whether you want to start your own business or just enjoy the 20% discount on products.
Want to purchase one of my original cards or some Stampin’ Up! retired sets CLICK HERE. I’ll be updating the sales page all this week.  So check back daily.

Now on with today’s tutorial. . . . .  . .

Supplies:

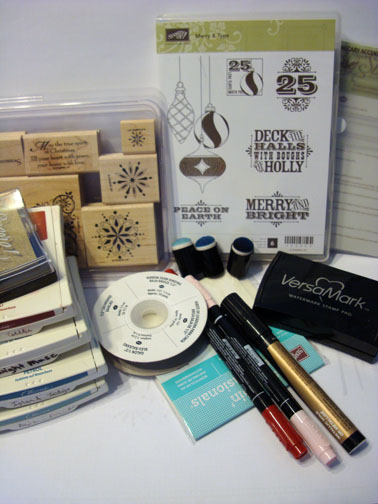
Stamps: Stampin’ Up! Merry & Type and Snow Swirled

Card Stock: Stampin’ Up! Whisper White, Cherry Cobbler and Baja Breeze

Ink: Stampin’ Up! Baja Breeze, Island Indigo, Midnight Muse, Cherry Cobbler and Gold

Accessories: Stampin’ Up! Sponge Daubers, Versamark Pad, Versamarker, Clear Embossing Powder, Heat Gun, Stampin Dimensionals, Framelits – Apothecary Accents, Big Shot Machine, Baja Breeze Seam Binding, Stampin’ Markers – Pink Pirouette and Cherry Cobbler, Prismacolor Gold Marker.

Are you getting inspiration from this blog?   One way you can help support it is to order your Stampin’ Up products through me.   Click HERE to place an order and have your order delivered directly to your door step from Stampin’ Up!


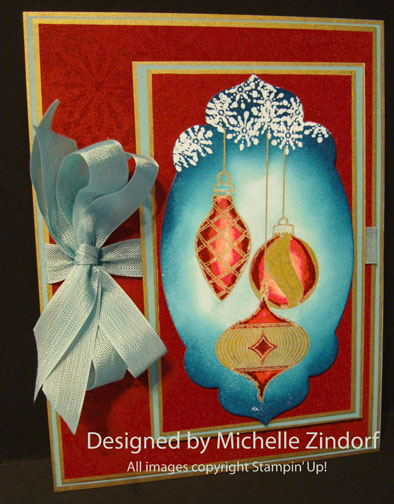
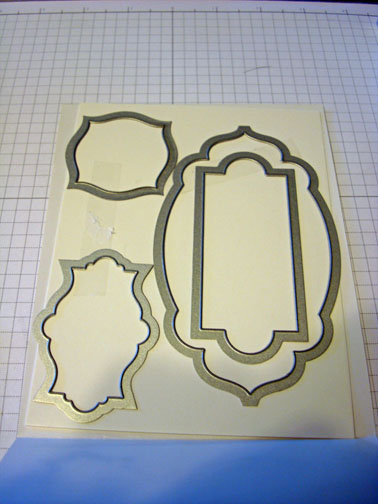
Gotta love these new Framelits from Stampin’ Up!  This set is the Apothecary Accents (item number 127003).  I used the large one on the right.

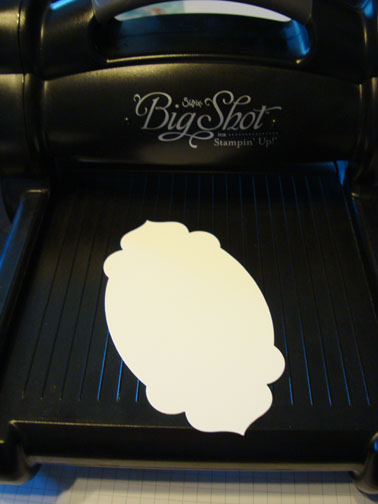
Die cut it using Whisper White card stock and the Big Shot Machine.

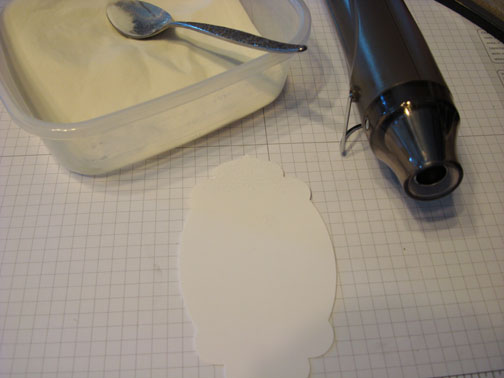
You won’t be able to tell what I stamp here until I start putting in the background color.   Take my word for it, lol.

Stamped Snowflakes at the top of the card stock using Versamark.   Embossed the images using clear embossing powder and a heat gun.


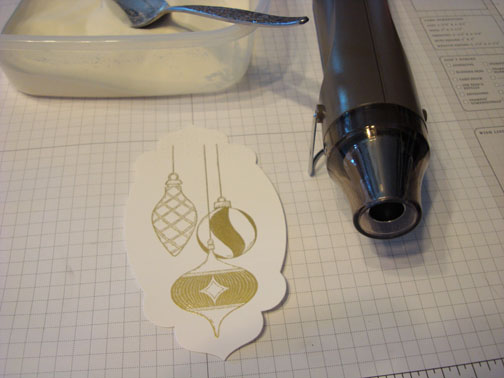
Stamped the Ornaments using Gold ink.  Heat embossed the image using clear embossing powder and a heat gun.


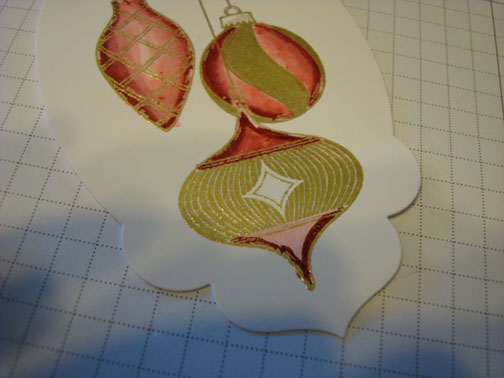
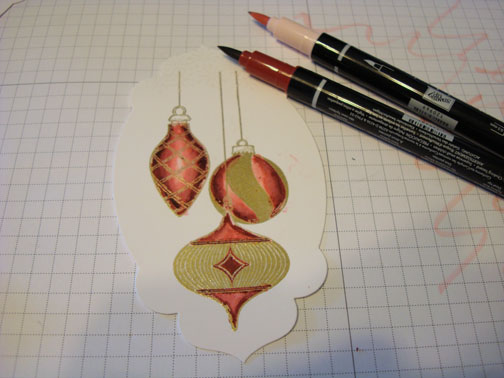
Colored the images in entirely using a Pink Pirouette marker.  Added Shading by adding Cherry Cobbler marker to the outside of the area and then blended it using the Pink Pirouette marker.   I left it light in the middle of the ornaments to give it a rounded look.


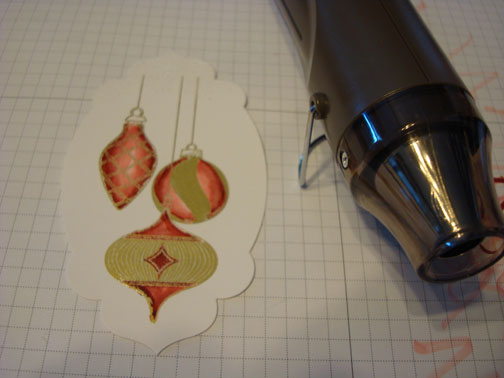
Heated the ornaments quickly to set the marker.

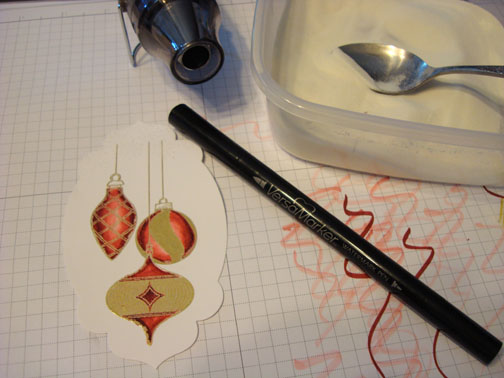
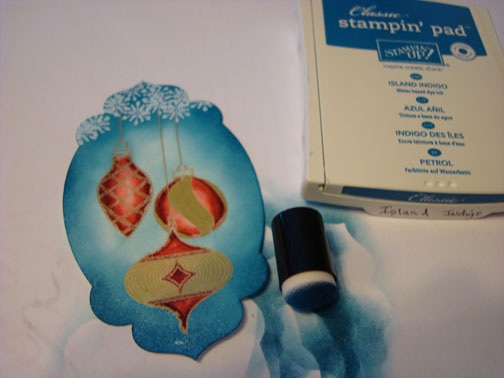
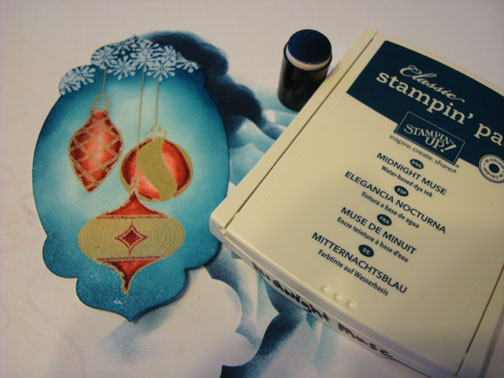
Colored over the ornaments (stay inside of the gold embossed image) using a Versamarker.   Embossed the entire image using clear embossing powder and a heat gun.  Now all the images are covered with embossing powder and will resist the background colors I will be putting on next.

Sponged Baja Breeze ink on the inside of the card stock and at the top.

Sponged Island Indigo ink around the edges of the card stock, leaving the middle of the card stock light.

Sponged Midnight Muse at the top of the card stock.

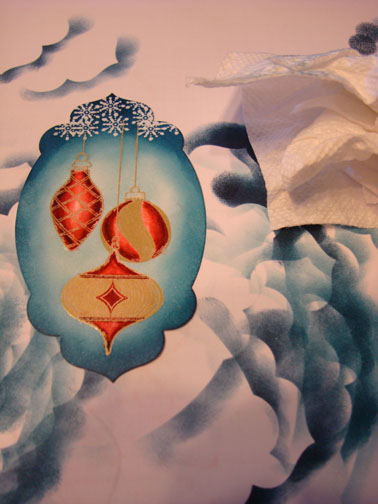
Softly wiped the embossed images off with a paper towel.

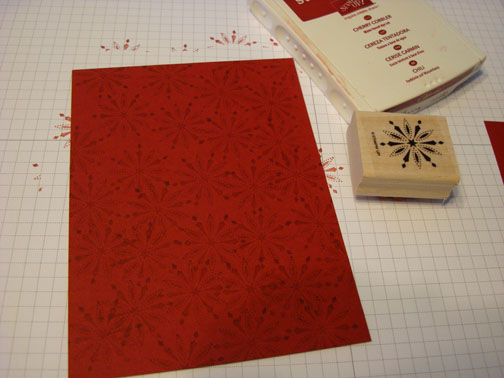
Cut a 4.75″ x 6.25″ panel of Cherry Cobbler.   Stamped a snowflake all over the card stock using Cherry Cobbler ink.

Added a 5″ x 6.5″ Baja Breeze Panel, 3″ x 5″ Cherry Cobbler Panel and a 3.25″ x 5.25″ Baja Breeze Panel.

Edged all of the panels with a Prismacolor Gold Marker.   To edge the card stock, put the marker tip 1/2 on the card stock and 1/2 on your scrap paper as you pull the marker along the edge.

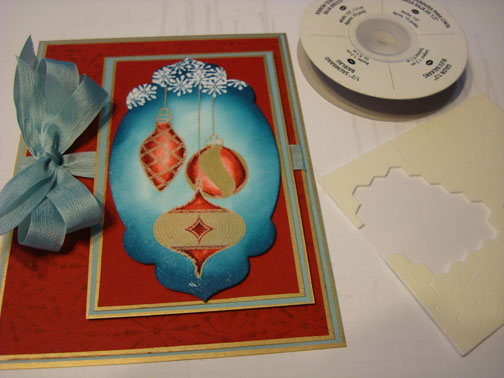
Assembled the card adding a 10″ x 6.5″ Whisper White card base folded in half and a Baja Breeze seam binding double bow.

The main image panel and the 2 panels below it are popped up using Stampin’ Dimensionals.

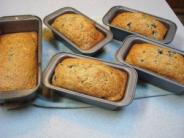
Now about that Blueberry Zucchini Bread. ………….

Ingredients

  • 3 eggs, lightly beaten
  • 1 cup vegetable oil
  • 3 teaspoons vanilla extract
  • 2 1/4 cups white sugar
  • 2 cups shredded zucchini
  • 3 cups all-purpose flour
  • 1 teaspoon salt
  • 1 teaspoon baking powder
  • 1/4 teaspoon baking soda
  • 1 tablespoon ground cinnamon
  • 1 pint fresh blueberries

Directions

  1. Preheat oven to 350 degrees F (175 degrees C). Lightly grease 4 mini-loaf pans.
  2. In a large bowl, beat together the eggs, oil, vanilla, and sugar. Fold in the zucchini. Beat in the flour, salt, baking powder, baking soda, and cinnamon. Gently fold in the blueberries. Transfer to the prepared mini-loaf pans.
  3. Bake 50 minutes in the preheated oven, or until a knife inserted in the center of a loaf comes out clean. Cool 20 minutes in pans, then turn out onto wire racks to cool completely.

This recipe is from allrecipes.com.

May you have sunny days and cool breezes.

My heart and thoughts are with those of you that are in the flood areas of Florida or the fire areas of Colorado.  Please be safe.

Until my next post. . . . . .  .

Hugs,

Get ready for Brayer and Direct to Paper Workshops!  I am coming to the following locations, click the location name for more information.

Lawrence, Kansas

Elizabethtown, Kentucky

West Bend, Wisconsin

Purcellville, Virginia

Orange, Massachusetts

Scottsdale, Arizona

Sacramento, California

Staley, North Carolina

St. Petersburg, Florida

Newburge, Indiana

I hope you can make it to one of my workshops in 2012.  I have decided not to travel after this year, so be sure to catch one this year!

Link to my Stampin’ Up website where you can order all of your must have Stampin’ Up products from me 24-7: https://michellezindorf.stampinup.net


Tea Shoppe Sneak Peek – Tutorial #478


Hey There,

I hope you have had a wonderful holiday.   I sure did.  It was spent with family, celebrating and eating great food.  🙂  We did have something extra special to celebrate, my youngest son, Mitch proposed to his lovely, lovely girlfriend, Jamie and she said “YES”.

The happy couple. . . . . .  . .

I heard the news and cried tears of joy!     Jamie has already won all of us over and has been a part of this family from the day we met her.  I’m looking forward to them making it official.

Now, with the personal stuff set aside, I’m happy to bring you a tutorial today.   I took a little hiatus from stamping to have some spare time to prepare for the holidays and just have some general down time.   But now I’m back and was anxious to get back into my office to create.   I received my pre-order from Stampin’ Up! which included stamps from the up and coming Stampin’ Up! Occasions Mini Catalog.   The catalog will be in effect January 4 – April 30, 2012.   My current Stampin’ Up! customers will receive this mini catalog automatically from me.  If you would like an Occasions Mini Catalog, please e-mail your address to: [email protected] and I will get one in the mail to you.   You won’t want to miss out on the exceptionally wonderful things in this mini!

As the title of this post suggests, I am giving you a sneak peek of a project using a new set from the new mini.   The set name is Tea Shoppe and it’s right up my ally, I’m a tea drinker.

The tutorial below gives you instructions on how to create a stenciled wall, striped table cloth and embossed teacup.  Check it out below and then put this stamp set on your list of stamps you must have in 2012.


********************************************************************

Reminder!

My customer drawing for December 2011 is a full set of Stampin’ Up! Clear Mount Acrylic Blocks and a rockin’ Stampin’ Up! Clear Block Storage Caddy to store them in.  The block set includes 9 different block sizes.    Total prize package is an $86.90 value.    How do you enter? For the month of December, 2o11, when you place a Stampin’ Up!  order using me as your Demonstrator,  you will receive one entry toward this months prize for each $25 increment in merchandise purchased.  Place an order for $50 and get two chances and so on and so on.    CLICK HERE TO PLACE AN ORDER OR TO BROWSE. Your order will be shipped directly to you from Stampin’ Up!.
Clear Block Bundle - by Stampin' Up!

If you stamp with clear-mount stamps, you’ll need a clear block to adhere your stamps to. Stampin’ Up’s blocks are a clear choice. Made from high-quality, sturdy acrylic, these blocks can hold one stamp or multiple stamps if you want to create a collage of images.

Clear Block Storage Caddy - by Stampin' Up!

This compact storage caddy holds one of each size of our clear-mount blocks. The foam insert securely holds the blocks in place; an additional foam insert sits between the blocks to protect them when the caddy is closed.

■ Opens flat for easy access
■ Locks shut
■ Built-in handle makes it easy to carry
■ 8-1/16″ x 10-5/8″ x 1-13/16″

I will use a random number generator to determine the winner on January 1, 2012.

*****************************************************************************

Now on with the tutorial. . . . .

Supplies:

Stamps: Stampin’ Up!  Tea Shoppe

Card Stock: Stampin’ Up! Elegant Eggplant, Wisteria Wonder, Very Vanilla and Whisper White

Ink: Stampin’ Up! Old Olive, Always Artichoke, Elegant Eggplant and River Rock

Accessories: Stampin’ Up!  Old Olive and Wisteria Wonder Markers, Wisteria Wonder Ribbon, Elegant Eggplant brads, Brayer, Clear embossing powder, heat gun, sponges, Versamark Pad and marker, Label punch, scissors, post it notes.

Want a free copy of the current Stampin’ Up! Mini Catalog?  Just e-mail your address to [email protected] and I will get one right out to you.  Get your copy of the 2011-2012 Stampin’ Up! Idea Book & Catalog by sending $9.95 to me at P.O. box 116, West Alexandria, Ohio 45381 or via paypal to [email protected], shipping is free. Are you getting inspiration from this blog?   One way you can help support it is to order your Stampin’ Up products through me.   Click HEREto place an order and have your order delivered directly to your door step from Stampin’ Up!    Want to become a Stampin’ Up Demonstrator , receive a 20% discount on product and earn instant income on orders, get to purchase products before they are released to the public?  Consider being part of my Stampin’ Up Team and start your own business or become a Hobby Demo just for the discount.  Click HERE for more information.


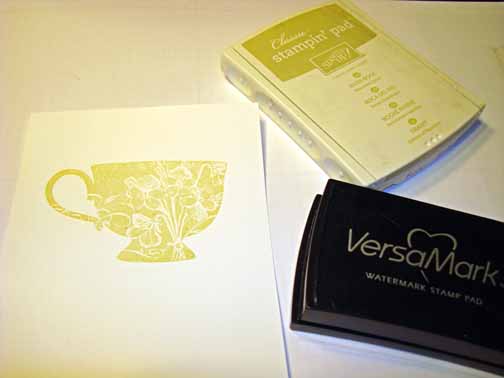
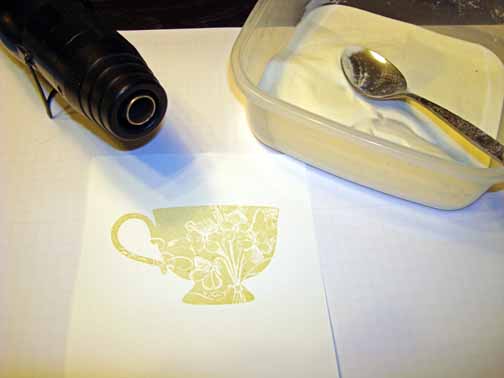
Stamped the teacup by loading it with Versamark and then with River Rock before stamping it on Whisper White card stock.

Heat embossed the image using clear embossing powder and a heat gun.

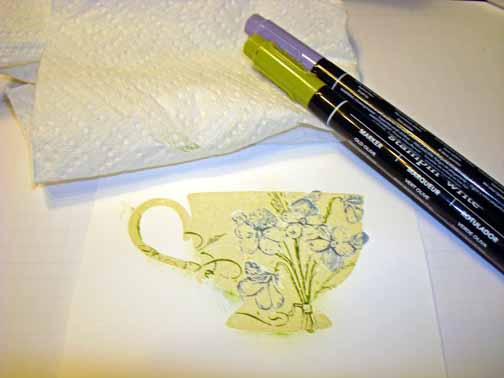
Colored the openings in the cup design using a Wisteria Wonder and Olive markers.   Wiped the excess marker off of the embossed image using a paper towel.


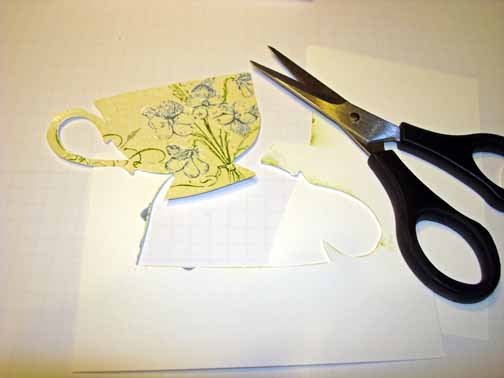
Cut the cup out.


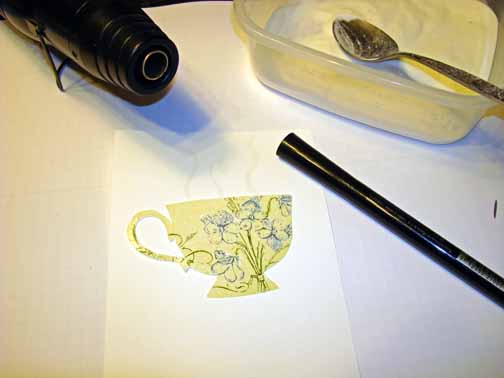
Laid my cup (don’t adhere yet ) on a 4.25″ x 5.75″ piece of Whisper White card stock and then added a few steam lines using my Versamark marker above the cup.  Heat embossed the steam lines using clear embossing powder and a heat gun.

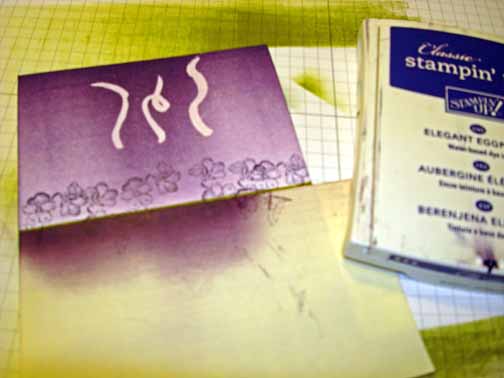
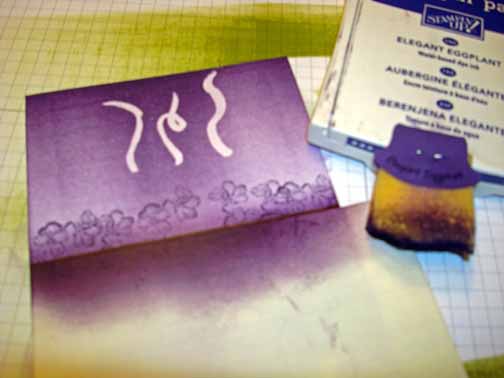
Masked the bottom of the card stock using a post it note.

Brayered Elegant Eggplant ink at the top of the card stock.

Unmasked the bottom of the card stock and masked the top of the card stock.  Brayered Old Olive ink at the bottom of the card stock.

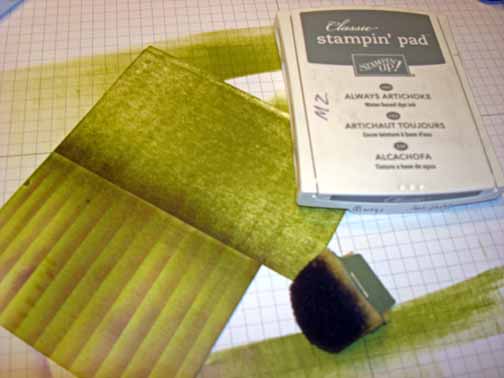
Using another post it note, sponged in stripes on the table cloth using Elegant Eggplant ink.  Sponged at the post it note edge and then moved a bit down for the next stripe.

Continue until you have the whole table cloth striped.

Sponged Always Artichoke at the top of the table cloth.

Remasked the bottom of the card stock and stamped the pansy stamp repeatedly across the bottom of the wall using Elegant Eggplant ink.

Sponged Elegant Eggplant ink at the bottom of the wall at the post it note edge.

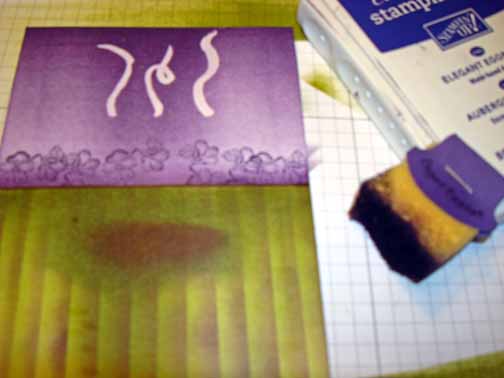
Created a shadow for the cup by sponging a spot of Always Artichoke ink and then inside that spot sponged a spot of Elegant Eggplant ink.

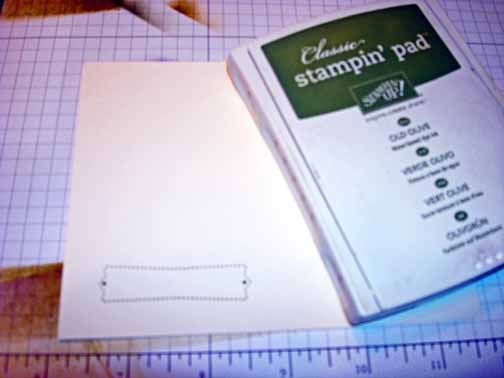
On a scrap of Very Vanilla card stock stamp the label outline stamp using Old Olive ink.

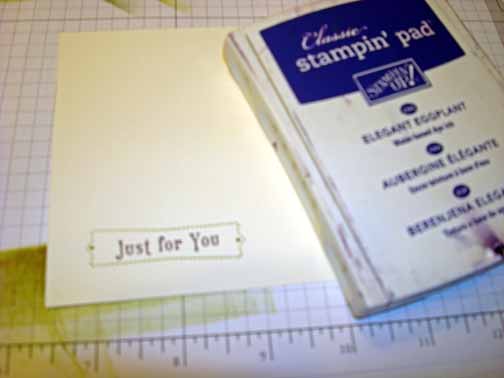
Stamped the sentiment inside of the label stamp using Elegant Eggplant ink.

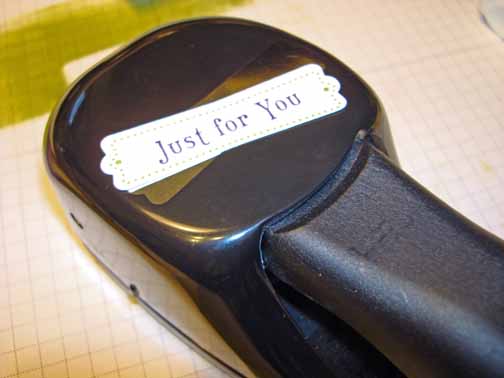
Punched the image out.

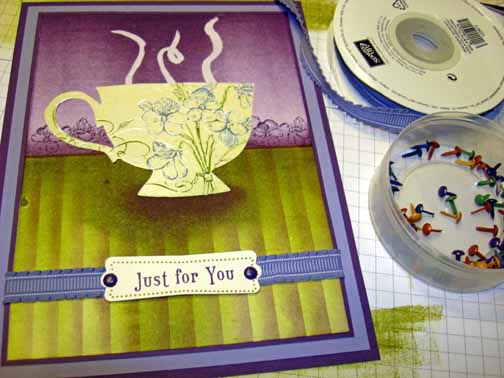
Added two Elegant Eggplant panels, one Wisteria Wonder panel, my tea cup, Wisteria Wonder ribbon, my label and Elegant Eggplant brads.


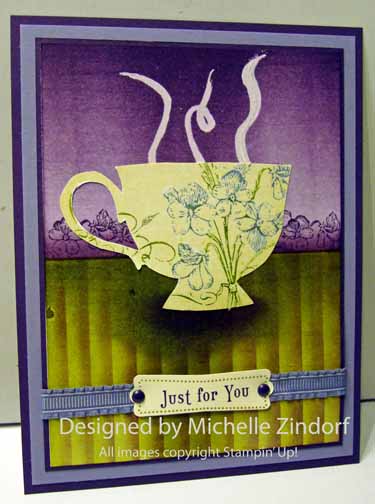
Here is the finished card measuring 5″ x 6.5″.

May your day be as warm and inviting as a good cup of tea!

Until my next post. . . . . . .

Hugs,

Get ready for Brayer and Direct to Paper Workshops!  I am coming to the following locations, click the location name for more information.

Dayton, Ohio – Direct to Paper Workshops

Dayton, Ohio – Brayer Workshops

Las Vegas, Nevada

Austin, Texas

Seattle, Washington

Greeneville, Tennessee

Indianapolis, Indiana

Indiana, Pennsylvania

Sparta, New Jersey

Piedmont, Alabama

Post Falls, Idaho (outside of Coeurd’Alene)

Sand Lake, Michigan (just North of Grand Rapids)

Lawrence, Kansas

Elizabethtown, Kentucky

West Bend, Wisconsin

Longmont (Gunbarrel), Colorado

Orange, Massachusetts

Sacramento, California

Staley, North Carolina


Here is a link to my workshop calendar where you can see all of my travel schedule and to get info on beginner and advanced Brayer workshops, along with the newly added Direct to Paper Workshop: https://zindorf.splitcoaststampers.com/workshop-calendar

Don’t see a workshop in your State?  Interested in hosting the workshops in your area   Click HERE to get hostess information.
Link to my Stampin’ Up website where you can order all of your must have Stampin’ Up products from me 24-7: https://michellezindorf.stampinup.net