Category Archives: Technique Swap Tutorials

Water Stamped Winter – Tutorial #545

Hey There,

Whew, it seems like it’s been forever since I’ve gotten the chance to create something new here at home.   Feels good to get something done.

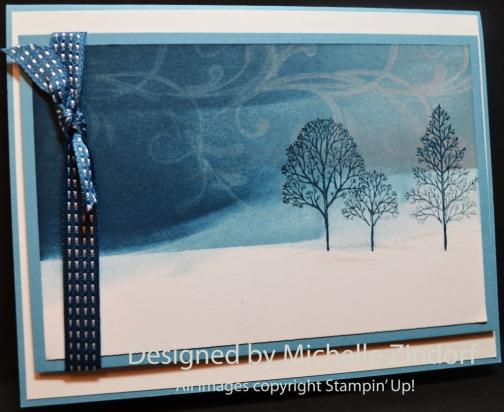
Today’s tutorial uses the water stamping technique to create the wind in the scene.  It’s an easy, easy technique, so please give it a try.  Also, this is a quick card to make since the background is done with the Direct to Paper technique.    Check it out below.

***********************************************************************

CLICK HERE TO SEE THE LATEST STAMPIN’ UP! PROMOTION AND TO SHOP NOW!

********************************************************
Joining Stampin’ Up!

You can join my Stampin’ Up! team and become a Stampin’ Up! Demonstrator now for the great new price of $99, and you can create your own kit, CLICK HERE TO CHECK IT OUT.  Contact me whether you want to start your own business or just enjoy the 20% discount on products.

*************************************************************

Stampin’ Up! is selling single stamps from 3 stamp sets on a trial bases until January 2, 2013.  Check out the flyers at the links below.

WORD PLAY

PERFECTLY PENNED

SEASONAL SAYINGS

*************************************************************

Have you checked out the great clearance rack at Stampin’ Up!  CLICK HERE

***********************************************************

Get Free Stamps

Don’t miss out on my Customer free stamp set program. Check it out!  Along with a handmade thank you card from me for your order you will receive a token for each $50 in product you ordered using me as your demonstrator.  After you have collected 10 tokens you will receive a free current stamp set of your choosing, a value of $39 or less.   Here is a link to my online shopping page that you can shop at 24/7 (from the comfort of your home, even in your pj’s) and the products will be shipped directly to your door step from Stampin’ Up:   CLICK HERE TO SHOP.   My free stamp set program will be an on going program.  :)

************************************************************

The new Stampin’ Up! Holiday Catalog is now in effect.  I love all of Stampin’ Up’s products, but the new catalog just blew me away (CLICK HERE TO VIEW THE HOLIDAY CATALOG).  I especially love the coordinating products that you can get as a bundle at a discount.    Gotta love a discount, right?  Especially for those products to make your holiday gifts and cards.

Want a new annual catalog shipped to you?     I will be happy to send you one.  The catalog is free, but there is a $5 shipping charge.   Note, I will only sell or ship within the United States do to Stampin’ Up! policies.  Please contact me at [email protected].  Payment can be sent via Paypal or check.


**********************************************************

Now on with today’s tutorial. . . . .  . .

Project Supplies:

Stampin’ Up! Stamps: Everything Eleanor and Lovely as a Tree

Card Stock: Stampin’ Up! Whisper White and Marina Mist

Ink: Stampin’ Up! Marina Mist, Midnight Muse ad Basic Gray

Accessories: Stampin’ Up! Midnight Muse Marker, Stampin’ Dimensionals, Midnight Muse Ribbon

Are you getting inspiration from this blog?   One way you can help support it is to order your Stampin’ Up products through me.   Click HERE to place an order and have your order delivered directly to your door step from Stampin’ Up!

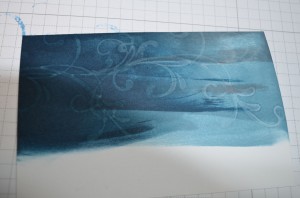
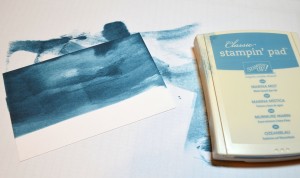
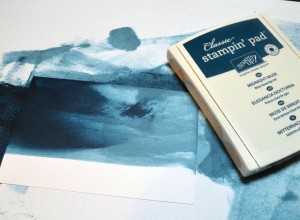
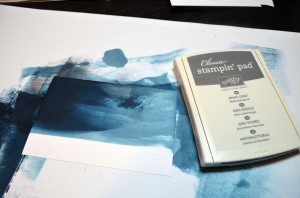
Started with a 3.5″ x 5″ piece of Whisper White card stock.  Smeared Marina Mist ink on the card stock.  This is called the Direct to Paper Technique.

You don’t want even coverage here and you want to leave 1/3rd of the card stock at the bottom with no color.

Smeared Midnight Muse ink on the left side of the sky area.

Smeared Basic Gray ink at the top of the card stock.

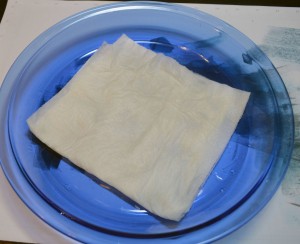
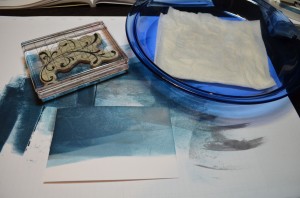
Folded two paper towels and wet them. Put them on a pie plate and used them as my stamp pad to stamp the Everything Eleanor flourish with water.  This lifts some of the color from the card stock and reveals the design.


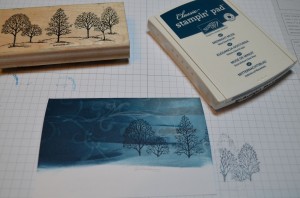
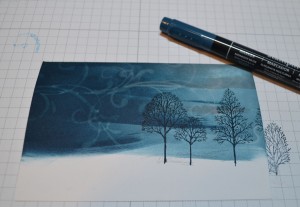
Loaded just the tree portion of the Lovely as a Tree stamp with Midnight Muse ink and stamped it.   Pulled the trunks down to the snow area using a Midnight Muse marker.

Added a Marina Mist panel, Midnight Muse Ribbon, Stampin’ Dimensionals, Whisper White Panel and a Marina Mist card stock base.

Here is the finished card measuring 4.25″ x 5.5″.

***********************************************************************************

I traveled from Ohio to Staley, NC this past weekend to teach some very terrific ladies my brayer and direct to paper techniques.  Here are some of the pictures I took along the way.

Click on them to make them larger.  🙂


*********************************************************

May your day be filled with delightful happenings!

Until my next post.. . . . .

Hugs,


Get ready for Brayer and Direct to Paper Workshops!  I am coming to the following locations, click the location name for more information.

St. Petersburg, Florida

Newburge, Indiana

I hope you can make it to one of my workshops in 2012.  I have decided not to travel full time after this year, so be sure to catch one now!

Link to my Stampin’ Up website where you can order all of your must have Stampin’ Up products from me 24-7: https://michellezindorf.stampinup.net

 

Wax Resist Rose – Tutorial #538

Hey There,

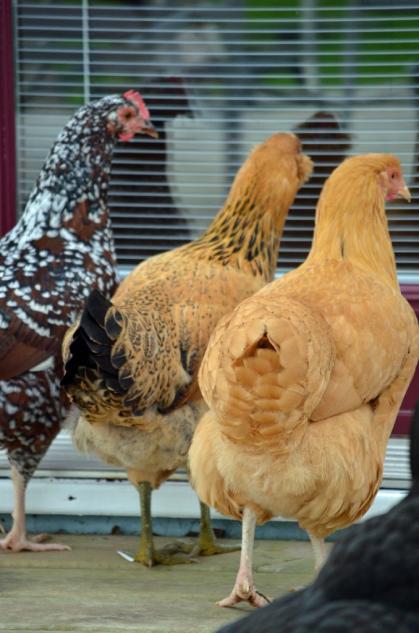
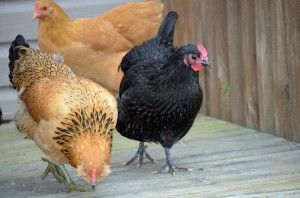
I just came in from outside.  I’ve been letting these characters run around outside of their chicken run for about an hour a day.  We have about an acre for them to run around in and, of course, this is what they do.  They run up on the deck and look in the door.  I think they are looking for Russ, hoping he will come out with some tasty meal worms, lol.

You can try to shoo them off of the deck, but they all just run to the opposite side, lol.

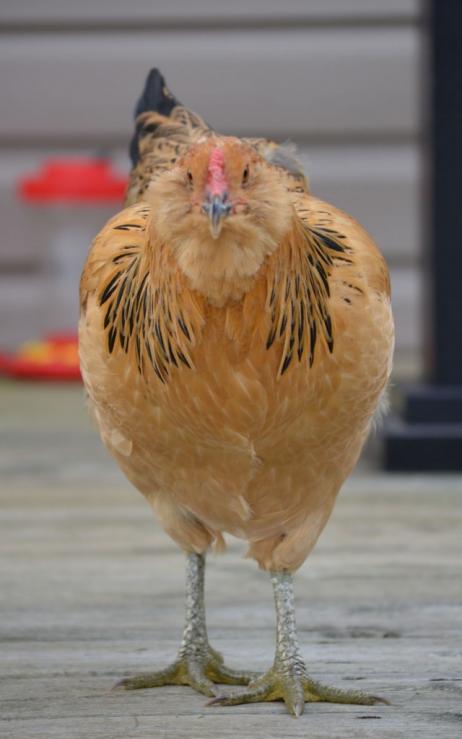
Then you get this look from Bunny!  What do you imagine she is thinking?  Maybe she should have those funny symbol characters in  a bubble above her head.  Really, she is super sweet.  Before you ask, we have not had an egg sighting yet, sigh.

***********************************************************************************************

Now let’s get down to business. . . . .

I have a Waxed Paper Resist card tutorial for you today.  Check it out below.

************************************************************************************

CLICK HERE TO SEE THE LATEST STAMPIN’ UP! PROMOTION AND TO SHOP NOW!

Don’t miss out on my Customer free stamp set program. Check it out!  Along with a handmade thank you card from me for your order you will receive a token for each $50 in product you ordered using me as your demonstrator.  After you have collected 10 tokens you will receive a free current stamp set of your choosing, a value of $39 or less.   Here is a link to my online shopping page that you can shop at 24/7 (from the comfort of your home, even in your pj’s) and the products will be shipped directly to your door step from Stampin’ Up:   CLICK HERE TO SHOP.   My free stamp set program will be an on going program.  :)

The new Stampin’ Up! Holiday Catalog is now in effect.  I love all of Stampin’ Up’s products, but the new catalog just blew me away (CLICK HERE TO VIEW THE HOLIDAY CATALOG).  I especially love the coordinating products that you can get as a bundle at a discount.    Gotta love a discount, right?  Especially for those products to make your holiday gifts and cards.

Want a new annual catalog shipped to you?     I will be happy to send you one.  The catalog is free, but there is a $5 shipping charge.   Note, I will only sell or ship within the United States do to Stampin’ Up! policies.  Please contact me at [email protected].  Payment can be sent via Paypal or check.

You can join my Stampin’ Up! team and become a Stampin’ Up! Demonstrator now for the great new price of $99, and you can create your own kit, CLICK HERE TO CHECK IT OUT.  Contact me whether you want to start your own business or just enjoy the 20% discount on products.

*****************************************************************************

Now on with today’s tutorial. . . . .  . .

Card Supplies:

Card Stock: Stampin’ Up! Glossy White, Lucky Limeade, Basic Black, Daffodil Delight and Rose Red

Ink: Stampin’ Up! Daffodil Delight, Rose Red, Bravo Burgundy, Basic Black and Elegant Eggplant

Accessories: Stampin’ Up! Sponge, brayer, Stampin’ Dimensionals, Mini Silver Brads, Old Olive Ribbon, Elegant Butterfly Punch, Manhattan Flower Embossing Folder, Big Shot Machine, Stampin’ Dimensionals, Blender Pen, Old Olive, Rose Red and Pink Pirouette Markers

Are you getting inspiration from this blog?   One way you can help support it is to order your Stampin’ Up products through me.   Click HERE to place an order and have your order delivered directly to your door step from Stampin’ Up!

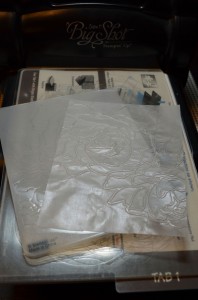
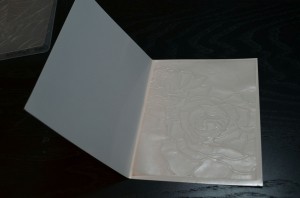
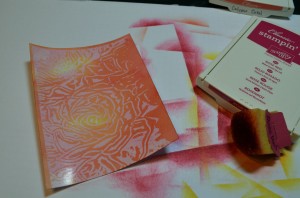
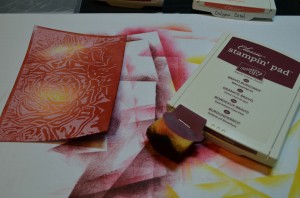
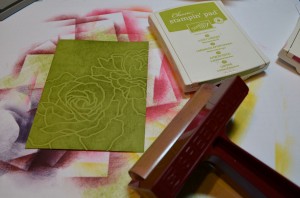
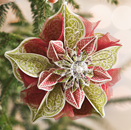
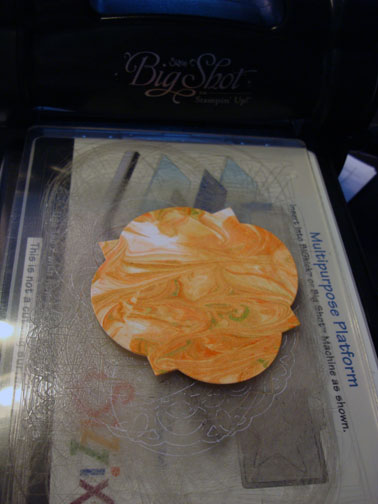
Cut a piece of Waxed Paper the size of the embossing folder and then embossed it using the Manhattan Flower Embossing Folder and Big Shot Machine.

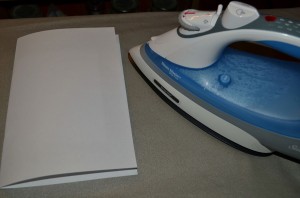
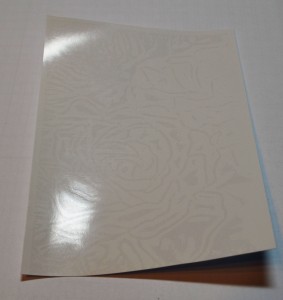
Cut a 11 x 4.25 piece of glossy card stock and folded it in half, shiny sides facing each other.  Put the waxed paper inside and iron the card stock with a piece of copy paper over it.  Have your iron on the cotton setting with no steam.  Keep your iron moving the entire time you are ironing.  It will only take a moment.


Cut the glossy paper in half.

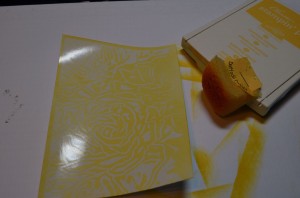
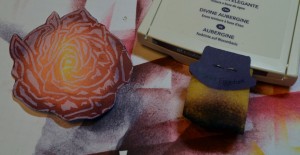
Sponged Daffodil Delight ink, Rose Red ink and then Bravo Burgundy ink on the card stock.

It was at this point that I decided to not use the card stock as my background, but in stead put the rose up front and center.  🙂

Cut out the large flower and sponged Elegant Eggplant on the edges of the rose.

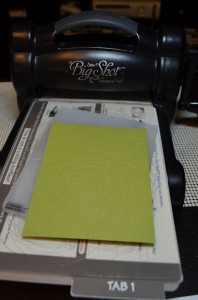
Cut a 3 7/8″ x 5 1/8″ piece of Lucky Limeade card stock.  Embossed it using the Manhattan Flower Embossing folder.

Brayered Lucky Limeade ink over the top of the card stock to make the embossing pop.

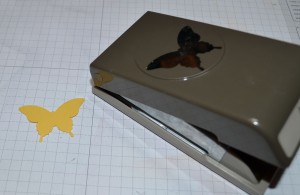
Punched a butterfly using the Elegant Butterfly punch.

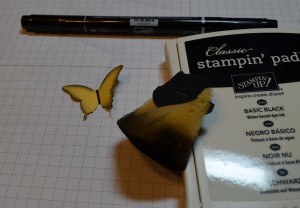
Sponged Basic Black ink around the edges and put Basic Black marker dots on the wing edges and a Basic Black marker line for the body.

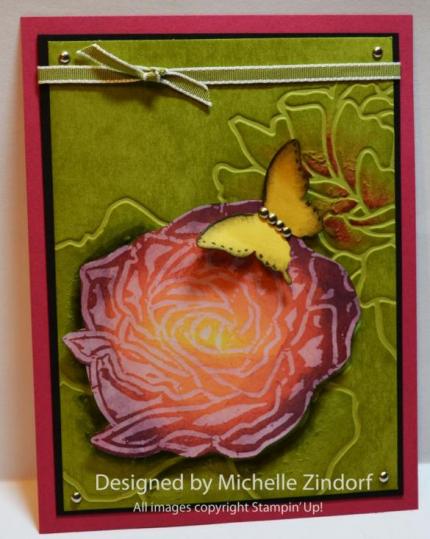
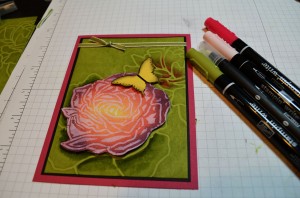
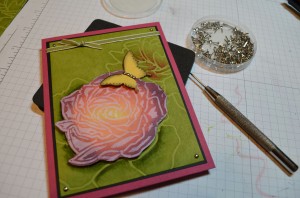
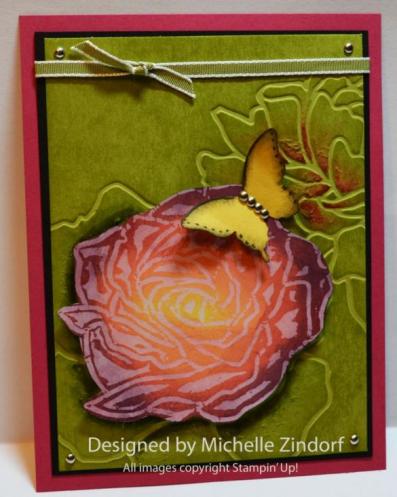
Added a Rose Red panel, Basic Black Panel, Old Olive Ribbon.  Also added Old Olive marker on some of the petals on the Old Olive panel and blended them with a Blender Pen.  Added Rose Red marker to the small flower petals and blended them in with a Pink Pirouette Marker.

Popped the Rose and Butterfly up using Stampin’ Dimensionals.  Added mini silver brads at the Old Olive panel corners and down the Butterfly’s body.

Lastly, added a Whisper White card base.

Here is the finished card measuring 4.25″ x 5.5″.


May your day be filled with all the things that bring you joy.

Until my next post.. . . . .

Hugs,


Get ready for Brayer and Direct to Paper Workshops!  I am coming to the following locations, click the location name for more information.

Scottsdale, Arizona

Sacramento, California

Staley, North Carolina

St. Petersburg, Florida

Newburge, Indiana

I hope you can make it to one of my workshops in 2012.  I have decided not to travel after this year, so be sure to catch one now!

Link to my Stampin’ Up website where you can order all of your must have Stampin’ Up products from me 24-7: https://michellezindorf.stampinup.net


Autumn Reflection – Tutorial #534 and Freezing BBQ Chicken

Hey There,

Well my computer is still in the shop but I swiped Russ’ so I can post.  I was having withdrawals, lol.

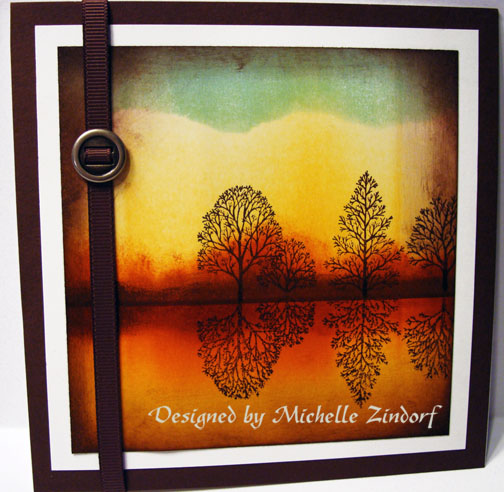
Today’s tutorial is one using some Autumn colors and tree reflections.   Hope you like it.

Here are a few Stampin’ Up Reminders before I start the project:

The new Stampin’ Up! Holiday Mini catalog is now in effect.  I love all of Stampin’ Up’s products, but the new mini catalog just blew me away (CLICK HERE TO VIEW THE HOLIDAY MINI CATALOG).  I especially love the coordinating products that you can get as a bundle at a discount.    Gotta love a discount, right?  Especially for those products to make your holiday gifts and cards.

Don’t miss out on my Customer free stamp set program. Check it out!  Along with a handmade thank you card from me for your order you will receive a token for each $50 in product you ordered using me as your demonstrator.  After you have collected 10 tokens you will receive a free current stamp set of your choosing, a value of $39 or less.   Here is a link to my online shopping page that you can shop at 24/7 (from the comfort of your home, even in your pj’s) and the products will be shipped directly to your door step from Stampin’ Up:   CLICK HERE TO SHOP.   My free stamp set program will be an on going program.  :)

Want a new annual catalog shipped to you?     I will be happy to send you one.  The catalog is free, but there is a $5 shipping charge.   Note, I will only sell or ship within the United States do to Stampin’ Up! policies.  Please contact me at [email protected].  Payment can be sent via Paypal or check.

You can join my Stampin’ Up! team and become a Stampin’ Up! Demonstrator now for the great new price of $99, CLICK HERE TO CHECK IT OUT.  Contact me whether you want to start your own business or just enjoy the 20% discount on products.

Want to purchase one of my original cards or some Stampin’ Up! retired sets CLICK HERE.

*****************************************************************************

Now on with today’s tutorial. . . . .  . .

Card Supplies:

Stamps: Stampin’ Up! Lovely As A Tree

Card Stock: Stampin’ Up! Whisper White and Chocolate Chip

Ink: Stampin’ Up! Chocolate Chip, Cajun Craze, More Mustard and Pool Party

Accessories: Stampin’ Up! Sponges, Clear Window Sheet, Brayer, Ribbon Slide, Chocolate Chip Ribbon, Chocolate Chip Marker

Are you getting inspiration from this blog?   One way you can help support it is to order your Stampin’ Up products through me.   Click HERE to place an order and have your order delivered directly to your door step from Stampin’ Up!

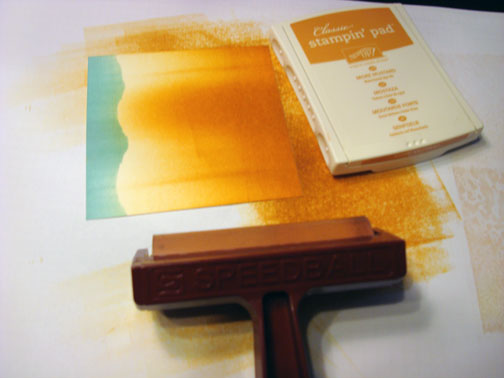
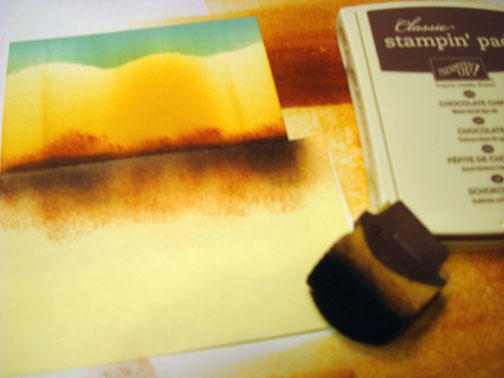
Ripped a jagged edge off of a post it note and used it as a mask on 4.5″ square piece of Whisper White card stock.  Brayered Pool Party ink at the top of the card stock.

Removed the mask and brayered More Mustard ink at the bottom of the card stock.

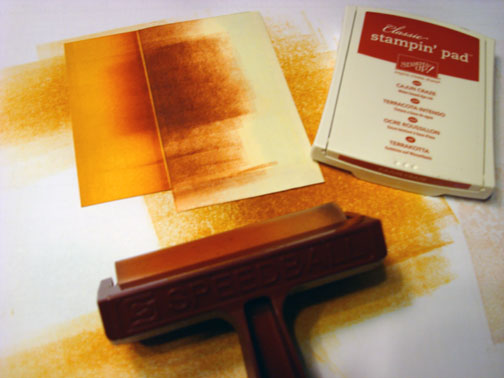
Removed the torn post it note and added a new post it note 1 1/2″ from the bottom of the card stock and then brayered Cajun Craze ink at the post it note edge.

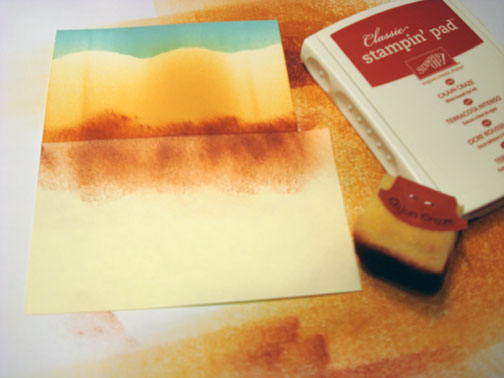
Turned the post it note around and sponged Cajun Craze ink in to create background brush.

Sponged a bit of Chocolate Chip ink at the post it note edge.


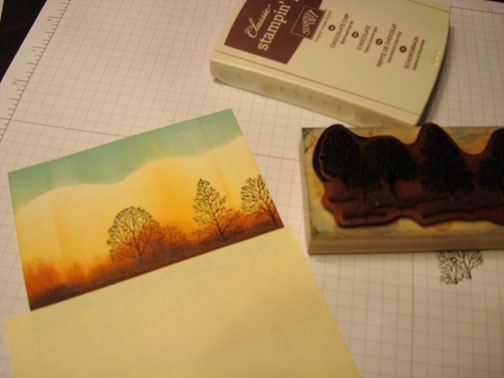
Inked up only the tree part of the stamp with Chocolate Chip and then stamped it omitting the ground area of the stamp.

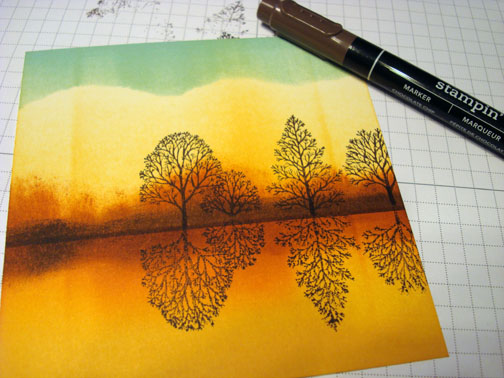
Inked up only the tree portion of the stamp and stamped it on a Window Sheet and then turned the window sheet over onto the card stock lining the trees up and then rubbed the back side of the window sheet to transfer the image.

Darkened the trunks of the trees using a Chocolate Chip marker.


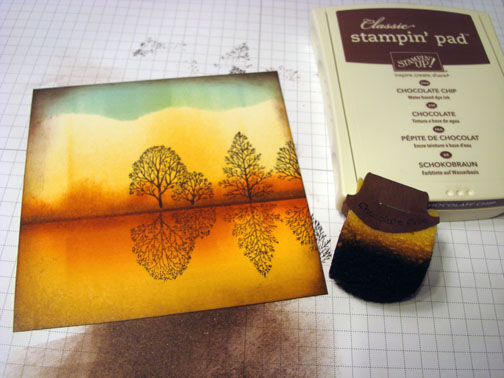
Sponged Chocolate Chip ink around the edges of the card stock.

Added a Chocolate Chip panel and Whisper White panel.  Also added Chocolate Chip ribbon and a ribbon side.

Here is the finished card measuring 5.5″ square.


*******************************************************************************************

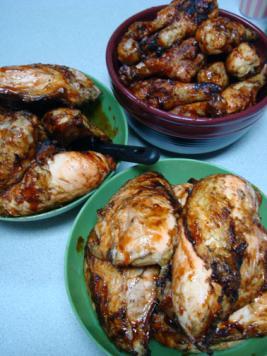
Once again I found chicken at a really good price and I got a bit carried away.  Thank goodness we have a very large 8 burner grill that we use when entertaining.

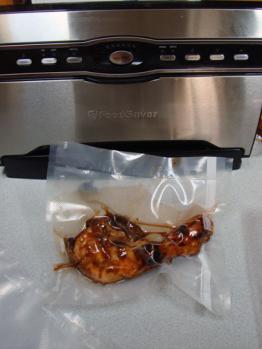
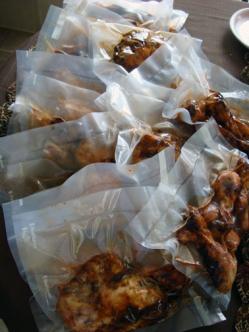
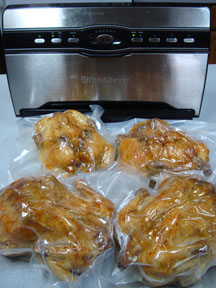
I BBQ ed 12 chicken breast and 38 legs.  Divided the chicken up into two piece packets and used my Food Saver to seal it air tight and then popped it in the freeze.   Since it is fully cooked just thaw heat and eat, yum.  Great for when the weather is bad but you still have the craving for BBQ.


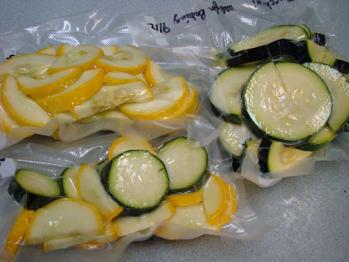
I’m also still putting up some squash and zucchini from the garden.  Wash, slice, seal in food saver bags and eat within 6 months.

While I cooked the chicken on the grill I also popped 4 whole chickens in the oven and roasted them.    They also got packed with the Food Saver and froze.   This is great chicken to pull out for a meal and use the left overs to make yummy chicken salad.

It’s just as easy to cook 4 chickens in the oven as it is one.

Well that’s it for today.  I’m off tomorrow for a wonderful trip to Purcellville, Virginia.  I cannot wait to meet my students there.

May your day be filled with blessings.

Until my next post. . . . .

Hugs,


Get ready for Brayer and Direct to Paper Workshops!  I am coming to the following locations, click the location name for more information.

Purcellville, Virginia

Orange, Massachusetts

Scottsdale, Arizona

Sacramento, California (Sold Out)

Staley, North Carolina

St. Petersburg, Florida

Newburge, Indiana

I hope you can make it to one of my workshops in 2012.  I have decided not to travel after this year, so be sure to catch one now!

Link to my Stampin’ Up website where you can order all of your must have Stampin’ Up products from me 24-7: https://michellezindorf.stampinup.net
Shaped Christmas Card – Tutorial #531

Hey There,

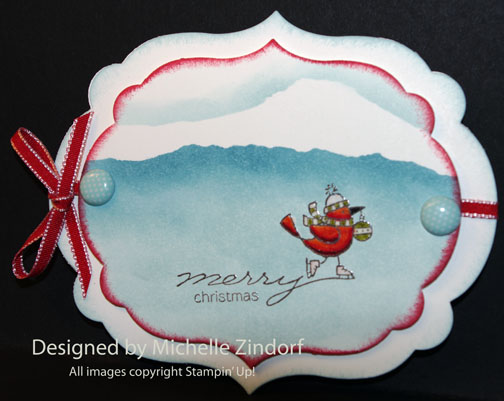
I have a tutorial today on how to make a shaped card using a die cut.   This card will easily fit into an A-2 envelope (quarter card).   My scene was put together using the emboss resist technique.  This technique allows you to put your background in over your main image.  🙂   Hope you hang out and give this card try.  It’s fun stepping outside the box and making a different shape than square or rectangle.

Here are a few Stampin’ Up Reminders before I start the project.

The new Stampin’ Up! Holiday Mini catalog is now in effect.  I love all of Stampin’ Up’s products, but the new mini catalog just blew me away (CLICK HERE TO VIEW THE HOLIDAY MINI CATALOG).  I especially love the coordinating products that you can get as a bundle at a discount.    Gotta love a discount, right?  Especially for those products to make your holiday gifts and cards.

Don’t miss out on my Customer free stamp set program. Check it out!  Along with a handmade thank you card from me for your order you will receive a token for each $50 in product you ordered using me as your demonstrator.  After you have collected 10 tokens you will receive a free current stamp set of your choosing, a value of $39 or less.   Here is a link to my online shopping page that you can shop at 24/7 (from the comfort of your home, even in your pj’s) and the products will be shipped directly to your door step from Stampin’ Up:   CLICK HERE TO SHOP.   My free stamp set program will be an on going program.  :)

Want a new annual catalog shipped to you?     I will be happy to send you one.  The catalog is free, but there is a $5 shipping charge.   Note, I will only sell or ship within the United States do to Stampin’ Up! policies.  Please contact me at [email protected].  Payment can be sent via Paypal or check.

You can join my Stampin’ Up! team and become a Stampin’ Up! Demonstrator now for the great new price of $99, CLICK HERE TO CHECK IT OUT.  Contact me whether you want to start your own business or just enjoy the 20% discount on products.

Want to purchase one of my original cards or some Stampin’ Up! retired sets CLICK HERE.

Now on with today’s tutorial. . . . .  . .

Supplies:

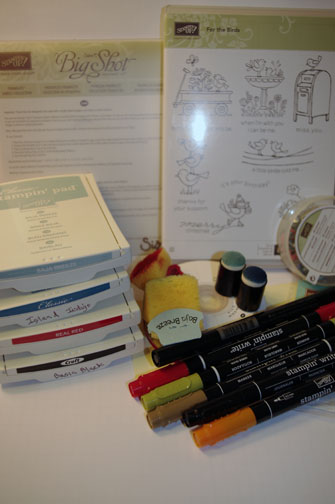
Stamps: Stampin’ Up! For the Birds

Card Stock: Stampin’ Up! Whisper White

Ink: Stampin’ Up! Baja Breeze, Island Indig, Real Red and Basic Black

Accessories: Stampin’ Up! Sponges, Sponge Daubers, Stampin’ Dimensionals, Versamark Marker, Clear Embossing Powder, Heat Gun, Post it Note, Printed Designer Brads, Labels Collection Framelits Die, Big Shot Machine, Real Red Ribbon, Markers (Pumpkin Pie, Real Red, Old Olive, Basic Black and Soft Suede).

Are you getting inspiration from this blog?   One way you can help support it is to order your Stampin’ Up products through me.   Click HERE to place an order and have your order delivered directly to your door step from Stampin’ Up!


Love the Framelits.  🙂

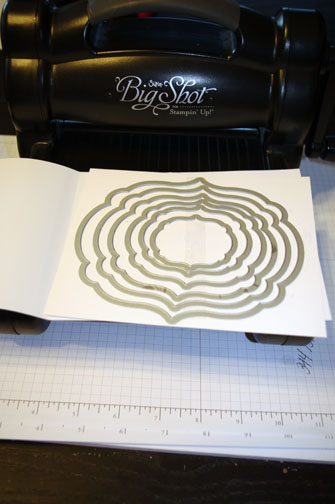
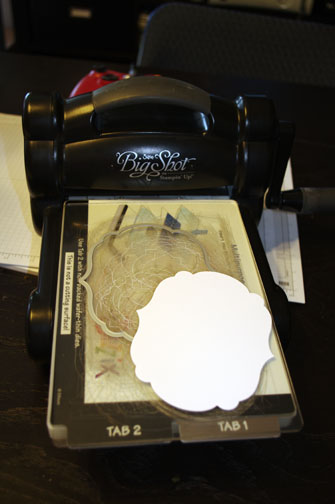
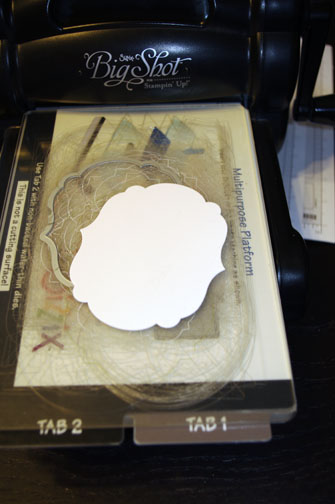
Die Cut the frame using the second to the largest framelit, Whisper White card stock and the Big Shot Machine.  This piece will be the front of my card.

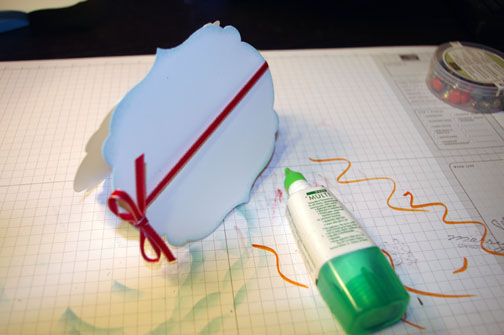
Folded a Whisper White card stock and put the fold just below the edge of the framelit as shown below.

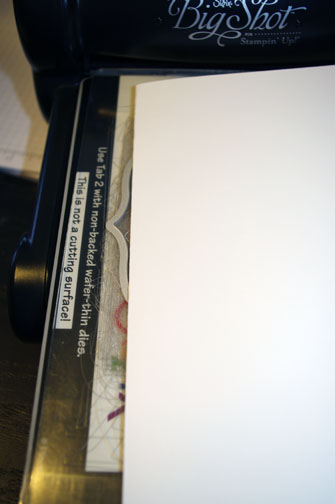
Run it through the big shot machine.  This piece of the card base.

Die cut another frame.  This time I used the 3rd to the largest Framelit, Whisper White and the Big Shot Machine.   This piece is for the main image panel.

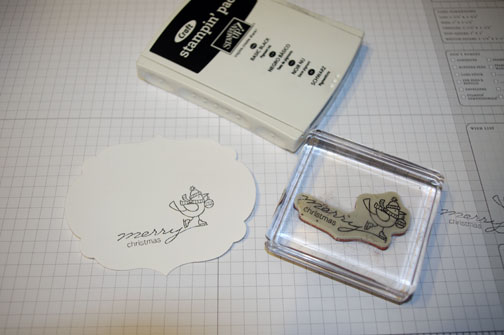
Stamped the image using Craft Basic Black ink on the main image panel.

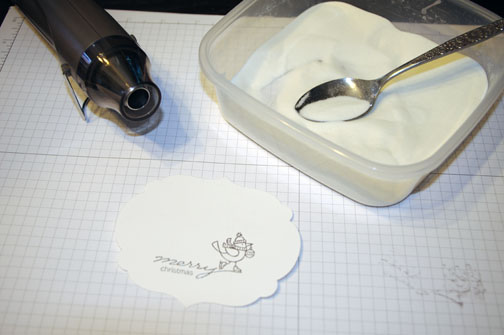
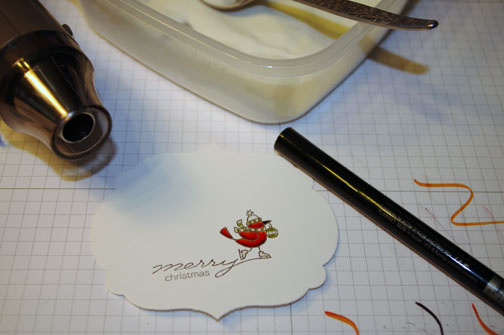
Heat embossed the image using clear embossing powder and a heat gun.

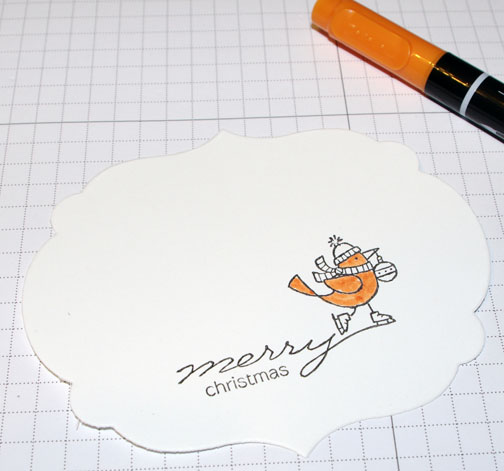
Colored the bird in with Pumpkin Pie marker.

Added Real Red marker.

Blended the color together using the Pumpkin Pie marker.   Now there is a shadow at the bottom of the bird and it’s wing.

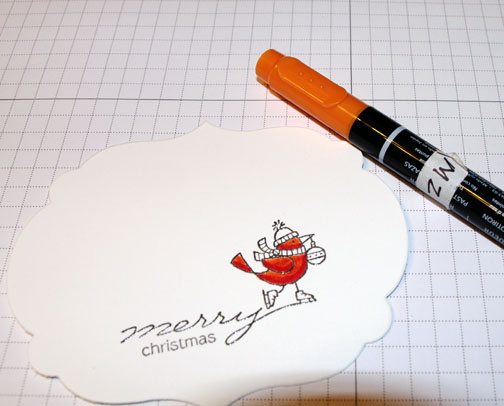
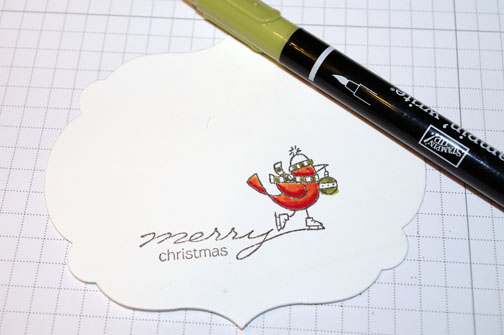
Added Old Olive marker to the hat, scarf and ornament.

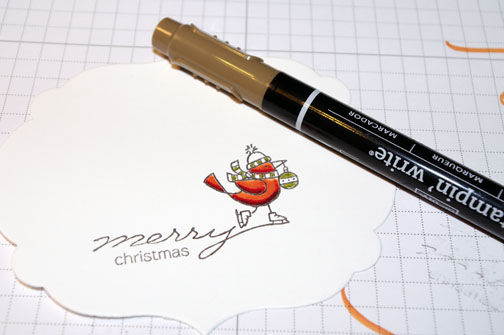
Added a thin line to the bottom of the wing and belly using a Soft Suede marker.

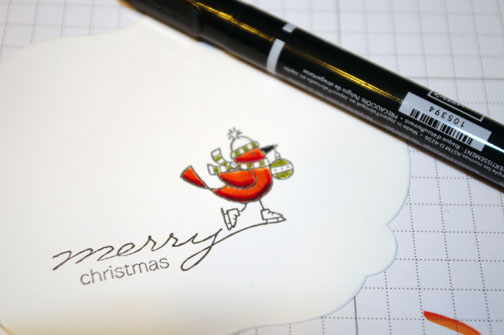
Colored the beak in with Basic Black marker.

Colored in the image using a Versamarker.  Be sure to stay inside the embossed lines and start with the lightest part and work toward the darker parts.   Heat emboss the image using clear embossing powder and a heat gun.   Now the whole bird is embossed.

Ripped the sticky part of a post it note and masked the sky of the scene.

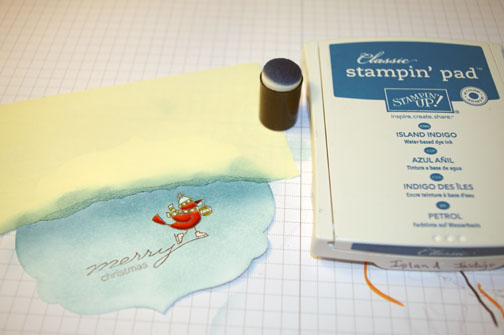
Sponged Baja Breeze ink on the unmasked area.

Sponged Island Indigo ink on the top of the unmasked area.

Removed the post it note mask and ripped a hill shape in the post it note.   Sponged Baja Breeze ink a the top of the post it note edge.

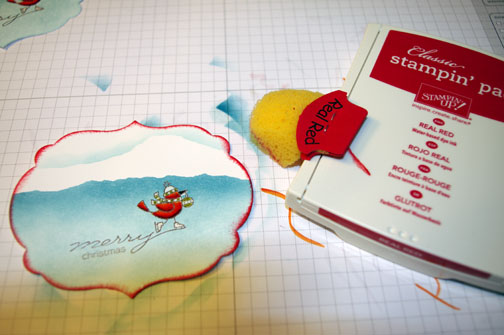
Removed the mask and sponged Real Red ink around the main image panel edge.

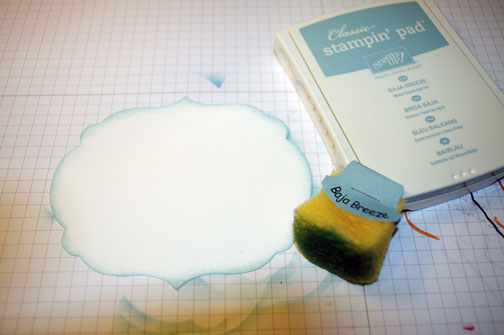
Sponged Baja Breeze ink around the edge of the card front panel.

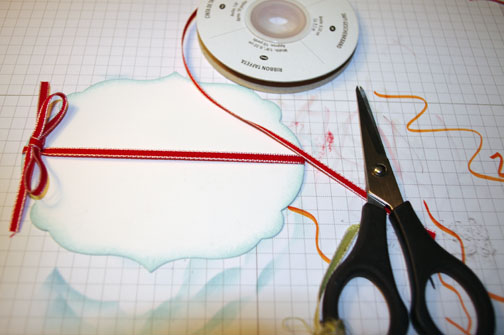
Added Real Red Ribbon.

Adhered the card front to the card base lining up the die cut edges.

Added brads to the right and left sides of the main image panel.

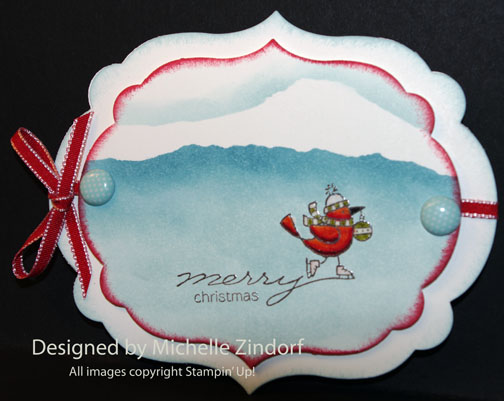
Adhered the main image panel to the card front using Stampin’ Dimensionals.   Here is the finished card.  🙂

May your day be filled with love and laughter.

Until my next post. . . . .

Hugs,

Get ready for Brayer and Direct to Paper Workshops!  I am coming to the following locations, click the location name for more information.

Purcellville, Virginia

Orange, Massachusetts

Scottsdale, Arizona

Sacramento, California (Sold Out)

Staley, North Carolina

St. Petersburg, Florida

Newburge, Indiana

I hope you can make it to one of my workshops in 2012.  I have decided not to travel after this year, so be sure to catch one now!

Link to my Stampin’ Up website where you can order all of your must have Stampin’ Up products from me 24-7: https://michellezindorf.stampinup.net
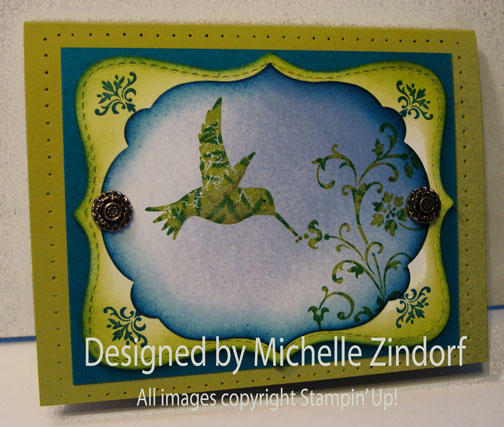
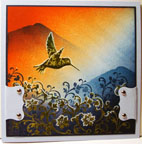
Shaving Cream Hummingbird – Tutorial #522

Hi There,

Today’s card was made using the Shaving Cream Technique.   This technique is an oldie but goodie!   It makes such wonderful backgrounds and no two are a like.   So grab that shaving cream and your re-inkers and follow the tutorial below.

Also, there are 3 sneak peek Stampin’ Up! Holiday Mini Catalog products used on this card.   The holiday mini catalog will be out August 1, 2012.   Woohoo!  So write these products down because you will definitely want to add them to your list of must haves.

Here are a few Stampin’ Up Reminders before I start the project.   During the month of July, with any $50 purchase, you can get this beautiful stamp set for $5.

Want a new annual catalog shipped to you?     I will be happy to send you one.  The catalog is free, but there is a $5 shipping charge.   Note, I will only sell or ship within the United States do to Stampin’ Up! policies.  Please contact me at [email protected].  Payment can be sent via Paypal or check.

You can join my Stampin’ Up! team and become a Stampin’ Up! Demonstrator now for the great new price of $99, CLICK HERE TO CHECK IT OUT.  Contact me whether you want to start your own business or just enjoy the 20% discount on products.

Want to purchase one of my original cards or some Stampin’ Up! retired sets CLICK HERE.

Now on with today’s tutorial. . . . .  . .

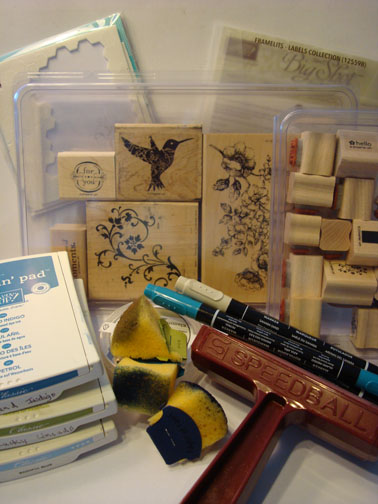
Supplies:

Stamps: Stampin’ Up! Elements of Style

Card Stock: Stampin’ Up! Whisper White, Calypso Coral and Old Olive

Ink: Stampin’ Up! Re-inkers (Calypso Coral, Lucky Limeade and Tangerine Tango), Stazon Jet Black

Accessories: Stampin’ Up! Stampin’ Dazzle Silver Marker, Framelits – Window Frames Collection, Textured Impressions Embossing Folder Lacy Brocade, Stampin’ Dimensionals, Whisper White Organza Ribbon, Shaving Cream, paper plate or plastic container and paper towels.

Are you getting inspiration from this blog?   One way you can help support it is to order your Stampin’ Up products through me.   Click HERE to place an order and have your order delivered directly to your door step from Stampin’ Up!

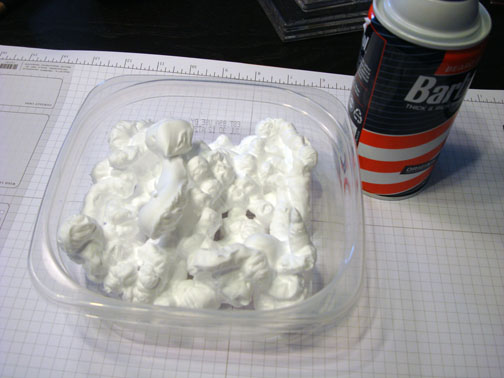
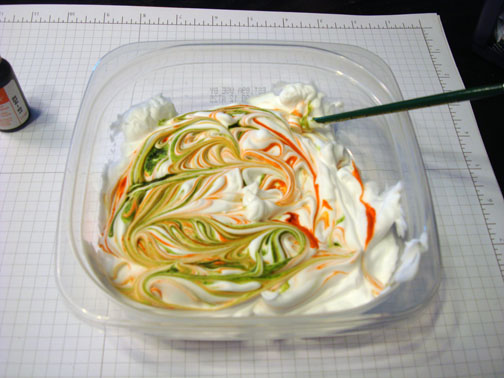
Put shaving cream in a plastic container or on a paper plate.

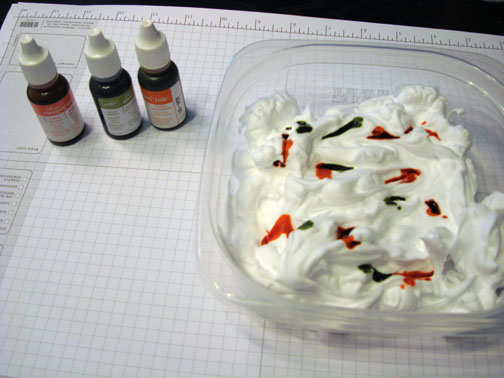
Drop a few dots of re-inkers in the shaving cream.  I used Calypso Coral, Tangerine Tango and Lucky Limeade.

I used the wood end of a paint brush to swirl the colors around.  Be sure not to mix to much or the colors will muddy.

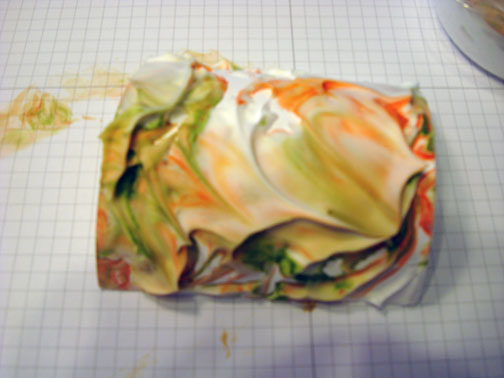
Put your Whisper White card stock down into the shaving cream and press just a bit so that the paper comes in contact with the color.   Lift the card stock out.  It will look like this, YIKES!

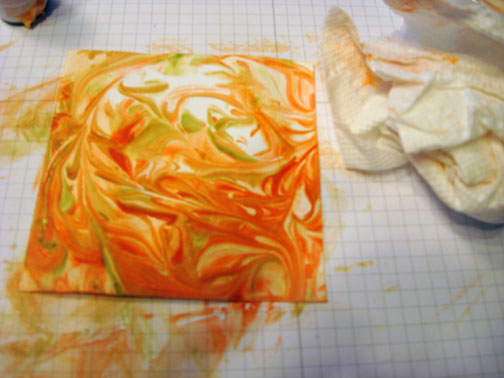
If you want another background, but lighter in color put another piece of card stock over the first one so the shaving cream is sandwiched in between the two pieces of card stock.

Pull them apart and wipe the shaving cream off of the card stock with a paper towel.

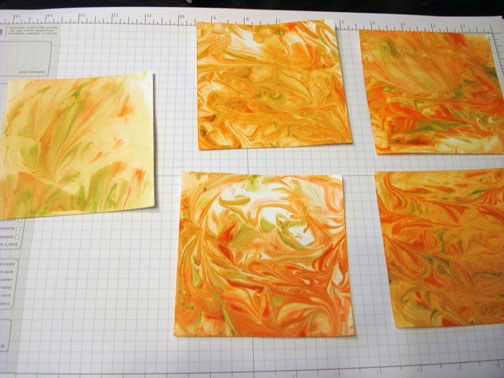
The light piece on the far left is the piece I put on top of the 1st one.  See how much lighter it is.

If you continue to use the shaving cream with additional pieces of card stock the colors will mix more and more (like the ones on the far right).

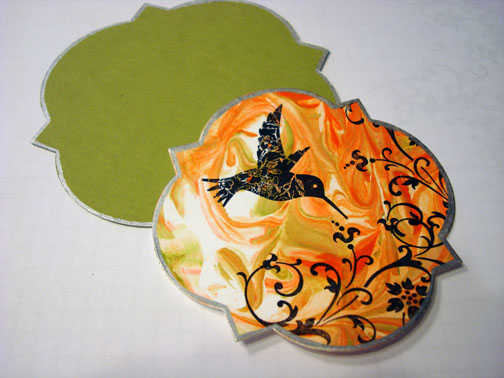
Cut the card stock using the big shot machine and the NEW FRAMLITS WINDOW FRAMES COLLECTION die cut.  Also cut the next size up using Lucky Limeade card stock.


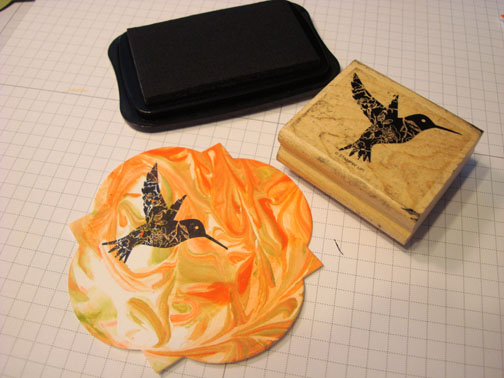
Stamped the humming bird and the flourish using Stazon Jet Black ink.


Used the NEW STAMPIN’ DAZZLE Silver marker around the edge of the two die cuts.

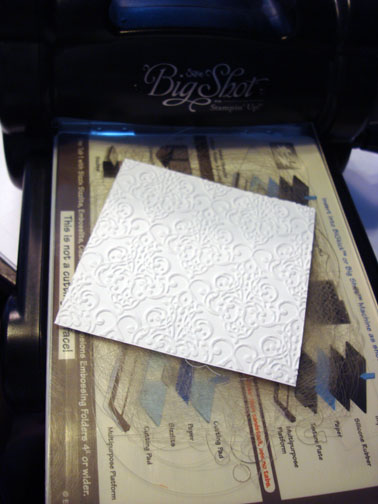
Used the NEW LACY BROCADE Embossing Folder on a 4.25″ piece of Whisper White card stock.

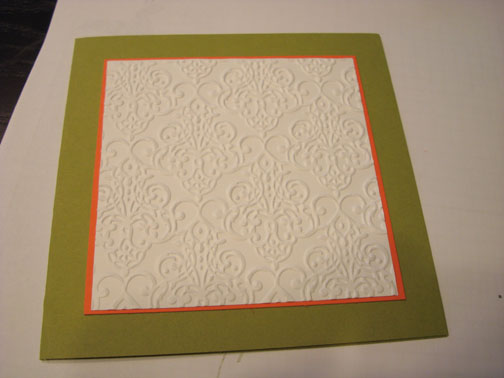
Added a 5.5″ square Lucky Limeade card base and a 4 3/8″ square Calypso Coral panel.

Added some Whisper White Organza Ribbon and popped the die cuts up with Stampin’ Dimensionals.

Here is the finished card measuring 5.5″ square.

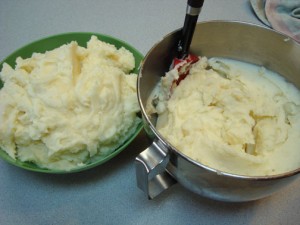
I’m a little late posting today.  I was busy in the kitchen putting up some mashed potatoes.


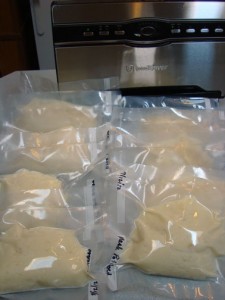
When I find bags of potatoes on sale really cheap, I cannot resist buying them in order to freeze mashed potatoes.  All you have to do is peel, boil and make your regular mashed potato recipe and then freeze either in quart bags or food saver bags.  I can’t live without my food saver.

If you didn’t know, I love to make at least 4 of something that I am cooking.  That way we get to freeze 3.

I got 8 batches of mashed potatoes out of 10 lbs of potatoes with only a little more time than it would have took me to make one batch.  Great side to be able to pull out of the freezer and quickly heat.

Also, when you make your own dishes to freeze you know just what went into them.  No preservatives!!!

Well I’m going to be on the road for over a week.  I’m heading to Lawrence, Kansas tomorrow to teach this weekend and then I’m off to Stampin’ Up’s convention in Salt Lake City, Utah.   Hang tight and check out some of my past tutorials while I’m gone.  Better yet, how about making some cards using the tutorials.   Either way, thank you for hanging out with me here on my blog.   I hope you find yourself inspired.

Until my next post. . . . . .  .

Hugs,

Get ready for Brayer and Direct to Paper Workshops!  I am coming to the following locations, click the location name for more information.

Lawrence, Kansas

Elizabethtown, Kentucky

West Bend, Wisconsin

Purcellville, Virginia

Orange, Massachusetts

Scottsdale, Arizona

Sacramento, California

Staley, North Carolina

St. Petersburg, Florida

Newburge, Indiana

I hope you can make it to one of my workshops in 2012.  I have decided not to travel after this year, so be sure to catch one this year!

Link to my Stampin’ Up website where you can order all of your must have Stampin’ Up products from me 24-7: https://michellezindorf.stampinup.net


Thumped Hummingbird – Tutorial #512

Hey There,

I’m patiently waiting on my large Stampin’ Up! order that is filled to the brim with all the new goodies from the brand new catalog.  Tap, tap, tap, tap, where is Mr. Brown. . . .. . . . . . lol.  I’m feeling like an expectant mother.    Actually, my order won’t be here for a couple of more days, tap, tap, tap, tap. . . . . . .   Guess, I have to play with the wonderful things I already have and my chicks, grin.   Love the chicks!   I have a chick update for those who are interested at the bottom of this post.  Yep, once again they are trying to learn how to stamp.

Today’s tutorial uses the wonderful Elements of Style Stamp set and the Tiny Tags Stamp set.   I’ve also pulled out the Big Shot and used a great stamping technique “Thumping”.    If you haven’t tried thumping, grab a solid stamp and an ink pad and a contrasting marker with a brush end and follow along.  It’s a simple but very lovely looking technique.

Reminders:

Check out what’s new at Stampin’ Up!  The brand new Annual Catalog has been released.   CLICK HERE TO LOOK AT THE CATALOG ONLINE. I got my order in and I’m ecstatic about the new products and, of course, the new stamps!    CLICK HERE TO PLACE AN ORDER. Contact me at [email protected] or 937-344-1312 with product questions.

Want a new annual catalog shipped to you?     I will be happy to send you one.  The catalog is free, but there is a $5 shipping charge.   Note, I will only sell or ship within the United States do to Stampin’ Up! policies.  Please contact me at [email protected].  Payment can be sent via Paypal or check.

You can join my Stampin’ Up! team and become a Stampin’ Up! Demonstrator now for the great new price of $99, CLICK HERE TO CHECK IT OUT.

Want to purchase one of my original cards or some Stampin’ Up! retired sets CLICK HERE. I’ll be updating the sales page all this week.  So check back daily.

Now on with today’s tutorial. . . . .  . .

Supplies:

Stamps: Stampin’ Up! Elements of Style and Tiny Tags

Card Stock: Stampin’ Up! Lucky Limeade, Island Indigo and Whisper White

Ink: Stampin’ Up! Bashful Blue, Island Indigo, Lucky Limeade

Accessories: Stampin’ Up! Sponges, Basic Black Marker, Sahara Sand Marker, Island Indigo Marker, Brayer, Antique Brads, Top Note Die, Framelits Labels Collection, Big Shot Machine, Mat Pack and Piercing Tool.

Are you getting inspiration from this blog?   One way you can help support it is to order your Stampin’ Up products through me.   Click HEREto place an order and have your order delivered directly to your door step from Stampin’ Up!


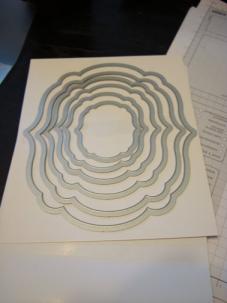
Here is a picture of the Stampin’ Up! framelets – Labels Collections.  Love them!


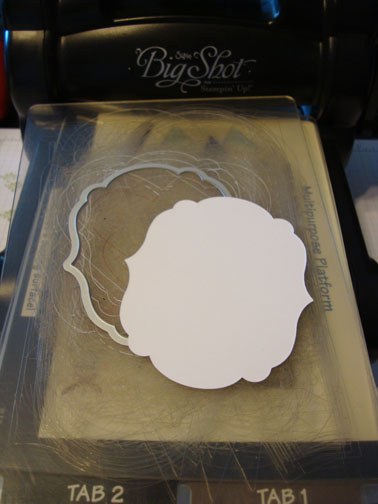
Used the 3rd to the largest framelet and die cut it using Whisper White card stock and the Big Shot Machine.

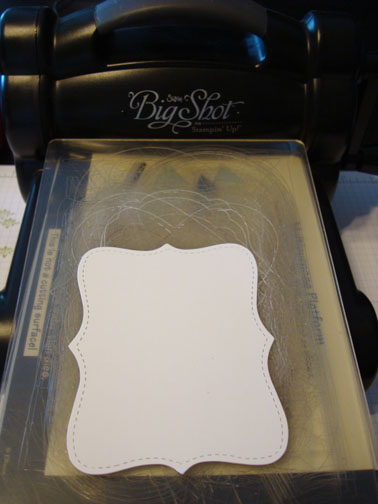
Also die cut a Top Note from Whisper White using the Big Shot Machine.

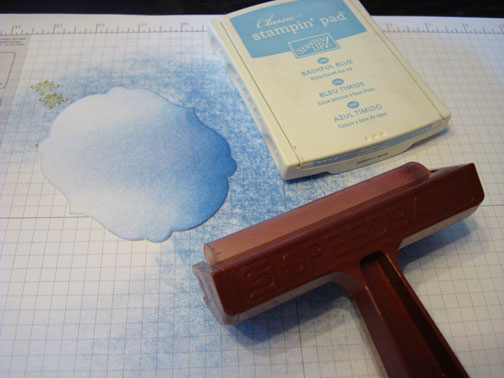
Brayer Bashful Blue ink at an angle on the card stock.

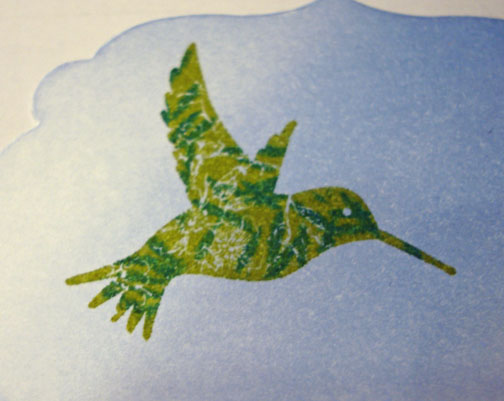
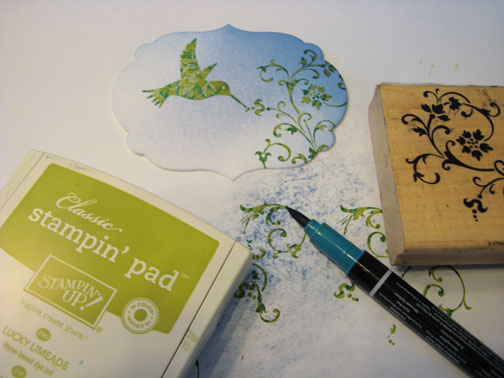
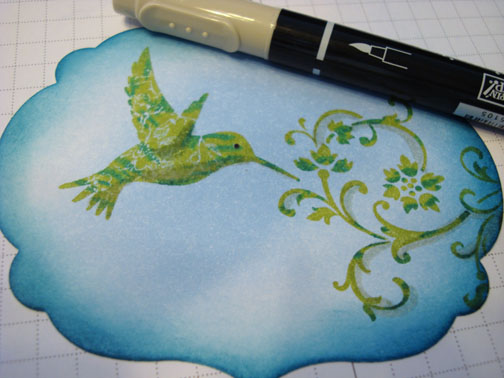
Loaded the hummingbird stamp with Lucky Limeade ink, tapped the side of the brush end of an Island Indigo marker on the inked up stamp and then huffed my breath on the stamp to moisten it and then stamp the image on my card stock.     This technique “thumping” gives this great marbled look.


Did the same process for the flourish.

Sponged Island Indigo ink around the edge of the card stock.

Added an eye on the bird using a Basic Black marker.

Added a shadow to the wing and bottom of the bird using the brush end of a Sahara Sand Marker.

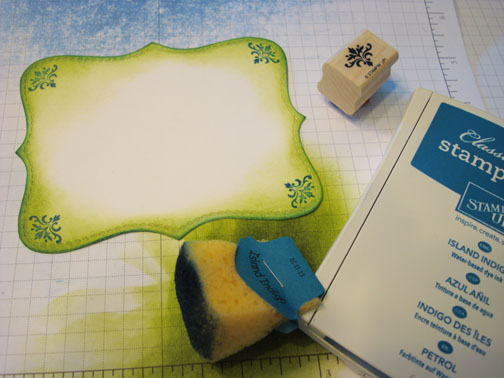
Sponged Lucky Limeade ink on the Top Note die cut, sponged Island Indigo ink around the very edge of the it and then stamp the flourish from the Tiny Tags set using Island Indigo on each corner.

Added a 3.75″ x 4.75″ piece of Island Indigo card stock to the front of a 8.5″ x 5″ piece of Lucky Limeade card stock that has been folded in half.

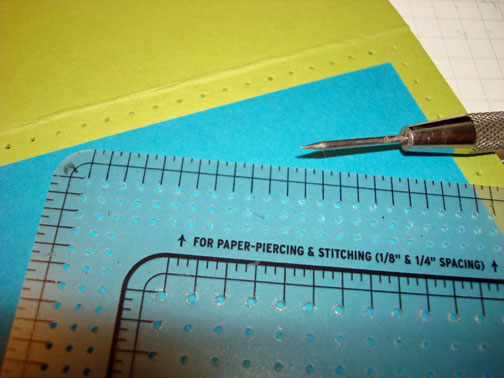
Using a piercing tool and mat pack, pierced holes around the edge of the card stock.

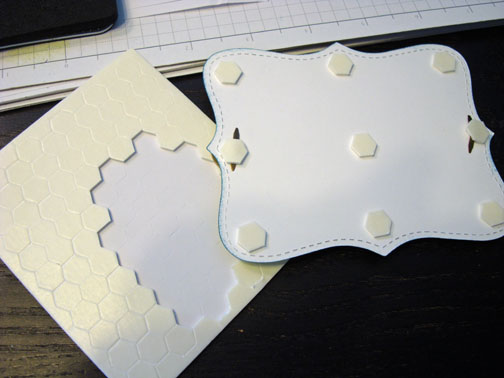
Adhered the main image panel to the top note panel and added 2 antique brads.   Adhered the top not then to the front of the card using Stampin’ Dimensionals.


Here is the finished card measuring 4.25″ x 5.5.

Now for a little chick update. . . . .

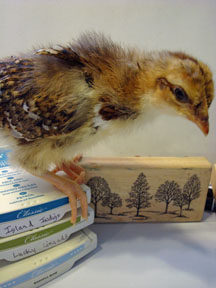
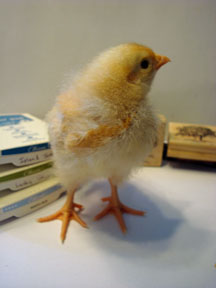
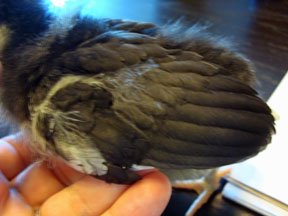
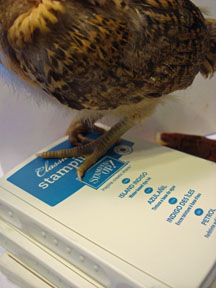
This is Red.  She is the most friendliest one of the bunch.  When I put my hand down in the brooder (cage) she jumps right up in my hand.    See how very big she is getting.    The girls are all looking like they are having a very bad feather day while their feathers are coming in and their fuzzy down feathers are being pushed out.   I bet you didn’t know that ink pads are great to perch on.

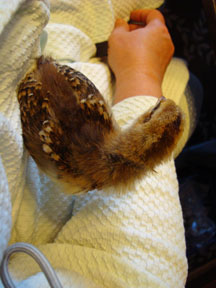
Red, spent just a couple of minutes on my stamp table before she decided to go to her favorite place, the crook of my arm.

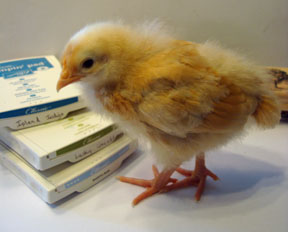
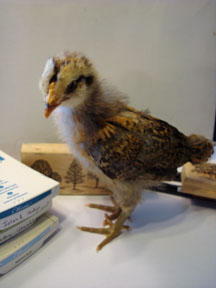
Now, in walks Buffy.   Buffy has these creamy/gold beautiful feathers.   She will be a stunner when she reaches maturity, just wait!   Buffy is very laid back.   Her favorite thing to do is fall a sleep in your lap.  Hmmm, maybe I just bore her.

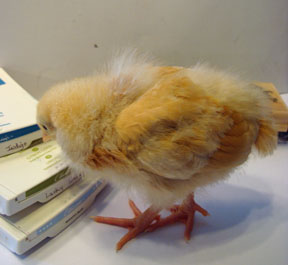
This wild feather girl is Sophie.  Sophie is shy and growing super fast.  She is, like the rest, are starting to get their combs in and check out those wings.   All those feathers weren’t there last week.

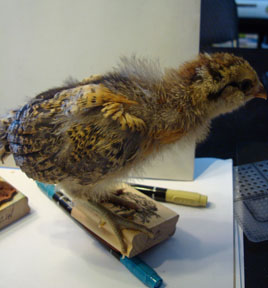
Now this is Bunny, she is my crazy girl.   If you let her, she would be into everything.   She doesn’t want to sit still like the rest.  She perched on as many things as she could in the short time she was on my desk.   It’s hard to tell in these pictures, but Bunny has Baja Breeze colored legs and multi-colored feathers.

The chicks get held daily so they won’t be a pain to hold and take care when they are full grown.   They really love being held.   Do you remember the Dr. Seuss book “Are you my Mommy.”   I think that they all asked me that daily and the answer now is yes.  🙂

May your day be filled with all the peeps you love.  🙂

Until my next post. . . . .  . . .

Hugs,

Get ready for Brayer and Direct to Paper Workshops!  I am coming to the following locations, click the location name for more information.

Sand Lake, Michigan (just North of Grand Rapids)

Lawrence, Kansas

Elizabethtown, Kentucky

West Bend, Wisconsin

Purcellville, Virginia

Orange, Massachusetts

Scottsdale, Arizona

Sacramento, California

Staley, North Carolina

St. Petersburg, Florida

Newburge, Indiana

I hope you can make it to one of my workshops in 2012.  I have decided not to travel after this year, so be sure to catch one this year!

Link to my Stampin’ Up website where you can order all of your must have Stampin’ Up products from me 24-7: https://michellezindorf.stampinup.net
 

Faux Silk Love Birds – Tutorial #504

Hey There,

Happy Hump Day!   Wednesday is the day I start to panic when I have a long, long to do list for the week and have yet to even get 1/4 of it done.   I sometimes think other people must get more hours in their week then I do.  What’s your secret for getting all the things done you want to do?   I bet I just have way to many hobbies, gardening, cooking, quilting, crochet, cross stitching, drawing, pastels, reading, and the biggie STAMPING!
Yesterday, I was chatting with my new neighbor and her husband creates beautiful stained glass windows.  She says to me “come on over anytime and he will teach you how to do stained glass.”   My mind starts to race, where, oh where would I fit stained glass into my life?  Better yet, where would I put all the necessary supplies for such a hobby?   I have to admit, I have been dreaming of building a building just for my craft supplies.  I can remember being new to crafts and I started out with a basket filled with things, which grew into an iris cart, then 2 iris carts, then the smallest room in the house, then the largest room in the house.  Do we ever have enough?   Do you have a secret that you would like to share on keeping your crafting supplies to a minimum?  I would love to hear it and so would my readers.  Is there a group called crafter’s anonymous?  Where do you meet at, Hobby Lobby?  LOL

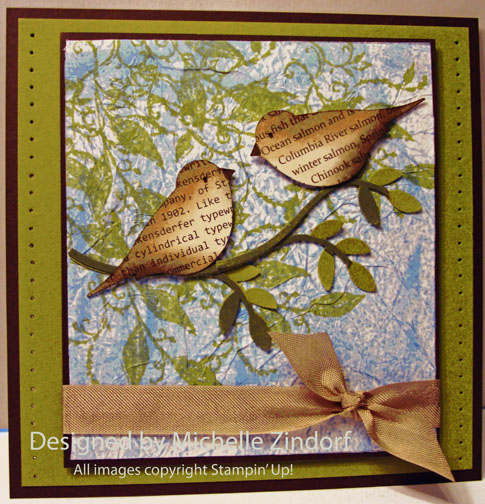
Now about today’s tutorial, I created this project using the Faux Silk technique for my Stampin’ Up Down Line Monthly Technique Swap.  This technique is so very simple, but creates this yummy background that looks like silk fabric using ordinary tissue paper.

Reminders before I start the tutorial:

The Stampin’ Up Stamp retired list came out last week.  Today the Accessory retired list comes out.  Hop on over to my Stampin’ Up! sales page to check it out.

. . .  . Check out what’s going, going, going by clicking here.

Don’t miss out on my Customer free stamp set program. Check it out!  Along with a handmade thank you card from me for your order you will receive a token for each $50 in product you ordered using me as your demonstrator.  After you have collected 10 tokens you will receive a free current stamp set of your choosing, a value of $39 or less.   Here is a link to my online shopping page that you can shop at 24/7 (from the comfort of your home, even in your pj’s) and the products will be shipped directly to your door step from Stampin’ Up:   CLICK HERE TO SHOP.   My free stamp set program will be an on going program.  :)

Now on with today’s tutorial. . . . .  . .

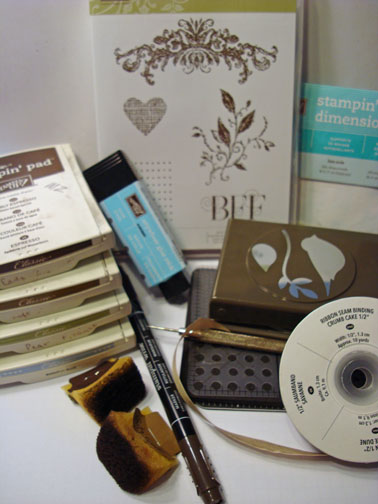
Supplies:

Stamps: Stampin’ Up! Best Friends Forever (Item number 122807)

Card Stock: Stampin’ Up! Whisper White, Early Espresso, Old Olive and Stampin’ Up! DSP First Edition (Item number 121878)

Ink: Stampin’ Up! Early Espresso, Soft Suede, Pear Pizzazz and Bashful Blue

Accessories: Stampin’ Up! Sponges, Large Bird Punch, Mat Pack and Piercing tool, Crumb Cake Seam Binding, Early Espresso marker, Stampin’ Dimensionals, Tissue Paper and a glue stick.

Want a free copy of the current Stampin’ Up! Occasions Mini Catalog?  Just e-mail your address to [email protected] and I will get one right out to you.  Get your copy of the 2011-2012 Stampin’ Up! Idea Book & Catalog by sending $9.95 to me at P.O. box 116, West Alexandria, Ohio 45381 or via paypal to [email protected], shipping is free. Are you getting inspiration from this blog?   One way you can help support it is to order your Stampin’ Up products through me.   Click HEREto place an order and have your order delivered directly to your door step from Stampin’ Up!    Want to become a Stampin’ Up Demonstrator , receive a 20% discount on product and earn instant income on orders, get to purchase products before they are released to the public?  Consider being part of my Stampin’ Up Team and start your own business or become a Hobby Demo just for the discount.  Click HERE for more information.

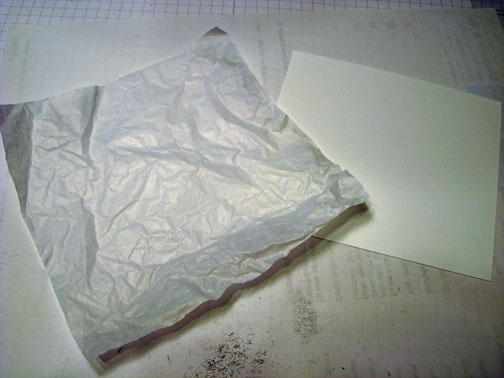
Cut a piece of ordinary tissue paper larger than my Whisper White Panel that is 4″ x 4.5″.

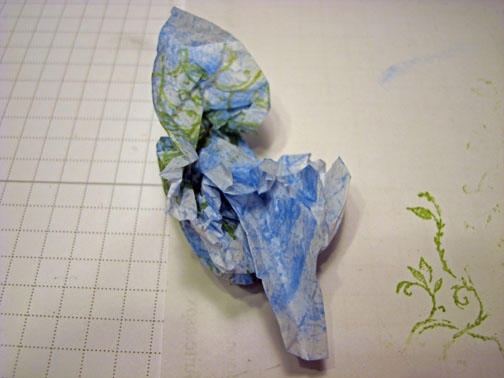
Wrinkled the tissue paper by balling it up and then smoothing it out.   Smeared Bashful Blue ink directly on the tissue paper.

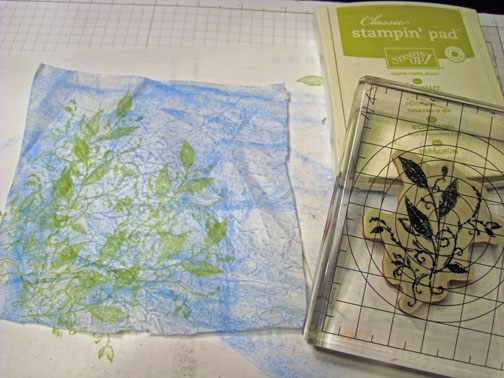
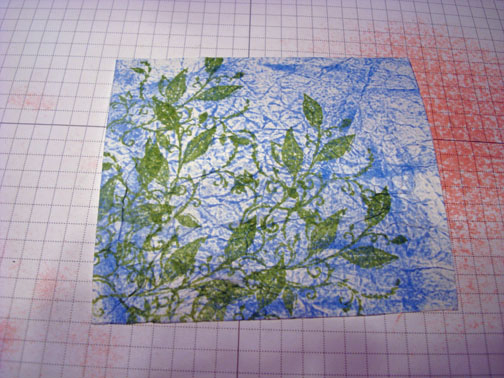
Stamped the leaves stamp on the tissue paper a few times using Pear Pizzazz ink.

Covered my Whisper White panel with Glue from a glue stick.

Crumpled the tissue up again and then smoothed it out a little.

Laid it down on the glue sticked card stock leaving some of the wrinkles.  The texture in the background is what you want.

Trimmed the tissue paper even with the card stock.

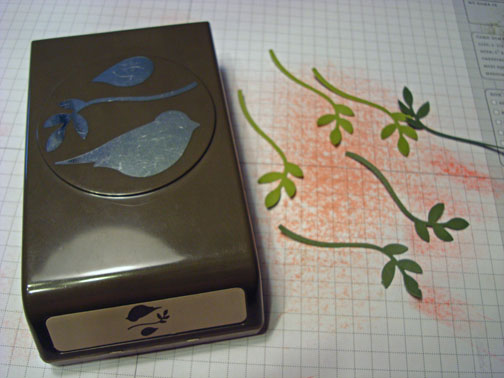
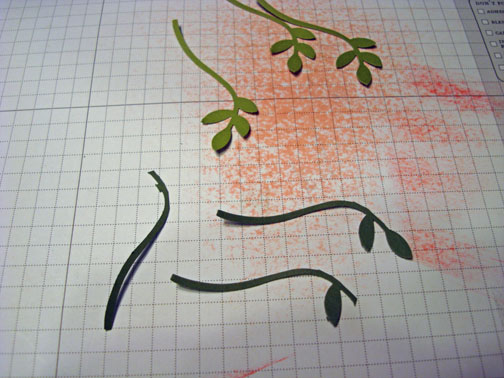
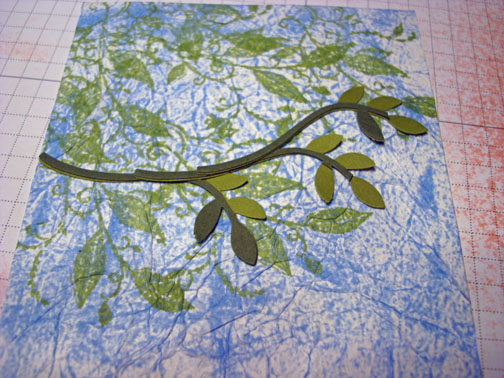
Punched 3 branches from Old Olive card stock and 3 branches from Always Artichoke card stock.

Cut some of the leaves off of the Always Artichoke branches and then glued the Always Artichoke branches on top of the Old Olive ones to get 2 toned branches and leaves.

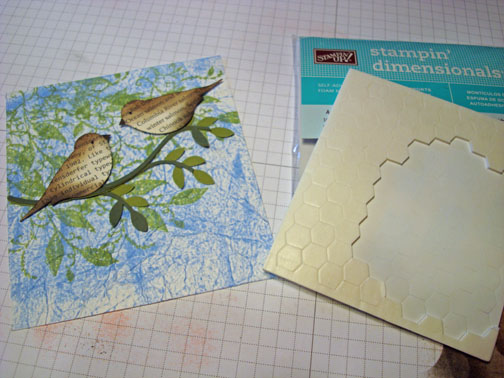
Adhered them to my background panel.

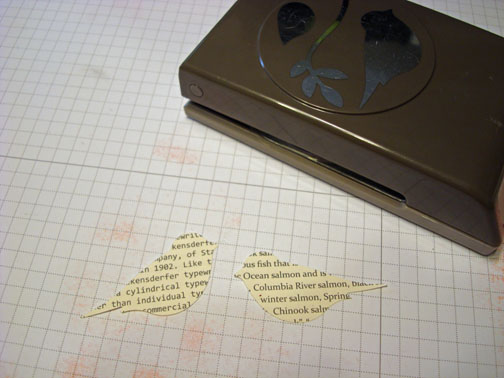
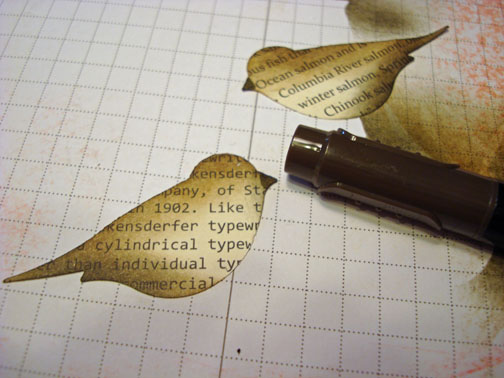
Punched 2 birds from the Stampin’ Up! DSP, First Edition.

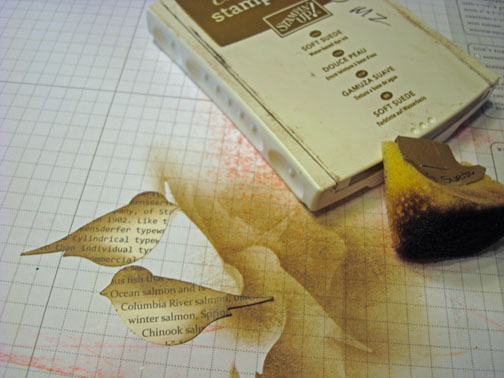
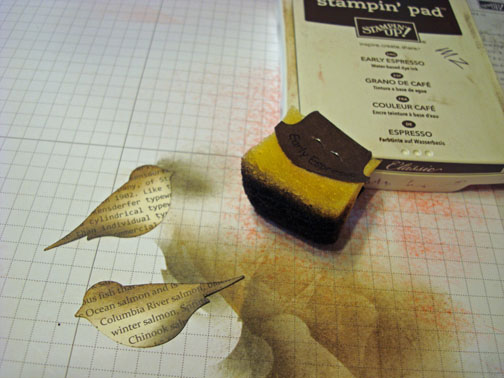
Sponged Soft Suede ink on the birds.

Sponged Early Espresso ink on the bottom of the birds.

Colored their beaks in using an Early Espresso Marker.

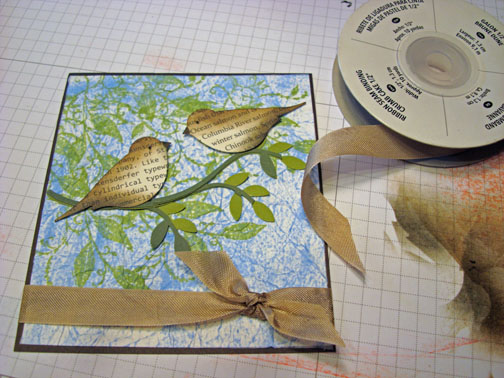
Adhered the birds to the background using Stampin’ Dimensionals so they would be popped up.

Added a 4 1/8″ x 4 5/8″ Early Espresso Panel and Crumb Cake Seam Binding.

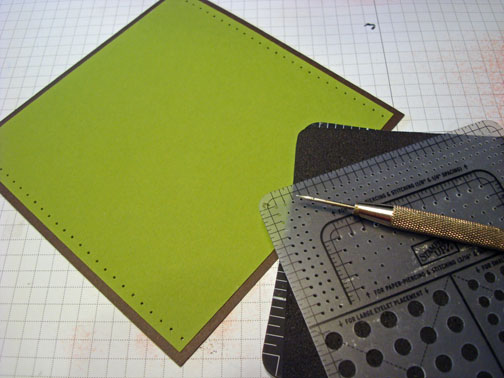
Added an Early Espresso Panel 5.25″ square and an Old Olive Panel 5″ square.  Pierced holes down the right and left sides of the Old Olive panel using the Stampin’ Up mat pack and piercing tool.

Assembled my card.  Here it is finished measuring 5.25″ square.

May your day be out of this world wonderful!

Until my next post. . . . .  . . .

Hugs,

Get ready for Brayer and Direct to Paper Workshops!  I am coming to the following locations, click the location name for more information.

Sand Lake, Michigan (just North of Grand Rapids)

Lawrence, Kansas

Elizabethtown, Kentucky

West Bend, Wisconsin

Purcellville, Virginia

Orange, Massachusetts

Scottsdale, Arizona

Sacramento, California

Staley, North Carolina

St. Petersburg, Florida

Newburge, Indiana

I hope you can make it to one of my workshops in 2012.  I have decided not to travel full time after this year, so be sure to catch one this year!

Link to my Stampin’ Up website where you can order all of your must have Stampin’ Up products from me 24-7: https://michellezindorf.stampinup.net