
Hey There,
Are you stuck in the United States heat wave? We are expecting temps to reach 105 degrees for the next couple of days here. Now, I know that isn’t extremely hot for some of you in the USA, but it’s unusual here in Ohio in June.
I’m just trying to keep cool by thinking of Christmas. So hence, the Christmas card project today. Besides, I now have 2 Christmas cards done for this year, lol.
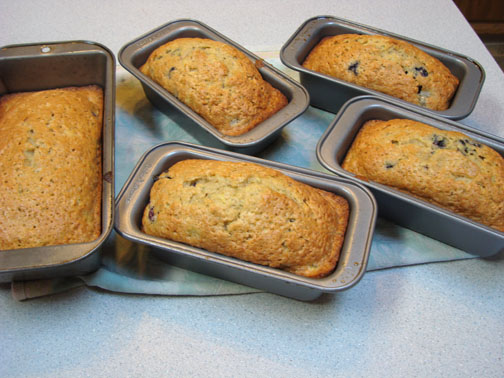
I think I have lost my mind. I’ve been running the oven kicking out some Blueberry Zucchini Bread. I’ll give the recipe for those of you who are interested at the end of this post. It’s yummy! Already, my garden is producing more veggies than Russ and I can eat, so I’m trying to do some baking and canning to stay ahead of the game. This Blueberry Zucchini Bread is super moist and freezes well.
Here are a few Stampin’ Up Reminders before I start the project.

Check out what’s new at Stampin’ Up! The brand new Annual Catalog has been released. CLICK HERE TO LOOK AT THE CATALOG ONLINE. I got my order in and I’m ecstatic about the new products and, of course, the new stamps! CLICK HERE TO PLACE AN ORDER. Contact me at [email protected] or 937-344-1312 with product questions.
Want a new annual catalog shipped to you? I will be happy to send you one. The catalog is free, but there is a $5 shipping charge. Note, I will only sell or ship within the United States do to Stampin’ Up! policies. Please contact me at [email protected]. Payment can be sent via Paypal or check.
You can join my Stampin’ Up! team and become a Stampin’ Up! Demonstrator now for the great new price of $99, CLICK HERE TO CHECK IT OUT. Contact me whether you want to start your own business or just enjoy the 20% discount on products.
Want to purchase one of my original cards or some Stampin’ Up! retired sets CLICK HERE. I’ll be updating the sales page all this week. So check back daily.
Now on with today’s tutorial. . . . . . .
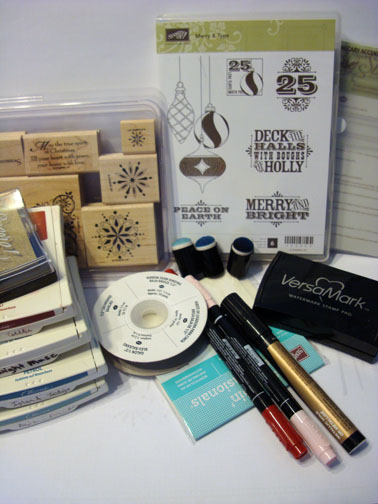
Supplies:
Stamps: Stampin’ Up! Merry & Type and Snow Swirled
Card Stock: Stampin’ Up! Whisper White, Cherry Cobbler and Baja Breeze
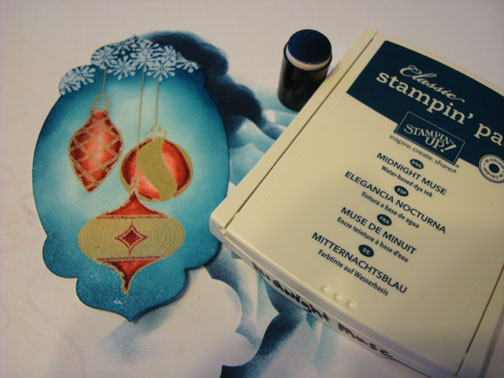
Ink: Stampin’ Up! Baja Breeze, Island Indigo, Midnight Muse, Cherry Cobbler and Gold
Accessories: Stampin’ Up! Sponge Daubers, Versamark Pad, Versamarker, Clear Embossing Powder, Heat Gun, Stampin Dimensionals, Framelits – Apothecary Accents, Big Shot Machine, Baja Breeze Seam Binding, Stampin’ Markers – Pink Pirouette and Cherry Cobbler, Prismacolor Gold Marker.
![]() Are you getting inspiration from this blog? One way you can help support it is to order your Stampin’ Up products through me. Click HERE to place an order and have your order delivered directly to your door step from Stampin’ Up!
Are you getting inspiration from this blog? One way you can help support it is to order your Stampin’ Up products through me. Click HERE to place an order and have your order delivered directly to your door step from Stampin’ Up!
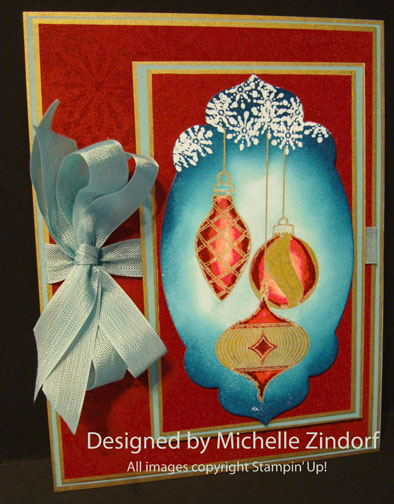
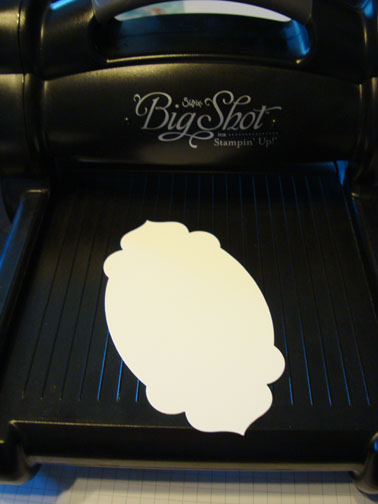
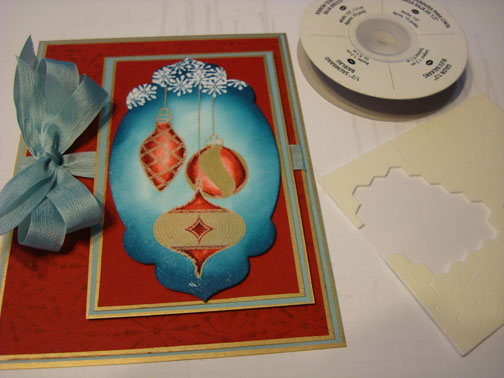
Gotta love these new Framelits from Stampin’ Up! This set is the Apothecary Accents (item number 127003). I used the large one on the right.
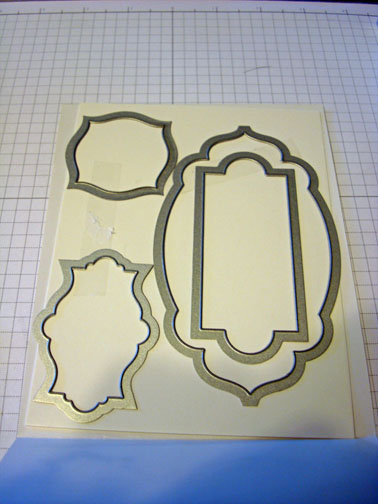
Die cut it using Whisper White card stock and the Big Shot Machine.
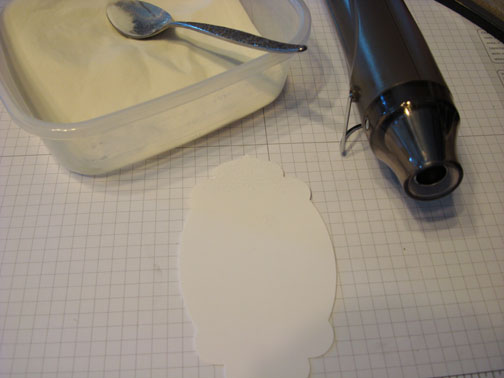
You won’t be able to tell what I stamp here until I start putting in the background color. Take my word for it, lol.
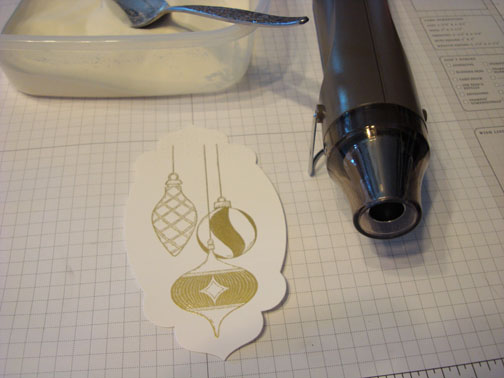
Stamped Snowflakes at the top of the card stock using Versamark. Embossed the images using clear embossing powder and a heat gun.

Stamped the Ornaments using Gold ink. Heat embossed the image using clear embossing powder and a heat gun.

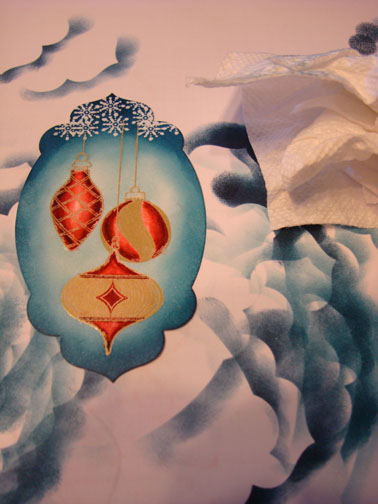
Colored the images in entirely using a Pink Pirouette marker. Added Shading by adding Cherry Cobbler marker to the outside of the area and then blended it using the Pink Pirouette marker. I left it light in the middle of the ornaments to give it a rounded look.
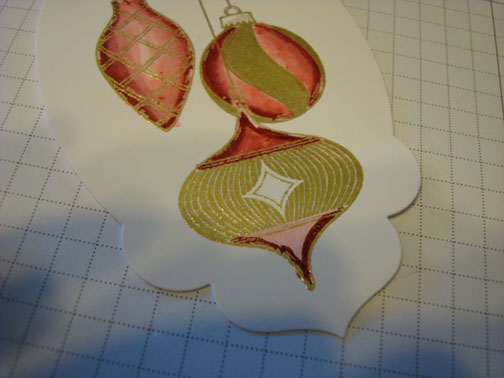
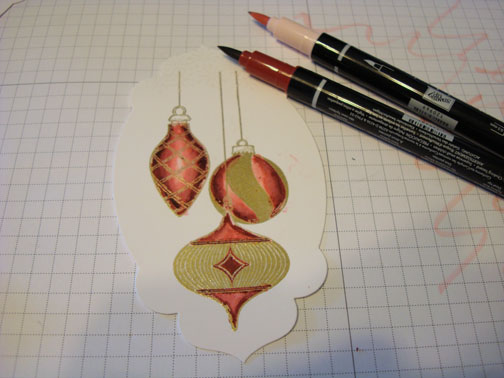
Heated the ornaments quickly to set the marker.
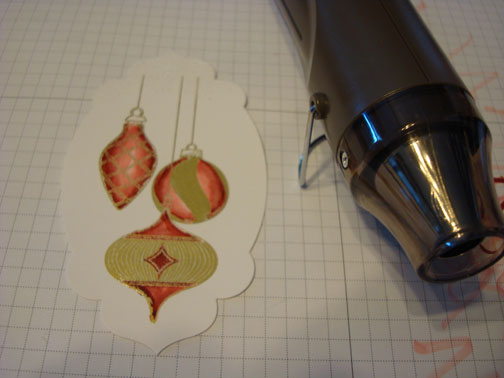
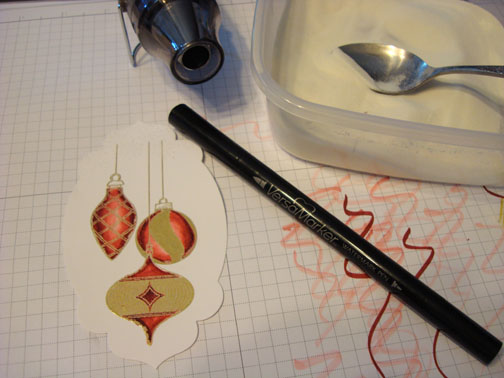
Colored over the ornaments (stay inside of the gold embossed image) using a Versamarker. Embossed the entire image using clear embossing powder and a heat gun. Now all the images are covered with embossing powder and will resist the background colors I will be putting on next.
Sponged Baja Breeze ink on the inside of the card stock and at the top.

Sponged Island Indigo ink around the edges of the card stock, leaving the middle of the card stock light.
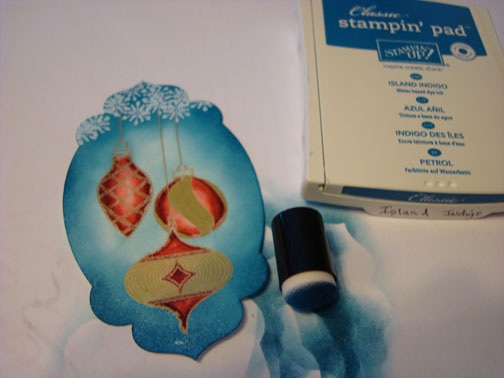
Sponged Midnight Muse at the top of the card stock.
Softly wiped the embossed images off with a paper towel.
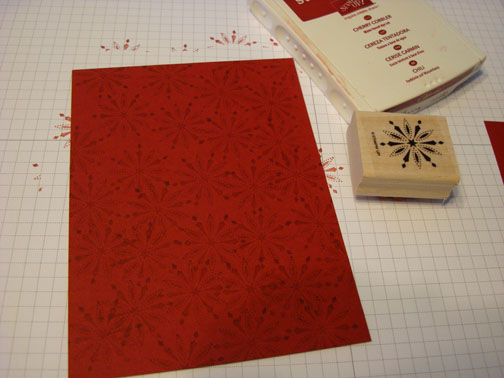
Cut a 4.75″ x 6.25″ panel of Cherry Cobbler. Stamped a snowflake all over the card stock using Cherry Cobbler ink.
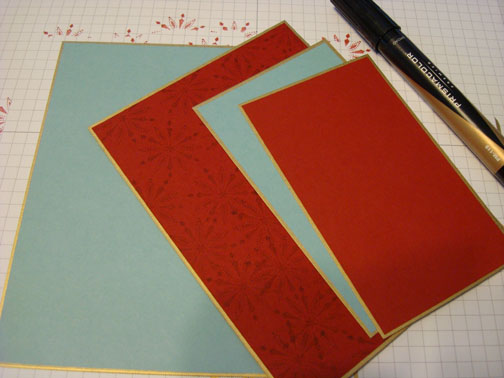
Added a 5″ x 6.5″ Baja Breeze Panel, 3″ x 5″ Cherry Cobbler Panel and a 3.25″ x 5.25″ Baja Breeze Panel.
Edged all of the panels with a Prismacolor Gold Marker. To edge the card stock, put the marker tip 1/2 on the card stock and 1/2 on your scrap paper as you pull the marker along the edge.
Assembled the card adding a 10″ x 6.5″ Whisper White card base folded in half and a Baja Breeze seam binding double bow.
The main image panel and the 2 panels below it are popped up using Stampin’ Dimensionals.
Now about that Blueberry Zucchini Bread. ………….

Ingredients
- 3 eggs, lightly beaten
- 1 cup vegetable oil
- 3 teaspoons vanilla extract
- 2 1/4 cups white sugar
- 2 cups shredded zucchini
- 3 cups all-purpose flour
- 1 teaspoon salt
- 1 teaspoon baking powder
- 1/4 teaspoon baking soda
- 1 tablespoon ground cinnamon
- 1 pint fresh blueberries
Directions
- Preheat oven to 350 degrees F (175 degrees C). Lightly grease 4 mini-loaf pans.
- In a large bowl, beat together the eggs, oil, vanilla, and sugar. Fold in the zucchini. Beat in the flour, salt, baking powder, baking soda, and cinnamon. Gently fold in the blueberries. Transfer to the prepared mini-loaf pans.
- Bake 50 minutes in the preheated oven, or until a knife inserted in the center of a loaf comes out clean. Cool 20 minutes in pans, then turn out onto wire racks to cool completely.
This recipe is from allrecipes.com.
May you have sunny days and cool breezes.
My heart and thoughts are with those of you that are in the flood areas of Florida or the fire areas of Colorado. Please be safe.
Until my next post. . . . . . .
Hugs,


 Get ready for Brayer and Direct to Paper Workshops! I am coming to the following locations, click the location name for more information.
I hope you can make it to one of my workshops in 2012. I have decided not to travel after this year, so be sure to catch one this year!
Link to my Stampin’ Up website where you can order all of your must have Stampin’ Up products from me 24-7: https://michellezindorf.stampinup.net
10 responses to “Embossed Ornaments – Tutorial #519”