Tag Archives: ink sponging

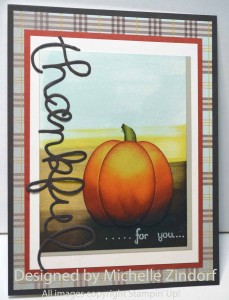
Thankful for You – Stampin’ Up! Card

Hello There,

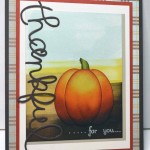
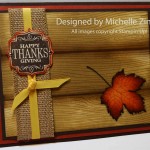
As the card reads, I really am so thankful for you!

Today’s card features the brand new Stampin’ Up! Expressions Thinlits Dies and a big pieced pumpkin.  There is nothing, in my opinion, more Autumn like than a pumpkin.  It brings on feelings of the harvest and all that we should be thankful for, including the people in our lives.

I know I cannot send everyone of my readers this card, but know I was thinking of you as I was creating it.


*********************************************

FREE TUTORIALS

The complete tutorial for these five cards will be e-mailed to my customers who place an order anytime between August 8, 2013 through August 17, 2013 free of charge.  Starting August 18, 2013 there will be a different set of free tutorials started.

All you need to do is place your order online using me as your demonstrator and the tutorials will be e-mailed to you within 24 hours.  🙂  Free tutorials will now be an exclusive perk for my valued Stampin’ Up! customers.  This is not the only customer perk I offer to my amazing customers, check out the rest at the bottom of this post.

Shop my online store now CLICK HERE *

************************************

If you wish to purchase the tutorials for these cards CLICK HERE FOR DETAILS.
Today’s card has been added to my card sales page CLICK HERE FOR DETAILS.

************************************

Thankful For You Card Supply List

Stamps: Stampin’ Up! Fabulous Phrases (item 128577 wood or 120501 clear)
Card Stock: Stampin’ Up! Whisper White, Sahara Sand, Summer Starfruit, Old Olive, Cajun Craze, Early Espresso and Designer Series Paper – Sweater Weather (item 132184)
Ink: Stampin’ Up! Whisper White, Early Espresso, Basic Black, Pumpkin Pie, Cajun Craze, Baked Brown Sugar, Summer Starfruit and Soft Sky
Accessories: Stampin’ Up!  Sponges, Stampin’ Chalk Marker (item 132133), Extra Large Oval Punch Punch (item 119859), Big Shot Machine (item 113439), and Expressions Thinlits Dies (item 132171)

************************************

Note:  Here are the links to yesterday’s recipes that I used for my Zucchini breads.

Chocolate Zucchini Bread, Banana Zucchini Bread, Pineapple Zucchini Bread

May your day be filled with blessings.

Until my next post. . . . . .
Huge Hugs!

************************************

Be sure to use the Mystery Hostess code when placing your next order. You could be the next Mystery Hostess and get a ton of free stuff!!

The new Mystery Hostess Code is BC3V9MQS and this is how it works:

MYSTERY HOSTESS:

With Stampin’ Up!’s announcement  of the new Hostess Code, we can now “pool” Online Orders together (place them individually, orders will ship directly to you – within the US only, but use the same hostess code). When smaller orders are put in together, the larger order qualifies for HOSTESS BENEFITS.
That means FREE STAMPS (or other products) I can SHARE with YOU!
So let’s get started with August Online Mystery Hostess Workshop!
How do you get to be part of the Mystery Hostess Workshop?
Simply use the Hostess Code below and place an order in my online store by 11:00 pm on Sunday, August 25, 2013.
Important: To be part of the Online Mystery Hostess Workshop, once you add your first item to your shopping bag the hostess code must be entered just below the Special Offers section and it should say Michelle Zindorf as the Hostess.
Once all the orders are placed, on Monday morning, August 26, 2013, I will draw ONE name to get hostess benefits on the entire order! I will email the winner to get your choices.
Your Hostess Code is: BC3V9MQS
Ready – Set – GO!! Start placing your orders now!… Remember, the deadline for this event is 11:00 pm on Sunday, August 25, 2013.
Please do not put the hostess code in if your merchandise order is $150 or more.  You would lose your hostess benefits that you would have coming already.

***********************************************************

Customer Free Stamp Set Program

Don’t miss out on my Customer free stamp set program. Check it out!  For your order of $50 in product using me as your demonstrator you will receive one virtual token.  Order $100 in product receive two virtual tokens, etc.  After you have collected 10 virtual tokens you will receive a free current stamp set of your choosing, a value of $30 or less.
Here is a link to my online shopping page that you can shop at 24/7 (from the comfort of your home, even in your pj’s) and the products will be shipped directly to your door step from Stampin’ Up.   CLICK HERE TO SHOP.   My free stamp set program will be an on going program.  :)

******************************************************************

Shop my online store now CLICK HERE *

******************************************************************

Have a long Stampin’ Up! wish list?  Check out how you can save 20%, CLICK HERE!

*********************************

Free tutorials are also a perk for my Stampin’ Up! Team – Join now!

Sunflower – Stampin’ Up! Card Tutorial #630

Hey There,

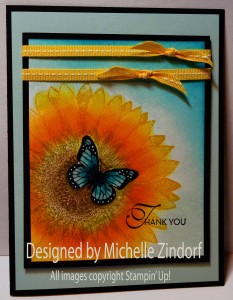
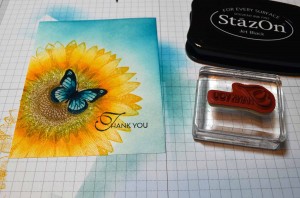
It’s kinda gloomy outside here in West Alexandria, Ohio today, but it’s not gloomy in my stamping room.  I brightened things up by creating this cheerful card using the beautiful Stampin’ Up! sets Sunflower and Backyard Basics.  I love, love, love nature stamps.  Just cannot get enough of them.

In today’s project I show how to use the emboss resist technique to get a realistic looking scene.  You can find the complete tutorial for this project below.

I think I should take this card out to show the girls (my hens), they did not want to wake up and come outside this morning.  They are probably up and running about now.  I’ll collect eggs here in a moment and check on them.

***************************************************************
I’ve added the featured card of the day to my sales page where you will also find some great deals on retired stamp sets and my beginner brayer videos.  CLICK HERE TO CHECK IT OUT
**************************************************
Now on with today’s tutorial. . . . .  . .
Project Supplies:
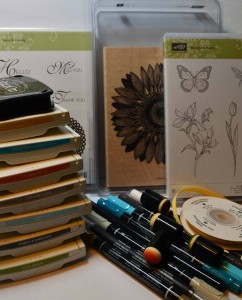
Stamps: Stampin’ Up! Sunflower (128736), Backyard Basics (129255) and Lacy & Lovely (item 132025)
Card Stock: Stampin’ Up! Whisper White, Soft Sky and Basic Black
Ink: Stampin’ Up! Crushed Curry, Tempting Turquoise, Pumpkin Pie, Crumb Cake, Soft Sky, Early Espresso, Old Olive and Stazon Jet Black
Accessories: Stampin’ Up!  Sponges, Stampin’ Dimensionals, , Clear Embossing Powder and Heat Gun, Versamarker, Stampin’ Write Markers (Soft Suede, Sahara Sand, Tempting Turquoise, Island Indigo and Basic Black, Blender Pen, Stampin’ Chalk Marker and Daffodil Delight Grosgrain Stitched Ribbon


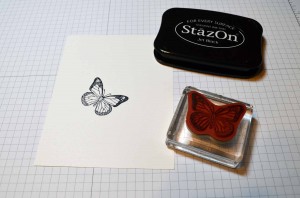
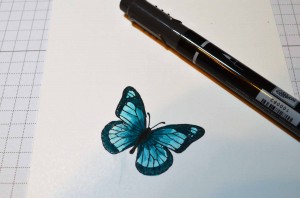
Started with a 4.25″ x 5.5″ piece of Whisper White card stock.  Stamped the butterfly from the Backyard Basics set using Stazon Jet Black ink.


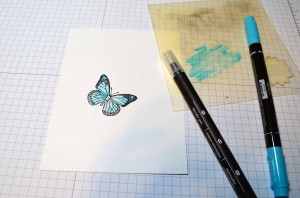
To get a lighter shade of Tempting Turquoise I scribbled my marker on my Stamp-a-ma-jig plastic sheet and then picked the color up with a blender pen and colored in the butterfly.

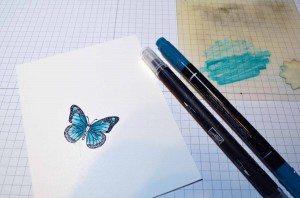
Added Island Indigo marker with the Blender pen on the inside of the wings.

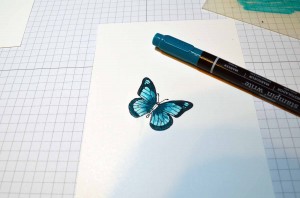
Added some darker Island Indigo on the very inside of the wings and the edges of the wings using an Island Indigo marker.

Colored the butterfly’s body in using a Basic Black marker.

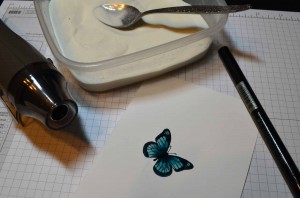
Colored over the butterfly (being careful to stay inside the image) using a Versamarker.  Heat embossed the image using clear embossing powder and a heat gun.  Now my image is protected and I can stamp over the image.

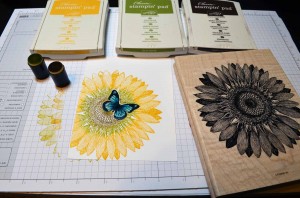
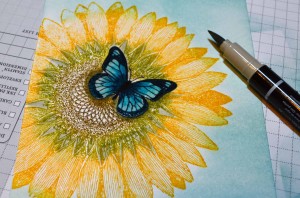
Loaded the Sunflower stamp with Crushed Curry and then using sponge daubers, sponged in Old Olive and Early Espresso right on the stamp.  Then stamped the image over the butterfly.  Wiped the ink off of the butterfly with a paper towel.

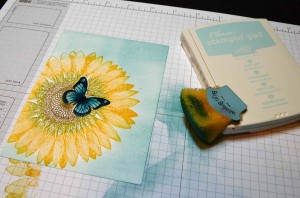
Sponged Soft Sky ink around the sunflower.

Added Sahara Sand marker to the points in the Old Olive area.

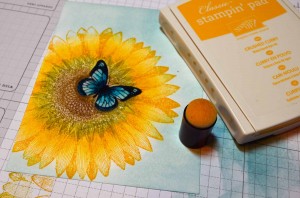
Sponged Crushed Curry ink on the sunflower petals.

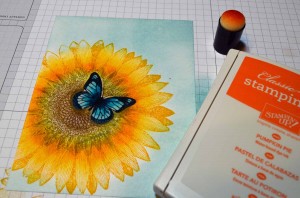
Sponged Pumpkin Pie ink around the base of the petals.


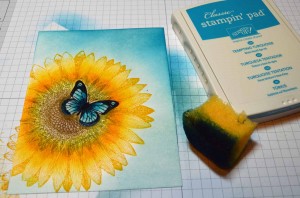
Sponged Tempting Turquoise ink at the top of the card stock.


Cropped my main image panel down to 4″ x 5″.  Stamped the sentiment from the Lacy & Lovely stamp set using Stazon Jet Black ink.


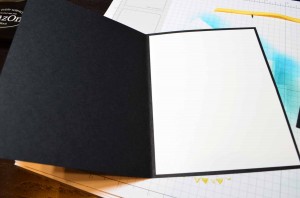
Added a 6.5″ x 10″ Basic Black card base (folded in half) and a 4.75″ x 6.25″ Whisper White panel inside the card.

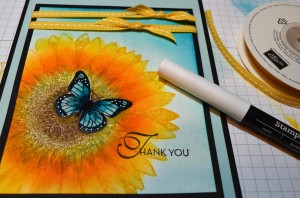
Also added a 4.75″ x 6.25″ Soft Sky panel, 4.25″ x 5.25″ Basic Black panel, Daffodil Delight Stitched Ribbon and using the new Stampin’ Chalk Marker I put dots on the butterfly’s wings.  Note:  This new Stampin’ Chalk Marker is the answer to our White Gel Pen woes, in my opinion  🙂  Item #132133

Here is the finished card measuring 5″ x 6.5″.

May your day be bright and cheery!

Until my next post. . . . . .
Huge Hugs!
******************************************************************

Be sure to use the Mystery Hostess code when placing your next order.  You could be the next Mystery Hostess and get a ton of free stuff!!

The new Mystery Hostess Code is BC3V9MQS and this is how it works:

MYSTERY HOSTESS:

With Stampin’ Up!’s announcement  of the new Hostess Code, we can now “pool” Online Orders together (place them individually, orders will ship directly to you – within the US only, but use the same hostess code). When smaller orders are put in together, the larger order qualifies for HOSTESS BENEFITS.

That means FREE STAMPS (or other products) I can SHARE with YOU!
So let’s get started with August Online Mystery Hostess Workshop!
How do you get to be part of the Mystery Hostess Workshop?
Simply use the Hostess Code below and place an order in my online store by 11:00 pm on Sunday, August 25, 2013.
Important: To be part of the Online Mystery Hostess Workshop, once you add your first item to your shopping bag the hostess code must be entered just below the Special Offers section and it should say Michelle Zindorf as the Hostess.
Once all the orders are placed, on Monday morning, August 26, 2013, I will draw ONE name to get hostess benefits on the entire order! I will email the winner to get your choices.
Your Hostess Code is: BC3V9MQS
Ready – Set – GO!! Start placing your orders now!… Remember, the deadline for this event is 11:00 pm on Sunday, August 25, 2013.
Please do not put the hostess code in if your merchandise order is $150 or more.  You would lose your hostess benefits that you would have coming already.

******************************************************************

Shop my online store now CLICK HERE *

******************************************************************

Have a long Stampin’ Up! wish list?  Check out how you can save 20%, CLICK HERE!

By The Tide Shell – Stampin’ Up! Card Tutorial #587

Hello There,

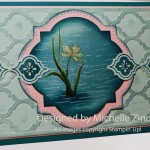
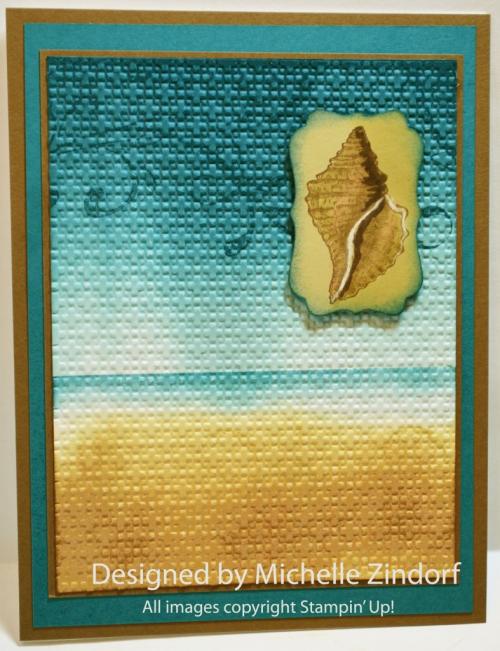
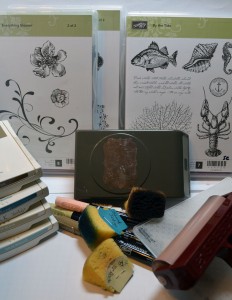
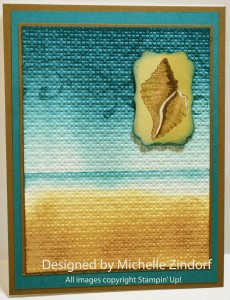
Let’s go to the beach today with this card tutorial.   I teamed up two Stampin’ Up! sets, By the Tide and Everything Eleanor, brayered background and a bit of dry embossing.  Check out the tutorial below.

********************************************

I’ve added this card to my sales page where you will also find some great deals on retired stamp sets.  CLICK HERE TO CHECK IT OUT

********************************************

Now on with today’s tutorial. . . . .  . .

Project Supplies:

Stamps: Stampin’ Up!  By the Tide (item number 129120) and Everything Eleanor (item number 124164)

Card Stock: Stampin’ Up! Whisper White, River Rock, Soft Suede and island Indigo

Ink: Stampin’ Up! Soft Suede, Island Indigo, River Rock and Baja Breeze

Accessories: Stampin’ Up! Brayer, Sponge, Stampin’ Dimensionals, Decorative Label, White Gel Pen, Markers (Blush Blossom, Soft Suede and River Rock), Square Lattice Embossing Folder and Big Shot Machine and Post it Notes


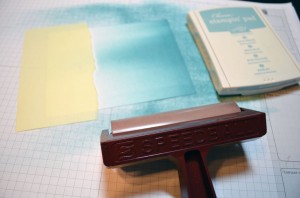
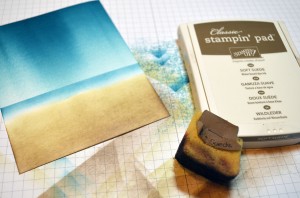
Started by masking the sand area of a 4.25″ x 5.5″ piece of Whisper White card stock with a post it note that I ripped the edge off of.   Brayered Baja Breeze and then Island Indigo ink at the top of the card stock.


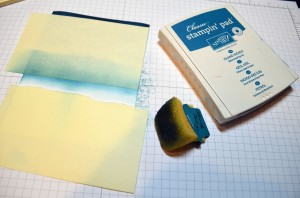
Added another post it note mask and sponged Island Indigo ink at the post it note edge to create a horizon line.

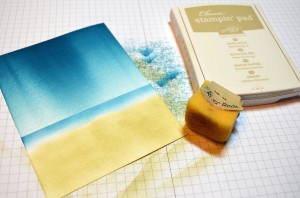
Removed both post it note masks and sponged River Rock ink at the bottom of the card stock.

Lightly sponged Soft Suede ink in the sand area.

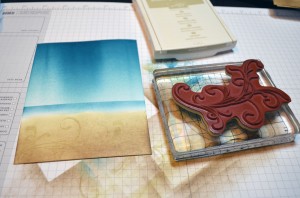
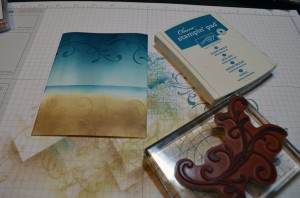
Stamped the Florish from the Everything Eleanor set using River Rock ink in the sand area and then in the sky using Island Indigo ink.


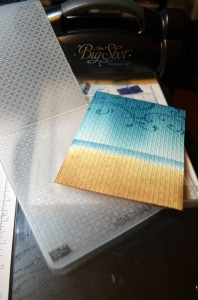
Embossed the card stock using the square lattice embossing folder and Big Shot Machine.

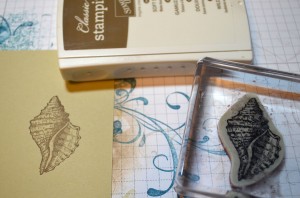
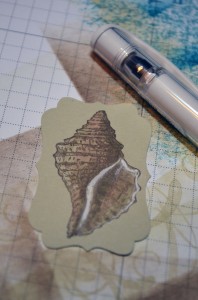
Stamped the shell from the By the Tides set on River Rock card stock using Soft Suede ink.

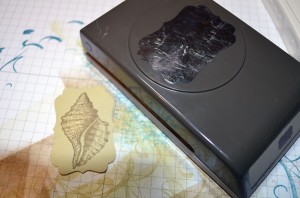
Punched the image out using the Decorative Label punch.

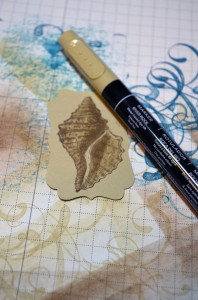
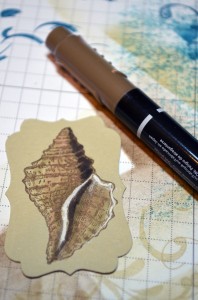
Colored the shell in using a River Rock marker.

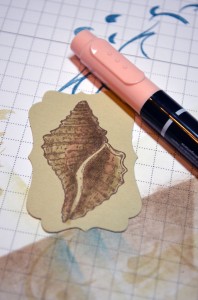
Added Blush Blossom marker to the darker areas.

Added White Gel pen and while wet smugged it to lighten and blend it a bit.

Added Soft Suede marker to the really dark areas.

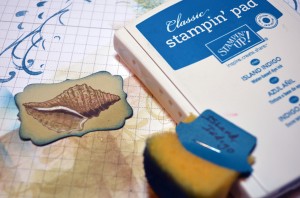
Sponged Island Indigo ink around the edges.

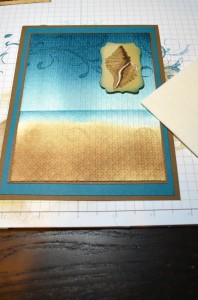
Added a Whisper White card base, Soft Suede panel, Island Indigo panel, Soft Suede panel, main image panel and then popped the shell image up using Stampin’ Dimensionals.

Here is the finished card measuring 5″ x 6.5″.

May your day be filled with peace and joy.

Until my next post. . . . . .

Check out the awesome things happening at Stampin’ Up! below.  There are only 7 days left to take advantage of the free Sale-a-bration products.  Hurry, don’t  miss out!

Hugs,

Weight loss in 2013:  17.5 lbs

********************************

Introducing Photopolymer by Stampin’ Up!

Always wanted to be a graphic designer?  My favorite part about design is typography. I adore type. There’s just something inherently beautiful about letterforms and what happens when you stack them to create different shapes and combine them to say different things.  So without further adieu, let me introduce you to the Designer Typeset Stamp Set. It’s based around a really great san serif font that will work well on just about any project. And then there are embellishments and shapes to take whatever you want to say to the next level. The possibilities are seriously endless.

I’ll admit, once you start playing around with the stamp set, you will have a hard time stopping!

But before we get too carried away, let’s get to talking about the benefits of photopolymer stamps. For those who are unfamiliar, let me point out a couple of things that are really cool.

First, they’re completely clear, making it oh-so-easy to stamp exactly where you want. They come unmounted, on an acetate sheet, and temporarily adhere to our clear blocks. Awesome!

Second, they are pliable. Want your arrow to shoot a certain way? No problem! Want your banner to have the perfect sag? Easy peasy! Being able to play with the shape gives you even more creative freedom.

So let’s get down to the nitty gritty. The Designer Typeset Stamp Sets in the online store starting now. So just click HERE to order yours today!

************************************************************************

NEW!  STAMPIN’ UP! ON-LINE VIDEO CLASSES. Videos, supplies lists and pdfs for 30+ simple and pretty projects.

PERFECT FOR THE BUSY STAMPER! Learn  innovative ways to get the most out of your Stampin’ Up! supplies (from stamps to the Big Shot) with clever tips and all the techniques you need to start creating with success.           Divided into six sections focused on a variety of topics, Stampin’ Up! on-line classes include videos, pdfs, and supply lists for 30+ projects. Join the fun!

BIG THUMBS UP–WAY UP! I  purchased “The Basics” class and am knocked out by the details, tips and new ideas.  Wonderful for seasoned as well as new stampers.  I just watched a video that’s part of the class on the Stamp-a-ma-jig and learned how to easily line up stamped letters once and for all–woo hoo!

CLICK  HERE TO ORDER ‘THE BASICS” CLASS $14.95

THESE ARE DOWNLOADABLE ZIP FILES.  YOU DO NOT NEED MY  DIGITAL STUDIO TO TAKE ADVANTAGE OF THE CLASS! After purchasing and downloading the class, open “Stampin’  Class–The Basics” folder and there will be six folders inside.  Click on each and enjoy!

PC Instructions
The files will be downloaded as archive files that you can then extract and save on your computer. When you click on the download link, an extraction program will automatically  launch. Choose the location where you would like to save the  files (be sure to note where you save them). Follow the  prompts on the extraction program, then navigate to the location where you saved the files. Click on the file and open.

Mac Instructions
When you click on the download link, the file will be mounted  as a drive. Once it is mounted, open the drive and drag and  drop the files to the location of your choice on your hard drive. The files can then be opened.

**************************************************

Stampin’ Up’s fabulous Spring Catalog Get your supplies to rock those Spring projects.

Sale-a-bration brochure showing the totally terrific stamps and things you can get for free with a $50 order.

***********************************************************

Michelle’s Free Stamp Program

Don’t miss out on my Customer’s free stamp set program. Check it out!  Along with a handmade thank you card from me for your $50 order you will receive a token for each $50 in product you ordered using me as your demonstrator.  After you have collected 10 tokens you will receive a free current stamp set of your choosing, a value of $39 or less.   Here is a link to my online shopping page that you can shop at 24/7 (from the comfort of your home, even in your pj’s) and the products will be shipped directly to your door step from Stampin’ Up.   CLICK HERE TO SHOP.   My free stamp set program will be an on going program.  :)

**************************************************

It’s the time of year us Stampin’ Up! Fans look forward to, it’s Sale-a-bration time!!!!  The best time of year to get your Stampin’ Up! products.  Why you ask?

Shop and receive a free Sale-a-bration product for every $50 you spend.  CLICK HERE TO CHECK OUT THE SALE-A-BRATION PRODUCTS! This is a long brocure so be sure to scan right when viewing. . . . .

CLICK HERE TO SHOP NOW

***********************************************************************

Join Stampin’ Up! during Sale-a-bration and chose $156.50 in product in your kit for just $99.  That’s 25% more product!   Start a business or just enjoy being a demonstrator to receive the 20% discount.

CLICK HERE TO LEARN MORE!

*************************************************

It’s a Magical Paper Escape Every Month!

Check this out, you can now get a monthly kit called Paper Pumpkin from Stampin’ Up! that includes exclusive stamps and everything you will need for a great project.  You can get more info on this great product at www.mypaperpumpkin.com They even have a try me kit!  You won’t want to miss out on even one of these kits. . . . . . .  Please select me as your demonstrator when placing your order.

********************************************

Have you checked out the great clearance rack at Stampin’ Up!  CLICK HERE


Shadowed Hummingbird – Stampin’ Up! Card Tutorial #577

Hello There,

I hope you had a suburb weekend.  Mine was very laid back, just the way I like it.  🙂

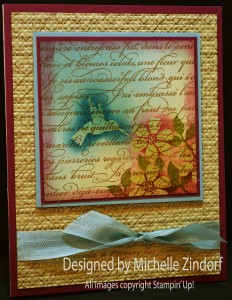
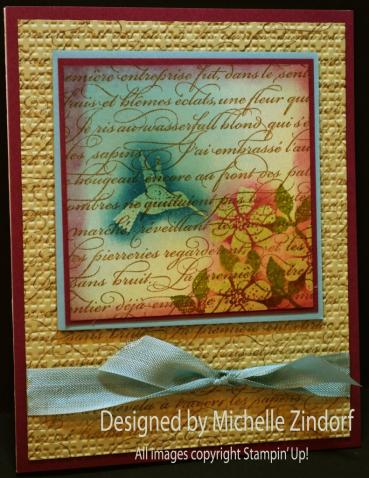
In today’s tutorial I thought I would use the emboss resist technique along with the beautiful Stampin’ Up! Sale-a-bration set, Bloomin’ Marvelous.  Remember, you can get this set for free with a $50 order.

I paired the Bloomin’ Marvelous set up with the En Francais background stamp.

I love how this card turned out.  Check out the tutorial below for instructions.

********************************************

I’ve added this card to my sales page where you will also find some great deals on retired stamp sets.  CLICK HERE TO CHECK IT OUT

********************************************

A few reminders of things you will want to check out. . . . . . . .here are some links:

Stampin’ Up’s fabulous Spring Catalog Get your supplies to rock those Spring projects.

Sale-a-bration brochure showing the totally terrific stamps and things you can get for free with a $50 order.

Paper Pumpkin Monthly Kits, hello, they are wonderful.

Stampin’ Up! Clearance Rack Hurry, you don’t want to miss out on these deals.

***********************************************************

Michelle’s Free Stamp Program

Don’t miss out on my Customer’s free stamp set program. Check it out!  Along with a handmade thank you card from me for your $50 order you will receive a token for each $50 in product you ordered using me as your demonstrator.  After you have collected 10 tokens you will receive a free current stamp set of your choosing, a value of $39 or less.   Here is a link to my online shopping page that you can shop at 24/7 (from the comfort of your home, even in your pj’s) and the products will be shipped directly to your door step from Stampin’ Up.   CLICK HERE TO SHOP.   My free stamp set program will be an on going program.  :)

*************************************************

Now on with today’s tutorial. . . . .  . .

Project Supplies: Stampin’ Up!  Bloomin’ Marvelous (Sale-a-bration set) and En Francais Background Stamp

Stamps:  Card Stock: Stampin’ Up! Whisper White, Baja Breeze, River Rock and Rich Razzelberry

Ink: Stampin’ Up! Soft Suede, Rich Razzelberry, Old Olive, Island Indigo, Pretty in Pink, Baja Breeze and River Rock

Accessories: Stampin’ Up! sponge daubers, clear embossing powder, heat gun, Versmark Pad, Stampin’ Dimensionals, Baja Breeze Seam Binding, Brayer, Square Lattice Embossing Folder and Big Shot Machine
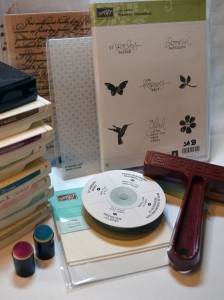
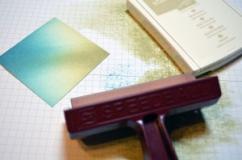
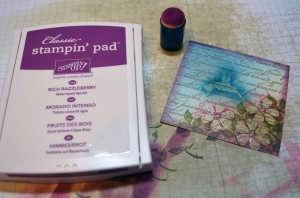
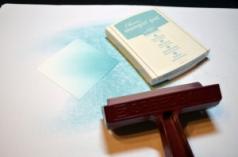
Brayered Baja Breeze ink at an angle starting off of the corner of a 3″ piece of Whisper White card stock.  Brayered River Rock ink starting off the opposite corner.
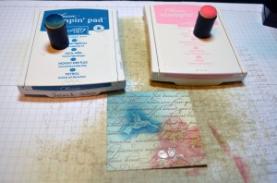
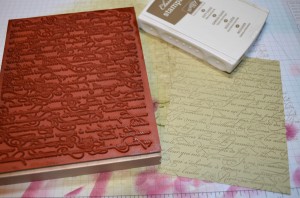
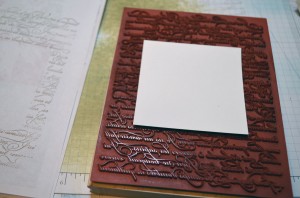
Loaded the En Francais background stamp with Soft Suede ink and put the main image panel on top of it.  Layered a piece of scrap paper on top of that and rubbed the back of the scrap paper.   I find this method easier than trying to stamp straight on a piece of paper that is smaller than my stamp.
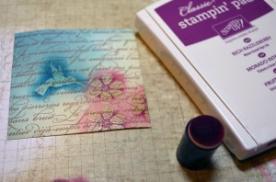
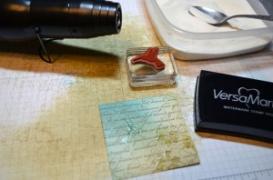
Dryed my card stock using my heat gun and the stamped the flower 3 times on the lower right corner and the hummingbird using Versamark Pad for ink.  Heat embossed the images using clear embossing powder and a heat gun.
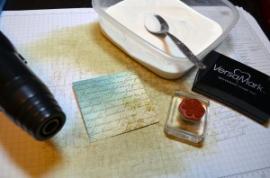
Sponged Island Indigo ink over the hummingbird and Pretty in Pink in over the flowers using sponge daubers.  Sponged Rich Razzelberry ink in the center of the flowers.

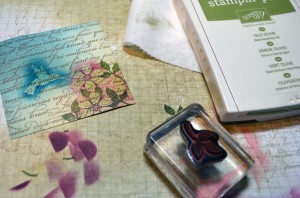
Stamped the leaves in the lower right corner using Old Olive ink and then wiped the ink off of the embossed images.

Sponged Rich Razzelberry ink around the edges of the card stock.

Cut a 5.25″ x 4″ piece of River Rock card stock and stamped the En Francais back ground stamp on it using Soft Suede ink.

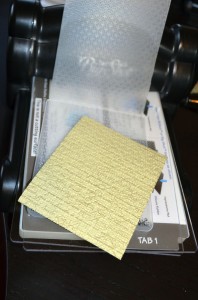
Embossed the card stock using the Square Lattice Embossing Folder and Big Shot Machine.

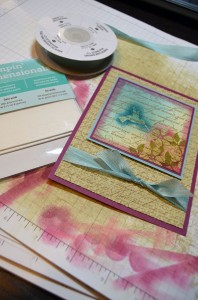
Added 2 Rich Razzelberry Panels,Baja Breeze panel, Baja Breeze seam binding ribbon and a Whisper White card base.  Popped my main image panel up using Stampin’ Dimensionals.

Here is the completed card measuring 4.25″ x 5.5″.

May you find peace in your soul today.

Until my next post. . . . . .

Check out the awesome things happening at Stampin’ Up! below.

Hugs,

*******************************************

Weight loss in 2013:  11.2 lbs

*************************************************

Digital Content Discs for One Dollar

From now until February 12 (or while supplies last) you can get your hands on any of these content discs for just $1. That’s not a typo–they’re just one buck. So indulge–it won’t break the bank.

Since the discs are on the Clearance Rack, they must be purchased via demonstrator or online order. Go get yours today.

********************************************************************

It’s the time of year us Stampin’ Up! Fans look forward to, it’s Sale-a-bration time!!!!  The best time of year to get your Stampin’ Up! products.  Why you ask?

Shop and receive a free Sale-a-bration product for every $50 you spend.  CLICK HERE TO CHECK OUT THE SALE-A-BRATION PRODUCTS! This is a long brocure so be sure to scan right when viewing. . . . .

CLICK HERE TO SHOP NOW

***********************************************************************

Join Stampin’ Up! during Sale-a-bration and chose $156.50 in product in your kit for just $99.  That’s 25% more product!   Start a business or just enjoy being a demonstrator to receive the 20% discount.

CLICK HERE TO LEARN MORE!

*************************************************

It’s a Magical Paper Escape Every Month!

Check this out, you can now get a monthly kit called Paper Pumpkin from Stampin’ Up! that includes exclusive stamps and everything you will need for a great project.  You can get more info on this great product at www.mypaperpumpkin.com They even have a try me kit!  You won’t want to miss out on even one of these kits. . . . . . .  Please select me as your demonstrator when placing your order.

Also. . . . . . .

There is now a great stamp kit, Dude Your Welcome,  for the men in your life.  Check it out!

[youtube]https://www.youtube.com/watch?v=ED18tTC7XG8[/youtube]

Guys don’t always have the easiest time expressing themselves, but with the Dude, You’re Welcome! kit, they’ll have

  • Four wood-mount stamps (double-mounted) with the perfect sentiment for every occasion
  • Twelve 4″ x 6″ postcards in four different (manly) colors
  • Twelve gray envelopes
  • A Basic Gray Classic Stampin’ Pad
  • An instructional guide (for the most novice stamper!)

Basically, the kit includes everything a dude needs to create the perfect manly card that any woman would adore, all packaged in an appropriately masculine box.

This set can be purchased now with item number 132807.  Great gift idea!

********************************************

Check out the brand new Spring Catalog and get all those supplies you need for your up coming projects.

CLICK HERE TO SHOP!

**********************************************************

Have you checked out the great clearance rack at Stampin’ Up!  CLICK HERE


Tea Anyone? – Stampin’ Up! Card Tutorial #575

Hey There,

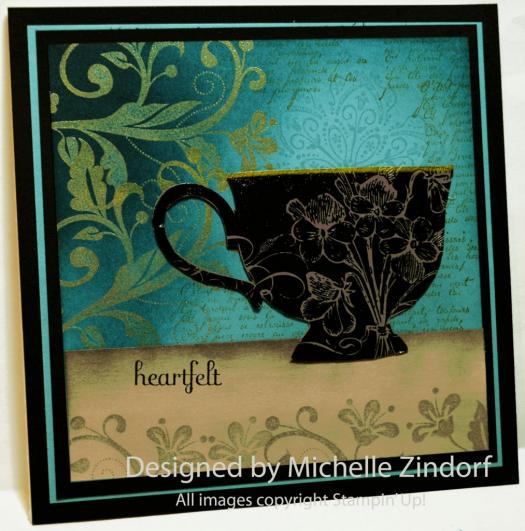
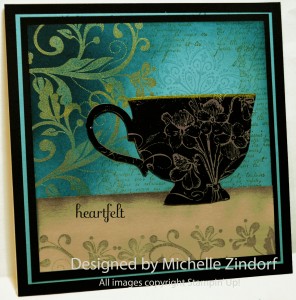
Today’s project is a perfect example of why I have such a large stamp collection.  I ended up pulling out 5 stamp sets.  Isn’t wonderful how well they all work together?  Check out my tutorial below to see just how I pulled them all together.

********************************************

I’ve added this card to my sales page.  CLICK HERE TO CHECK IT OUT

********************************************

A few reminders of things you will want to check out. . . . . . . .here are some links:

Stampin’ Up’s fabulous Spring Catalog Get your supplies to rock those Spring projects.

Sale-a-bration brochure showing the totally terrific stamps and things you can get for free with a $50 order.

Paper Pumpkin Monthly Kits, hello, they are wonderful.

Stampin’ Up! Clearance Rack Hurry, you don’t want to miss out on these deals.

***********************************************************

Michelle’s Free Stamp Program

Don’t miss out on my Customer’s free stamp set program. Check it out!  Along with a handmade thank you card from me for your $50 order you will receive a token for each $50 in product you ordered using me as your demonstrator.  After you have collected 10 tokens you will receive a free current stamp set of your choosing, a value of $39 or less.   Here is a link to my online shopping page that you can shop at 24/7 (from the comfort of your home, even in your pj’s) and the products will be shipped directly to your door step from Stampin’ Up.   CLICK HERE TO SHOP.   My free stamp set program will be an on going program.  :)

*************************************************

Now on with today’s tutorial. . . . .  . .

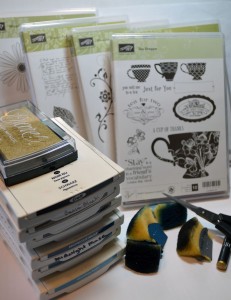
Project Supplies: Stampin’ Up!  Tea Shoppe (item# 125547, Flowering Flourishes (item#126367), French Foliage (item#121166), Mixed Bunch (item#125537), Fabulous Phrases (item#120501)

Stamps:  Card Stock: Stampin’ Up! Whisper White, Basic Black, Marina Mist, Basic Gray, Sahara Sand

Ink: Stampin’ Up! Basic Black, Soft Suede, Basic Gray, Midnight Muse, Not Quite Navy, Marina Mist and Encore Gold

Accessories: Stampin’ Up! sponges, clear embossing powder, heat gun, Stampin’ Dazzle  gold marker, paper snips

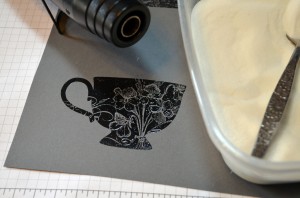
Stamped the teacup on Basic Gray card stock with Craft Basic Black ink.  Heat embossed the image using clear embossing powder and a heat gun.  Cut the image out using papersnips.
Added a gold rim on the top of the cut using the Stampin’ Dazzle Gold Marker.

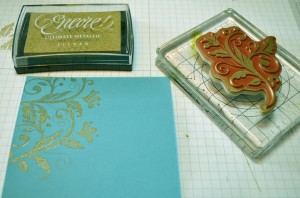
Stamped the flourish on Marina Mist card stock using Encore Gold ink.  Heat embossed the image using clear embossing powder and a heat gun.

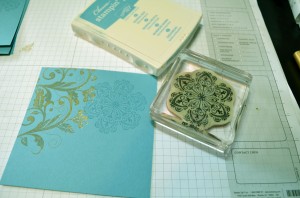
Stamped the image from the Mixed Bunch set using Marina Mist ink.

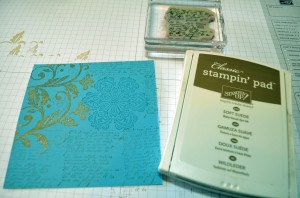
Stamped the texted stamp from the French Foliage set using Soft Suede ink around the flower design.

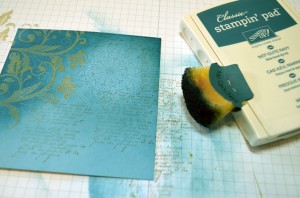
Sponged Marina Mist ink around  all over the card stock.  Leave the flower design empty so it will be lighter.

Sponged Not Quite Navy ink at the top of the card stock and over the gold embossed images.

Sponged Midnight Muse ink on the top left corner of the card stock.

Cut a 1 1/2″ by 4.5″ piece of Sahara Sand card stock and stamped the flourish with Basic Gray ink at the bottom of the card stock.  Sponged Basic Gray ink over the card stock to grunge it up a bit.


Added a 5.25″ Whisper White card base, 5.25″ Basic Black panel, 4 7/8″ Marina Mist panel, 4.75″ Basic Black panel, the Sahara Sand piece and the tea cup.  Stamped the sentiment “heartfelt” using Basic Black ink.

Here is the finished card measuring 5.25″ square.

Have a terrific day!

Until my next post. . . . . .

Check out the awesome things happening at Stampin’ Up! below.

Hugs,

*******************************************

Weight loss in 2013:  10.8 lbs

*************************************************

Digital Content Discs for One Dollar

From now until February 12 (or while supplies last) you can get your hands on any of these content discs for just $1. That’s not a typo–they’re just one buck. So indulge–it won’t break the bank.

Since the discs are on the Clearance Rack, they must be purchased via demonstrator or online order. Go get yours today.

********************************************************************

It’s the time of year us Stampin’ Up! Fans look forward to, it’s Sale-a-bration time!!!!  The best time of year to get your Stampin’ Up! products.  Why you ask?

Shop and receive a free Sale-a-bration product for every $50 you spend.  CLICK HERE TO CHECK OUT THE SALE-A-BRATION PRODUCTS! This is a long brocure so be sure to scan right when viewing. . . . .

CLICK HERE TO SHOP NOW

***********************************************************************

Join Stampin’ Up! during Sale-a-bration and chose $156.50 in product in your kit for just $99.  That’s 25% more product!   Start a business or just enjoy being a demonstrator to receive the 20% discount.

CLICK HERE TO LEARN MORE!

*************************************************

It’s a Magical Paper Escape Every Month!

Check this out, you can now get a monthly kit called Paper Pumpkin from Stampin’ Up! that includes exclusive stamps and everything you will need for a great project.  You can get more info on this great product at www.mypaperpumpkin.com They even have a try me kit!  You won’t want to miss out on even one of these kits. . . . . . .  Please select me as your demonstrator when placing your order.

Also. . . . . . .

There is now a great stamp kit, Dude Your Welcome,  for the men in your life.  Check it out!

[youtube]https://www.youtube.com/watch?v=ED18tTC7XG8[/youtube]

Guys don’t always have the easiest time expressing themselves, but with the Dude, You’re Welcome! kit, they’ll have

  • Four wood-mount stamps (double-mounted) with the perfect sentiment for every occasion
  • Twelve 4″ x 6″ postcards in four different (manly) colors
  • Twelve gray envelopes
  • A Basic Gray Classic Stampin’ Pad
  • An instructional guide (for the most novice stamper!)

Basically, the kit includes everything a dude needs to create the perfect manly card that any woman would adore, all packaged in an appropriately masculine box.

This set can be purchased now with item number 132807.  Great gift idea!

********************************************

Check out the brand new Spring Catalog and get all those supplies you need for your up coming projects.
CLICK HERE TO SHOP!

**********************************************************
Have you checked out the great clearance rack at Stampin’ Up!  CLICK HERE

New items added!


She Thinks My Tractors Sexy – Tutorial #567

Continue reading

Poppies – Tutorial #562

Hello There,

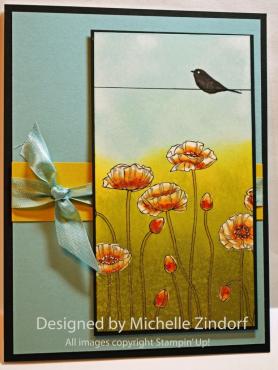
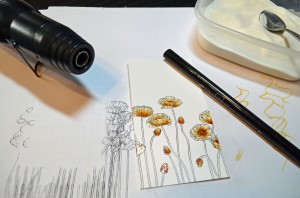
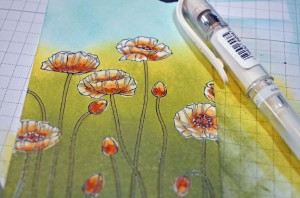
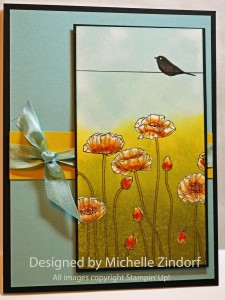
The sun is shining today and put me in the mood to stamp and color some flowers.   I pulled out the Beautiful Stampin’ Up! Stamp Pleasant Poppies (item #129499).  I used the emboss resist technique on this project in order to put the light poppies in front of a darker background.   I also left plenty of white showing in the flowers to give them that extra pop and to add a little more life to scene I added the bird from the Everything Eleanor set.

This card has been added to my sales page.  Click here to check it out.

****************************************

Now on with today’s tutorial. . . . .  . .

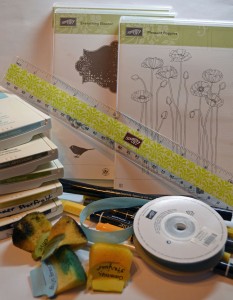
Project Supplies:

Stampin’ Up! Stamps: Pleasant Poppies (item#129499), Everything Eleanor (item#124164)

Card Stock: Stampin’ Up! Whisper White, Basic Black, Baja Breeze and Summer Starfruit

Ink: Stampin’ Up! Baja Breeze, Always Artichoke, Old Olive, Summer Starfruit, Basic Black

Accessories: Stampin’ Up! Sponges, Baja Breeze Seam Binding, White Gel Pen, So Saffron, More Mustard, Summer Starfruit and Basic Black markers, Ruler, Versamarker, Clear Embossing Powder and Heat Gun

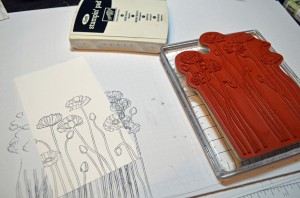
Started with a 3″ x 5.5″ Whisper White card stock and stamped the poppies on it using Craft Basic Black ink.

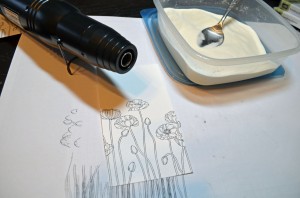
Heat embossed the image using clear embossing powder and a heat gun.

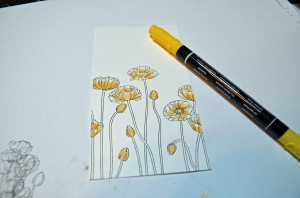
Added So Saffron marker to the flowers and buds leaving plenty of white showing at the edges of the petals.

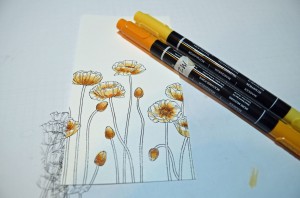
Added More Mustard marker at the base of the petals and then blended it in using a So Saffron marker.

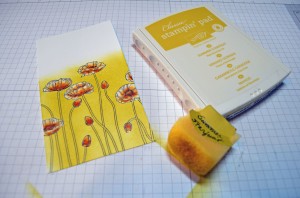
Colored over the flowers and buds using a Versamarker and the heat embossed the images using clear embossing powder and heat gun.  Now the flowers are protected and I can put my background ink in without it ruining the flowers.

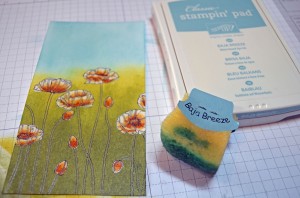
Sponged Summer Starfruit on the card stock.

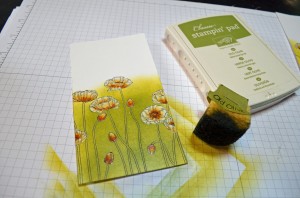
Sponge Old Olive ink on.

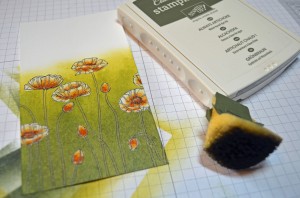
Sponged Always Artichoke ink at the bottom of the card stock.

Sponged Baja Breeze ink at the top of the card stock for the sky.

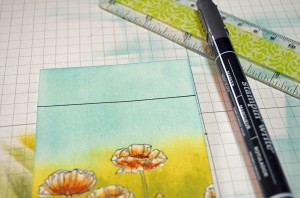
Added a Basic Black marker line across the top of the card stock using a Ruler.

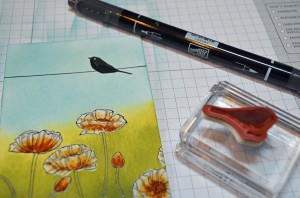
Stamped the bird from the Everything Eleanor set omitting the birds legs.  I omitted the birds legs by coloring the bird with Basic Black marker on the rubber and then stamping it.

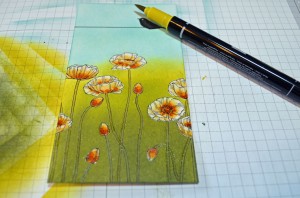
Colored the stems in with Summer Starfruit.

Added just a few white gel pen dots to the stamens in the middle of the flowers.

Added a Whisper White 5″ x 6.5″ card base, Basic Black ” x 6.5″ panel, 4.75″ x .25″ Baja Breeze panel, 3.25″ x 5.75″ Basic Black panel, 4.75″ x 1″ strip of Summer Starfruit and Baja Breeze seam binding.

Here is the finished card.

May your day be out of this world wonderful!

Check out the great deals at Stampin’ Up! below.

Until my next post. . . . . .

Hugs,

*************************************************

CLICK HERE TO SEE THE LATEST STAMPIN’ UP! PROMOTION AND TO SHOP NOW!


************************************************************

Check out the brand new Spring Catalog and get all those supplies you need for you up coming projects.

CLICK HERE TO SHOP!

**********************************************************

Have you checked out the great clearance rack at Stampin’ Up!  CLICK HERE
New items added!

***********************************************************

Michelle’s Free Stamp Program

Don’t miss out on my Customer free stamp set program. Check it out!  Along with a handmade thank you card from me for your order you will receive a token for each $50 in product you ordered using me as your demonstrator.  After you have collected 10 tokens you will receive a free current stamp set of your choosing, a value of $39 or less.   Here is a link to my online shopping page that you can shop at 24/7 (from the comfort of your home, even in your pj’s) and the products will be shipped directly to your door step from Stampin’ Up:   CLICK HERE TO SHOP.   My free stamp set program will be an on going program.  :)
***************************************************

CHECK OUT MY STAMPING EVENTS Click here to see my event calendar