

Are you in the Fog today? I am, lol. This is a photo I snap this morning. It is a scene we see often out in the country where I live. Fog, fog, fog, I love it when I don’t have to drive in it. 🙂
Barn look familiar? It is the barn in my blog banner. I painted the pastel painting a few years ago and although the painting was sold I still use it as my banner.
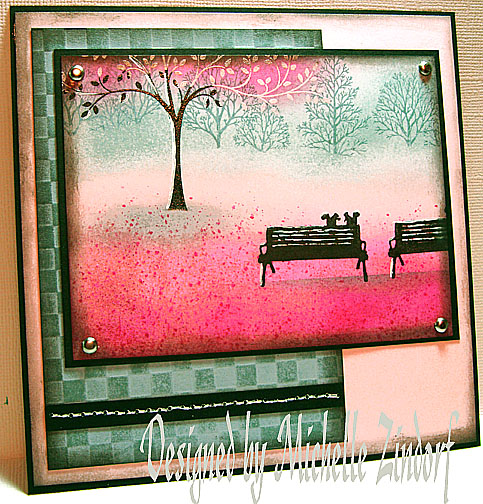
Anyway, the fog made me want to create a foggy type scene today in my tutorial.
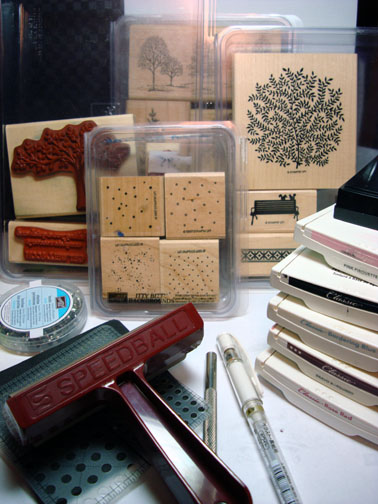
Sometimes I feel like I am in a rut so today I picked up some nontraditional colors to create my scene with. I also kept pulling out stamp sets. I used four Stampin’ Up sets, using one image out of each, lol.
By using all of those stamps I must have been making up for taking the day off yesterday. I was feeling a bit burned out so I took the day off completely “Mental Health Day”. My Husband, Russ got to hang out with me too. He proclaimed the day “No Fretting Thursday”. Which meant we agreed to not talk about work or home improvements not completed. We also spent the day hopping from on Garage sale to another. It was great!
So today I am back and refreshed, but have loads of things to do to prepare for my Dayton, Ohio Workshops tomorrow. I will be teaching at Marcos Paper, which I am always excited about doing. If you have not been to Marcos before, you must make the trip if you can. The store is a little piece of heaven for us stampers. Here is a link to their website if you want to check out all the great things they have going on there or to register for my workshops: https://www.marcopaper.com/. For those of you who will be attending the workshops tomorrow, I have some really fun and exciting projects for you. All new projects and kit for you Advanced Students. 🙂 There are a couple of spots available if you want to register, call Marco’s at 1-888-433-5239. FYI, from the looks of my calendar I may not make it back to Marco’s for months.
I also have a new workshop location to add to my calendar. I will be teaching my brayer workshops in the Boise area of Meridian, Idaho on April 24-25, 2010, Woohoo!! If interested in information/registration, please e-mail me at [email protected].
Now let’s get started on that tutorial. . . .
Supplies:
| Stamps: Stampin’ Up Itty Bitty Background, Pendant Park, Thoughts & Prayers, Lovely As a Tree |
| Paper: Stampin’ Up Whisper White, Basic Black, Bordering Blue Pink Pirquette |
| Ink: Stampin’ Up Pink Pirquette, Rose Red, Bravo Burgundy, Bordering Blue, Basi Black |
| Accessories: Versmark Pad, Brayer, Stampin’ Up Piercing Tools, White Gel Pen, Silver Brads, Post it note, Sponges, Big Shot Die Cut Machine, Square Texture Plate, Clear embossing Powder, Heat Gun |
Are you inspired by this Blog? One way you can help support this blog is by ordering your Stampin’ Up products through me. You can order from me 24-7 from this link: https://michellezindorf.stampinup.net or e-mail me at [email protected] If you are within the United States. Want a copy of the brand new 2009-2010 Stampin’ Up Catalog for $9.95, just e-mail me at [email protected] and I will get one in the mail to you. Want to become a Stampin’ Up Demonstrator and earn instant income? Consider being part of my Stampin’ Up Team. Through August 31 you can become a Stampin’ Up Demonstrator for as little as $85 with the mini kit. Also Stampin’ Up is now having a weekly special, click this link to check it out: https://www.stampinup.net/esuite/home/michellezindorf/promotions
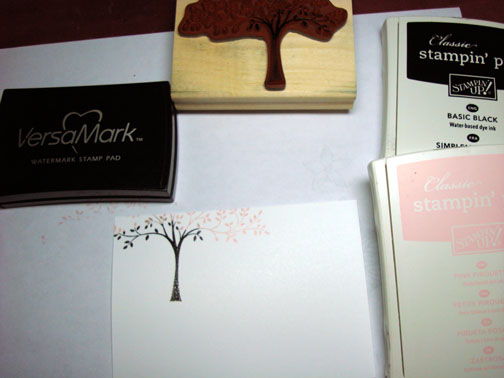
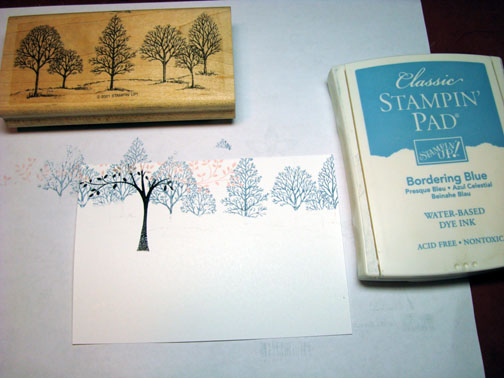
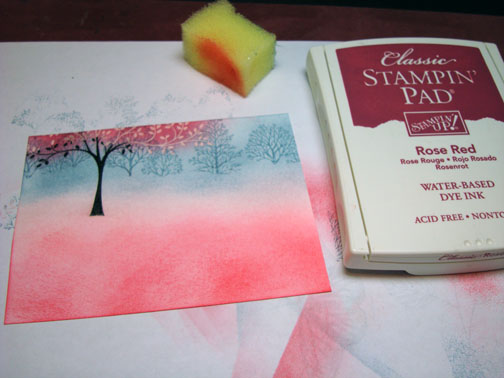
Stamped the Tree from the Stampin’ Up set “Thoughts & Prayers” by first loading the stamp with Versamark, then Pink Pirquette and then tapped on some black ink ont he trunk before stamping the image on a 3.5″ x 4.5″ piece of Whisper White card stock.
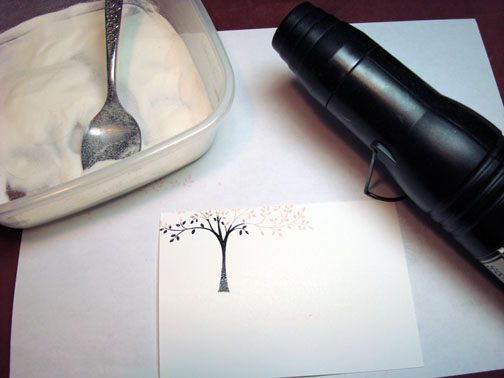
Heat embossed the image using clear embossing powder and a heat gun.
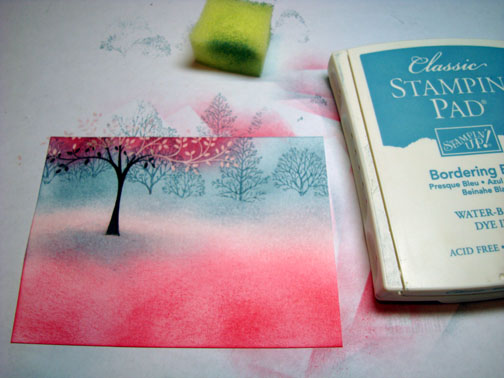
Loaded Bordering Blue ink only on the tree part of the “Lovely As a Tree” stamp, omitting the ground area of the stamp. Stamped it twice at the top of the card stock.
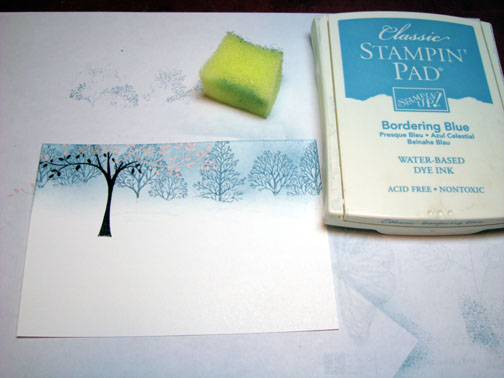
Sponged Bordering Blue ink a the top of the card stock.
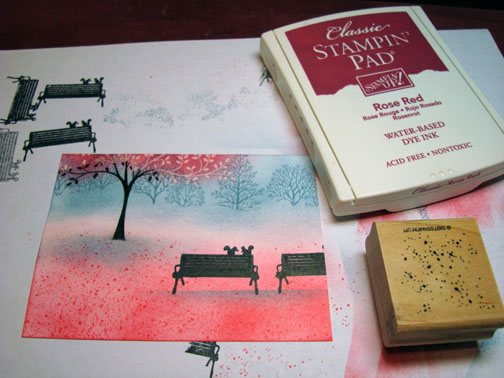
Sponged Rose Red ink at the top of the tree.
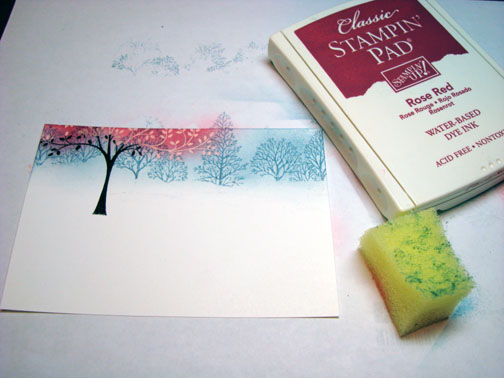
Sponged Pink Pirquette ink below the Bordering Blue ink.
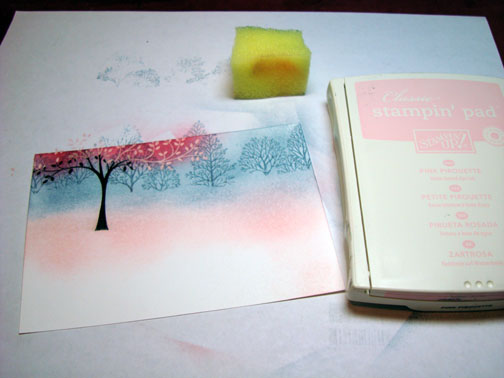
Sponged Rose Red ink below the Pink Pirquette ink.
Sponged Bordering Blue ink at the base of the large tree to create a shadow.
Stamped the bench from the new Stampin’ Up set “Pendant Park” twice with Basic Black ink.
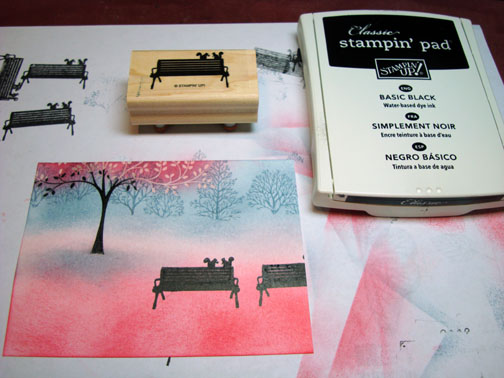
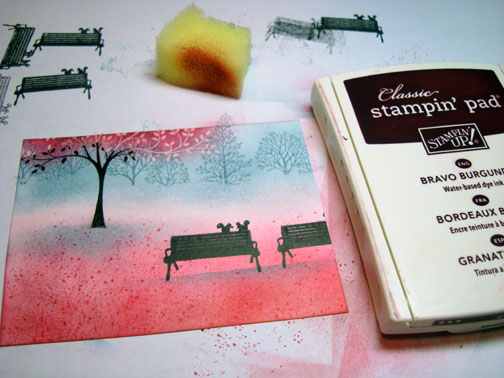
Masked the top of the card stock with a post it note and sponged Bordering Blue ink at the base of the benches to create a shadow for them.
Used the Speckle stamp and Rose Red ink to added the speckles at the bottom of the card stock.
Sponged a bit of Bravo Burgundy ink at the bottom of the card stock and the very top of the tree.
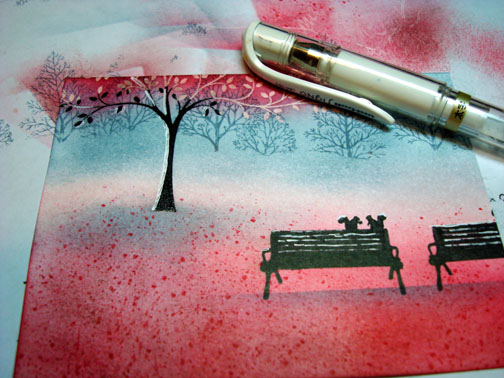
Added White Gel Pen highlight to the tree, squirrels and benches.
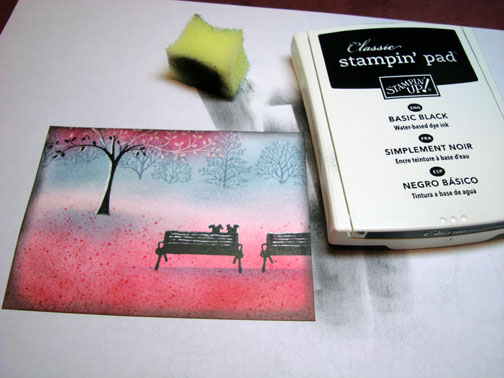
Sponged Basic Black ink all around the edge of the card stock.
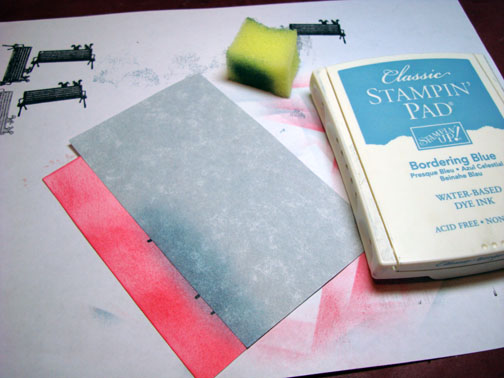
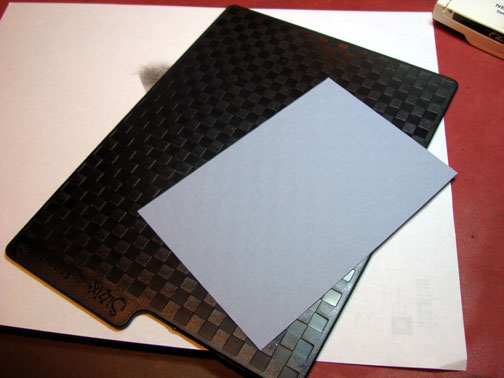
Used my Big Shot die cut machine and the Squares texture plate to emboss a Bordering Blue panel.
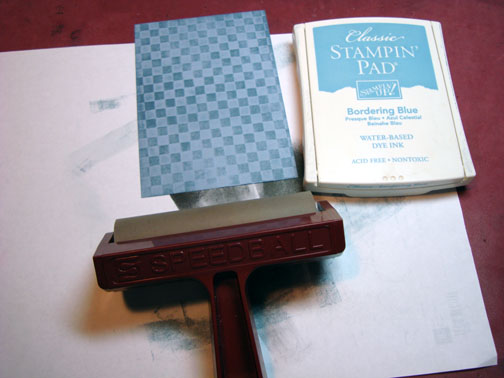
Brayered Bordering Blue ink over the embossed panel to bring out the texture more.
Sponged Basic Black ink around the outside edges of the Bordering Blue and Pink Pirquette panels.

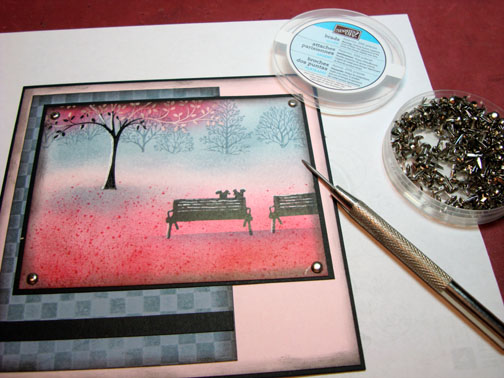
Used my piercing tool to start my holes for the four silver brads.
Added a thin strip of black card stock to the Bordering Blue panel and then pierced holes down the center of it.
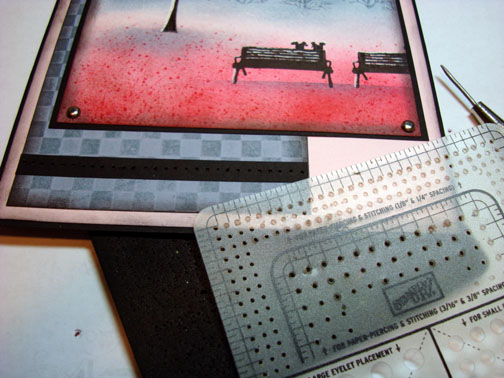
Used my white gel pen again to create the faux stitching on the card by dragging my pen from one pierced hole to the next, stopping in each hole with the pen.
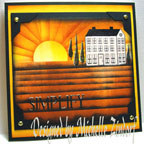
Here is the complete card measuring 5.5″ square.
May your day be filled with nothing but clear skies!
Until my next post. . . . . . .
Huge Hugs,
Michelle
 Get ready for Brayer Workshops! I am coming to:
Dayton, Ohio
Columbia, Missouri
Lynchburg, Virginia
Greenwood, Indiana
Castro Valley, California
Yardley, Pennsylvania (near Philadelphia)
Knox, Maine
Akron, Ohio
Broomfield, Colorado
Moore, Oklahoma
Nashville, Indiana
Portland, Michigan
2010
Phoenix, Arizona
Monroe, Louisiana
Jacksonville, Florida
St. Louis, Missouri
Mechanicsville, Virginia
Raleigh, North Carolina
Colleyville, Texas
Colorado Springs, Colorado
Boise area of Meridian, Idaho
Riverside, California (Southern California)
Salem, Oregon
Wheaton, Illinois
Rockville, Maryland
North Chili, New York (near Rochester)
New Johnsonville, Tennessee
Helena, Montana
Middleburg Heights, Ohio
Venice, Florida
Here is a link to my workshop calendar where you can see all of my travel schedule and to get info on beginner and advanced Brayer workshops: https://zindorf.splitcoaststampers.com/workshop-calendar
Link to my Stampin’ Up website were you can order all of your must have Stampin’ Up products from me 24-7: https://michellezindorf.stampinup.net
Frequently asked questions answers: https://zindorf.splitcoaststampers.com/frequently-asked-questions/
15 responses to “In the Fog (Nontraditional colors) – Tutorial #239”