Tag Archives: stamping tutorials

Rain – Stampin’ Up! Card

Hello there,

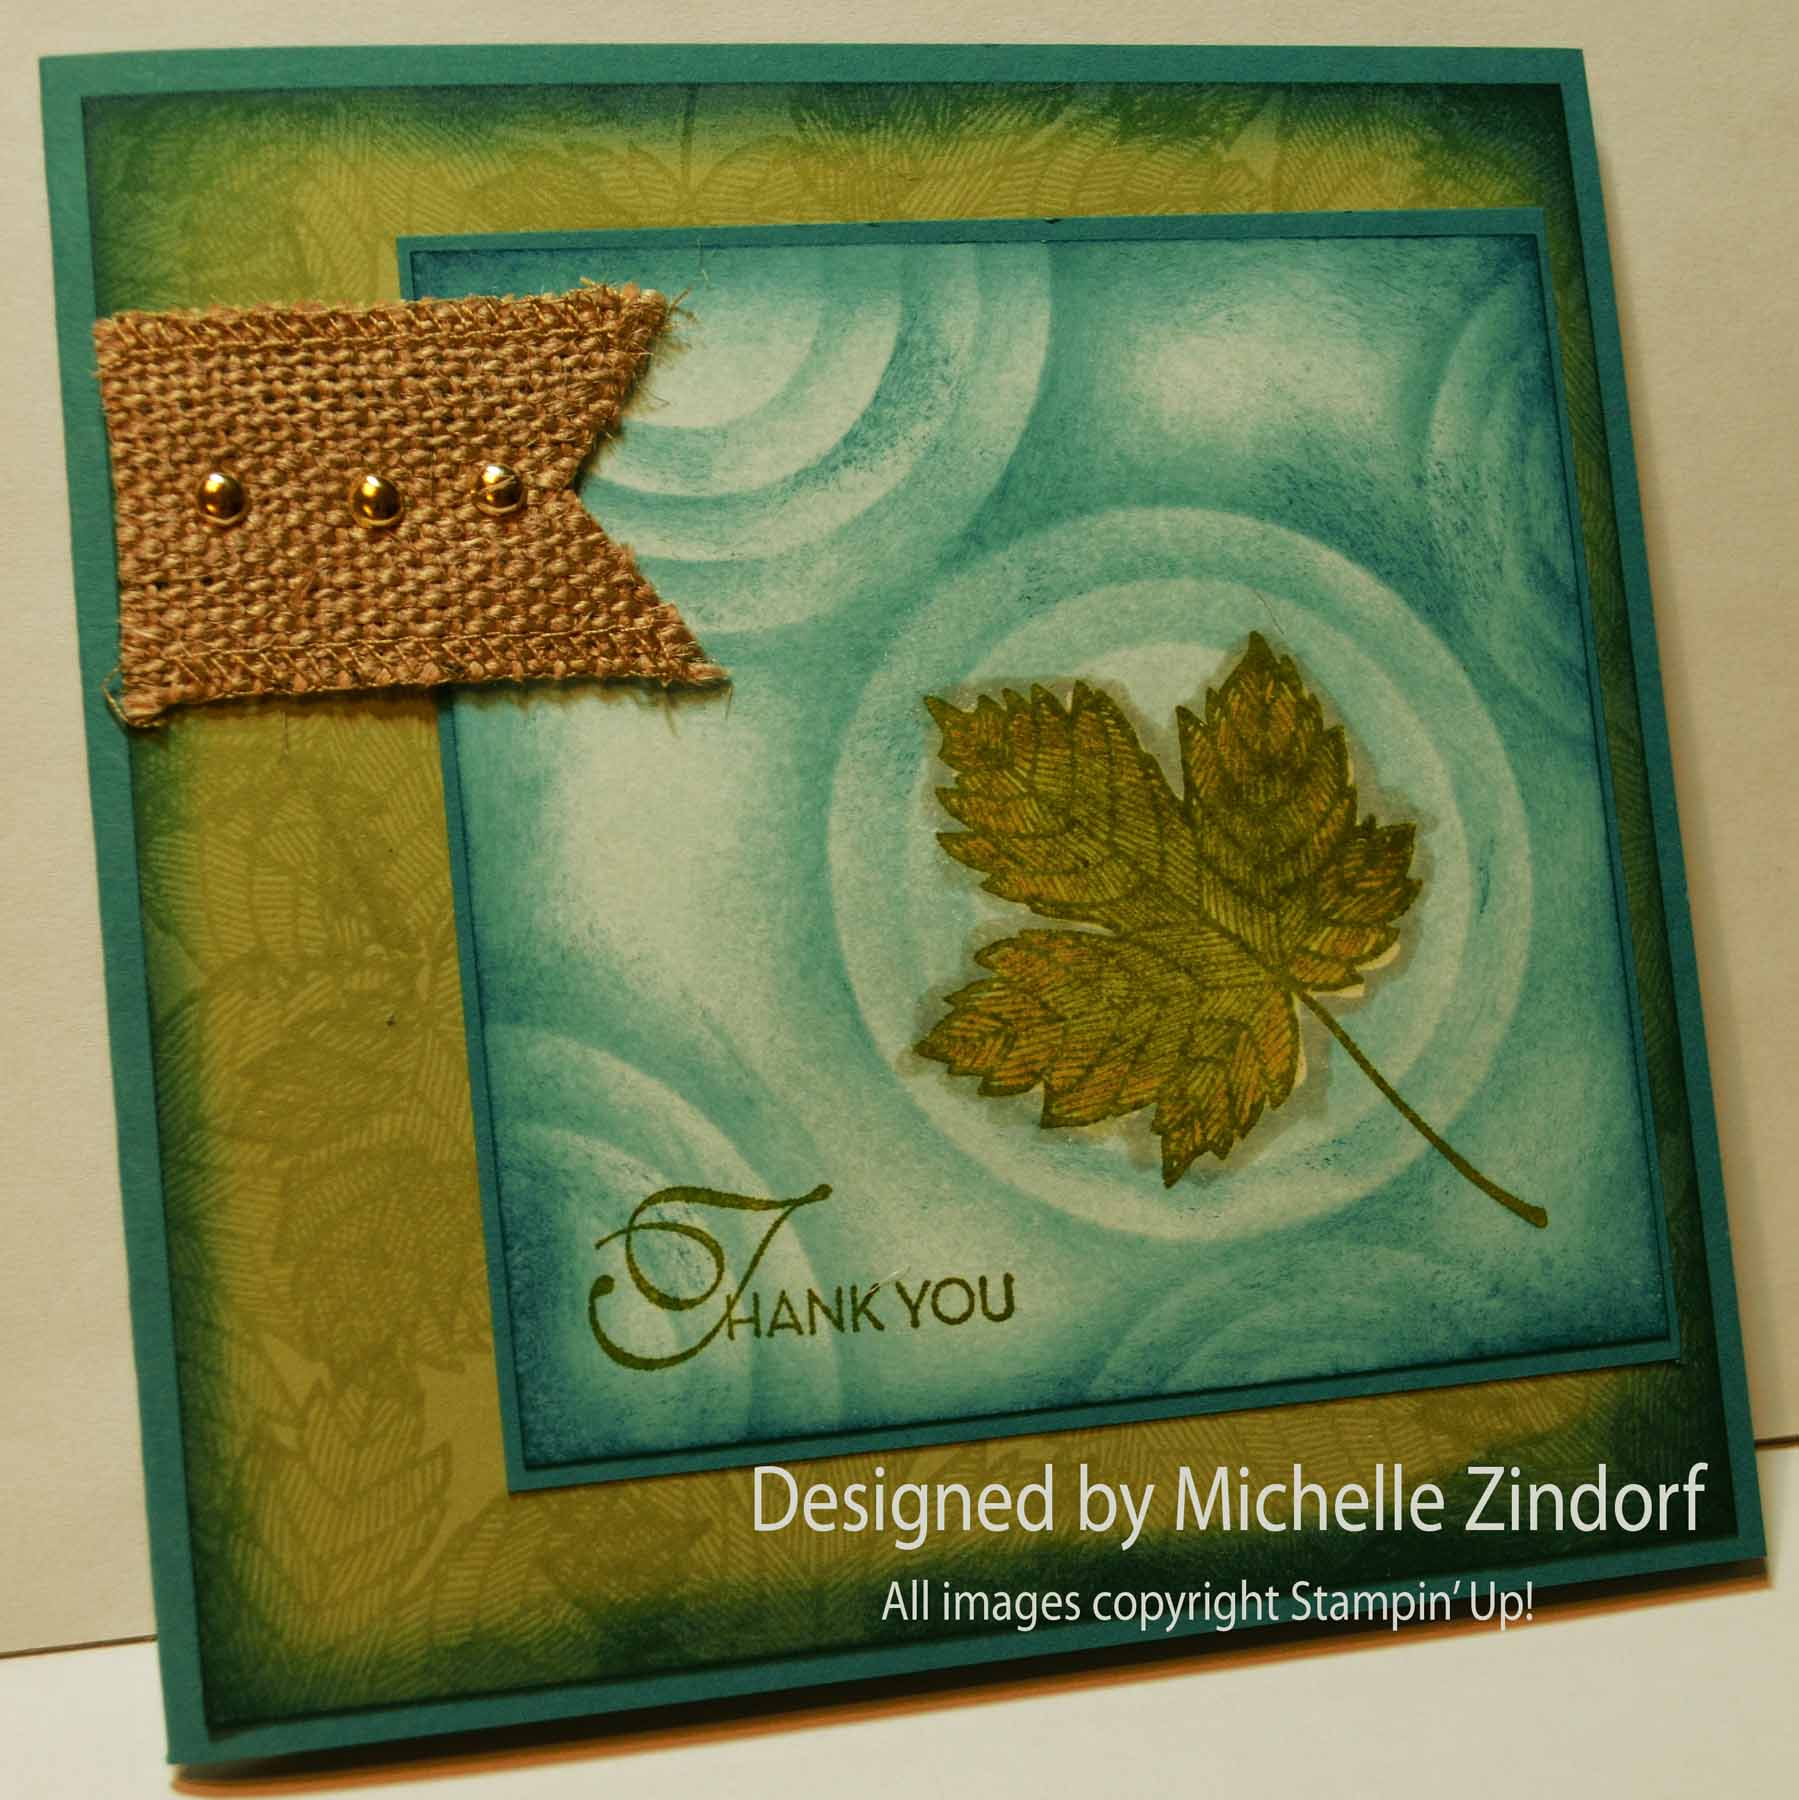
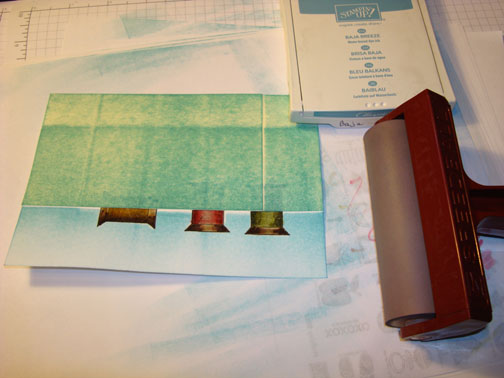
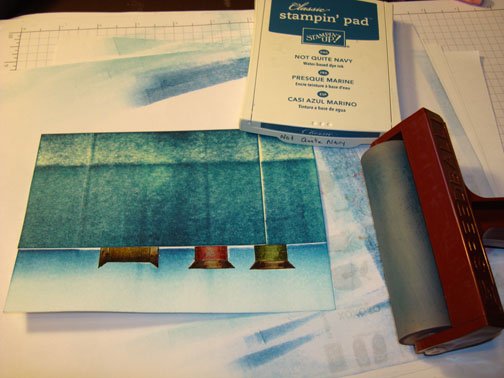
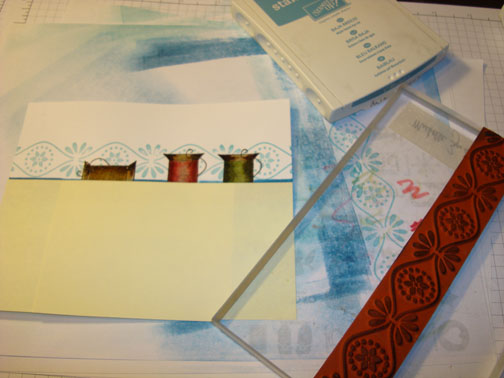
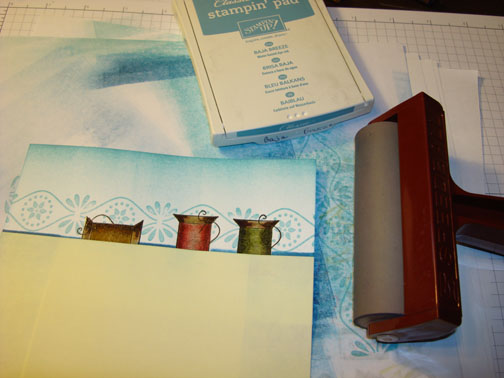
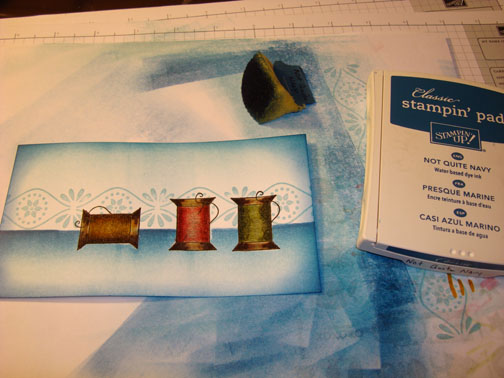
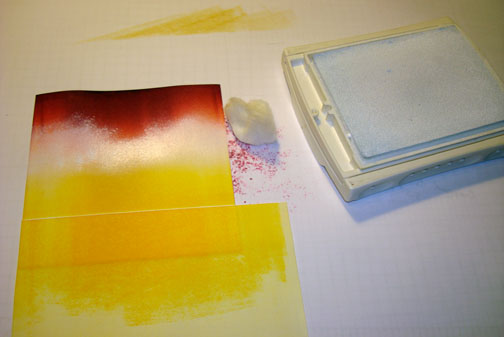
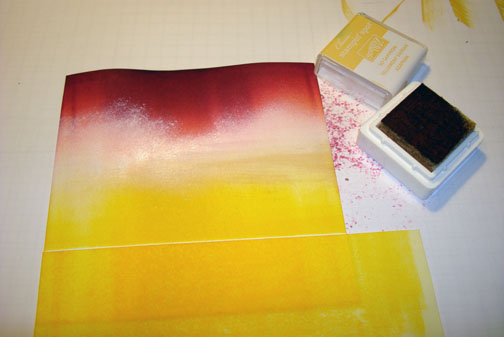
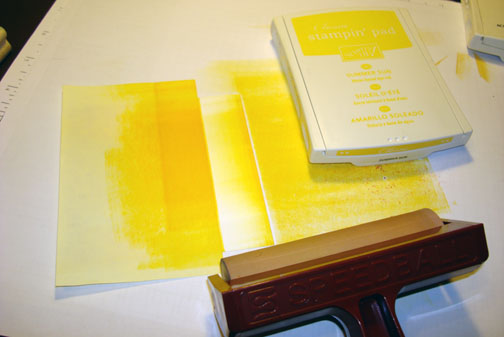
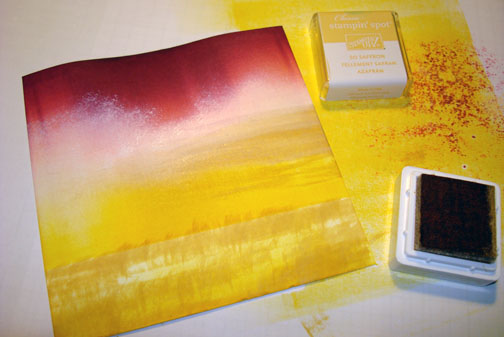
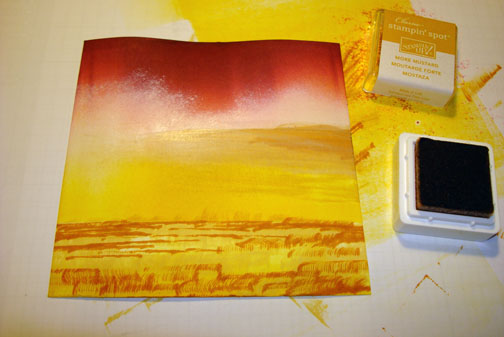
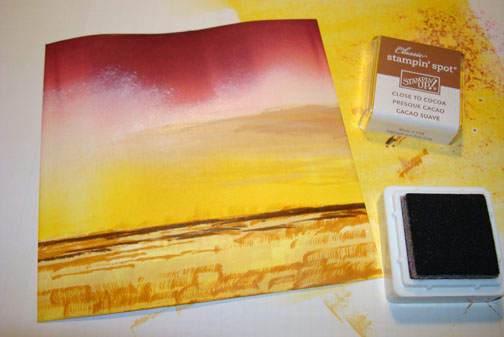
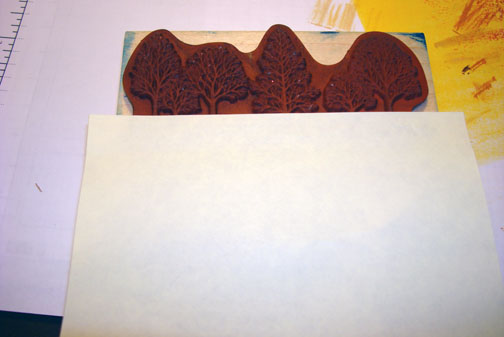
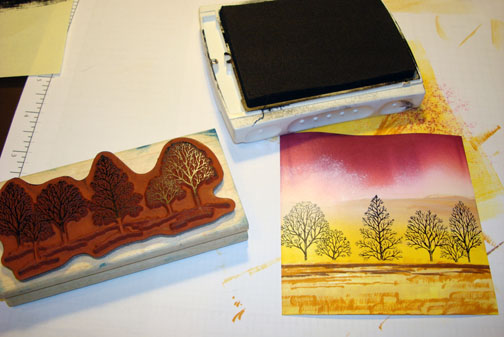
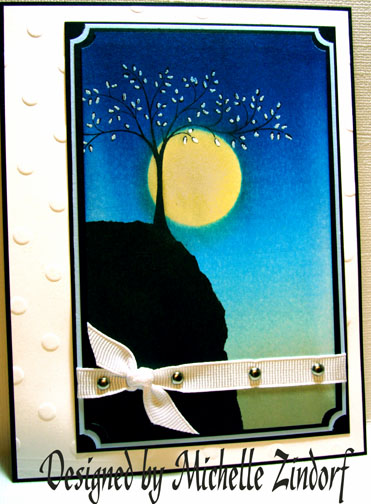
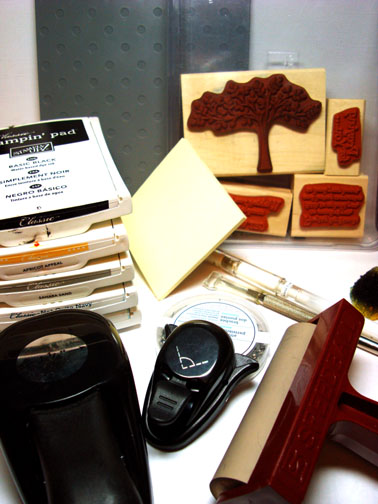
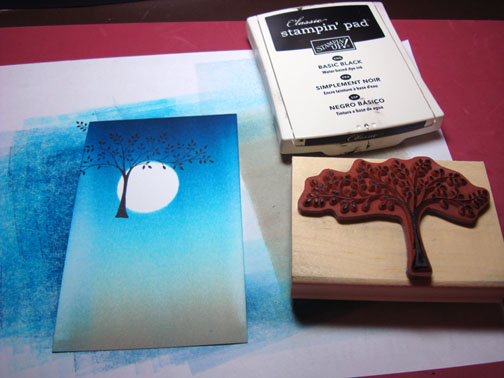
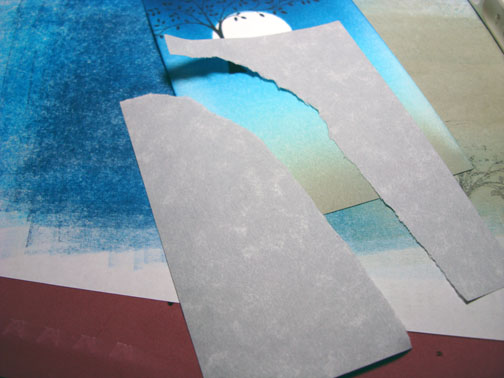
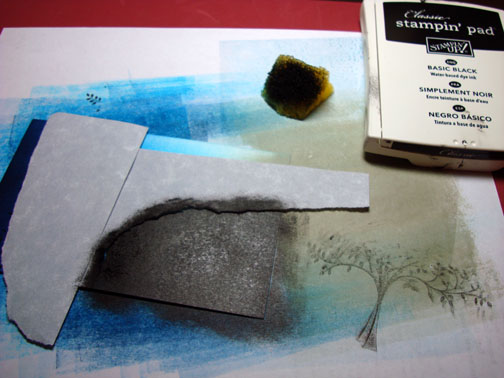
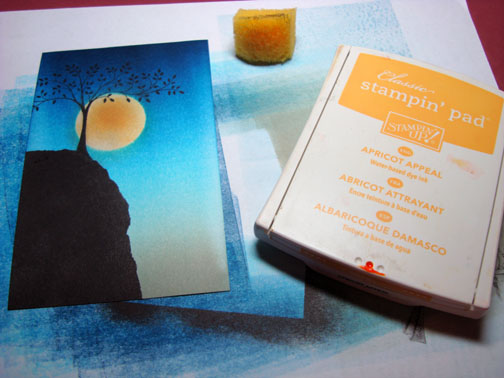
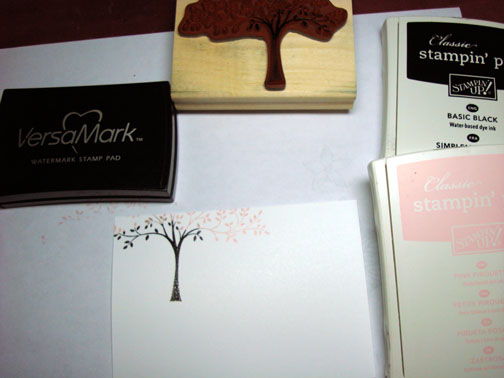
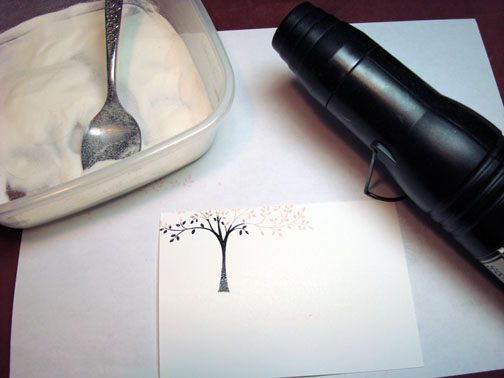
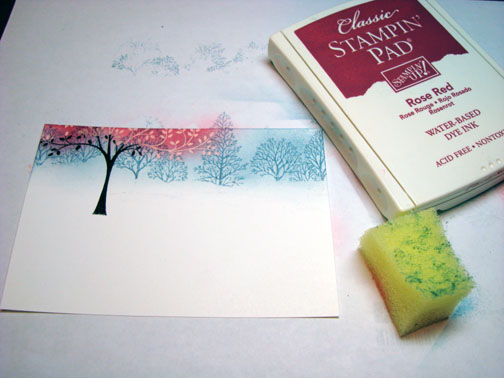
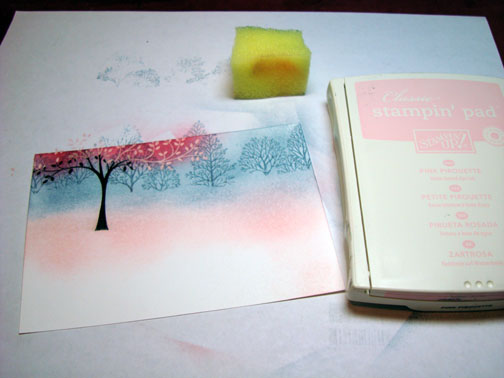
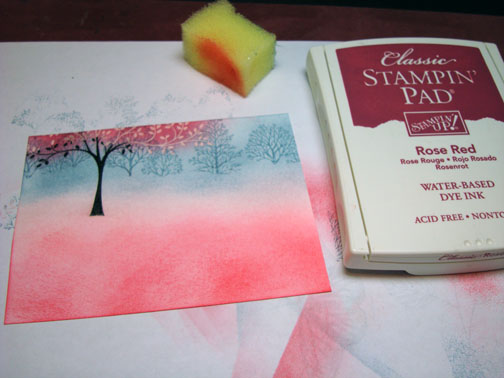
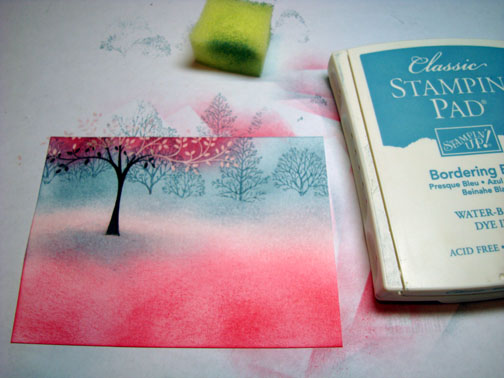
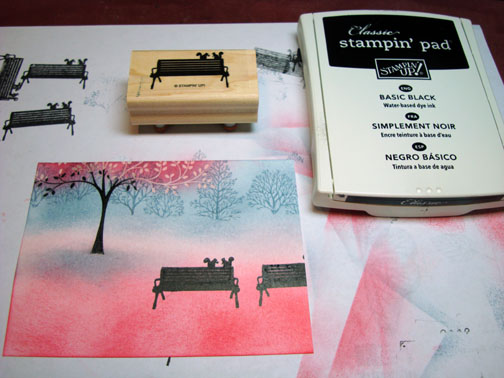
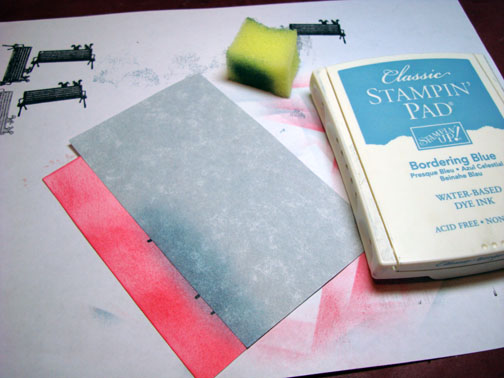
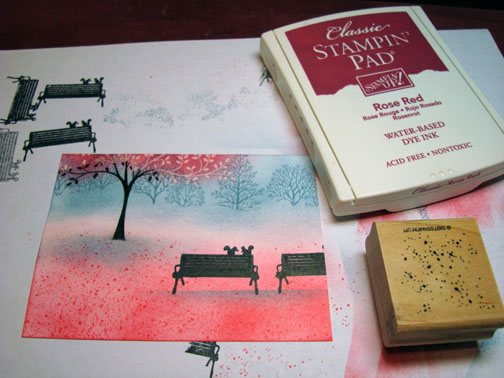
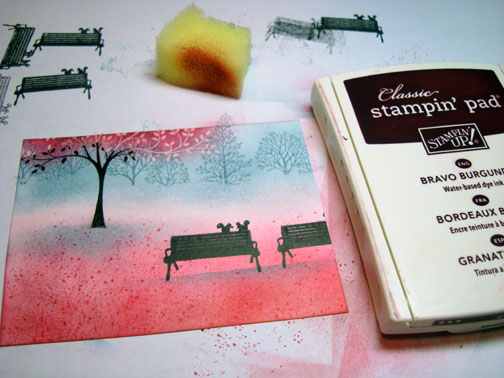
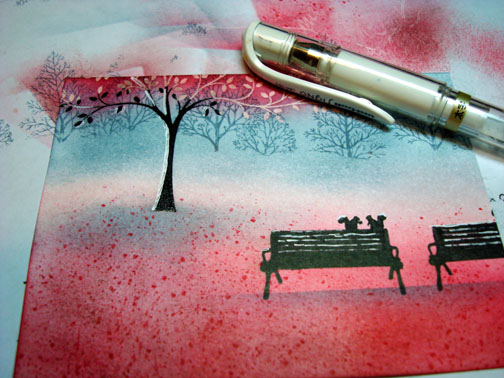
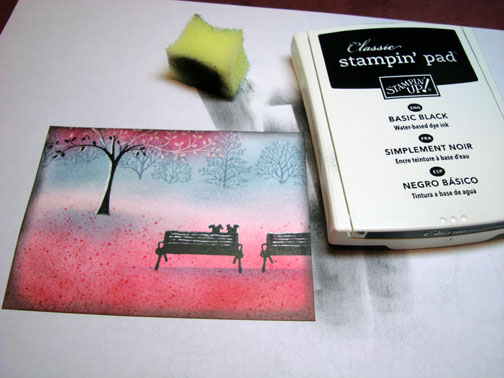
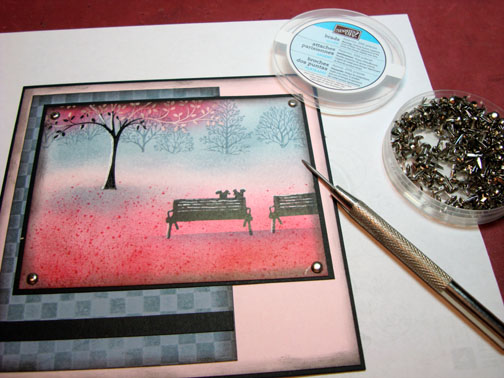
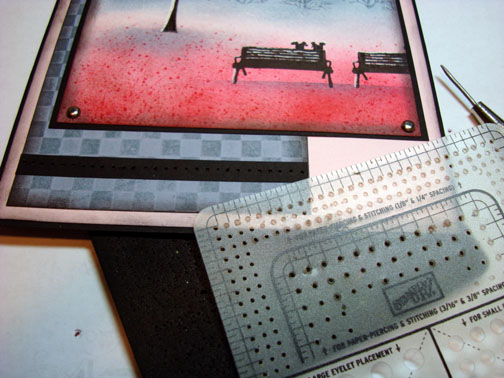
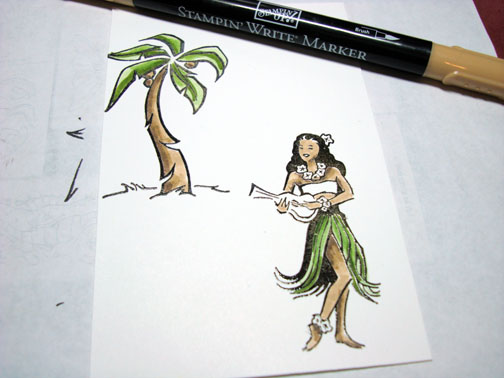
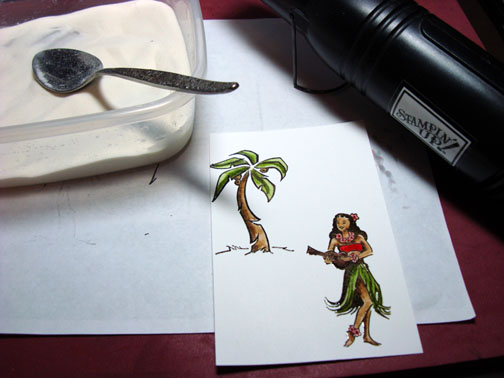
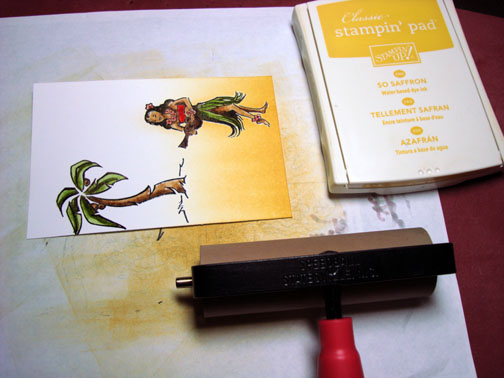
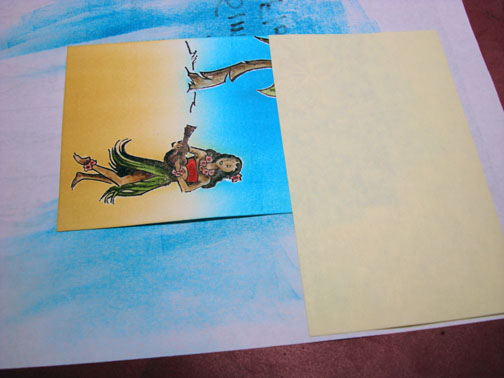
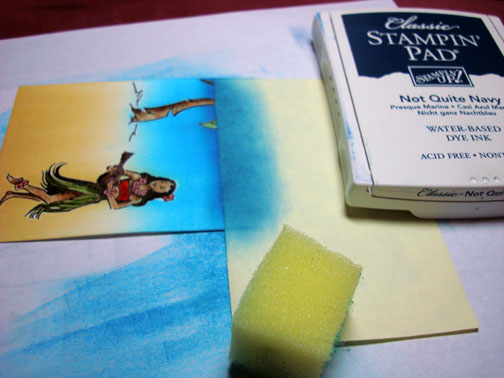
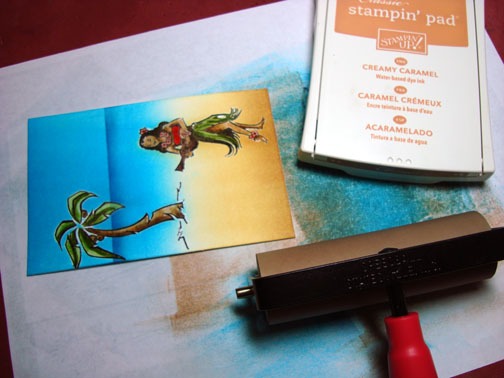
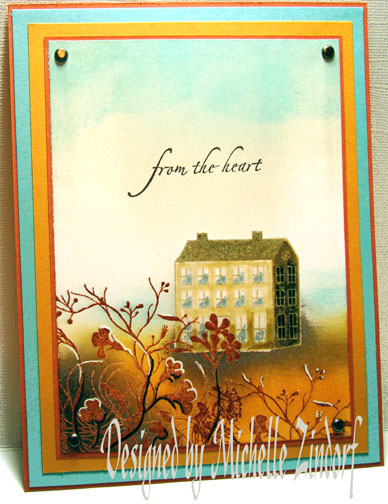
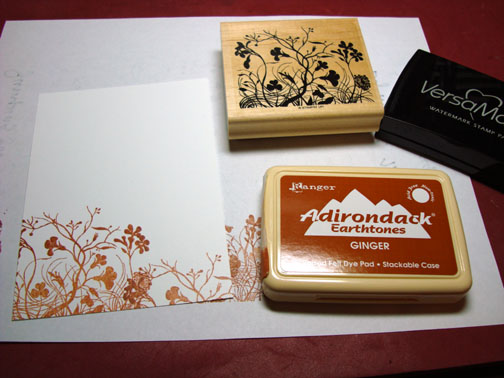
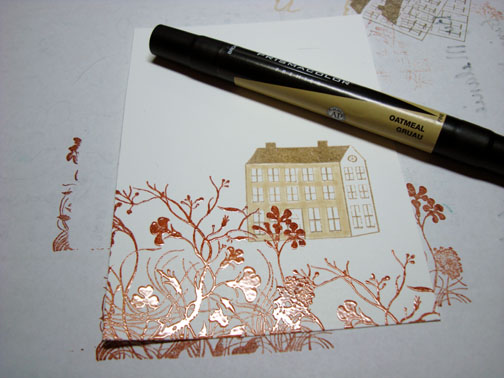
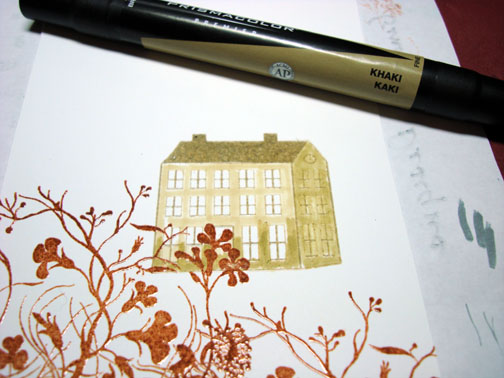
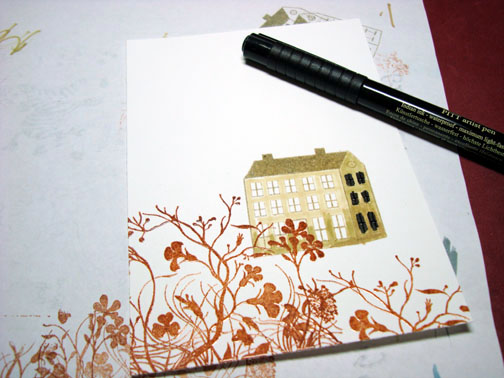
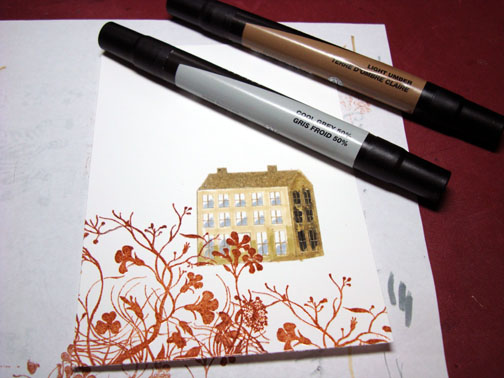
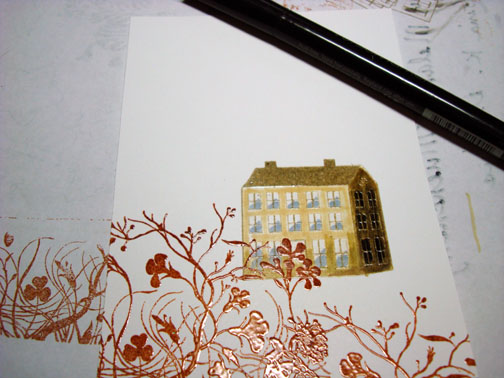
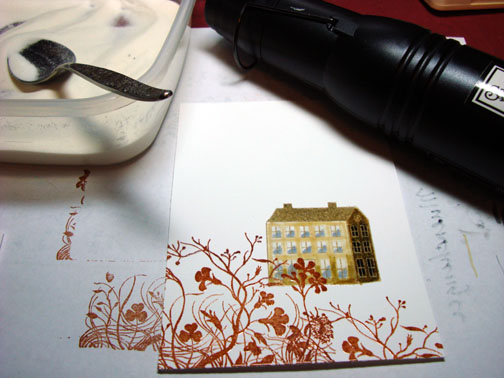
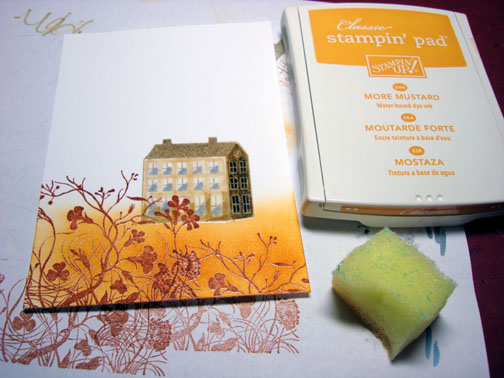
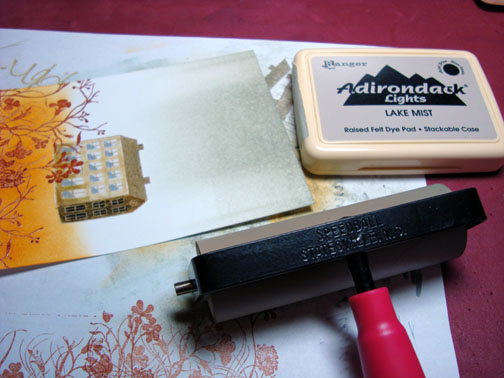
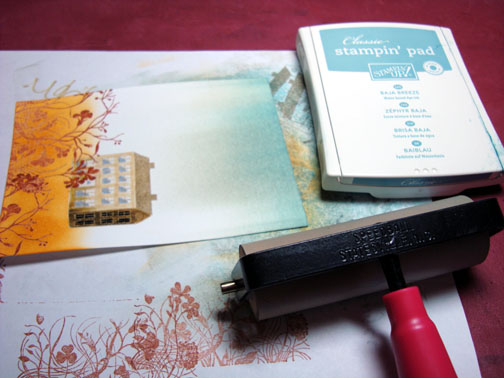
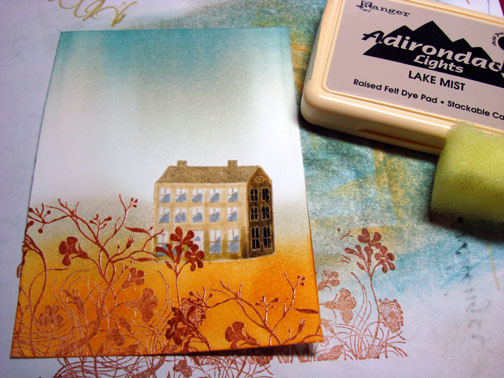
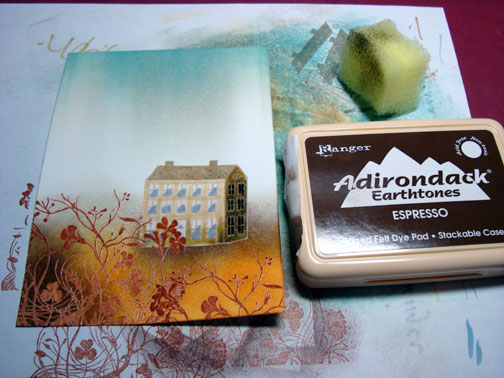
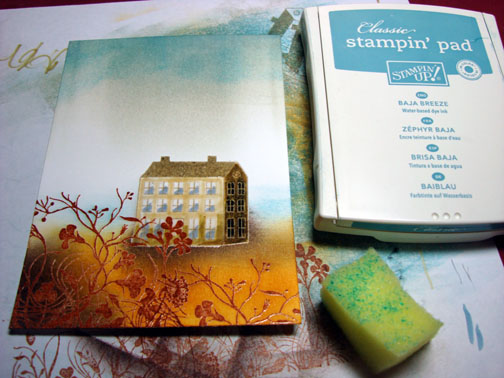
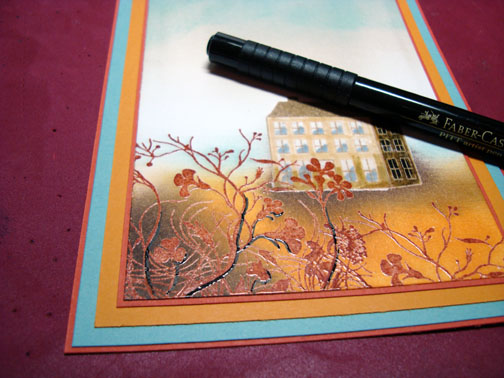
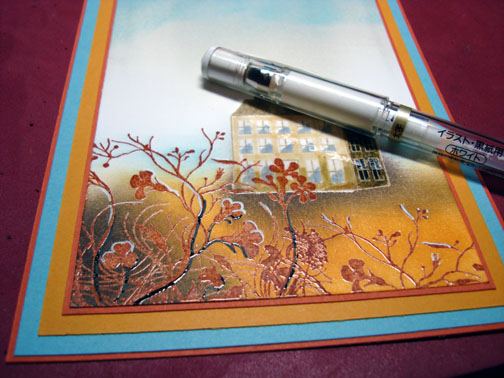
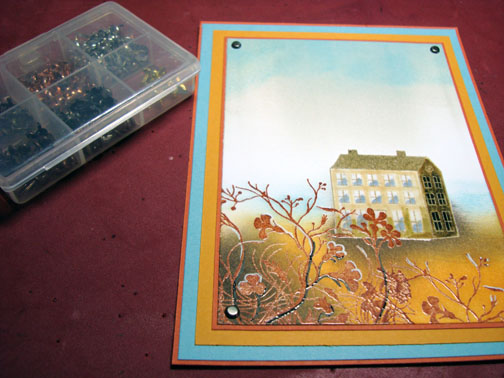
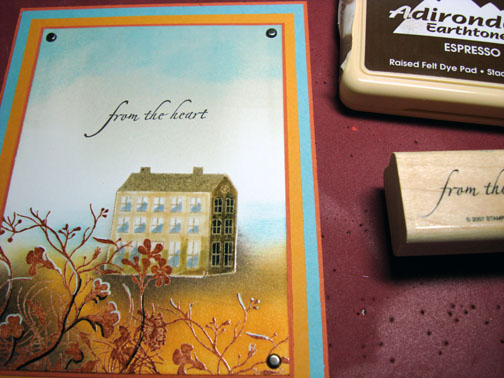
It’s a rainy, rainy Sunday here in little West Alexandria, Ohio so I just had to communicate that in my card for today.  I combined the Stampin’ Up! Single Stamp, Magnificent Maple and the sentiment from the lovely Stampin’ Up! set Lacy & Lovely.

You can find the supply list and how to the get the tutorial for this project free or by purchase below.

****************************************

FREE TUTORIALS

The complete tutorial for today’s project along with all of the card tutorials I create from October 1, 2013 through October 15, 2013 will be e-mailed to my customers who place a merchandise order of $10-$149 anytime between October 1, 2013 through October 15, 2013 free of charge.
Note:  Merchandise orders of $150 or more get free tutorials for the entire month, plus hostess benefits and 3 Virtual tokens!
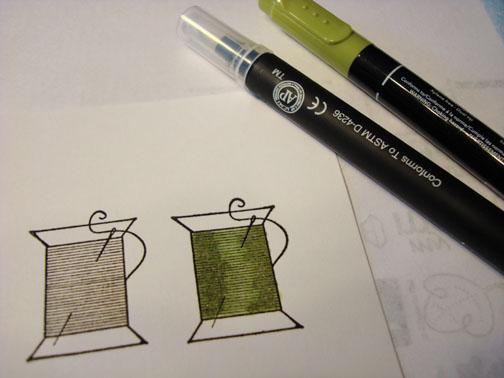
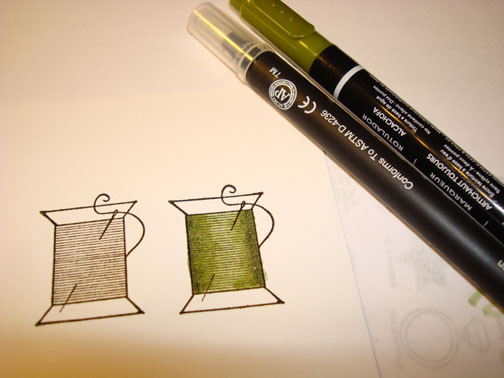
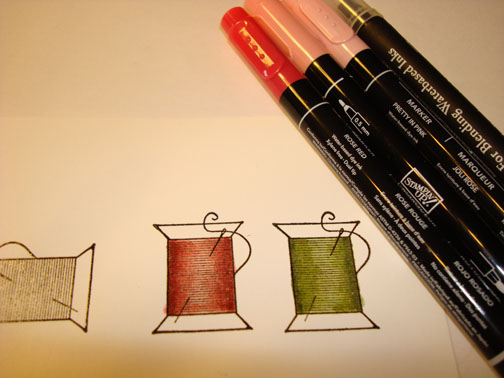
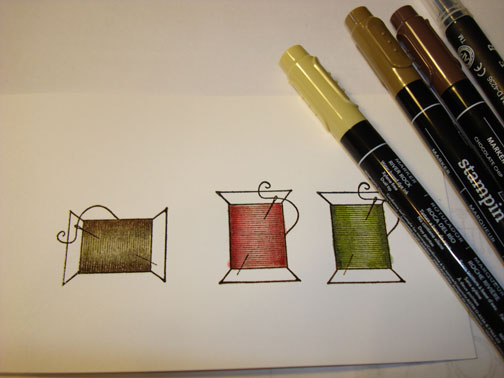
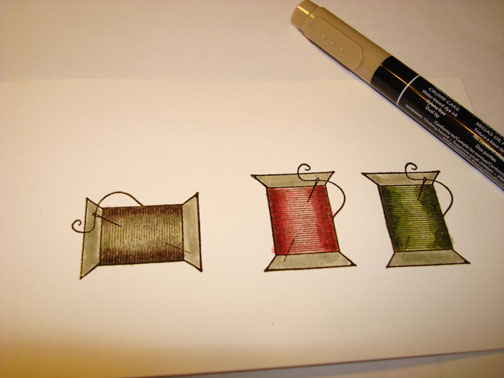
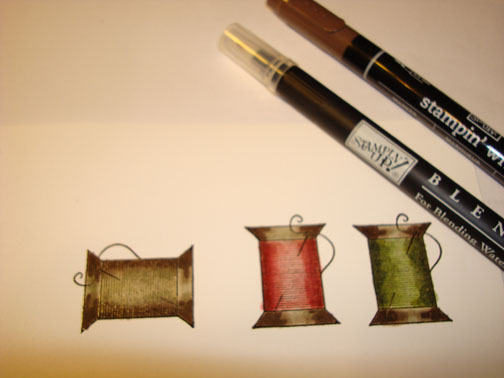
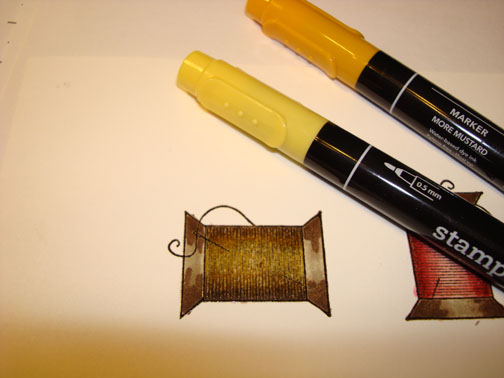
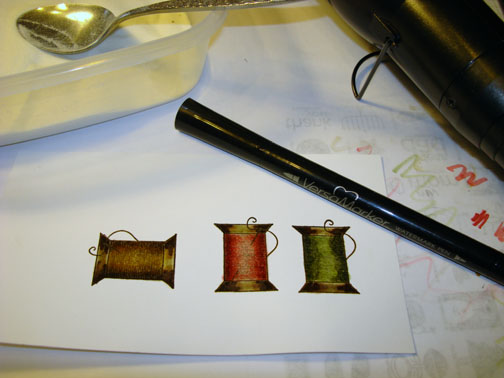
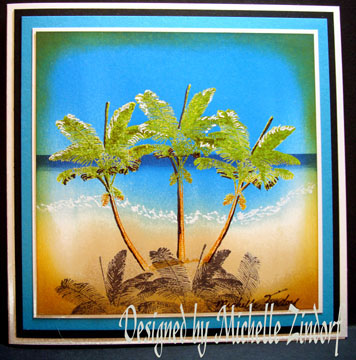
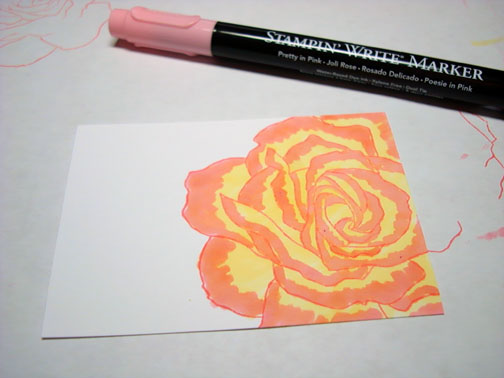
Shown below are the tutorials I have created so far for this period.  🙂

All you need to do is place your order online using me as your demonstrator and the tutorials will be e-mailed to you within 24 hours.  🙂  Free tutorials are an exclusive perk for my valued Stampin’ Up! customers and down line.  This is not the only customer perk I offer to my amazing customers, check out the rest at the bottom of this post.


************************************

If you wish to purchase the tutorial for this card or check out the new monthly subscription option.  CLICK HERE FOR DETAILS.

Today’s card has been added to my card sales page CLICK HERE FOR DETAILS.

************************************

Rain card – Supply List

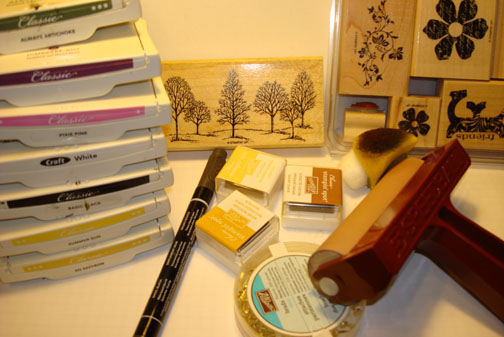
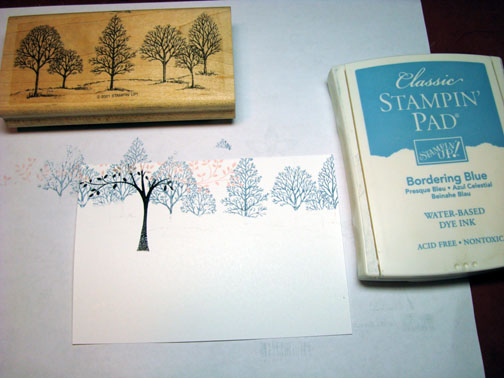
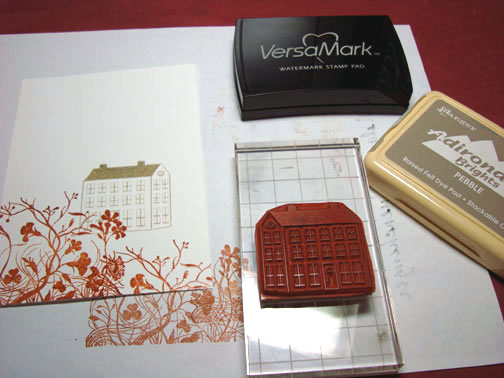
Stamps: Stampin’ Up! Magnificent Maple (131868 wood) and Lacy & Lovely (132025 wood and 122887 clear)
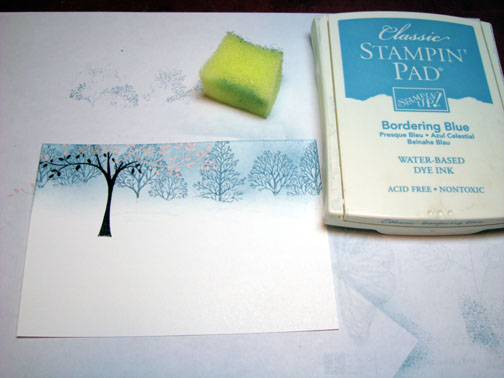
Card Stock: Stampin’ Up! Whisper White, Island Indigo and Pear Pizzazz
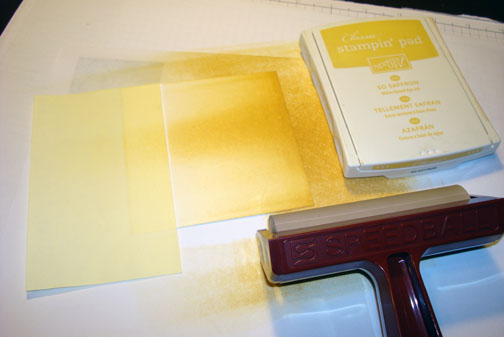
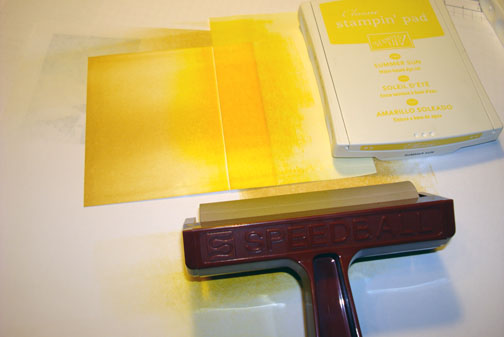
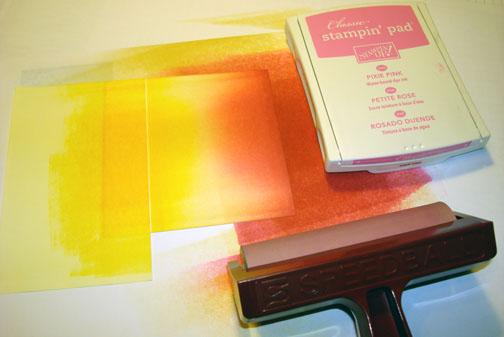
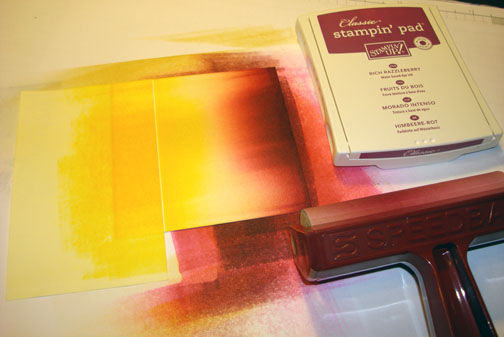
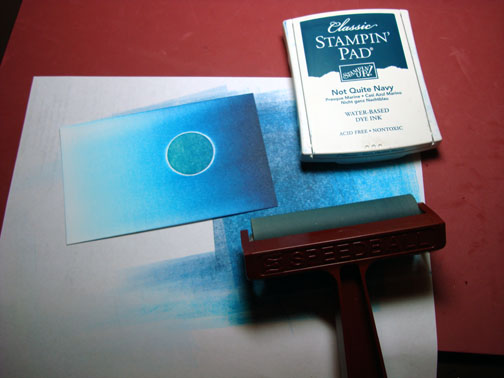
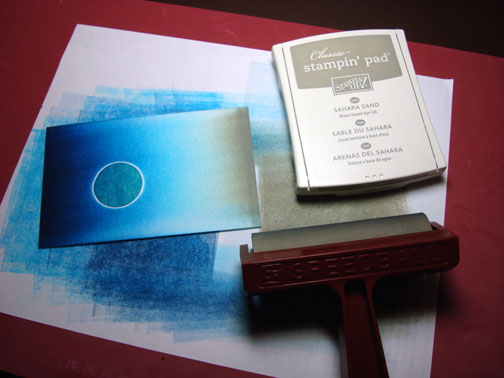
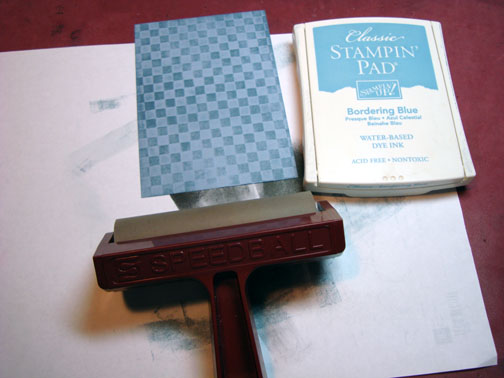
Ink: Stampin’ Up! Old Olive, Soft Sky, Island Indigo and Pear Pizzazz
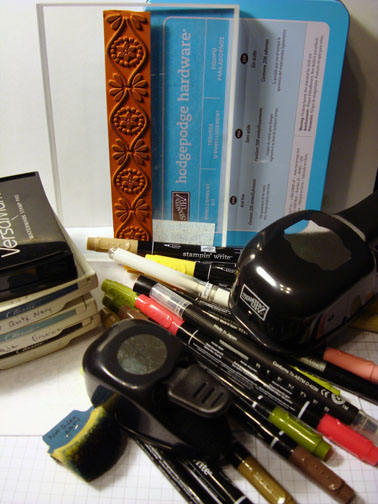
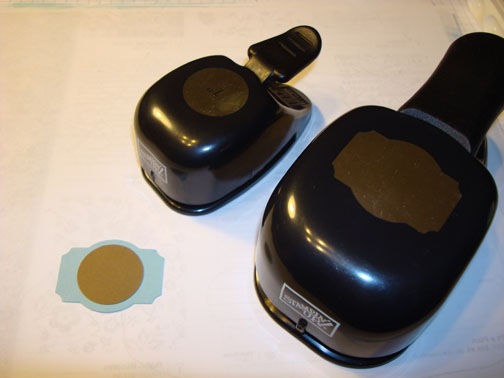
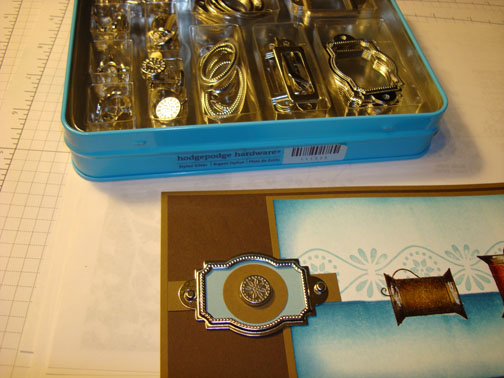
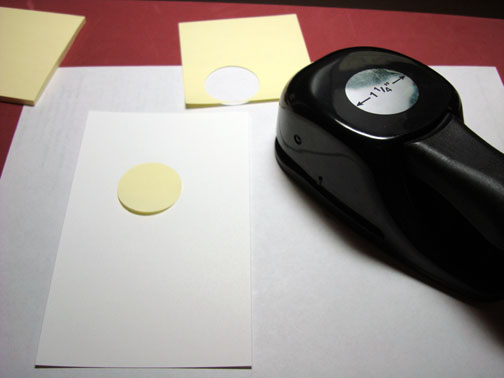
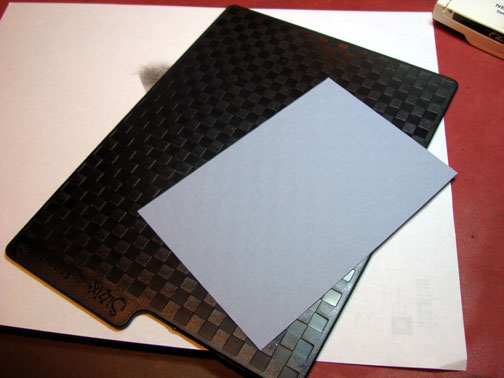
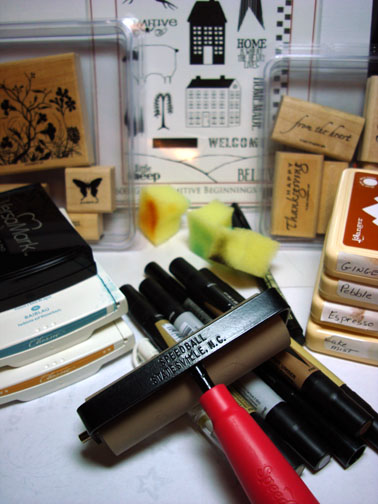
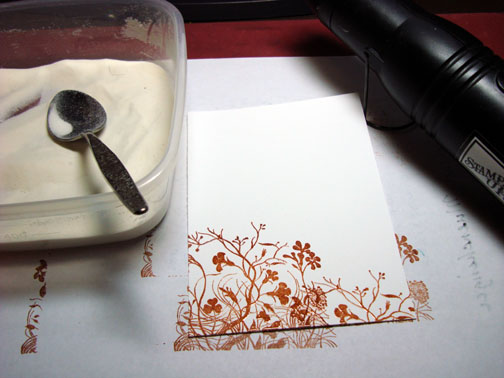
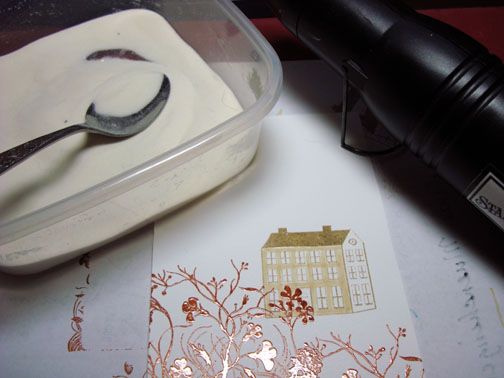
Accessories: Stampin’ Up! Sponges (101610), Versamark (102283), Versamarker, Gold Brads, Burlap Ribbon (132140), Circles #2 Die (114526), Big Shot Machine (113439), Stampin’ Write Markers (Pear Pizzazz, Summer Starfruit and Sahara Sand), Clear Embossing Powder (109130) and Heat Tool (129053)

***********************************

May your day be totally terrific!
Until my next post. . . . . .
Huge Hugs!
**********************************************

Mystery Hostess Code

Be sure to use the Mystery Hostess code when placing your next order.  You could be the next Mystery Hostess and win $120 worth of Stampin’ Up! products of your choice!!
The new Mystery Hostess Code is VACMHYZQ and this is how it works:
MYSTERY HOSTESS:
Place an merchandise order of $10-$149 order from October 1, 2013 through October 15, 2013 and use the current Mystery Hostess code and your name will go in a drawing and you could be the winner of $120 in free Stampin’ Up! products of your choice, including highly sot after hostess stamp sets.
So let’s get started with the 1st half of October’s Online Mystery Hostess Workshop!
Simply use the Hostess Code below and place an order in my online store by 12:00 pm on October 15, 2013.
Important: To be part of the Online Mystery Hostess Workshop, once you add your first item to your shopping bag the hostess code must be entered just below the Special Offers section and it should say Michelle Zindorf as the Hostess.
Once all the orders are placed, on October 16, 2013, I will draw one winner.

Your Mystery Hostess Code is: VACMHYZQ

Ready – Set – GO!! Start placing your orders now!… Remember, the deadline for this event is 12:00 pm on October 15, 2013.
Please do not put the hostess code in if your merchandise order is $150 or more.  You would lose your hostess benefits that you would have coming already.
***********************************************************

Customer Free Stamp Set Program

Don’t miss out on my Customer free stamp set program. Check it out!  For your order of $50 in product using me as your demonstrator you will receive one virtual token.  Order $100 in product receive two virtual tokens, etc.  After you have collected 10 virtual tokens you will receive a free current stamp set of your choosing, a value of $30 or less.
Here is a link to my online shopping page that you can shop at 24/7 (from the comfort of your home, even in your pj’s) and the products will be shipped directly to your door step from Stampin’ Up.   CLICK HERE TO SHOP.   My free stamp set program will be an on going program.  :)
******************************************************************

Shop my online store now CLICK HERE *

******************************************************************

Have a long Stampin’ Up! wish list?  Check out how you can save 20%, CLICK HERE!

*********************************

Free tutorials are also a perk for my Stampin’ Up! Team – Join now!

******************************************************

Special Announcement!

Join Stampin’ Up! for $25.  This is the lowest price ever!

This offer is only good for two weeks, so take advantage of it starting October 7th!
During this offer, only the special $25 starter kit will be available; the
regular $99  starter kit will not be available. The $25 Starter Kit
includes
  • $26.95 worth of Stampin’ Up! product (it must be more than $25, but not more than $26.95 before tax)
  • Business pack which includes
    • A box of annual catalogs
    • A package of the current seasonal catalog
    • Getting Started DVD
    • Starter Kit Business Brick
    • Customer postcards
STAMPIN’ UP! DEMONSTRATOR BENEFITS:
  • Receive 30% off your first product order of $150 or more (or keep it as “instant income” from sales).  Redeem in the first 45 days.
  • Get 20% off Stampin’ Up! products or keep as “instant income.”
  • Pre-order new products before the customers sales period. One of my favorite perks
  • Earn free hostess sets and merchandise faster because of your discount.
  • Receive Stampin’ Up!’s demonstrator magazine, Stampin’ Success.
  • Be inspired by video tutorials and project ideas on the Stampin’ Up! demonstrator web site.
  • Earn free stamps with Stampin’ Start, Sale-A-Bration and other promotions.
  • Qualify for cash bonuses, product bonuses, incentive trips and other awards.
  • Earn additional income (called a volume rebate) based on your monthly  product sales.
  • Encourage others to join your group (recruit) and receive additional compensation.
  • Enjoy 2 free months of a personalized Stampin’ Up! on-line store and blog (optional $12.95/mo. after trial).
  • Plus you will receive all of my tutorials for free for being part of my team.
Here is an easy link for when you are ready to join Stampin’ Up! and my team.  It is simple and all online.  CLICK HERE
Contact me at [email protected] with any questions you may have.


Sew It – Tutorial #384

Holy Mackerel!  I just received my Stampin’ Up pre-order from the new Occasions Mini Catalog that will be in effect from January 4, 2011 through April 30, 2011.   Just let me say, I fell in love with so many of the new stamp sets.  I purchased just about everything in the new mini as fast as I could.   You can probably tell by the photo below that I got a bit carried away. . . .   I love new rubber!

I cannot show you the complete stamp sets or embellishments prior to January 4th, but I am allowed to give you a sneak peep by using the new stamps in my projects.    Let me say “You sewers out there will be so very happy”.  The thread image is from an up and coming Stampin’ Up set “Sew Suite”.  I don’t even sew and I had to have the set, lol.

One announcement before I get started on the tutorial.  I have added the Jefferson, Louisiana to my Brayer Workshop calendar.

 CLICK HERE FOR THE DETAILS.

Let’s get started on this tutorial. . . . . .  . .

Supplies:

Stamps: Stampin’ Up Sew Suite and Boho Friend Wheel
Paper: Stampin’ Up Whisper White, Soft Suede and Early Espresso
Ink: Stampin’ Up Baja Breeze, Not Quite Navy and Basic Black
Accessories: Stampin’ Up Markers – So Saffron, More Mustard, Pretty in Pink, Regal Rose, Rose Red, Certainly Celery, Old Olive, Always Artichoke, River Rock, Soft Suede, Chocolate Chip and Crumb Cake, Blender Pen, Brayer, Clear embossing powder, heat gun, Versamark pad and marker, Hodgepodge hardware Silver, 1″ circle and Designer Label Punches, White Gel Pen


The Stampin’ Up USA Idea book and Catalog is here.   For your copy, please send a check for $9.95 to Michelle Zindorf, P.O. Box 116, West Alexandria, OH 45381 or send it via paypal to [email protected] USA only.     My current customers will receive a new Occasions Mini Catalog automatically from me.   Not a current customer and want a free copy of the new Occasions Mini Catalog ?  E-mail your mailing address to [email protected] and I will get one in the mail to you.  )  Are you getting inspiration from this blog?   One way you can help support it is to order your Stampin’ Up products through me.   Click HERE to place an order.    Want to become a Stampin’ Up Demonstrator , receive a 20% discount on product and earn instant income on orders?  Consider being part of my Stampin’ Up Team and start your own business or become a Hobby Demo just for the discount.  Click HERE for more information.

Stamped the thread stamp on a 3.25″ x 6.25″ piece of Whisper White by first loading the stamp with Versamark and then with Basic Black ink before stamping it. Repeated 2 more times.

Heat embossed the images using clear embossing powder and a heat gun.

Colored the middle of the green spool using a Certainly Celery marker.

Colored in Old Olive marker and smudged the edge lines (where the two colors meet) using a Blender Pen.

Added Always Artichoke marker to the sides of the spool and smudged the edges using a Blender pen.

Repeated the process using a light, medium and dark color of pink for the second spool.  Used Pretty in Pink marker, Regal Rose marker, Rose Red marker and a Blender Pen.

Repeated again using River Rock marker, Soft Suede marker, Chocolate Chip marker and a Blender pen.

Added Crumb Cake Marker to each spool end.

Added Chocolate Chip marker to each edge of the spools and blended the edges of color with a Blender Pen.

Sorry Folks, I changed my mind and decided to give the third spool a yellow cast by adding So Saffron marker to the middle of it and More Mustard to the edges.  Yeah, that’s better, looks like gold thread now.  🙂

Colored over the spools with a Versamark marker, making sure not to go outside of the image lines and heat embossed them using clear embossing powder and a heat gun.   Repeated again to make sure the images were fully covered and protected.   The should look like glass.

Maked the top of the card stock and brayered Baja Breeze at the top of the unmasked area to create the counter.

Brayered Not Quite Navy at the top of the unmasked area, not covering the Baja Breeze ink entirely.

Removed the mask and buffed off my images lightly to remove any ink on them. 

Masked the bottom of the card stock.

Stamped my unmounted Boho Friend Wheel using Baja Breeze ink.

Brayered Baja Breeze ink at the top of the card stock.

Sponge Not Quite Navy ink on all the edges of the card stock.

Add a bit of white gel pen to the wood part of the spools to create a highlight.  Rubbed the gel pen a bit when it is wet to soften.

Added Soft Suede and Early Espresso card stock panels and a 1/2″ strip of Soft Suede to the middle left side.

Punced a Design Label punch from Baja Breeze card stock and a 1″ circle punch from Soft Suede card stock.

Added a some Stampin’ Up Silver Hodgepodge Hardware.

Here is the finished card measuring 4″ x 8.5″. 

I hope you like this project. 

May your day be filled with new and exciting things.

Until my next post.. . . . . .  . .

Hugs,

Michelle

 dsc04164-2.jpg  Get ready for Brayer Workshops!  I am coming to the following locations, click the location name for more information.

Columbus, Ohio

Fayetteville, Tennessee near Nashville, TN & Huntsville, AL

Tucson, Arizona

Virginia Beach, Virginia

Houston, Texas

Wichita, Kansas

Syracuse (Bridgeport), New York

St. Peters, Missouri

La Porte, Indiana

Orlando (Davenport), Florida

St. Cloud, Minnesota

Colorado Springs, Colorado

Ottumwa, Iowa

Cleveland (Euclid), Ohio

Staley , North Carolina (South of Greensboro)

Monroe, Connecticut

Sturgis, South Dakota

Leesburg, Florida

Montreal, Wisconsin

Savannah, Georgia

Lincoln, Illinois

Jefferson, Louisiana (New Orleans Area)

Here is a link to my workshop calendar where you can see all of my travel schedule and to get info on beginner and advanced Brayer workshops:   https://zindorf.splitcoaststampers.com/workshop-calendar 

Don’t see a workshop in your State?  Interested in hosting the workshops in your area in 2012?   Click HERE to get hostess information.

Link to my Stampin’ Up website where you can order all of your must have Stampin’ Up products from me 24-7:  https://michellezindorf.stampinup.net

Frequently asked questions answers:  https://zindorf.splitcoaststampers.com/frequently-asked-questions/

Razzleberry Trees – Tutorial #342

dsc04220.JPG

I’m feeling a bit back in my element this morning.  I have my stamp studio all cleaned up.  I don’t know about you but I cannot work in a messy space.  My mind has to be clear of all that.    In fact, I have to clean up my work space entirely before I can start a new project.  Must the Virgo in me, plus I have issues, lol.  🙂

I’ve also been packing and creating some new advanced projects to take with me to North Chili, NY on Thursday.   Woohoo!  I’m going up a day early and my friend, Gail Emmons and I will be taking the day Friday to go to Niagara Falls (Canadian side, of course) to take in the sites and a little R & R.

Oh yeah, about today’s project, I experimented a little with sponging in clouds with a cotton-ball.  The effect is pretty, if i have to say so myself.

Also, I unwrapped my Rich Razzleberry ink pad that I have had for just about a year.  WHAT WAS I WAITING FOR!!!!  Rich Razzelberry is totally yummy.  Check it out!

Let’s get started. . . . . . .  .

Supplies:

Stamps: Stampin’ Up! Lovely as a Tree and Vintage Vouge
Paper: Stampin’ Up! Whisper White, Always Artichoke and Rich Razzelberry
Ink: Stampin’ Up! Always Artichoke, Rich Razzelberry, Pixie Pink, Basic Black, Summer Sun, So Saffron, Close To Cocoa and Whisper White
Accessories: Stampin’ Up! Gold Brads, Brayer, Post it Notes, Basic Black marker and a cotton ball

Live in the USA and need a copy of the Summer Mini Catalog?  E-mail your mailing address to [email protected] and I will get one in the mail to you.  )  Are you getting inspiration from this blog?   One way you can help support it is to order your Stampin’ Up products through me.   Click HERE to place an order.  Click HERE to check out the Stampin’ Up! catalogs.  Want to become a Stampin’ Up Demonstrator , receive a 20% discount on product and earn instant income on orders?  Consider being part of my Stampin’ Up Team and start your own business.  Click HERE for more information.

  dsc04224.JPG

Mask the bottom 1″ of a 4″ square piece of Whisper White with a post it note.

dsc04200.JPG

Brayered So Saffron from the top of the card stock down to the post it note.

dsc04202.JPG

Brayered Summer Sun ink at the bottom of the unmasked area.

dsc04203.JPG

Brayered Pixie Pink ink at the top of the card stock.

dsc04204.JPG

Brayered Rich Razzelberry ink at the top of the card stock, not covering the Pixie Pink ink entirely.

dsc04205.JPG

Using a cotton-ball, dabbed Craft White ink in the sky area.

dsc04206.JPG

Using a So Saffron ink spot, streaked some So Saffron ink from the right side into the middle of the card stock.

dsc04207.JPG

Took the mask off and turned it around and masked the sky area.  Brayered Summer Sun ink at the bottom of the card stock.

dsc04208.JPG

Removed the mask.  Using the So Saffron ink spot edge and a upward motion, put in little grasses.

dsc04209.JPG

Using a More Mustard ink spot and a upward motion, put in more grasses.

dsc04210.JPG

Using the edge of a Close to Cocoa ink spot and a side to side motion put in a bit of grasses.

dsc04211.JPG

I wanted to stamp the trees from the Stampin’ Up set Lovely as a Tree with out stamping the bottom of the stamp.  So I covered the bottom of the stamp with a post it note, ink the stamp with Basic Black ink and then removed the post it note and stamped the image.

dsc04212.JPG

dsc04213.JPG

Extended the tree trunks down to the ground with a Basic Black marker.

dsc04214.JPG

Sponged Always Artichoke ink around the edges of the main image panel and a 5.25″ Square panel of Rich Razzelberry card stock.

dsc04217.JPG

Assembled my card front by adding Always Artichoke and Rich Razzelberry panels.  Added 4 silver brads.

Stamped the stamp from the Stampin’ Up! set Vintage Vouge with Always Artichoke ink around the edge of the card front.

dsc04218.JPG

Sponged Always Artichoke ink very heavy around the edges of the card front.

dsc04219.JPG

Here is the finished card measuring 5.5″ square.

dsc04220.JPG

I hope you like this project and are inspired to try putting a few clouds in your scenes.

May your day be full of energy and light.

Until my next post. . . . . . .

Huge Hugs,

dsc03326-2.jpg   Get ready for Brayer Workshops!  I am coming to the following locations, click the location name for more information.

North Chili, New York (near Rochester)

Kenova (Huntington), West Virginia

Middleburg Heights, Ohio 

Venice, Florida

Grinnell, Iowa

Piedmont, Alabama (Near GA border close to Cedartown)

Auburn, Washington (near Seattle)

Elk Grove Village, Illinois

Savannah, Georgia

Atlanta, Georgia

Soledad, California

Tucson, Arizona

Virginia Beach, Virginia

Houston, Texas

Here is a link to my workshop calendar where you can see all of my travel schedule and to get info on beginner and advanced Brayer workshops:   https://zindorf.splitcoaststampers.com/workshop-calendar 

Link to my Stampin’ Up website where you can order all of your must have Stampin’ Up products from me 24-7:  https://michellezindorf.stampinup.net

Frequently asked questions answers:  https://zindorf.splitcoaststampers.com/frequently-asked-questions/ 

On a Cliff – Tutorial #258

dsc00793-small.jpg

Since there was a long Holiday weekend here in the United States I will be messed up all week, not knowing what day of the week it is.  Like today, I woke up thinking it is Monday.  When in fact it is Tuesday, which my husband was quick to point out when I told him the trash needed to go to the end of the driveway, smarty pants *#@)$.   You cannot change the routine of this old dog without throwing me for a loop, lol. 

Although I cannot blame the holiday for this, last week I stuck the dog’s bowls in the refrigerator instead of in the sink to be washed, don’t ask me why, lol.  Of course, my husband was the one to discover that too.  He found that really amusing.  So I’m losing my mind, as long as I don’t lose my brayer, ink pads and stamps my world will be good in my opinion.  🙂

Enough of my ramblings, let’s start the tutorial already. . . . . .

Supplies:

Stamps: Stampin’ Up Thoughts & Prayers
Paper: Stampin’ Up Whisper White, Basic Black & Bashful Blue
Ink: Stampin’ Up Basic Black, Apricot Appeal, Sahara Sand, Not Quite Navy & Tempting Turquoise
Accessories: White Gel Pen, Silver Brads, Post it Notes, Stampin’ Up Ticket Corner Punch, Brayer, Stampin’ Up 1 1/4″ Circle Punch

Want a free 39 page, Stampin’ Up Mini catalog?  If you are a resident of the United States,  just e-mail your mailing address to me and I will get one in the mail to you.  Are you inspired by this Blog?  One way you can help support this blog is by ordering your Stampin’ Up products through me.   You can order from me 24-7 from this link:  https://michellezindorf.stampinup.net or e-mail me at [email protected]  If you are within the United States.  Want a copy of the brand new 2009-2010 Stampin’ Up Catalog for $9.95, just e-mail me at [email protected] and I will get one in the mail to you.  Want to become a Stampin’ Up Demonstrator and earn instant income?  Consider being part of my Stampin’ Up Team.  Also check out the Stampin’ Up specials, click this link to check it out:  https://www.stampinup.net/esuite/home/michellezindorf/promotions

dsc00795.JPG

Punched a 1 1/4″ circle from the sticky part of a Post it Note and then used it as a mask for the moon.  I put the mask on a 3.5″ x 5.5″ piece of Whisper White card stock.

dsc00779.JPG

Brayered Tempting Turquoise ink on the card stock, starting at the top of the card stock.

dsc00780.JPG

Brayered Not Quite Navy ink at the top of the card stock, not covering the Tempting Turquoise ink entirely.

dsc00781.JPG

Brayered a bit of Sahara Sand ink at the bottom of the card stock.

dsc00782.JPG

Removed the Post it note mask and stamped the tree from the Stampin’ Up set “Thoughts & Prayers” with Basic Black ink.

dsc00783.JPG

Ripped a cliff shape from a large Post it note.

dsc00784.JPG

Put the Post it note mask on the card stock and sponged Basic Black ink on the create the cliff.

dsc00785.JPG

Sponged in a circular motion Apricot Appeal ink over the moon.

dsc00786.JPG

Colored the leaves on the tree in with a White Gel Pen.

dsc00787.JPG

Used my Big Shot Die Cut Machine and the Dots Texture Plate on a 4 7/8″ x 6 3/8″ piece of Whisper White Card stock.

dsc00788.JPG

Used the Stampin’ Up Ticket Corner punch on my main image panel, a basic Black panel and a Bashful blue panel.

Assembled the panels and added white ribbon.

dsc00789.JPG

Used my Stampin’ Up piercing tool to start my brads.  Added 4 silver brads.

dsc00790.JPG

Assembled the card and here it is finished measuring 5″ x 6.5″.

dsc00793-small.jpg

May your day be filled with the things and people you love most.  🙂

Until my next post. . . . .

Huge Hugs,

Michelle

dsc04306-tiny.jpg Get ready for Brayer Workshops!  I am coming to:

Castro Valley, California 

Yardley, Pennsylvania (near Philadelphia) 

Knox, Maine

Akron, Ohio

Broomfield, Colorado

Moore, Oklahoma

Nashville, Indiana

Portland, Michigan

2010

Dayton, Ohio at Marco Paper

Phoenix, Arizona

Monroe, Louisiana

Jacksonville, Florida

St. Louis, Missouri

Mechanicsville, Virginia

Raleigh, North Carolina 

Colleyville, Texas

Colorado Springs, Colorado

Boise area of Meridian, Idaho

Riverside, California (Southern California)

Salem, Oregon

Wheaton, Illinois

St. Cloud, Minnesota

Rockville, Maryland

North Chili, New York (near Rochester)

New Johnsonville, Tennessee

Helena, Montana

Middleburg Heights, Ohio

Venice, Florida

Here is a link to my workshop calendar where you can see all of my travel schedule and to get info on beginner and advanced Brayer workshops:  https://zindorf.splitcoaststampers.com/workshop-calendarLink to my Stampin’ Up website were you can order all of your must have Stampin’ Up products from me 24-7:  https://michellezindorf.stampinup.netFrequently asked questions answers:  https://zindorf.splitcoaststampers.com/frequently-asked-questions/

In the Fog (Nontraditional colors) – Tutorial #239

dsc00088.JPG

Are you in the Fog today? I am, lol.  This is a photo I snap this morning.  It is a scene we see often out in the country where I live.  Fog, fog, fog, I love it when I don’t have to drive in it.  🙂 

Barn look familiar?  It is the barn in my blog banner.  I painted the pastel painting a few years ago and although the painting was sold I still use it as my banner. 

Anyway, the fog made me want to create a foggy type scene today in my tutorial.

dsc00101.JPG

Sometimes I feel like I am in a rut so today I picked up some nontraditional colors to create my scene with.  I also kept pulling out stamp sets.  I used four Stampin’ Up sets, using one image out of each, lol. 

By using all of those stamps I must have been making up for taking the day off yesterday.  I was feeling a bit burned out so I took the day off completely “Mental Health Day”.   My Husband, Russ got to hang out with me too.  He proclaimed the day “No Fretting Thursday”. Which meant we agreed to not talk about work or home improvements not completed.  We also spent the day hopping from on Garage sale to another.  It was great!

So today I am back and refreshed, but have loads of things to do to prepare for my Dayton, Ohio Workshops tomorrow.  I will be teaching at Marcos Paper, which I am always excited about doing.  If you have not been to Marcos before, you must make the trip if you can.  The store is a little piece of heaven for us stampers.   Here is a link to their website if you want to check out all the great things they have going on there or to register for my workshops:  https://www.marcopaper.com/.   For those of you who will be attending the workshops tomorrow, I have some really fun and exciting projects for you.  All new projects and kit for you Advanced Students. 🙂  There are a couple of spots available if you want to register, call Marco’s at 1-888-433-5239.  FYI, from the looks of my calendar I may not make it back to Marco’s for months. 

I also have a new workshop location to add to my calendar.  I will be teaching my brayer workshops in the Boise area of Meridian, Idaho on April 24-25, 2010, Woohoo!!  If interested in information/registration, please e-mail me at [email protected].

 Now let’s get started on that tutorial. . . .

Supplies:

Stamps: Stampin’ Up Itty Bitty Background, Pendant Park, Thoughts & Prayers, Lovely As a Tree
Paper: Stampin’ Up Whisper White, Basic Black, Bordering Blue Pink Pirquette
Ink: Stampin’ Up Pink Pirquette, Rose Red, Bravo Burgundy, Bordering Blue, Basi Black
Accessories: Versmark Pad, Brayer, Stampin’ Up Piercing Tools, White Gel Pen, Silver Brads, Post it note, Sponges, Big Shot Die Cut Machine, Square Texture Plate, Clear embossing Powder, Heat Gun

 Are you inspired by this Blog?  One way you can help support this blog is by ordering your Stampin’ Up products through me.   You can order from me 24-7 from this link:  https://michellezindorf.stampinup.net or e-mail me at [email protected]  If you are within the United States.  Want a copy of the brand new 2009-2010 Stampin’ Up Catalog for $9.95, just e-mail me at [email protected] and I will get one in the mail to you.  Want to become a Stampin’ Up Demonstrator and earn instant income?  Consider being part of my Stampin’ Up Team.  Through August 31 you can become a Stampin’ Up Demonstrator for as little as $85 with the mini kit.  Also Stampin’ Up is now having a weekly special, click this link to check it out:  https://www.stampinup.net/esuite/home/michellezindorf/promotions

dsc00102.JPG

Stamped the Tree from the Stampin’ Up set “Thoughts & Prayers” by first loading the stamp with Versamark, then Pink Pirquette and then tapped on some black ink ont he trunk before stamping the image on a 3.5″ x 4.5″ piece of Whisper White card stock.

dsc00071.JPG

Heat embossed the image using clear embossing powder and a heat gun.

dsc00073.JPG

Loaded Bordering Blue ink only on the tree part of the “Lovely As a Tree” stamp, omitting the ground area of the stamp.   Stamped it twice at the top of the card stock.

dsc00074.JPG

Sponged Bordering Blue ink a the top of the card stock.

dsc00075.JPG

Sponged Rose Red ink at the top of the tree.

dsc00076.JPG

Sponged Pink Pirquette ink below the Bordering Blue ink.

dsc00077.JPG

Sponged Rose Red ink below the Pink Pirquette ink.

dsc00078.JPG

Sponged Bordering Blue ink at the base of the large tree to create a shadow.

dsc00079.JPG

Stamped the bench from the new Stampin’ Up set “Pendant Park” twice with Basic Black ink.

dsc00081.JPG

Masked the top of the card stock with a post it note and sponged Bordering Blue ink at the base of the benches to create a shadow for them.

dsc00083.JPG

Used the Speckle stamp and Rose Red ink to added the speckles at the bottom of the card stock.

dsc00084.JPG

Sponged a bit of Bravo Burgundy ink at the bottom of the card stock and the very top of the tree.

dsc00085.JPG

Added White Gel Pen highlight to the tree, squirrels and benches.

dsc00086.JPG

Sponged Basic Black ink all around the edge of the card stock.

dsc00089.JPG

Used my Big Shot die cut machine and the Squares texture plate to emboss a Bordering Blue panel.

dsc00090.JPG

Brayered Bordering Blue ink over the embossed panel to bring out the texture more.

dsc00091.JPG

Sponged Basic Black ink around the outside edges of the Bordering Blue and Pink Pirquette panels.

dsc00093.JPG

Used my piercing tool to start my holes for the four silver brads.

dsc00094.JPG

Added a thin strip of black card stock to the Bordering Blue panel and then pierced holes down the center of it. 

dsc00095.JPG

Used my white gel pen again to create the faux stitching on the card by dragging my pen from one pierced hole to the next, stopping in each hole with the pen.

Here is the complete card measuring 5.5″ square.

dsc00101.JPG

May your day be filled with nothing but clear skies!

Until my next post. . . . . . .

Huge Hugs,

Michelle

dsc09767tiny.jpg  Get ready for Brayer Workshops!  I am coming to:

Dayton, Ohio

Columbia, Missouri

Lynchburg, Virginia

Greenwood, Indiana

Castro Valley, California

Yardley, Pennsylvania (near Philadelphia)

Knox, Maine

Akron, Ohio

Broomfield, Colorado

Moore, Oklahoma

Nashville, Indiana

Portland, Michigan

2010

Phoenix, Arizona

Monroe, Louisiana

Jacksonville, Florida

St. Louis, Missouri

Mechanicsville, Virginia

Raleigh, North Carolina

Colleyville, Texas

Colorado Springs, Colorado

Boise area of Meridian, Idaho

Riverside, California (Southern California)

Salem, Oregon

Wheaton, Illinois

Rockville, Maryland

North Chili, New York (near Rochester)

New Johnsonville, Tennessee

Helena, Montana

Middleburg Heights, Ohio

Venice, Florida

Here is a link to my workshop calendar where you can see all of my travel schedule and to get info on beginner and advanced Brayer workshops:  https://zindorf.splitcoaststampers.com/workshop-calendar

Link to my Stampin’ Up website were you can order all of your must have Stampin’ Up products from me 24-7:  https://michellezindorf.stampinup.net

Frequently asked questions answers:  https://zindorf.splitcoaststampers.com/frequently-asked-questions/

To a Warmer Place – Tutorial #174

dsc07640.JPG

Here in Ohio we have had a bit of snow of late.  I am ready for some much warmer weather so I created it with this card.  Don’t you wish you were there sitting under an umbrella, drinking your favorite drink and listening to the Ocean?  Ahhh, I think I need a vacation in a much warmer place, lol.   A girl can dream, right?

The stamp set I used today is another I am saying farewell to.  It is Stampin’ Up 2005 Do the Hula.    If you are interested in any of the retired sets I have for sale, please check out my sales page at this link:  https://zindorf.splitcoaststampers.com/things-for-sale/

3-small.jpgOne more thing before we get started on the tutorial.  The Saturday morning Beginner Brayer Workshop in Wheaton, IL on March 14th has only one more spot available.  There are still a few spots open for the morning and afternoon Beginner Brayer workshops in Wheaton, IL on March 13th.  You can check out all of the locations I will be at this link:  https://zindorf.splitcoaststampers.com/workshop-calendar/

Now on to warmer weather, lol.

Supplies:

Stamps: Stampin’ Up Do the Hula
Paper: Stampin’ Up Whisper White, So Saffron, Old Olive & Tempting Turquoise
Ink: Stampin’ Up Not Quite Navy, Creamy Caramel, So Saffron, Tempting Turquoise & Basic Black
Accessories: Stampin’ Up Markers, Sponge, Brayer, Versamark Pad and Marker, Clear embossing Powder and a heat gun, Ribbon, Gold Brads, Stampin’ Up Photo Corner Punch

dsc07641.JPG

Stamped the Hula Girl and the Tree by first loading the stamps with Versamark and then Basic Black Dye based ink before stamping them.  Heat embossed both images using clear embossing powder and a heat gun.

Note:  If you use black pigment ink you do not have to use the Versamark with it.  I only do this method because I use all Dye Based inks and embossing powder doesn’t stick well to it.

dsc07616.JPG

dsc07617.JPG

dsc07618.JPG

dsc07619.JPG

Colored the girls skin and the tree with Creamy Caramel marker.

dsc07620.JPG

Colored the leaves of the tree and her skirt with Certainly Celery marker.

dsc07621.JPG

Added some darker tones to the Leaves of the tree and her skirt with an Old Olive Marker.

dsc07622.JPG

Blended the greens together a bit by going over them with the Certainly Celery marker again.

dsc07623.JPG

Added Close to Cocoa marker to the left side of the tree and the shadows on her skin.

dsc07624.JPG

Blended her skin and the tree browns together by going over the hard lines between the two colors with the Creamy caramel marker.

dsc07625.JPG

Colored her top with a Real Red marker.

dsc07626.JPG

Colored her flowers with a Pretty in Pink Marker.

dsc07627.JPG

Added Rose Red marker to the center of the flowers.

dsc07628.JPG

Colored her instrument with a Close to Cocoa marker.

dsc07629.JPG

Added Chocolate Chip marker to the under side of the instrument.

dsc07630.JPG

Colored over both the tree and the Hula Girl with a Versamark Marker and heat embossed the images using clear embossing powder and a heat gun.

dsc07631.JPG

dsc07632.JPG

Now the fun begins, at least for me anyway.

Brayered So Saffron ink at the bottom of the card stock.

Oops!  Missed a shot. I flipped the card stock around and brayered Tempting Turquoise at the top 2/3rds of the card stock.

dsc07633.JPG

Masked the sky area of the card stock with a Post It Note.

dsc07634.JPG

Sponged Not Quite Navy in a circular motion at the edge of the mask, just going onto the card stock.

dsc07635.JPG

Removed the mask.

dsc07636.JPG

Brayered Creamy Caramel ink at the very bottom of the card stock to give the sand some shading.

dsc07637.JPG

Added a few layers of card stock, brads, ribbon and two corner punches and here you have the finished card measuring 6 5/8″ x 5 1/8″.

dsc07640.JPG

I hope this inspires you to warm up your summer stamps today.

May your day be filled with warm thoughts.

Until my next post. . . . . . . . . .

Hugs,

Michelle

Links to all my tutorials can be found here:  https://zindorf.splitcoaststampers.com/tutorials-ive-written/

Here is a link to my workshop calendar if you want to get info on beginner and advanced Brayer workshops:  https://zindorf.splitcoaststampers.com/workshop-calendar

Frequently asked questions answers:  https://zindorf.splitcoaststampers.com/frequently-asked-questions/

Country Home – Tutorial #168

dsc07444.JPG

Hey Everyone!  I hope you are having a terrific Saturday.  I love Saturdays because I get to slow down and take a bit more time playing with stamps and ink.

Before we get started I wanted to say a big hello to you readers in Illinois who have already signed up for my beginner and advanced brayer workshops in March.  I can’t wait to get there! 

I have updated my Brayer Workshop calendar so check it out if you are interested in attending one.  Here is the link:  https://zindorf.splitcoaststampers.com/workshop-calendar/

Now on with the tutorial.   🙂

Supplies:

Stamps: Stampin’ Up Essence of Love and Holidays & Wishes, and Cornish Hertiage Farms Primitive Beginnings
Paper: Stampin’ Up Whisper White, Really Rust, More Mustard and Baja Breeze
Ink: Stampin’ Up Baja Breeze & More Mustard, Adirondack Ginger, Pebble, Espresso & Lake Mist
Accessories: Versamark Pad and Marker, Brayer, Clear embossing Powder, White Gel Pen, Heat Gun, Black Marker, Prismacolor Markers

dsc07447.JPG

Stamped weeds twice by first loading the stamp with Versamark and then Ginger ink before stamping it.  Heat embossed the images using clear embossing powder and a heat gun.

Note:  When building a scene using emboss resist, remember to start with your foreground images then the middle images and then put in your back ground etc.  In other words work front to back.  🙂

dsc07422.JPG

dsc07423.JPG

Stamped house by first loading the stamp with Versamark and then Pebble ink before stamping it.  Heat embossed the image using clear embossing powder and a heat gun.

dsc07424.JPG

dsc07425.JPG

Colored the front of the house using an Oatmeal Prismacolor marker.

dsc07426.JPG

Colored the right side and the bottom of the house with a Khaki colored Prismacolor Marker.

dsc07428.JPG

Added Light Umber marker to the bottom right side of the house.

dsc07429.JPG

Colored the windows on the right side of the house with a black marker.

dsc07430.JPG

Added Cool Grey 50% marker to the windows at the front of the house and decided to color the right side of the house entirely with Light Umber Marker to make it much darker.

dsc07431.JPG

Colored over the entire house with a Versamark marker and heat embossed it using clear embossing powder and a heat gun.

dsc07432.JPG

dsc07433.JPG

Sponged More Mustard using a circular motion at the bottom of the card stock.

dsc07434.JPG

Brayered Lake Mist ink at the top of the card stock.

dsc07435.JPG

Brayered Baja Breeze ink at the very top of the card stock not covering the Lake Mist ink entirely.

dsc07436.JPG

Sponged some lake mist ink at the top of the More Mustard ink.

dsc07437.JPG

Sponged Espresso ink under the house and in the bottom left corner of the card stock.

dsc07438.JPG

Sponged some Baja Breeze ink at the top of the sky area to give it some interest and a bit above the gray around the house.

dsc07439.JPG

Added some black outlining to just a few of the weeds to bring them forward in the picture.

dsc07440.JPG

Added some white highlights to the weeds with a White Gel Pen.

dsc07441.JPG

Added some simple card stock layers and some brads in each corner.

dsc07442.JPG

Decided to add a sentiment which I hardly ever do.  I stamped it with Espresso ink and I used a Stamp A Ma Jig to make sure I stamped it straight. 

dsc07443.JPG

Here is the finished card measuring 5″ x 6.5″.

dsc07444.JPG

Well I hope this tutorial has inspired you to try doing a scene using the emboss resist technique and layering  the embossed images. 

May your day be filled with tranquility.

Until my next post. . . . . . . . . . .

Hugs,

Michelle

Links to all my tutorials can be found here:  https://zindorf.splitcoaststampers.com/tutorials-ive-written/

Here is a link to my workshop calendar if you want to get info on beginner and advanced Brayer workshops:  https://zindorf.splitcoaststampers.com/workshop-calendar

Frequently asked questions answers:  https://zindorf.splitcoaststampers.com/frequently-asked-questions/