Monthly Archives: March 2008

The Search for the perfect White Gel Pen

dsc02631.JPG

I received an e-mail from Terri Honz “thonz on SCS”, she wanted to know what White Gel Pen I use.  Well Terri my current favorite is a White Gelly Roll Pen.  All it says on the side of it is Gelly Roll, Med, Sakura/Japan.  I picked it up at Michaels for around $2.00, if my feeble brain remembers right, lol.

I have purchased many white pens, most of them have clogged long before the ink was gone.  I have a really bad habit of using them on wet card-stock, over melted embossing powder, chalk, prismacolor pencils, etc., etc.

Stampin’ Up sells this other one shown in the picture above.  It’s a uni-ball Signo, medium point.  It is also a pretty good pen. 

I heard through the grapevine Ranger is coming out with a fantastic white pen, I suppose I will have to buy it so I can report to you here my findings.  You enablers, sigh. . . . . .

Sorry for the short post today.  I’m working on projects for the fan club gallery on SCS which will be unveiled the 15th.  Yikes!  the 15th and it’s almost here.  Gotta go!

Have a fantastically creative day!

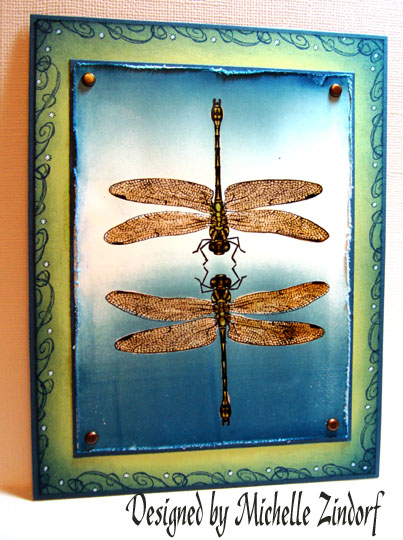
Dragonfly Dance Reflection – Tutorial

dsc02627.jpg

I was trying to create a dragonfly peering at his reflection, but I think I might have missed the mark on this one.  Oh well, here it is anyway. 

Supplies:

Stamps: Stampin’ Up Wonderful Wings & Delight in Life
Paper: Stampin’ Up Whisper White, Not Quite Navy and Certainly Celery
Ink: Stampin’ Up Basic Black, Soft Sky, Blue Bayou & Not Quite Navy
Accessories: Versamark Marker, Clear Embossing Powder, Heat Gun, Brayer, Brads, Sponge, White Gel Pen, Certainly Celery Marker

dsc02630.JPG

I didn’t need a mirror image stamp for this card.  The dragonfly looks pretty much the same no matter what direction it is stamped in.  Stamped two dragonflies facing each other with Basic Black.  (Note:  I recommend using Stazon Black instead of the Basic Black I used here).    You will see why in a later step.

dsc02614.JPG

Colored Dragonflies’ bodies with Certainly Celery marker.

dsc02615.JPG

Went over dragonflies with a Versamark marker and heat embossed them with clear embossing powder and a heat gun.

As you can see because I did not use Stazon black the dragonflies’ wings turned brown when I went over them with the Versamark marker.

dsc02616.JPG

Brayered Soft Sky at the bottom and at the top of the card stock leaving some white card stock showing behind one of the dragonflies.dsc02617.JPG 

dsc02618.JPG

Brayered on Blue Bayou the same way as I did the Soft Sky, but I did not cover all of the Soft Sky ink.  I’m working for a graduated look here.

dsc02619.JPG

dsc02620.JPG

Brayered Not Quite Navy the same as the last two steps, but did not cover all of the Blue Bayou ink.  Still working for a graduation in color.

dsc02621.JPG

Distressed edge of the card stock with a Tim Holtz distressing tool.  This gadget is so handy.  It makes quick work of distressing edges of the card stock.  All you have to do is put the edge of the card stock in one of the little nooks of the tool and run it back and forth.  Too easy!

I also sponged on Not Quite Navy ink at the distress edge to make it stand out more.

dsc02622.JPG

dsc02623.JPG

Cut a Certainly Celery card stock mat and stamped the swirl stamp around the edge of it.  I did not adhere the main image panel to it yet.  I don’t adhere anything until the final step in case I change my mind, as I often do, lol.

dsc02624.JPG

Sponged Not Quite Navy around edge of certainly celery card stock.

dsc02625.JPG

Colored in the dots in the border design with a White Gel pen.

dsc02626.JPG

Assembled the card and finished it off with brads.

Another card completed!

dsc02627.jpg

Thanks for following along with this tutorial today.  Hope you enjoyed it and will give it or one of my other tutorials a try.

Have a super day!

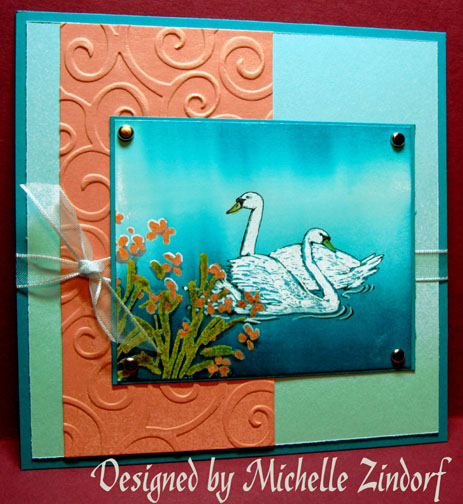
Spring Swans – Tutorial

dsc02608.jpg

I created a more Spring like card this morning. 

Supplies:

Stamps: Stampin’ Up retired sets Birds & Love Blooms
Paper: Stampin’ Up Whisper White, Groovy Guava, Cool Carribean, Taken with Teal
Ink: Stampin’ Up Basic Black & Groovy Guava, Adirondack Stream, Lettuce & Aqua
Accessories: Cuttlebug embossing folder, Brads, Ribbon, Versmark Pad, Yellow Ochre Prismacolor Pencil, White Gel Pen, Stampin’ Up markers Cameo Coral & Always Artichoke, Clear Embossing Powder, Heat Gun, Sponge, Stamp-a-ma-jig

dsc02606.JPG

Loaded Leaf stamp with Versamark and then Lettuce ink then stamped on Whisper White cardstock.  Heat embossed using clear embossing powder.

dsc02584.JPG

dsc02585.JPG

Loaded flower stamp with Versamark and then Groovy Guava ink then stamped it.  Heat embossed using clear embossing powder.

dsc02586.JPG

dsc02587.JPG

Brayered Aqua ink on top half of card stock.

dsc02588.JPG

Brayered Stream ink on Bottom of card stock and just a little on the top of the card stock.

dsc02589.JPG

Stamped Swans with Basic Black ink using a Stamp-a-ma-jig for placement. 

dsc02591.JPG

dsc02592.JPG

Wiped black ink off of embossed images using a paper towel. 

Colored beaks with a Yellow Ochre Prismacolor Pencil.

dsc02593.JPG

Colored the Swans in using a White Gel Pen.  Mark in the direction that the feathers would go in.  Stay inside the black lines so your Swans are separated.  It is OK for some of the blue background to show through.  It creates a water reflection effect on the birds.  Make sure your brayered ink is completely dry before doing this step.

dsc02595.JPG

Also use the White gel pen to trace beside the water ripples.

dsc02597.JPG

Used an Always Artichoke and Cameo Coral marker to create shadows on the flowers and leaves by highlighting under them.

Used the white gel pen to give a scenes of light to the tops of the flowers.

dsc02599.JPG

dsc02599.JPG

Sponged on Stream ink at the bottom of the card stock to darken the area.

dsc02600.JPG

Used Cuttlebug embossing folder on the Groovy Guava panel layer and assembled card.

Done!

dsc02608.jpg

This card did not photograph well at all.  I always have trouble with teal and guava showing their correct colors in photos.   Oh well, here it is anyway.

Hope you enjoyed this tutorial and feel inspired to get out your brayer and give it a try.

Have a super day!

Still Winter Card – Tutorial

dsc02577.jpg

I created this card and tutorial last night after checking out all the snow we received here in my neck of the woods.   We got a foot of snow and drifts of at least 4 foot.  Winter is not over in Ohio.

This is my man, best friend and love of my life, Russ clearing a path for me, as he put it “clearing the way for YOUR HIGHNESS”.  Too funny!

dsc02555.JPG

So, on with the winter scene tutorial without further ado.

Supplies:

Stamps: Stampin’ Up Trees Three, Baroque Motifs, Holidays & Wishes, Rubber Stampede Mirror Image Stamp
Paper: Stampin’ Up Whisper White, Blue Bayou, River Rock
Ink: Stampin Up’ Soft Sky, Blue Bayou, River Rock, Basic Black, Adirondack Lake Mist & Pebble
Accessories: Brayer, Sponges, Versamark Marker, White Gel Pen, Ribbon, Stamp-a-ma-jig, Post it note

dsc02583.JPG

I used my mirror image stamp.  It is made by Rubber Stampede.  You stamp any stamp on the solid rubber of the mirror image stamp then stamp the mirror image stamp on your paper and you got it, a mirror image.

dsc02562.JPG

I like to start off stamping my mirror image first.  I find it is easier to line the regular image up with it. 

Stamped Trees on mirror image stamp with Blue Bayou and then stamped the mirror image on Whisper White card stock.

dsc02564.JPG

Used my Stamp-a-ma-jig to line up tree image and stamped it with Basic Black ink.

dsc02565.JPG

dsc02566.JPG

Cropped the image and brayered Soft Sky ink over the Blue Bayou trees.

dsc02567.JPG

Brayered Lake Mist ink at top of black trees.

dsc02568.JPG

Sponged Pebble ink at top of card stock and sloped it down on the right side for interest.

dsc02569.JPG

Sponged Soft Sky under pebble sponging and at bottom of black trees.

dsc02570.JPG

Used the trusted torn Post-it-note as a mask to create a hard line where the ground meets the ice.  I sponged on Blue Bayou ink right at the torn edge of the Post-it-note. 

dsc02571.JPG

dsc02572.JPG

Removed Post-it-note and used my white gel pen in the crooks of the Black trees to create snow in the branches.  Put just a tiny bit in the Blue Bayou trees too.

dsc02574.JPG

Assembled card and decided I wanted the appearance of wind in the air so I stamped one of my favorite stamps, Baroque Motifs over all the layers with River Rock ink.   The River Rock ink did not show up well on the dark sky of the main image so I traced it with a Versamark marker to darken it.

dsc02576.JPG

There you have it another finished card. 

dsc02577.jpg

Thanks for joining me today for this tutorial.  Hope you have enjoyed seeing the process and will give it a try.

Hope your day is one of warmth and joy!

My Magical Brayer, NOT!

I get questions all the time about my brayer.  It’s a regular old Speedball brayer with a rubber roller, nothing magical about.  The roller, when new, was tan in color, but as you see it is stained black from lots and lots of use.  How do I get it to work so well for me?  Answer, lots and lots of use, lol.

dsc02492.JPG

I use Stampin’ Up – Stampin’ Mist and scrub pad to clean it after use.  

dsc02480.JPG

So there it is the not so glamorous or magical Zindorf brayer, lol.

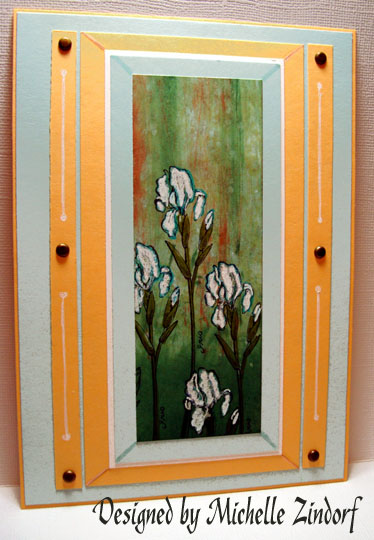
Iris Sympathy – Tutorial

dsc02534.jpg

I’m still working on sympathy cards.  I realize it may be a bit depressing, but we need them just the same.

Supplies:

Stamps: Stampin Up Long Stemmed
Paper: Stampin Up Whisper White, Soft Sky, Apricot Appeal
Ink: Stampin’ Up Re-inkers Soft Sky, Garden Green, Certainly Celery, Really Rust, Palette Noir Black
Accessories: Tim Holtz Alcohol ink applicator, felt, White Gel pen, Stampin’ Up Markers, Brads

dsc02531.JPG

Let me talk for a moment about a couple of supplies.  Below is the Tim Holtz Alcohol Ink Applicator.  This tool was made to be used with Alcohol inks but I found I can use my Stampin’ Up Re-inkers with this applicator to make interesting backgrounds.  You can purchase little pre-cut felt pads for around $4.99 to attached to the Ink Applicator.  Remember I’m cheap so I spend .25 cents on a piece of white felt and cut it myself.

dsc02510.JPG

My Stampin’ Up Re-inker storage is not fancy at all.  I bought these little baskets that will hold 18 re-inkers each for about a $1.  I like them because they are portable and can be moved from a shelf to my work area easily. 

dsc02511.JPG

I can also tilt a basket to the side to see what colors are in that row instead of picking through them.

dsc02512.JPG

On with the tutorial.

Dotted Applicator felt with Sky Blue re-inker and pounced it on Whisper White card stock.  I also did some circular smearing to cover the entire piece of card stock.  The pouncing motion gives you little dots, which I like.  Dots in a background give the impression of dabble light to me.

dsc02513.JPG

On the same applicator felt I put dots of Certainly Celery re-inker and pounced it on the card stock, not covering the whole card stock so the blue can show through.dsc02514.JPG

It’s hard to see in the photo, I apologize for the bad pic.  I put a stripe of Garden Green re-inker on the same applicator felt and then made stripes of color from the top of the card stock down in varying lengths.

dsc02515.JPG

I changed the felt for this step because I was afraid the colors would start getting muddy.  I dotted a fresh felt piece for the applicator with Really Rust re-inker and made stripes with it in varying lengths at the top of the card stock.

dsc02517.JPG

Put dots of Garden Green on the applicator felt and smeared it in a circular motion on the bottom of the card stock to create a shadow for the coming flowers.

dsc02518.JPG

Stamped flowers with Palette Nior Black ink.

dsc02519.JPG

You will want to learn from my mistake here.  I did not wait until the card stock was completely dry before coloring in my flowers with a white gel pen.  It did not do well and I have to repeat this step later to get whiter brighter flowers.  My suggestion let it dry completely or use your heat gun to dry it before coloring in the flowers.

dsc02520.JPG

Outlined flower petals with a Tempting Turquoise marker.

dsc02522.JPG

Colored in the flower stems with an Old Olive marker.

dsc02524.JPG

I cropped a lot of this off to get a more interesting shape.

dsc02525.JPG

Assembled card and drew lines at the corners of the layers to create a window look.  Also, went back over my flower petals with my white gel pen to make them stand out more.

Finished card.

dsc02534.jpg

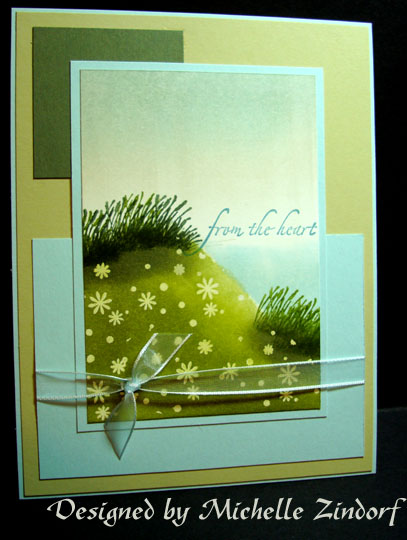
Grassy Hill Sympathy – Tutorial

dsc02503.jpg

I seem to never have enough sympathy cards on hand.  I keep a basket of cards at work for staff to purchase and for agency use.  Sympathy cards never last long in the basket I’m afraid.  I try to keep the price of my cards down.  I’m currently charging $4 a card.  I’m not into it for the money.  Stamping is my therapy.  It’s the creative process that gives me so much pleasure.  You will never see me do a 5 minute card (remember therapy, I need lots of it). With that being said, lets get started on today’s tutorial.

Supplies:

Stamps: SU Trees Three, SU Holdiays & Wishes, Grass stamp by Double D Rubber Stamps Inc.
Paper: Whisper White, Soft Sky, River Rock, Always Artichoke
Ink: Stampin Up Old Olive, Always Artichoke, Blue Bayou, Adirondack Ink Aqua, Lake Mist
Accessories: Versamark pad, SU markers Old Olive & Always Artichoke, Ribbon, Sponge, Brayer, Clear Embossing Powder, Post it notes, copy paper, Stamp-a-ma-jig

dsc02502.JPG

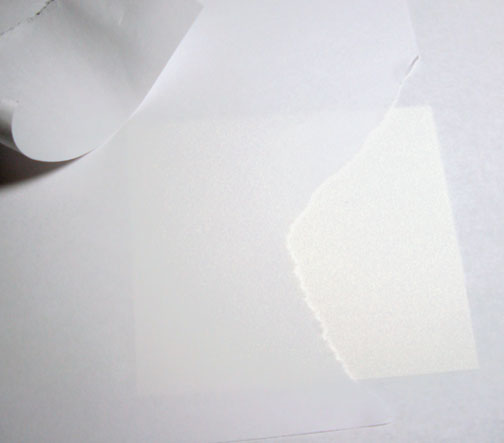
Starting with Whisper White card stock and a torn piece of copy paper as a mask for the sky area.  Keep the piece of paper you tore off.  We will use it in later steps. I just hold the copy paper in place.
dsc02466.JPG

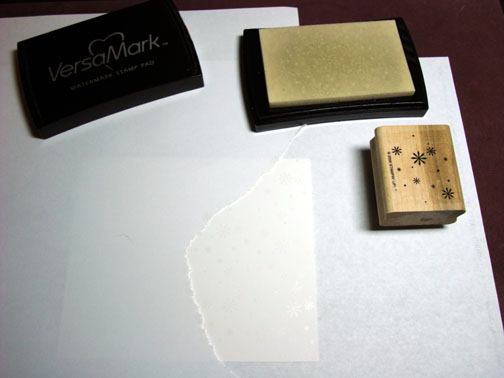
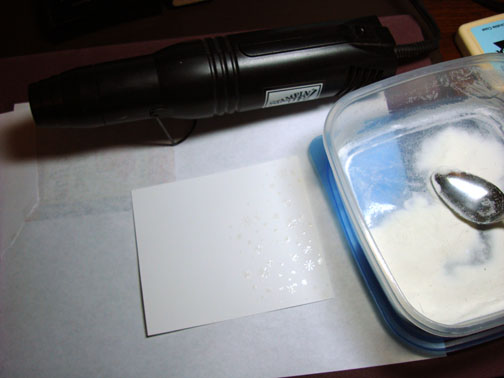
Stamped flowers from Trees Three set with Versamark and heat embossed using clear embossing powder.
dsc02468.JPG

dsc02473.JPG

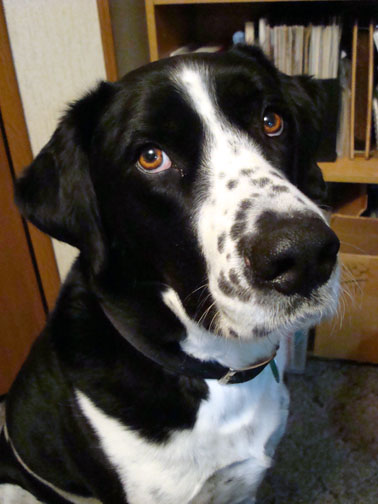
This is one of my stamping buddies, Lucas.  He is a German Short Haired Pointer/Great Dane mix and weighs about 110 lbs.  He is so darn cute and attentive this morning.  Thought I would share!
dsc02470.JPG

Sorry, back to the tutorial.

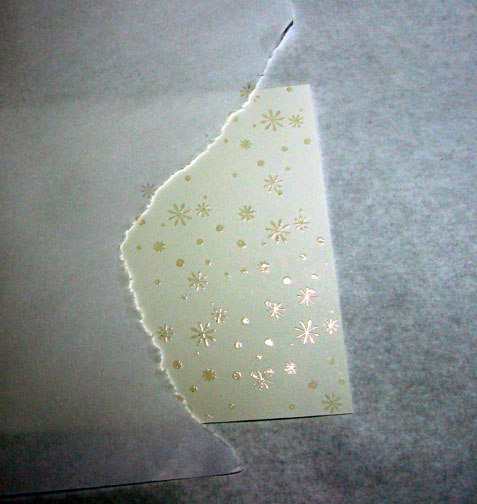
Return copy paper mask, lining it up as best you can.
dsc02474.JPG

Brayer on Old Olive ink.

dsc02475.JPG

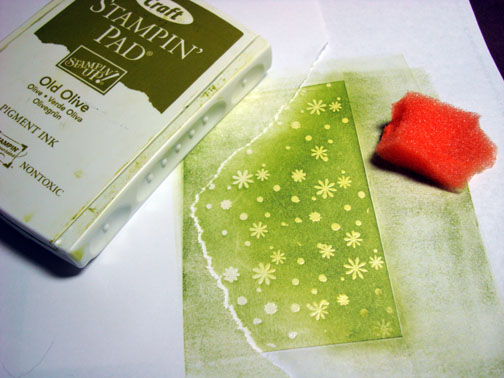
Now I sponged on more Old Olive ink to create a shadow on the hill.
dsc02476.JPG

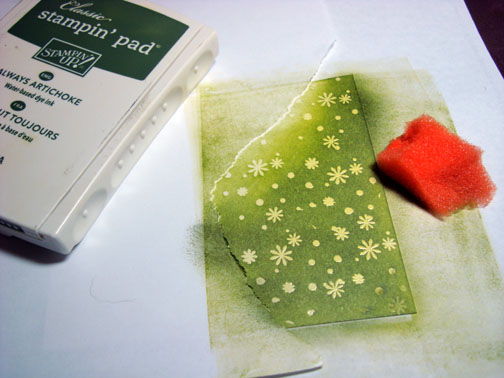
Sponged on Always Artichoke ink to get a graduation in shadow color.
dsc02477.JPG

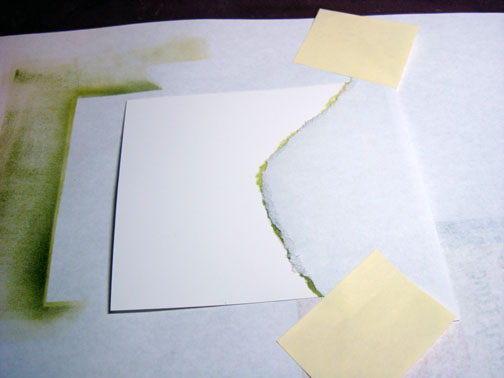
Remember the piece of copy paper I tore.  Well here we are using the chuck of it that was torn out to mask the hill area.  I tack it down with small post it notes on both sides to help keep the mask in place.
dsc02479.JPG

Brayer on Aqua ink to create lake.

dsc02481.JPG

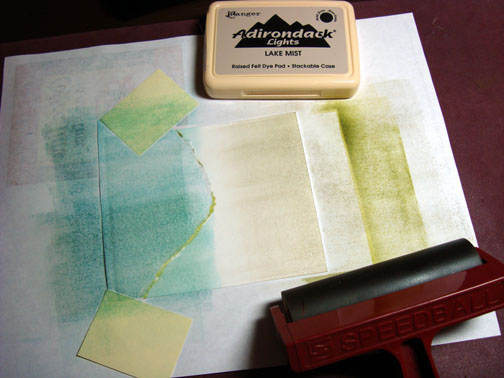
Turn piece around and brayer on Lake Mist ink for the sky, not brayering all the way down to the water color.  I like to leave white showing to brighten things up a bit.
dsc02482.JPG

Remove mask and wipe ink off the embossed flowers on the hill.
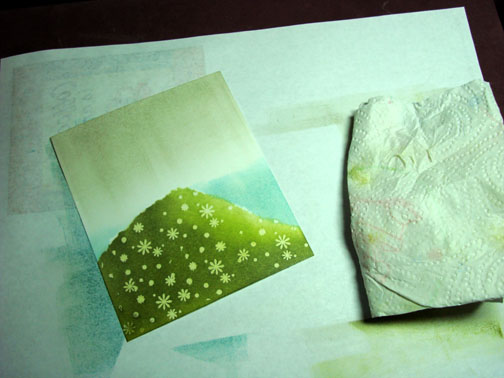
dsc02483.JPG

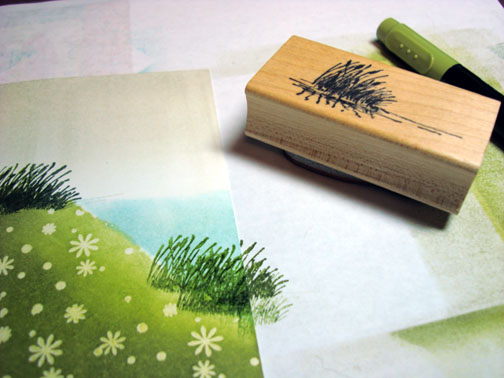
I just want to use the grassy part of this stamp in this step. So I colored in just the grass on the stamp with an Always Artichoke marker, huffed on it then stamped.
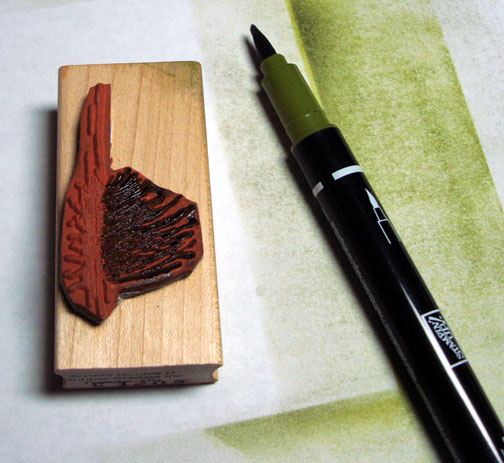
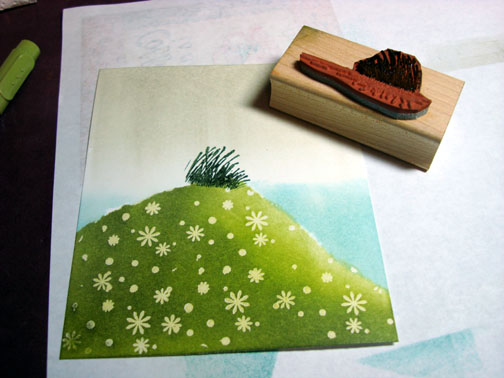
dsc02485.JPG

dsc02486.JPG

After stamping a line of grasses with Always Artichoke I stamped over them using an Old Olive marker to get some color variation in the grasses.
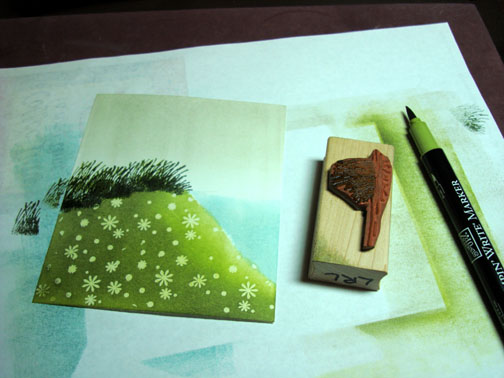
dsc02487.JPG

Stamp some more grasses using Old Olive marker at the bottom of hill.
dsc02488.JPG

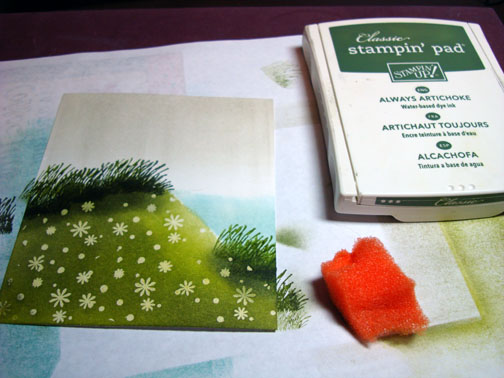
Used a sponge and Always Artichoke ink to sponge in the shadows at the base of the grasses.
dsc02489.JPG

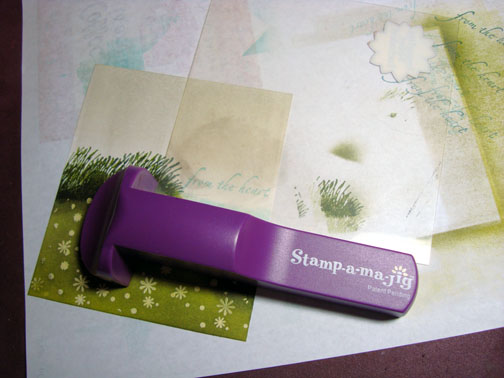
Put to much time into this card so far to mess up on the sentiment so I used my Stamp-a-ma-jig for placement.  Stamp my sentiment using Blue Bayou ink and stamping off on scrap paper once before stamping on the card stock to lighten the color of the image.
dsc02490.JPG

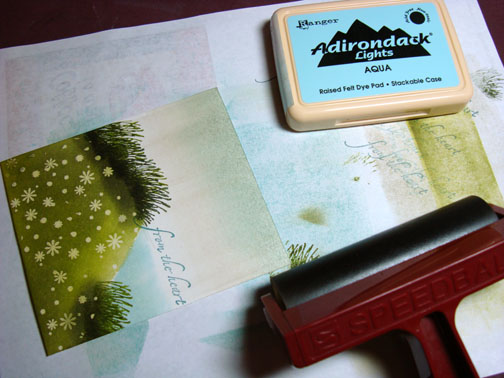
Thought the sky looked just a little drab, so I brayered in a bit of Aqua ink at the top of the sky area.
dsc02492.JPG

Completed card!

dsc02503.jpg

Hope you enjoyed this tutorial and will give it a try.

Thanks for visiting with me and Lucas today.  Have a wonderful day!