Monthly Archives: March 2008

Come join me at the Art & Soul Retreat!

Hello Everyone, I getting all geared up for my trip next month to California for the Art & Soul Retreat my sister and I  will be attending.  I’m so very excited!  I’ll be taking a 2 day class on making Nature Journals and a one day class to learn how to color black and white photos.

If you want to check out the retreat, here is the link:   

https://www.artandsoulretreat.com/Asilomar-2008.php

Check it out and attend.  I would love to meet you all!

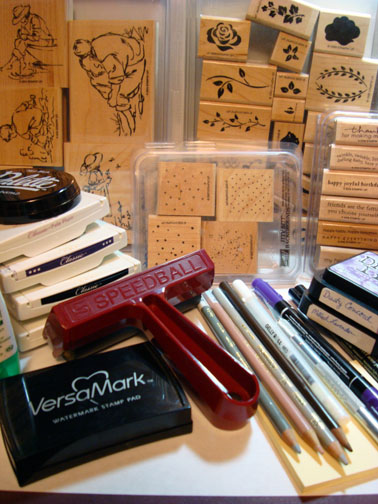
It’s so funny, I need to take some stamps for the nature journal class.  How on earth am I going to decide which ones to take and what inks!  You know the brayer will be shoved in the bag for sure.  I’m planning on taking one suit case just for art supplies, so what if I’m wearing the same outfits over and over again, lol.

Has anyone else prepared for something like this?  Do you have any suggestions?  Check out the link and look at all the things I have to haul from Ohio to California.  There is a supply list for each class, yikes!

I’ll share my projects with you all when I return from the trip, whether they are good or bad, lol.  You all are my friends now,  I can show you the yucky stuff too right? 

Anyway, I am extremely excited to be able to attend this retreat!   Packing suggestions are so very welcome.

One more thing, I already have another tutorial done.  I will be posting it tomorrow.  I haven’t made a card without doing a tutorial on it in over a month.  There has been such an over whelming response to this blog.  I had over 17,000 hits in a month and one day.  Woohooo!  Thanks everyone for your kind words and support this last month. 

Let’s go to the Beach – Tutorial

dsc02746.jpg

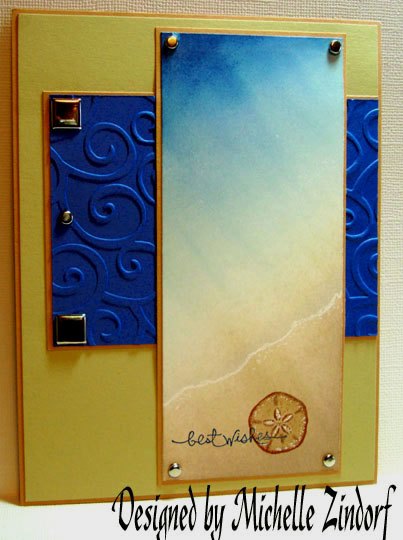
The sun was actually shining here in Ohio yesterday and it makes me long for warm summer days.  Here is a little piece of a beach scene to warm you this morning.  Let’s get started on today’s tutorial.

Supplies: 

Stamps: Stampin’ Up Stipple Shells and Short & Sweet
Paper: Whisper White, Creamy Caramel, River Rock and Brilliant Blue
Ink: Stampin’ Up White Craft and River Rock, Adirondack Denim, Ginger, Stonewashed, Aqua and Hazelnut
Accessories: Brayer, Cuttlebug Embossing Folder, White Gel Pen, Prismacolored Pencil, Brads, Sponges, Post It Note

dsc02750.JPG

On a 2 1/2″ x 6″ piece of Whisper White I brayered at an angle Hazelnut ink.

dsc02731.JPG

Keeping at the same angle, brayered River Rock ink over the Hazelnut ink and a little further up the card stock a bit.

dsc02732.JPG

Turned the card stock and brayered at an angle Aqua ink down to but not into the River Rock ink.

dsc02733.JPG

At the same agle, brayered Stonewashed ink on but I did not completely cover the Aqua ink.  Working on a graduation in color here.

dsc02734.JPG

Still staying at that same angle, brayered Denim ink at the top of the card stock, not covering completely the Stonewashed ink.

dsc02735.JPG

Stamped Sand dollar with Ginger ink.

dsc02736.JPG

Colored the sand dollar in with a Peach Beige Prismacolor Pencil.

dsc02737.JPG

Made some highlights on the sand dollar with a white gel pen.

dsc02738.JPG

Tore a Post It note and used it as a mask for the sand area so I could put in a water line.  Sponged on White Craft ink at torn edge of Post it Note.

dsc02739.JPG

Removed Post it Note and use my white gel pen to define the water line further.

dsc02741.JPG

Sponged a bit more Denim ink at the top left corner of the card stock to darken a bit.

dsc02742.JPG

Used my Cuttlebug machine and Cuttlebug embossing folder to emboss one of the card layers.

dsc02743.JPG

Assembled card front and stamped my sentiment in Denim, using my Stamp-A-Ma-Jig for placement.  I stamped the stamp off on scrap paper once to lighten the image before stamping on the card stock.

dsc02745.JPG

Added some brads and I have another finished card.

dsc02746.jpg

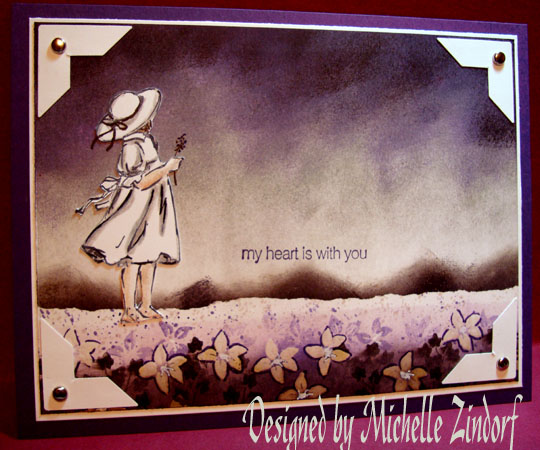
My Heart is With You – Tutorial

dsc02727.jpg

I’m still working on my Sympathy card stash.  So here is a tutorial on one of them.

Supplies:

Stamps: Stampin Up Summer by the Sea, Hand Painted Petites, Small Sayings and Itty Bitty Backgrounds
Paper: Stampin’ Up Whisper White & Elegant Eggplant
Ink: Stampin’ Up Pale Plum, Elegant Eggplan, Going Gray & Basic Black, Distress Inks Milled Lavender & Dusty Concord, Palette Noir Black
Accessories: Prismacolor Pencils Beige Sienna, 30% Warm Gray & 50% Cool Gray Pencils, Stampin’ Up Elegant Eggplant Marker, Black marker, Exacto Knife & Glass Mat, Photocorner Punch, Brayer, Brads, Clear Embossing Powder and Heat gun, Post It notes, White Gel pen, Sponge, Versamark Pad 

dsc02723.JPG

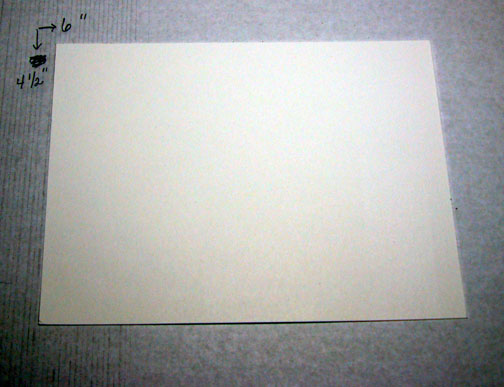
Starting with a piece of Whisper White card stock and masking the sky area with Post it Notes (nope, I don’t have stock in this company, lol).
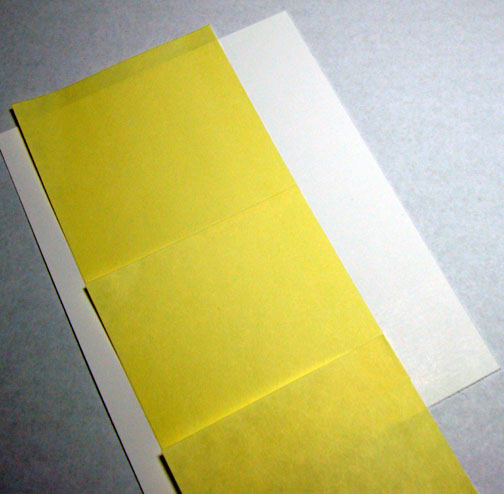
dsc02684.JPG

dsc02685.JPG

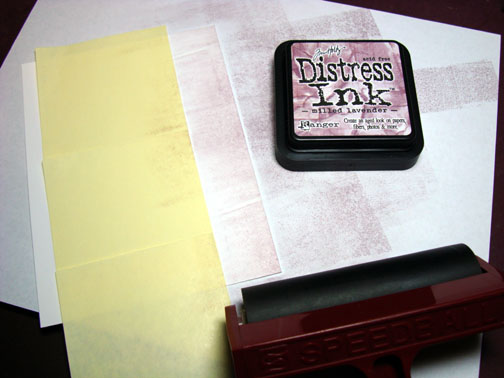
Brayered Milled Lavender ink on card stock.
dsc02686.JPG

dsc02687.JPG

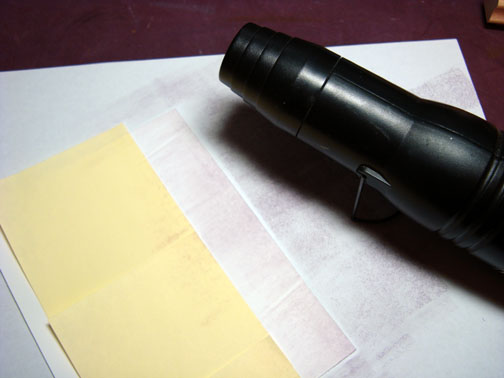
I heated the ink to dry and set it on the card stock before the next step.
dsc02687.JPG

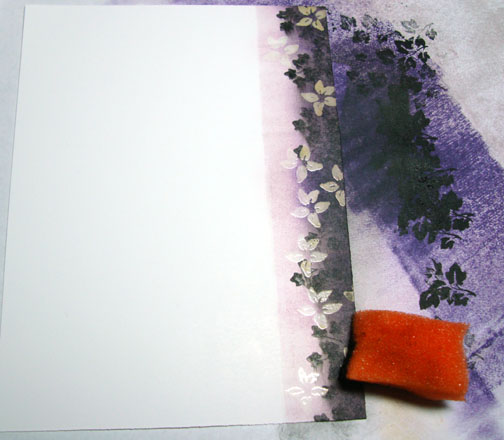
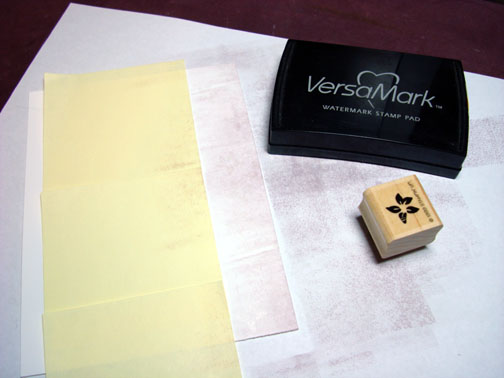
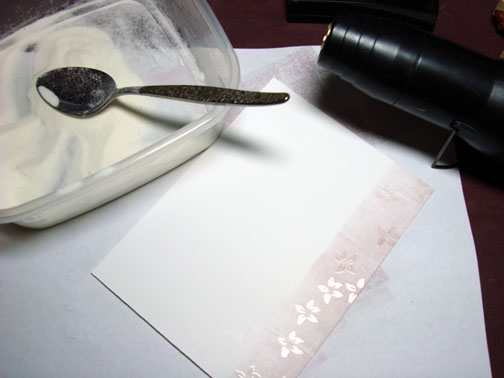
Stamped flowers randomly over Milled lavender with Versamark, removed Post it Notes and then heat embossed the flowers with clear embossing powder and a heat gun.  Note:  If I had not dried the brayered Milled Lavender ink the embossing powder would have stuck to it too.
dsc02688.JPG

dsc02689.JPG

Brayered Pale Plum ink over embossed images.

dsc02690.JPG

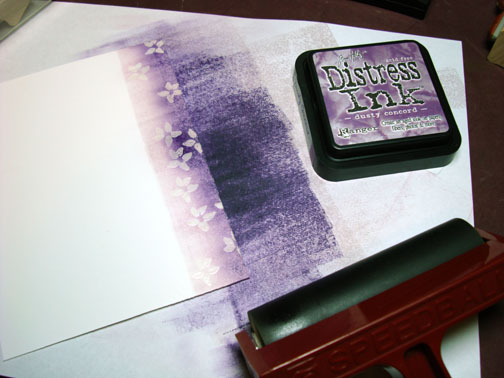
Brayered Dusty Concord ink at the bottom of the card stock being sure to not cover all of the Pale Plum ink to create a graduation in color.
dsc02691.JPG

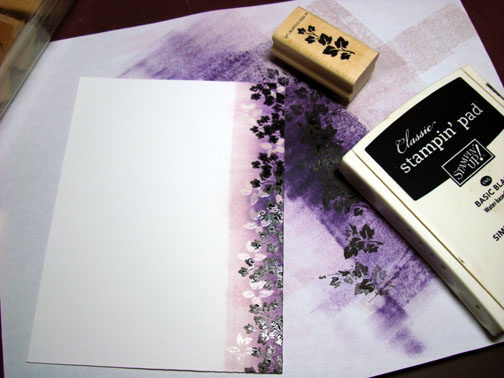
Stamped leaves with Basic Black ink and then wiped the ink off of the embossed images with a sponge in a circular motion to create shadow with the leaves.  I did not smear all of the leaf images.
dsc02692.JPG

dsc02693.JPG

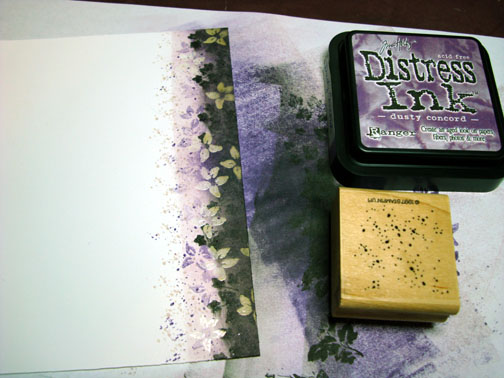
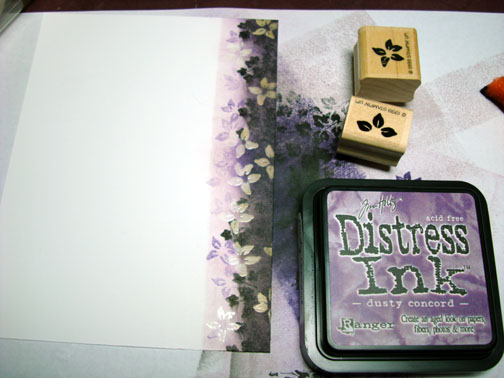
Stamped some more flowers on the milled lavender section with Dusty Concord ink.
dsc02694.JPG

Stamped the Itty Bitty Background stamp with both Milled Lavender and Dusty Concord.
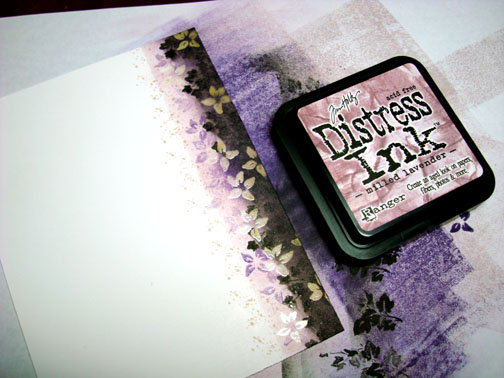
dsc02695.JPG

dsc02696.JPG

Outlined embossed flowers with an Elegant Eggplant marker to make them more visible.
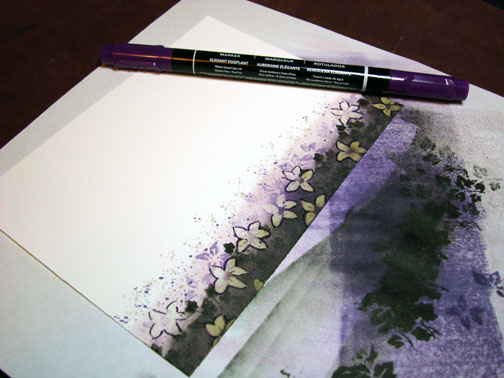
dsc02697.JPG

Highlighted the centers of the flowers with a White Gel Pen.
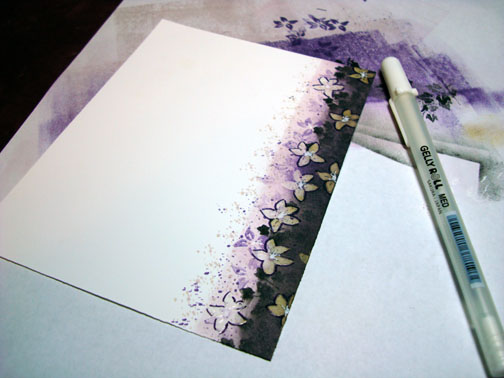
dsc02698.JPG

Stamped more leaves with Basic Black ink in between embossed flower images.
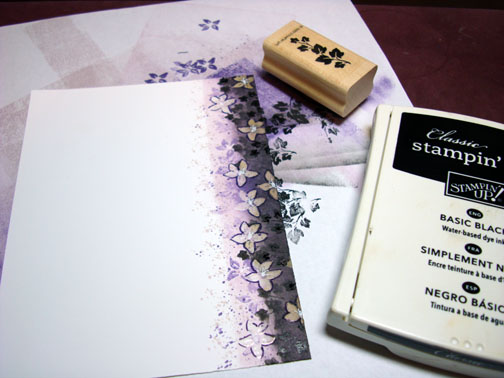
dsc02699.JPG

Time to work on the sky.

Turned the card stock around and brayered on Going Gray ink in the sky area leaving about 1 inch of  white space between sky and ground.
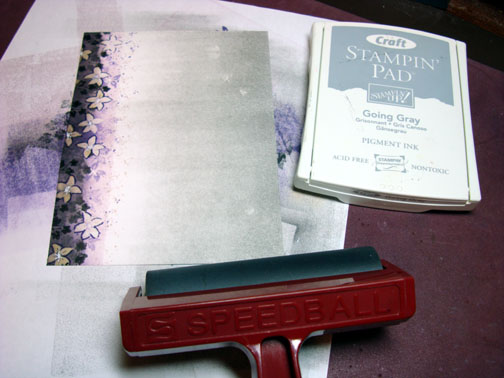
dsc02700.JPG

Time to put in the horizon line. 

Masked ground area and about 1/4 inch of the white area above the ground with Post it Notes that are torn through the sticky part of the note.
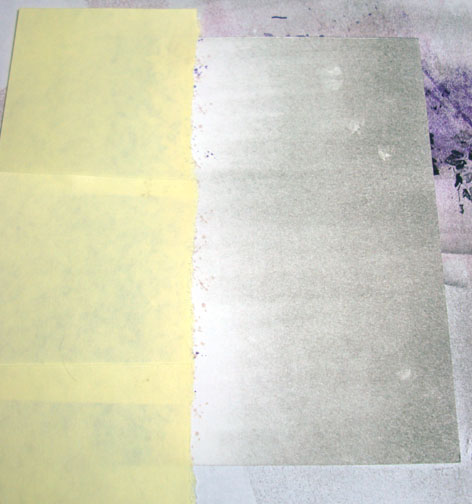
dsc02701.JPG

Sponged basic black ink right at the Post it note torn edge to create hills at the horizon line.
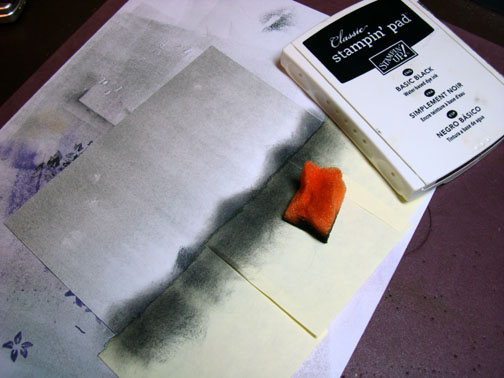
dsc02702.JPG

Removed Post it Note masks.  Wow, now that made an impact.  I love using really dark colors against light ones.  It makes things pop, don’t you think?
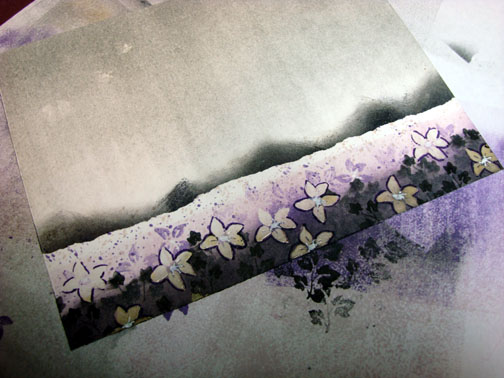
dsc02703.JPG

Sponged on Going Gray ink to start to create some interest in the sky.
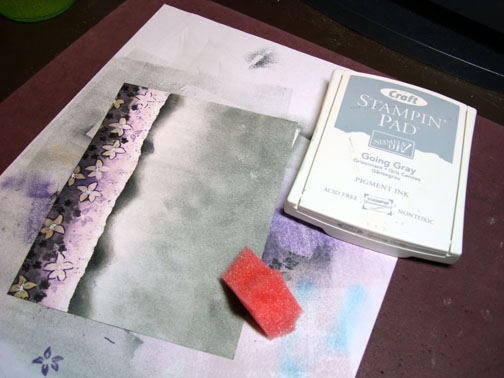
dsc02704.JPG

Sponge on Milled Lavender ink in the sky area, not covering all of the Going Gray ink.
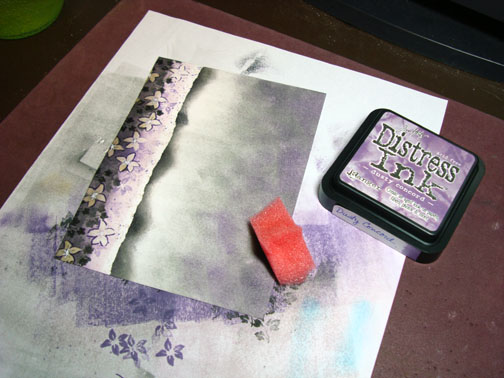
dsc02705.JPG

Sponge Elegant Eggplant ink but did not cover all of the Milled Lavender ink.  We are creating a nice graduation in the sky.
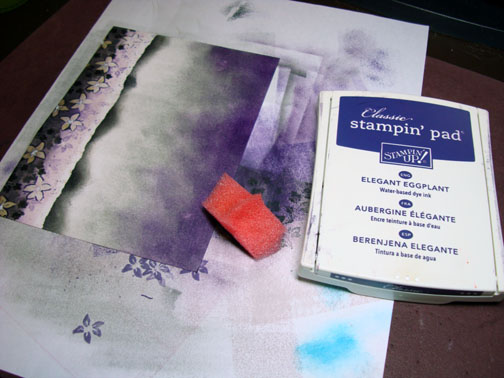
dsc02706.JPG

Sponged Basic Black ink right at the top of the card stock.
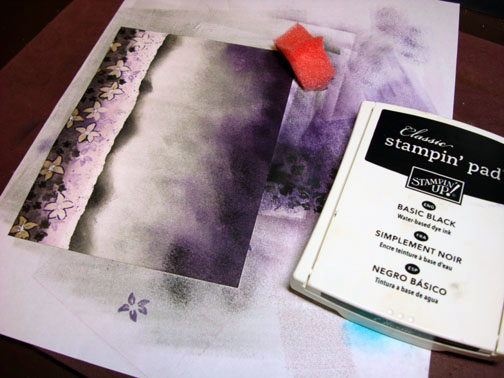
dsc02707.JPG

Stamped girl image with Palette Noir Black ink on a separate piece of Whisper White card stock.
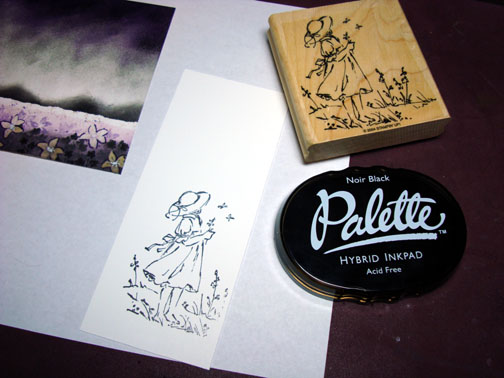
dsc02708.JPG

Colored the underside of her arm and back side of her legs with a Beige Sienna Prismacolor Pencil.
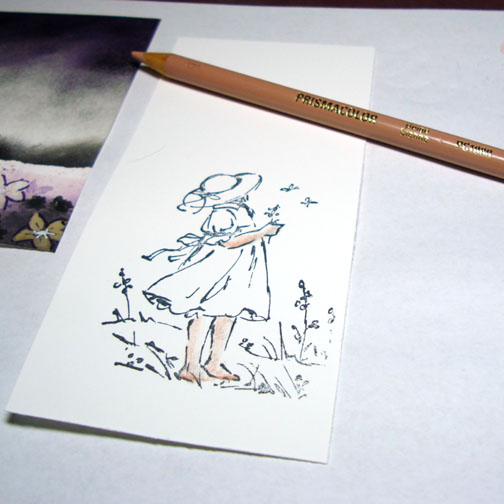
dsc02710.JPG

Colored the folds of her dress with a 30% Warm Gray pencil and then outlined the fold marks with a 50% Cool Gray pencil.   Basically, I used a light shade of gray and then a darker one.
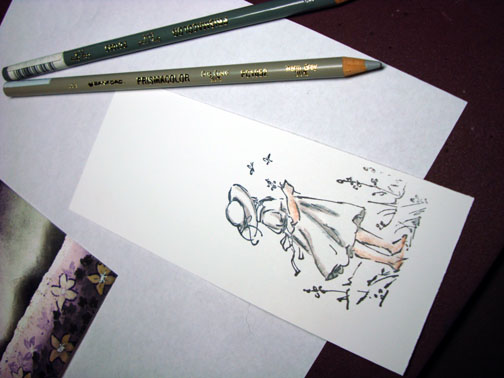
dsc02711.JPG

Brought out my Glass Mat and Exacto Knife and cut the girl image out.  If you use a glass mat and a very sharp Exacto knife you can cut images out very easily.  Like cutting butter.  I hold the knife in one place and move the paper to cut it, especially curved areas.

I didn’t show it, but I cut out the white area between her legs too.
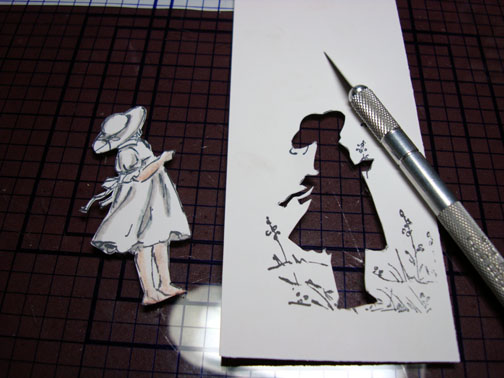
dsc02713.JPG

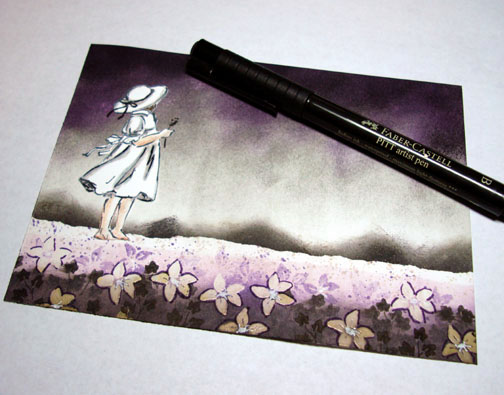
Adhered the girl to the scene with Tombo Mono Multi glue (love this glue).  Also drew in the little flower in her hand and darkened the folds of her dress and ribbon on her hat with a Faber-Castell Black marker.  Any fine point marker would work.
dsc02715.JPG

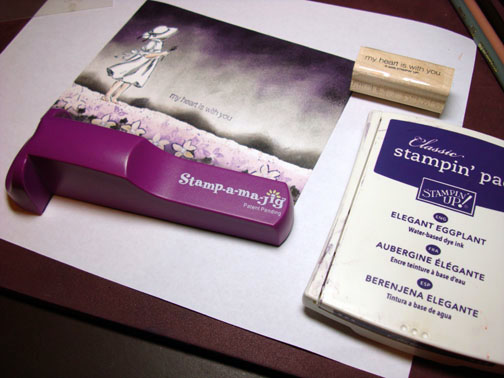
Using my Stamp-a-ma-jig for placement, I stamped my sentiment using Elegant Eggplant ink.
dsc02716.JPG

Assembled card and added some photo corner punches and brads and I have a finished card.

dsc02727.jpg

I hope you enjoyed following along with this tutorial and feel inspired to try it yourself.

Keep Stamping!

Searching for a Mirror Image Stamp

I used my Rubber Stampede Mirror Image Stamp, Item 247F in a tutorial and received e-mail/comments from a few of you looking for this stamp.  I got mine at Micheael’s 5 years ago, I have not seen one there for sometime.  A few of you have also done Internet searches and so have I looking for this stamp without any success.  I did find that two of them are listed on Ebay to end 3 and 4 days from now.  Maybe that is an option to getting this stamp.  Sorry I had no idea when I used it in my project it would be so hard to find.  I do love using mine and will probably use it in future tutorials, please forgive me!

If you have no idea what I am talking about here is a picture of the stamp.  

 dsc02728.JPG

dsc02729.JPG

As you can see mine is stained from use, but this has not effect on future images.

 You can stamp on the mirror image stamp and then stamp the mirror image stamp on your paper and it gives, that’s right, a mirror image.

If anyone knows of a place that these can be purchased new, please share that information with us by commenting on this post.

I’m in a Bit of a Fog This Morning, in More Ways Than One

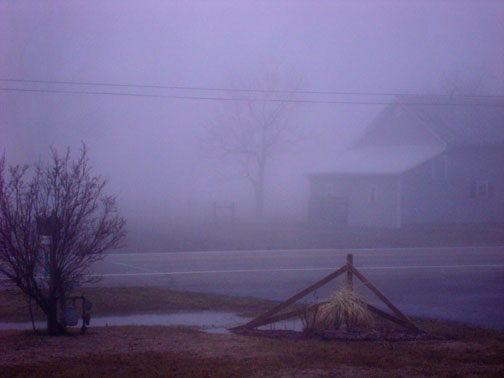
Thought I would share a couple of photos I took at 8:00 a.m. this morning.  These shots are from the deck at the back of my house toward the green space behind us.   Like I said we are in a bit of a fog.

dsc02667.JPG

We only have a half an acre, but there is a 4 acre green space behind us and a beautiful farm in front of us.

Now this next shot was taken from my front door toward the property across the road.  Hey, that barn looks familiar, yep, it’s the barn in my banner at the top of this page, lol.

dsc026682.jpg

This is lake Bob, lol.  Our neighbor is Bob and they are having a little drainage problem on their property.  Kinda pretty with the fog though.  I bet they don’t think so, lol. 

dsc02669.JPG

I love living in a rural community, expecially after living in the city all my life.  I think I appreciate the views more.

I’m going to try to get a tutorial done this afternoon for you all, but for now. . . . . . I’m in the fog.

My Stampin’ Up Stamp Storage – A glimps into my world, part II

dsc02662.JPG

Ah, a view of my wall of shame, lol.  I’m a stamp junkie, I confess!   I have around 250 Stampin’ Up sets at this time.  I have sold over 100 sets just last month.  Sets that were wonderful, but were definitely not my style.  That’s right I have a style now.  How liberating it is to be able to say that.

I store my stamps on their sides in Alphabetical order on shelves I put up on one wall of my craft-room.  The bottom shelf has wire baskets hanging from them that store my ribbon.

Anyway, storing my stamps on their sides gives me much easier access to them.  I’ve heard that if you store your stamps this way the rubber may slide off of the mount, but I have not had this happen to me.  The shelves are away from any heat source.  There is a window in the room but it is North facing and the sun does not shine directly on them.  I have stored my stamps on their sides for over five years now.

When I get a new set I catalog it in my binder by copying the sticker sheet and place it in a sheet protector in the binder.

dsc02664.JPG

They are put in the binder alphbetically too.  I didn’t want to put them in categories.  I thought that would hurt my creativity to use stamps in unexpected ways.  The binder is very easy to flip through. 

One more thing, I keep an Excel spreadsheet with the stamp set names in Alphabetical order.  I started this when friends would want to come over to stamp and wanted to prepare for a project ahead of time.  I would just e-mail them my stamp list and they could pick a set out to work with.  This list also keeps me in tune to exactly how many sets I have.

I’ve started collecting a large selection of unmounted stamps too, but that is another’s days topic, lol.

I hope your day is filled with abundance!

Until tomorrow, Michelle

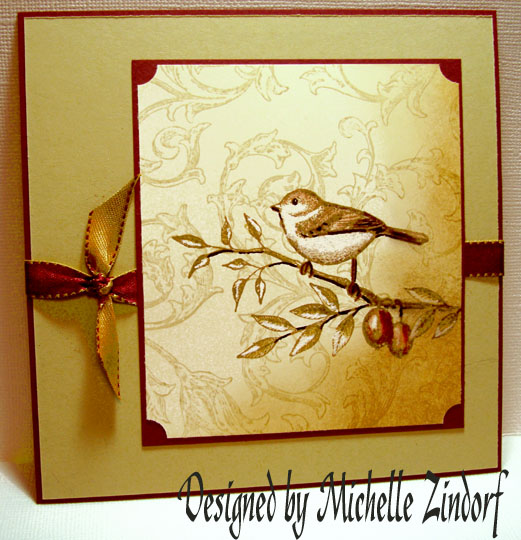
Prismacolor Bird – Tutorial

dsc02657-copy.jpg

I felt like coloring this morning, so this is the project I came up with. 

Supplies:

Stamps: Stampin’ Up Touch of Nature and Antique Background
Paper: Very Vanilla, River Rock, Baroque Burgundy
Ink: Tim Holtz Distress Inks Brushed Corduroy & Old Paper
Accessories: Black Marker, White Gel Pen, Sponge, Ribbon, Ticket Corner Punch, Prismacolor Pencils Bronze, Biege Seinna, Tuscan Red & Dark Brown

dsc02655.JPG

I wanted to create a subtle background for the main image so I pulled out my Antique background stamp.  I inked my background stamp with Old Paper Ink by turning it over, rubber side up and then pressed the ink pad against it in a circular motion so I don’t get hard lines from the ink pad in my finished image.

dsc02637.JPG

I put my Very Vanilla card stock on top of the inked background stamp and then put a piece of scrap paper on top and rub over it lightly to get the image to transfer to the card stock.  You can also use a brayer on top of it.  If you use the brayer you won’t need the scrap paper.

dsc02638.JPG

dsc02639.JPG

dsc02640.JPG

Stamped my bird image with Brushed Corduroy ink.

dsc02641.JPG

Used my Stamp-a-ma-jig for placement of branch stamp and stamped it with Brushed Corduroy ink.

dsc02642.JPG

There is a reason I used Very Vanilla card stock for this project.  I knew I wanted to have white highlights on the bird and leaves of the images and I wanted them to really pop.  This would definitely not look the same with a white card stock.

Here I colored the birds belly and throat with a White Gel Pen. 

dsc02644.JPG

Time to get out my fancy Prismacolor pencils and storage container, lol.   I keep my pencils, point up in a $1 bucket that I purchased at Target’s dollar spot.

dsc02643.JPG

Colored the dark lined part of the leaves with a Bronze pencil.

dsc02645.JPG

Used the White gel pen again only this time to color the light part of the leaves and berries in.

dsc02646.JPG

Colored the dark part of the berries with Tuscan Red Pencil.

dsc02647.JPG

Colored birds head and back with Beige Seinna pencil and also put a little on the berries.

dsc02648.JPG

Colored in the darkest parts of the birds feathers with a Dark Brown pencil.

dsc02649.JPG

Here is the fun part, bringing it to life.  With a black marker I created dark shadows on the under parts of the branch and the birds feathers, creating dimension in the piece.

I think this makes such a big difference.

dsc02651.JPG

Used the Tuscan Red pencil again to put some darker shadows on the berries.

dsc02652.JPG

Sponged on Brushed Corduroy on the right bottom side to create light in the scene.  Funny how you have to add darkness to create light.  I’m sure there is a philosophy lesson in there somewhere, but, that is to deep for me to think about this morning, lol.

dsc02653.JPG

Used the ticket corner punch for main image panel.

dsc02654.JPG

Assembled the finished card.  Another one done!

dsc02657-copy.jpg

Sure hope you enjoyed this tutorial this morning and you are inspired to get out those colored pencils. 

Hope your day if filled with light and warmth!