
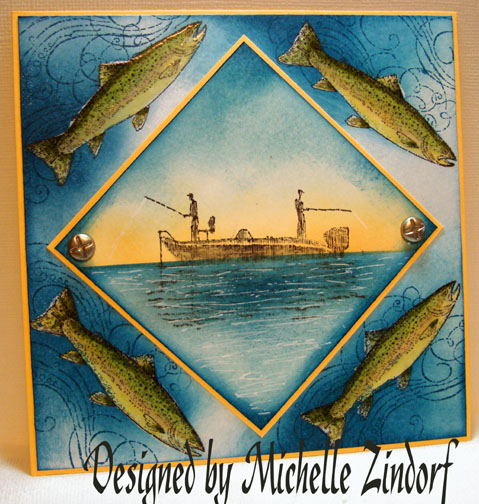
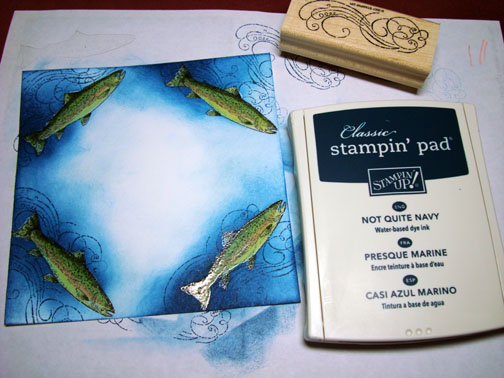
This is the Father’s Day card I created for my husband this morning. Nothing like waiting until the last moment to make a card, lol. I hope he likes it.
I always find cards for men very challenging. Probably 90% of the stamps I own are femine in nature. I hang onto the Stampin’ Up sets for men even though they are retired to help with my selection of manly stamps on hand to chose from.
This card does not use any brayering. Sponging seemed to be the way to go today.
Let’s get started. 🙂
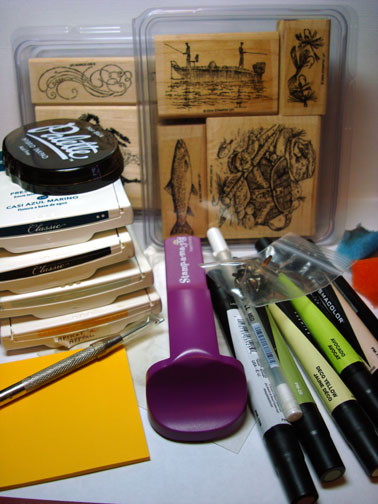
Supplies:
| Stamps: Stampin’ Up Angler, Bronc Buster |
| Paper: Stampin’ Up Whisper White, Apricot Appeal |
| Ink: Stampin’ Up Soft Sky, Apricot Appeal, Not Quite Navy & Basic Black, Palette Noir Black |
| Accessories: Prismacolor markers Light Olive Green, Cool Grey 20%, Deco Yellow, Avocado & Deco Peach, Versamark Marker, Fine Detail Clear embossing powder, heat gun, Stamp-a-ma-jig, White Gel Pen, Post it notes, Sponge, screw brads |
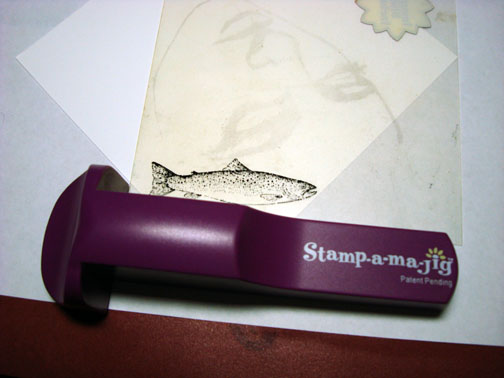
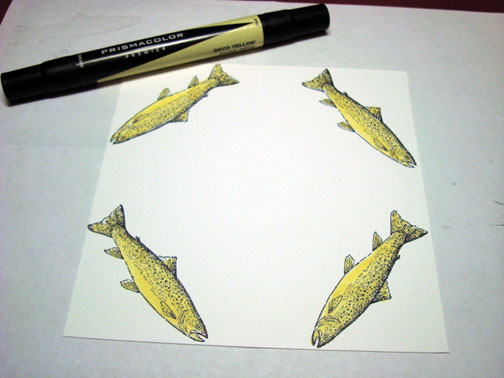
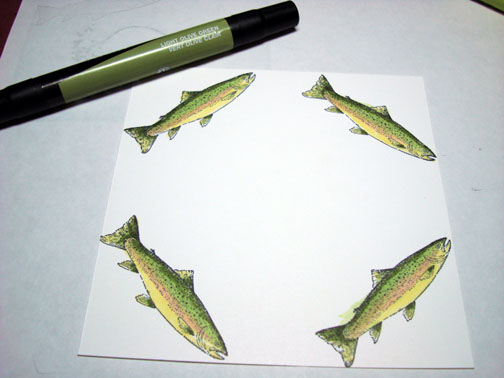
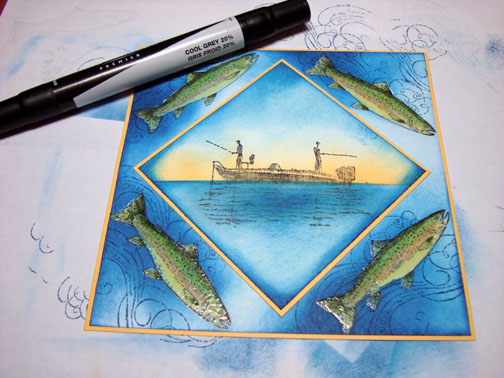
On a 5.25″ x 5.25″ piece of Whisper White card stock I stamped a fish in each corner with Palette Noir Black ink, using my Stamp-a-ma-jig for placement. I had to think about which way I wanted my card to go so I would not have any upside down fish.
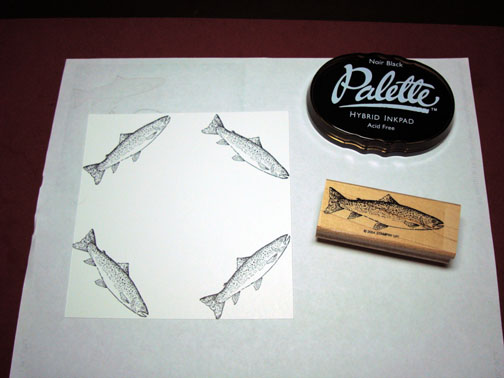
Colored the fish with a Primsacolor Deco Yellow marker.
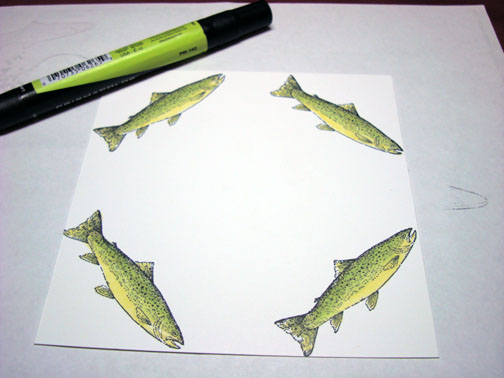
Colored the specked areas on the fish with a Prismacolor Avocado marker.
Colored a stripe on the center of the fish with a Prismacolor Deco Peach marker.
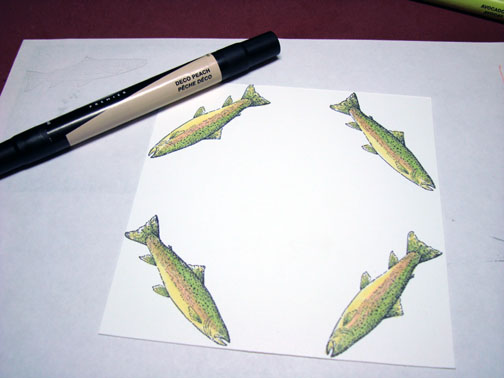
Went over the top part of the fish again with the Prismacolor Avocado marker to blend the stripe in.
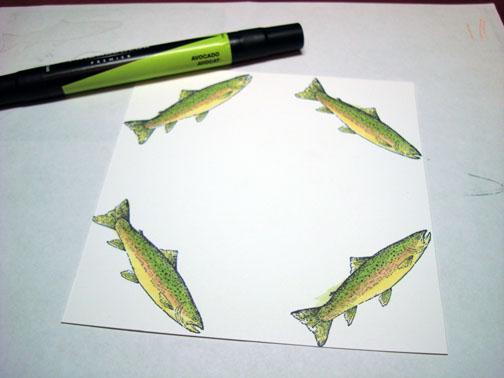
Colored the tops and top of fins of the fish with a Prismacolor Light Olive Green marker.
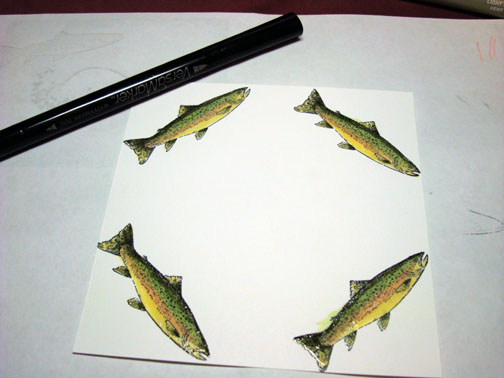
Colored the fish with a Versamark marker and heat embossed them with clear embossing powder and a heat gun.

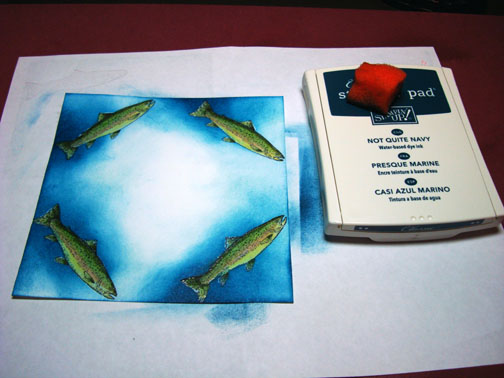
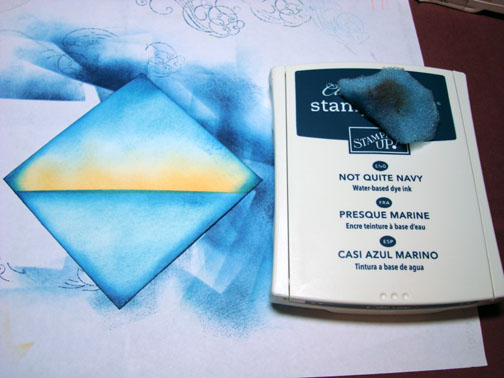
Sponged Soft Sky ink with a circular motion on the card stock.
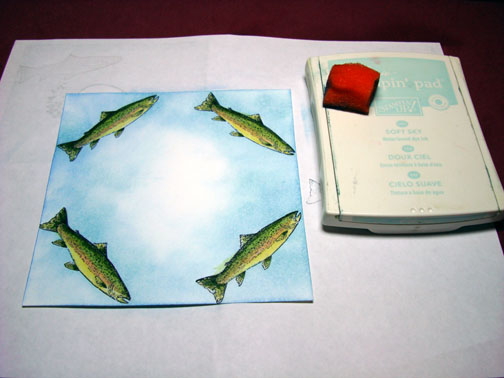
Sponged Not Quite Navy ink on the card stock.
Stamped the flourish stamp twice at each corner of the card stock with Not Quite Navy ink.
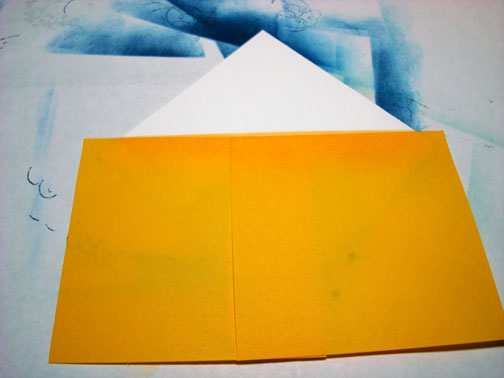
For the main image panel I cut a 3.25″ x 3.25″ piece of Whisper White card stock.
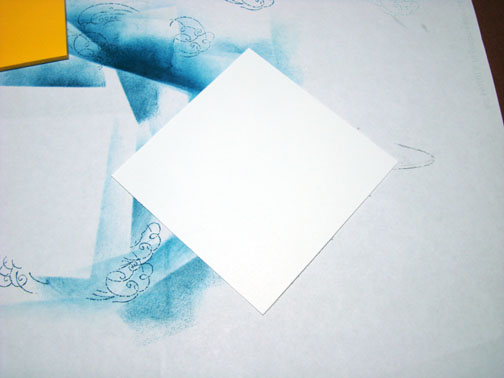
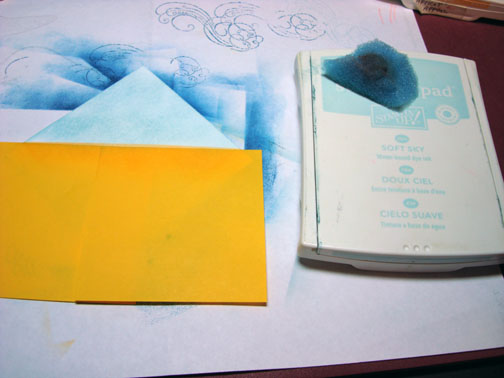
Using post it notes as a mask, I masked about 1/3 of the card stock at angle. Sponged on Soft Sky ink at the top leaving some white space about the post it notes.
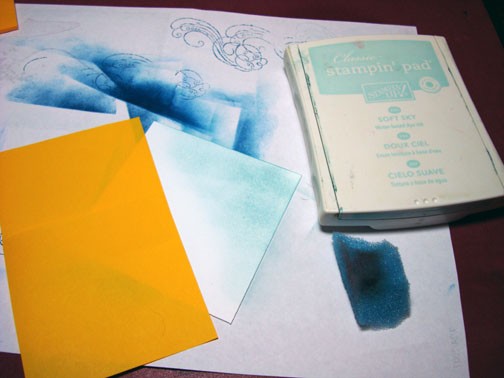
Sponged Apricot Appeal ink below the Soft Sky ink.
Flipped the post it notes so they now mask the sky portion of the card stock.
Sponged Soft Sky ink in the water area.
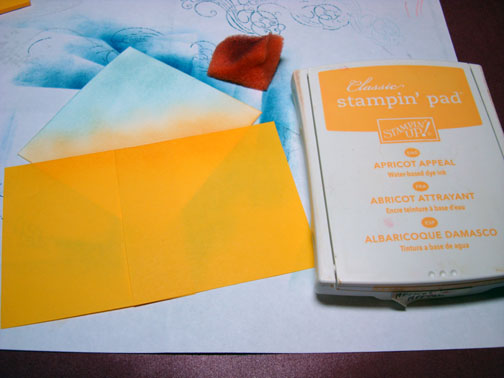
Sponged on Not Quite Navy ink on the card stock right where the post it notes meets the card stock.
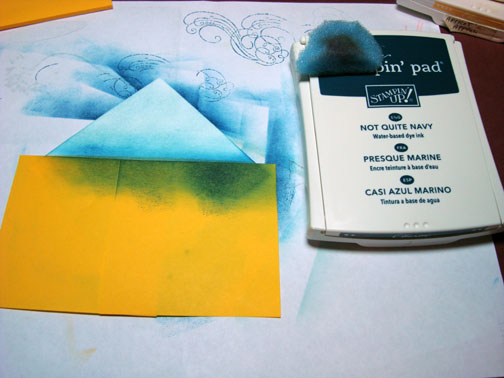
Removed post it notes.
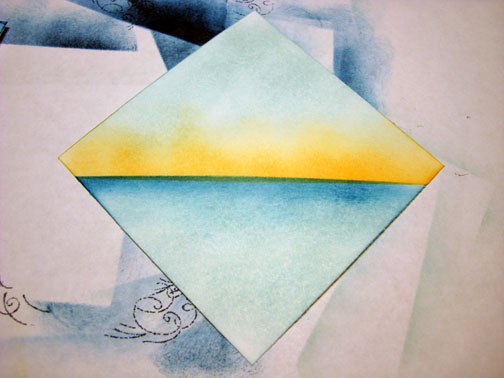
Sponged some Not Quite Navy ink at the top of the sky area and around the entire edge of the card stock.
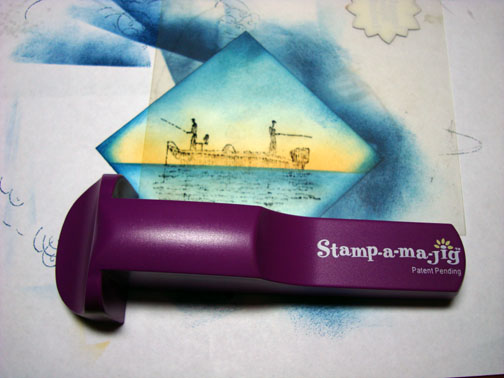
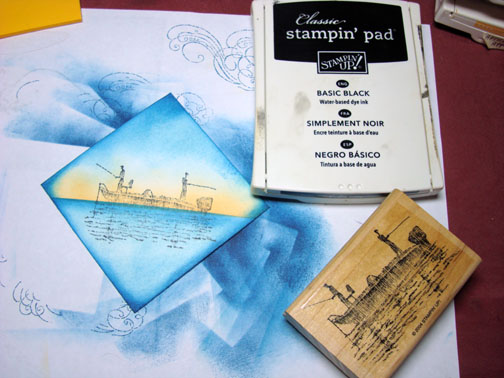
Using the Stamp a ma jig for placement, stamped the fishermen with Basic Black ink.
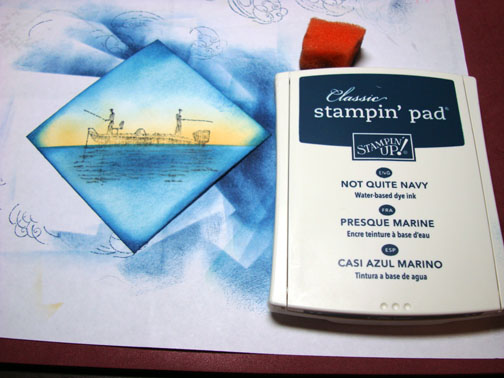
Added some Not Quite Navy ink with a spong below the boat.
Assembled card front and colored the boat and the men with a Prismacolor Cool Grey 20% marker to define them more.
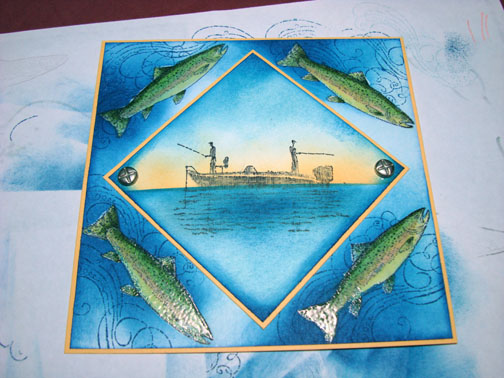
Put in these great screw brads at right and left corners of the main image panel.
Add some White gel pen streaks in the water area.
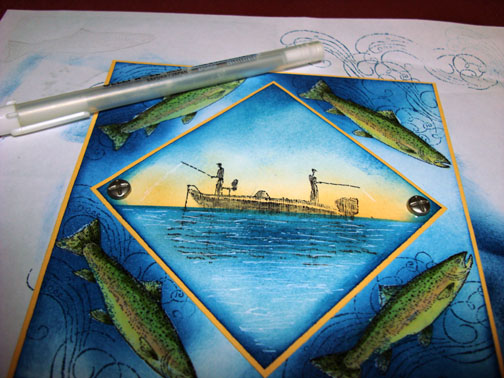
Here is is finished. 🙂
Thanks for following along with this tutorial today. Why don’t you give sponging a scene a try?
Have a Super, super Saturday!
Until my next post. . . . . .
Michelle
28 responses to “Fisherman’s Dream – MZ”