
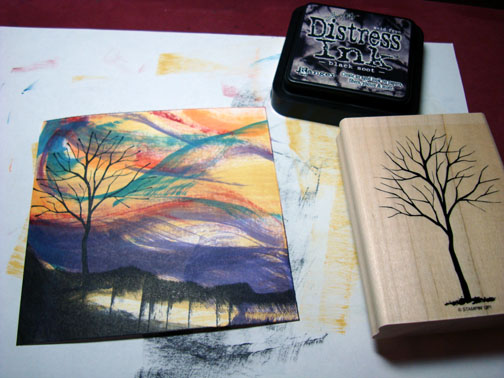
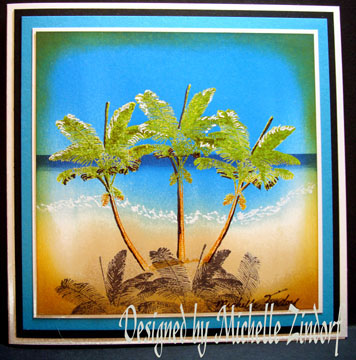
I love Tim Holtz Distress Inks and can spend hours whiling away smearing ink on card stock and creating backgrounds for silhouette images. Here is one I put together this morning. I hope this tutorial inspires you to smear some ink today. 🙂
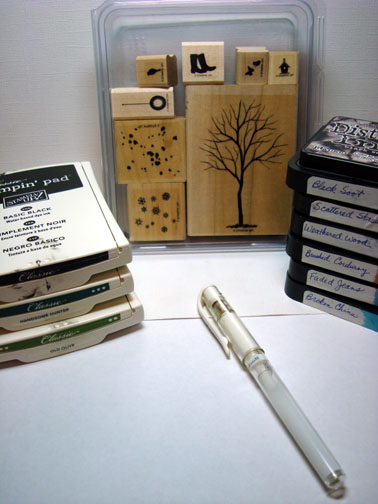
Supplies:
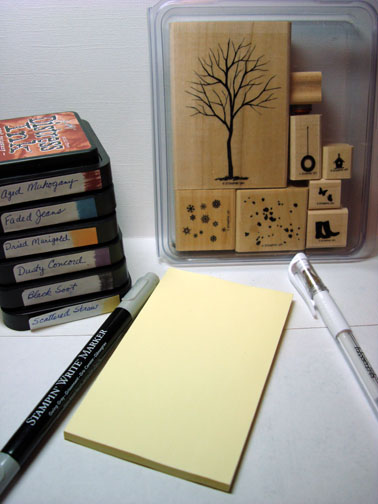
| Stamps: Stampin’ Up Branched Out |
| Paper: Stampin’ Up Whisper White, Basic Black and So Saffron |
| Ink: Stampin’ Up Basic Black, Handsome Hunter, Old Olive and Tim Holtz Distress inks Black Soot, Scattered Straw, Weathered Wood, Brushed Corduroy, Faded Jeans and Broken China |
| Accessories: White gel pen |
Are you inspired by this Blog? One way you can help support this blog is by ordering your Stampin’ Up products through me. You can order from me 24-7 from this link: https://michellezindorf.stampinup.net or e-mail me at [email protected] If you are within the United States. Want a copy of the brand new 2009-2010 Stampin’ Up Catalog for $9.95, just e-mail me at [email protected] and I will get one in the mail to you. Want to become a Stampin’ Up Demonstrator and earn instant income? Consider being part of my Stampin’ Up Team. Through August 31 you can become a Stampin’ Up Demonstrator for as little as $85 with the mini kit. Also check out the Stampin’ Up specials, click this link to check it out: https://www.stampinup.net/esuite/home/michellezindorf/promotions
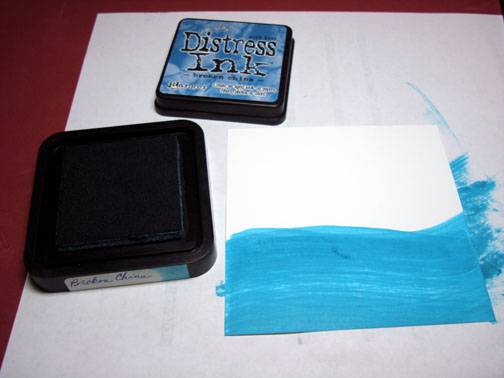
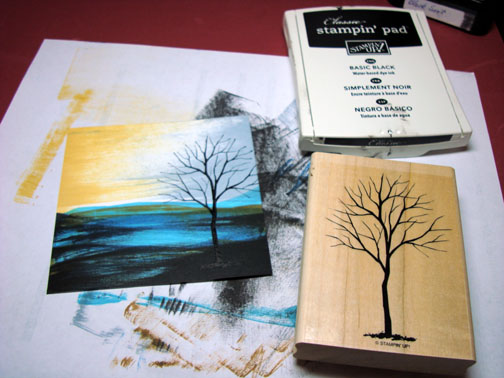
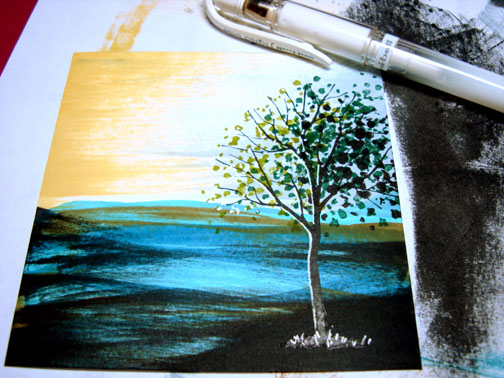
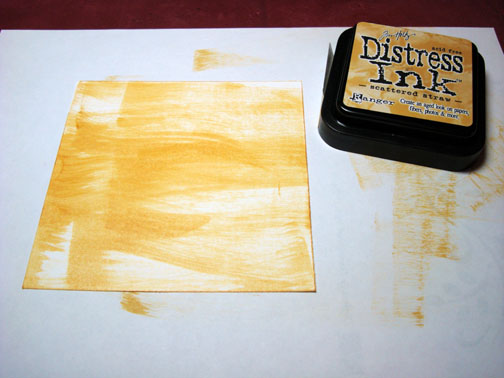
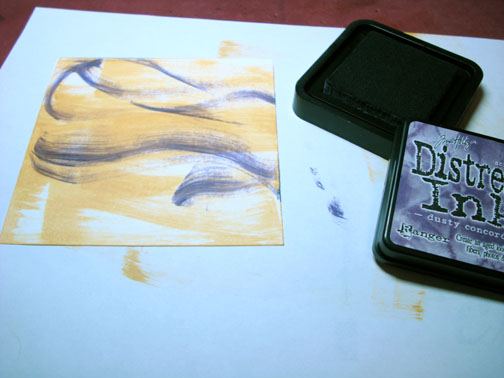
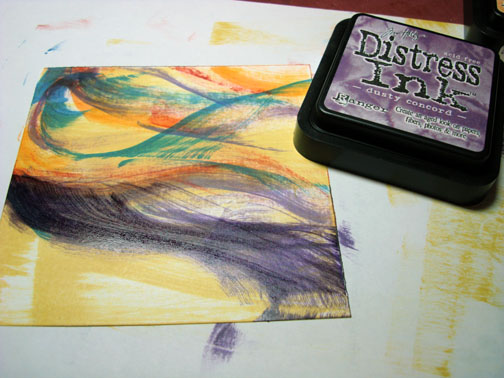
Started with a 4″ square piece of Whisper White card stock. Used the edge of the Broken China Distress ink pad and smeared it across the card stock. This technique is called “Direct to Paper”.
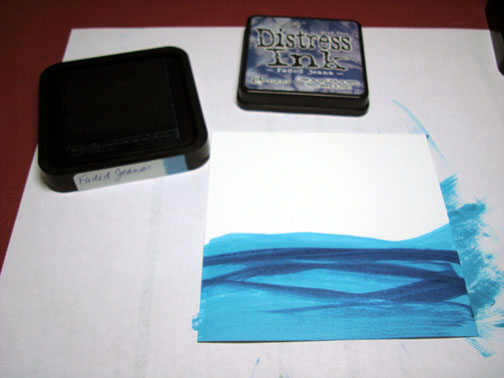
Added Faded Jeans Distress ink with the corner of the pad.
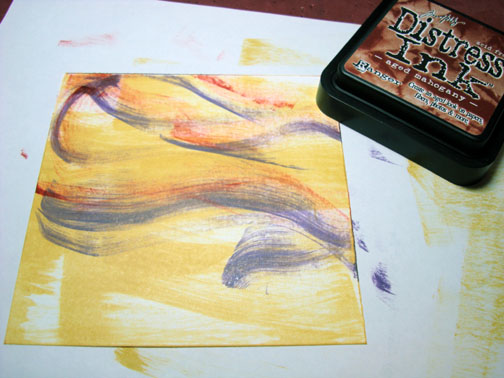
Added a little bit of Brushed Corduroy using the corner of the pad.
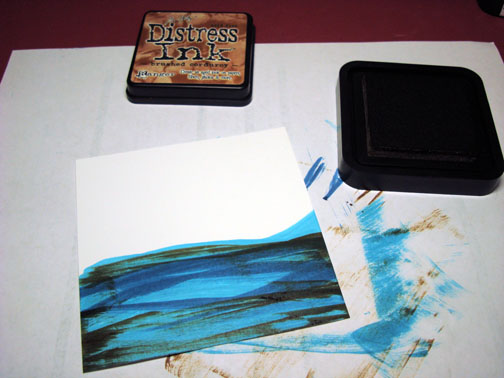
Added Black Soot Distress ink using the edge of the pad and a light touch.
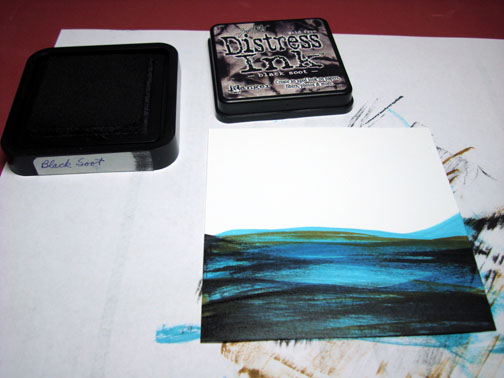
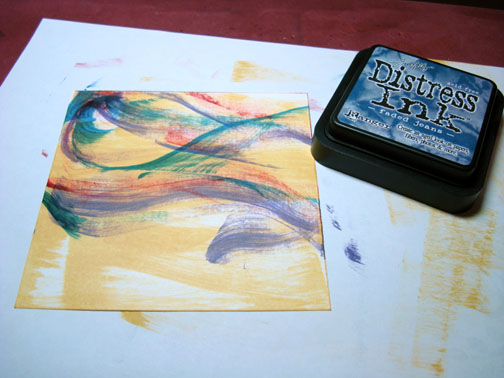
Added Weathered Wood Distress ink using the edge of the pad in the sky area of the card stock.
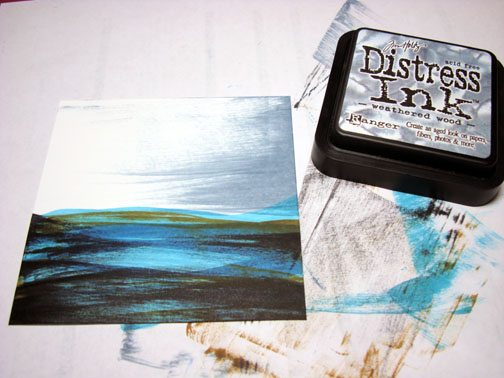
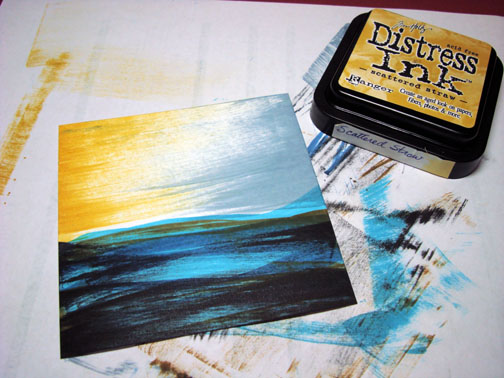
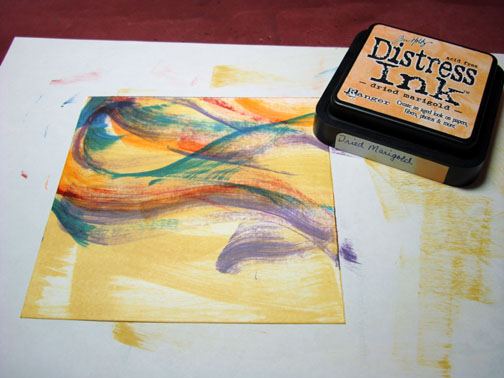
Added Scattered Straw Distress ink using the edge of the pad in the sky area of the card stock.
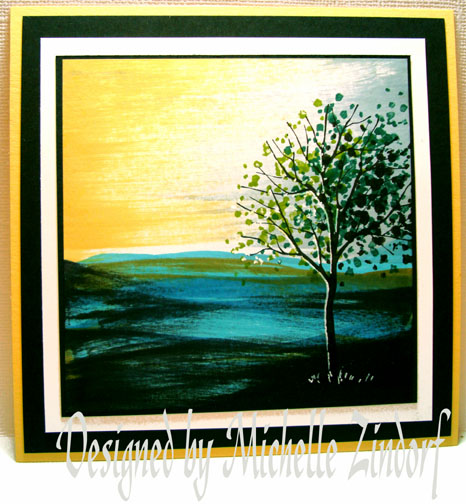
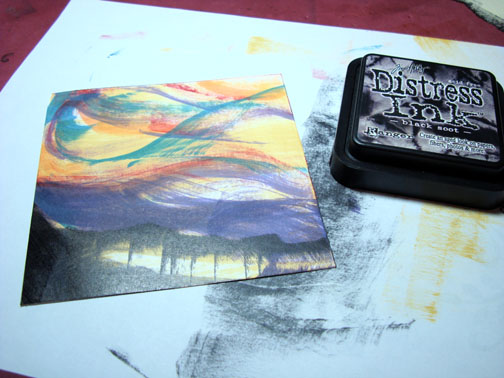
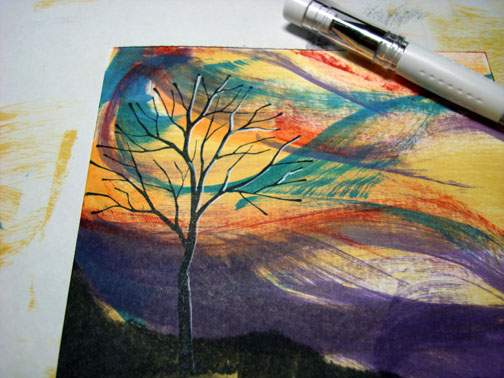
Stamped the Tree from the Stampin’ Up Branched Out Set with Basic Black ink.
Stamped the leaf stamp from the Branched Out set with Old Olive ink on the left side of the tree.
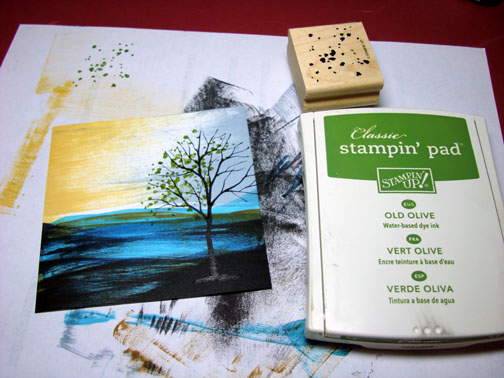
Added some more leaves with Handsome Hunter ink in the middle of the tree.
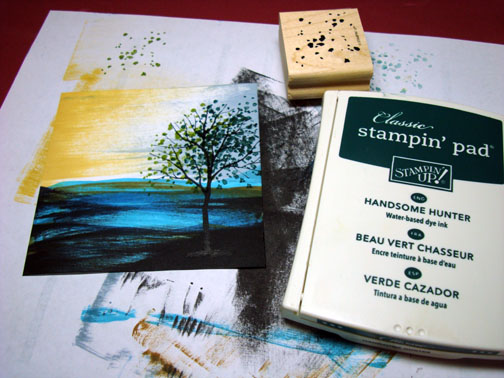
Stamped some more leaves with Basic Black ink on the right side of the tree.
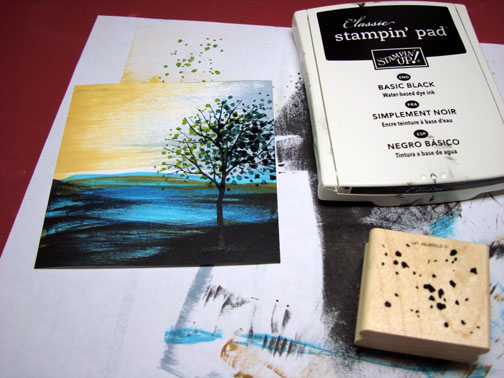
Put some highlights in the leaves on the left side of the tree, out lined the left side of the trunk and added a few grasses at the base of the tree with a white gel pen.
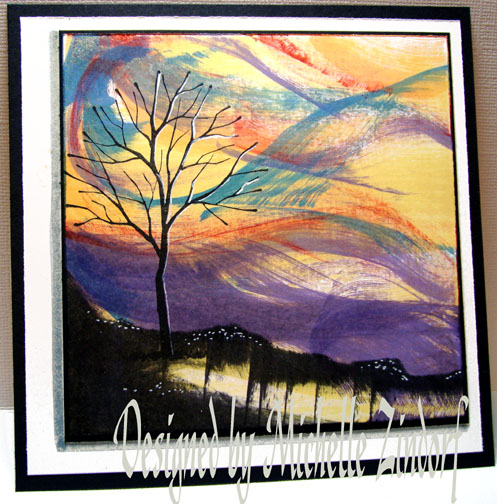
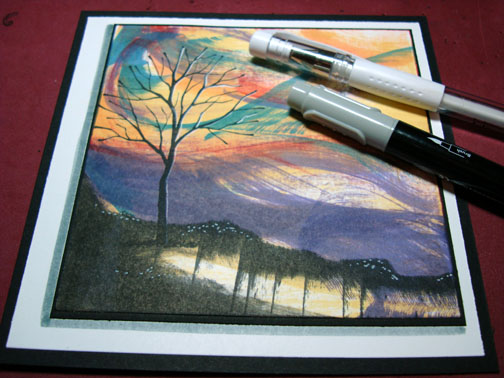
Teamed the main image panel up with a few card stock panels and left off embellishments. Some times embellishments take from your design instead of adding to. I felt that was the case with this piece today.
This is the finished card measuring 5.25″ square.
Until my next post. . . . . . . . . . . . . . . . . . ..
Huge Hugs,
Michelle
 Get ready for Brayer Workshops! I am coming to:
Greenwood, Indiana
Castro Valley, California
Yardley, Pennsylvania (near Philadelphia)
Knox, MaineAkron, Ohio
Broomfield, Colorado
Moore, Oklahoma
Nashville, Indiana Portland, Michigan
2010
Dayton, Ohio at Marco Paper
Phoenix, Arizona
Monroe, Louisiana
Jacksonville, Florida
St. Louis, Missouri
Mechanicsville, Virginia
Raleigh, North Carolina
Colleyville, Texas
Colorado Springs, Colorado
Boise area of Meridian, Idaho
Riverside, California (Southern California)
Salem, Oregon
Wheaton, Illinois
St. Cloud, Minnesota
Rockville, Maryland
North Chili, New York (near Rochester)
New Johnsonville, Tennessee
Helena, Montana
Middleburg Heights, Ohio
Venice, Florida
Here is a link to my workshop calendar where you can see all of my travel schedule and to get info on beginner and advanced Brayer workshops: https://zindorf.splitcoaststampers.com/workshop-calendar
Link to my Stampin’ Up website were you can order all of your must have Stampin’ Up products from me 24-7: https://michellezindorf.stampinup.net
Frequently asked questions answers: https://zindorf.splitcoaststampers.com/frequently-asked-questions/
