

Hey there,
Are you ready to grab that camping gear and head to the woods? It’s Summer time!
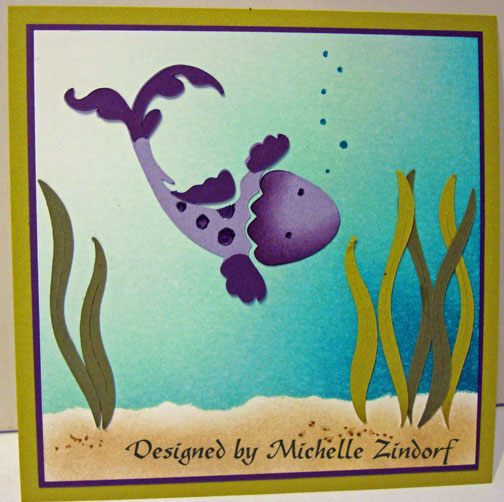
Here is a card that is perfect for that outdoors man or women that is on your card list. I broke out the brand new Stampin’ Up! stamp set, The Great Outdoors and the Cricut cartridge, Bloom to create some depth in this scene. Hope you like it. 🙂
Here are a few Stampin’ Up Reminders before I start the project.

Check out what’s new at Stampin’ Up! The brand new Annual Catalog has been released. CLICK HERE TO LOOK AT THE CATALOG ONLINE. I got my order in and I’m ecstatic about the new products and, of course, the new stamps! CLICK HERE TO PLACE AN ORDER. Contact me at [email protected] or 937-344-1312 with product questions.
Want a new annual catalog shipped to you? I will be happy to send you one. The catalog is free, but there is a $5 shipping charge. Note, I will only sell or ship within the United States do to Stampin’ Up! policies. Please contact me at [email protected]. Payment can be sent via Paypal or check.
You can join my Stampin’ Up! team and become a Stampin’ Up! Demonstrator now for the great new price of $99, CLICK HERE TO CHECK IT OUT. Contact me whether you want to start your own business or just enjoy the 20% discount on products.
Want to purchase one of my original cards or some Stampin’ Up! retired sets CLICK HERE. I’ll be updating the sales page all this week. So check back daily.
Now on with today’s tutorial. . . . . . .
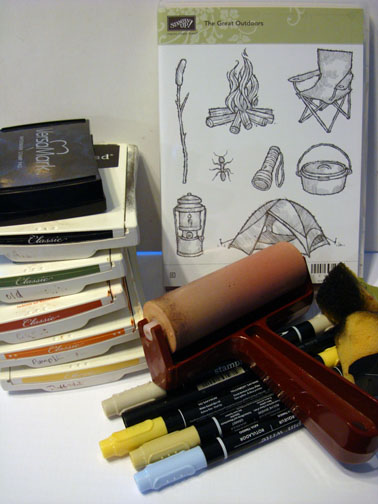
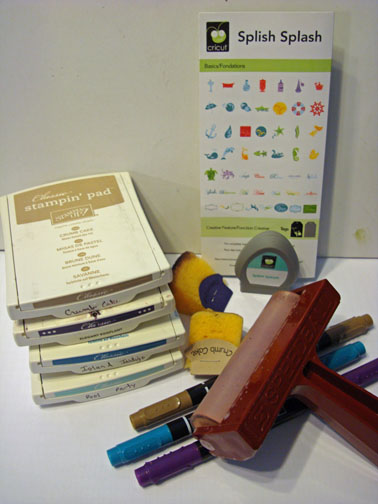
Supplies:
Stamps: Stampin’ Up! The Great Outdoors
Card Stock: Stampin’ Up! Basic Black, Cajun Craze, Old Olive and Whisper White
Ink: Stampin’ Up! Basic Black, Daffodil Delight, Pumpkin Pie, Old Olive and Cajun Craze
Accessories: Stampin’ Up! Sponges, Brayer, Versamark Pad, Versamarker, Heat Gun, Clear Embossing Powder, Markers (Daffodil Delight, River Rock, Sahara Sand and Bashful Blue), Cricut and Bloom Cricut Cartridge.
![]() Are you getting inspiration from this blog? One way you can help support it is to order your Stampin’ Up products through me. Click HERE to place an order and have your order delivered directly to your door step from Stampin’ Up!
Are you getting inspiration from this blog? One way you can help support it is to order your Stampin’ Up products through me. Click HERE to place an order and have your order delivered directly to your door step from Stampin’ Up!
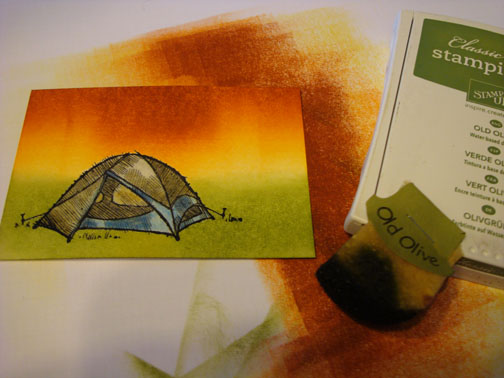
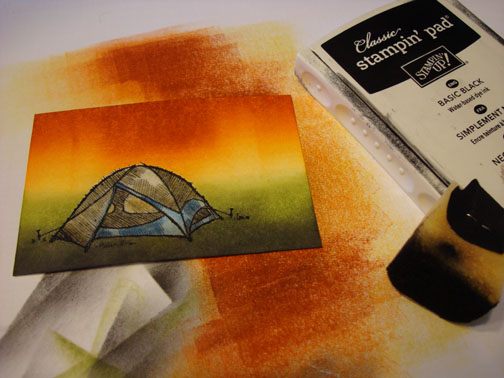
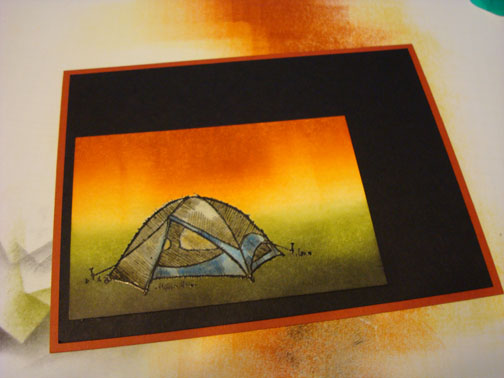
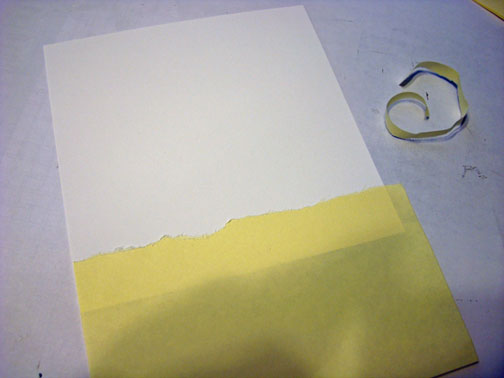
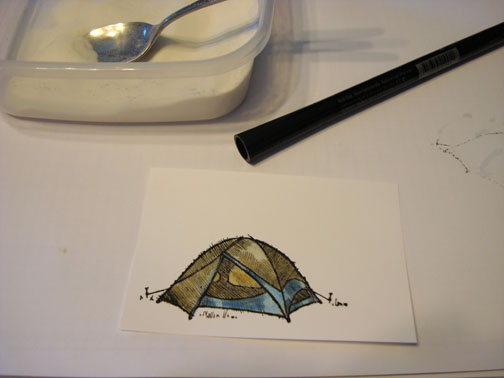
Stamped the tent by loading the stamp with Versamark and then Basic Black ink and then stamped it on a 3″ x 4.5″ piece of Whisper White card stock.
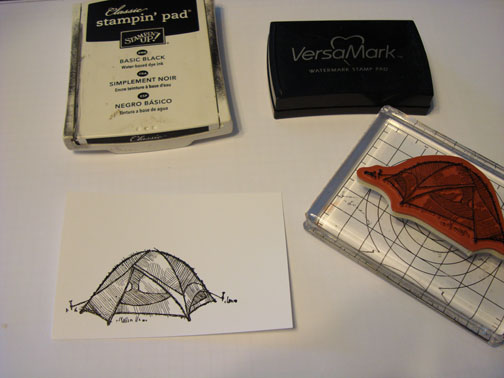
Heat embossed the image using clear embossing powder and a heat gun.
Colored the tent with Sahara Sand and Bashful Blue markers.
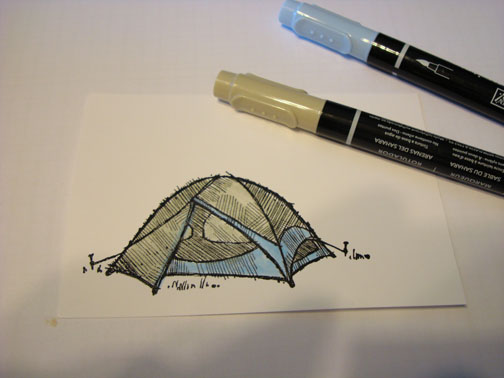
Colored the shadows in the Sahara Sand area with River Rock and the shadows in the Bashful Blue area by adding another layer of Bashful Blue marker.
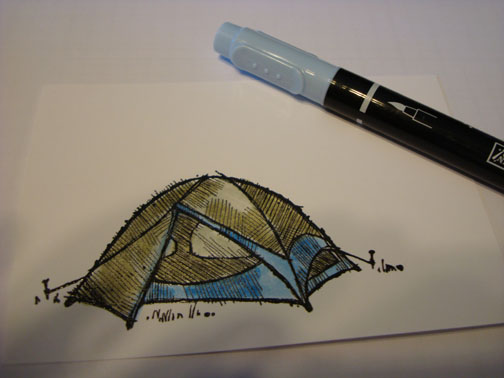
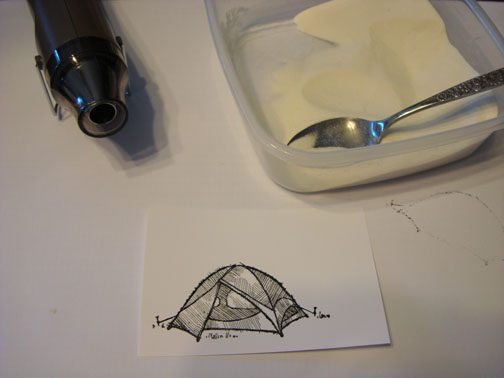
Added a bit of Daffodil Delight over the windows.
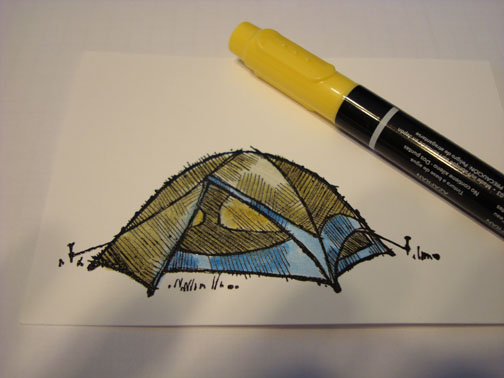
Colored over the tent using Versamarker and then heat embossed the entire image using clear embossing powder and a heat gun.
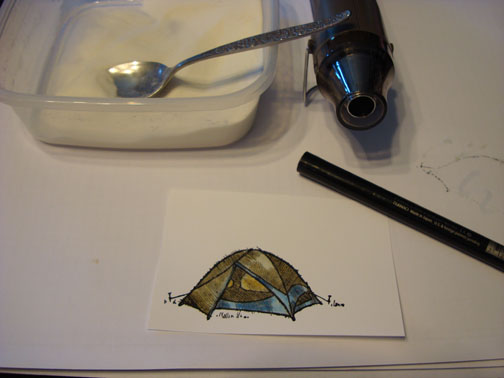
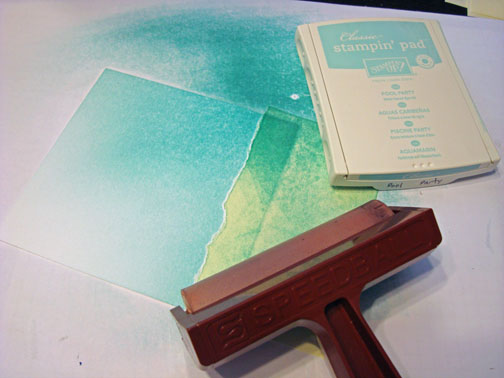
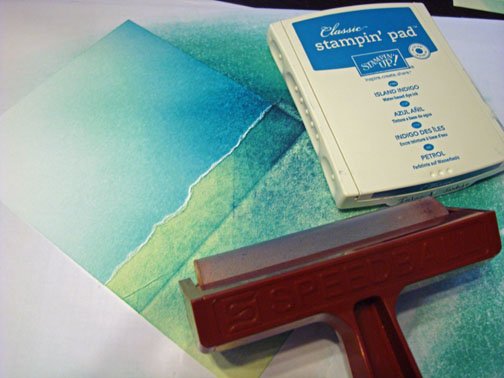
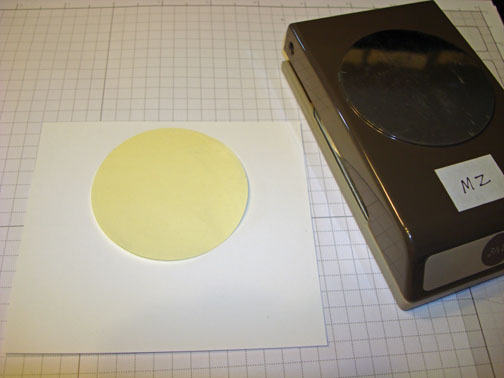
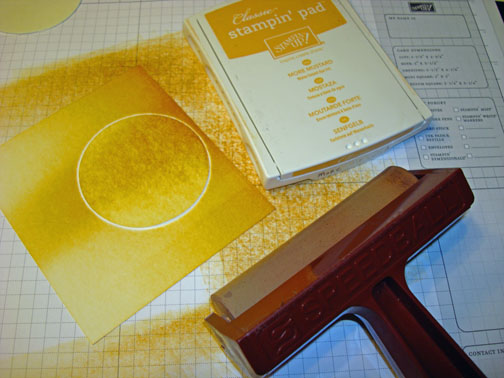
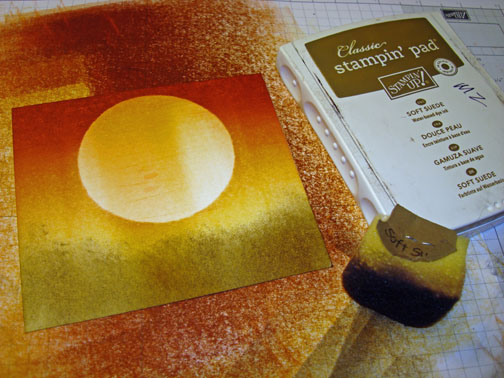
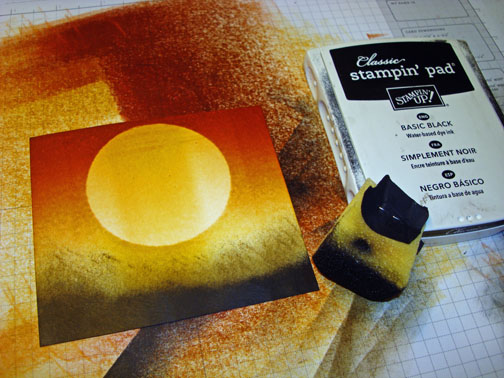
Brayered Daffodil Delight at the top of the card stock.
Brayered Pumpkin Pie ink at the top of the card stock, not covering the Daffodil Delight ink entirely.
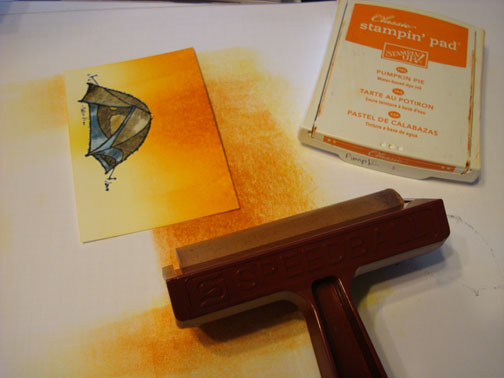
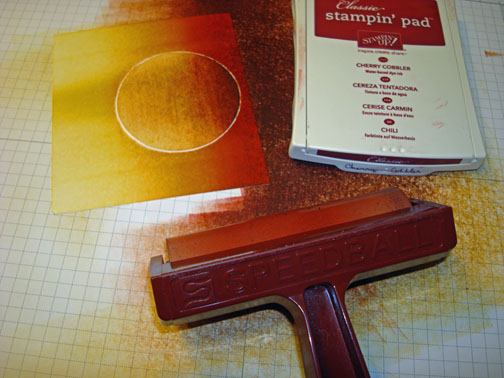
Brayered Cajun Craze at the very top of the card stock.
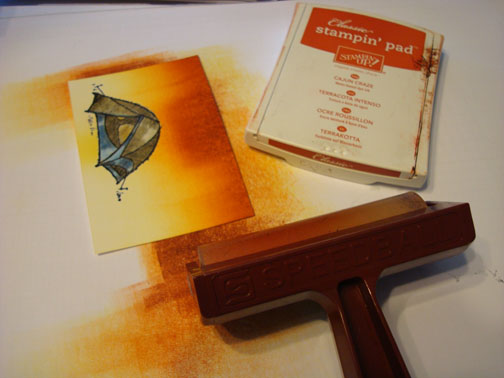
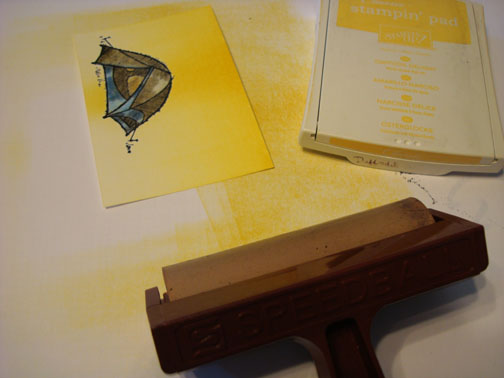
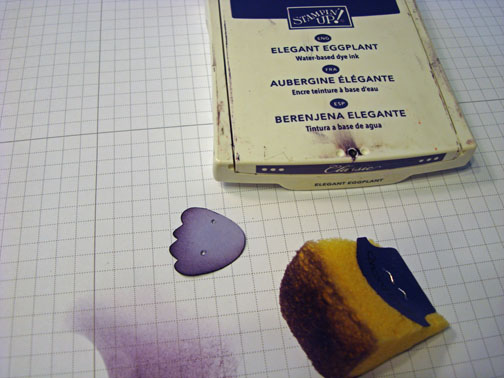
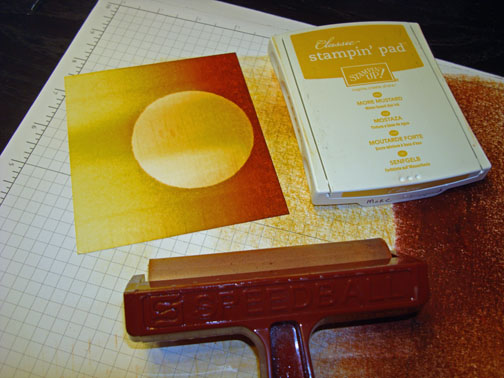
Sponged Old Olive ink at the bottom of the card stock.
Sponged Basic Black at the very bottom of the card stock.
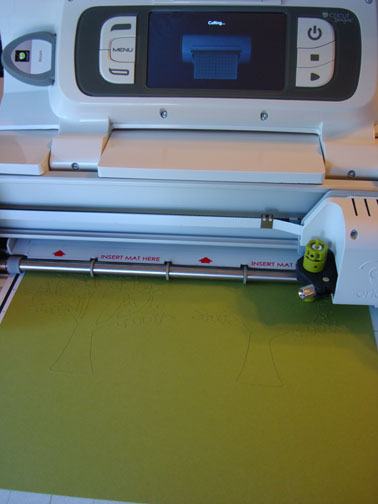
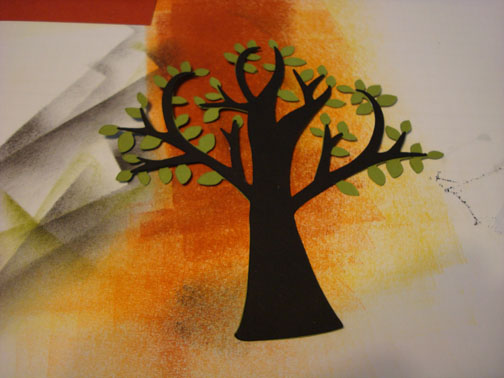
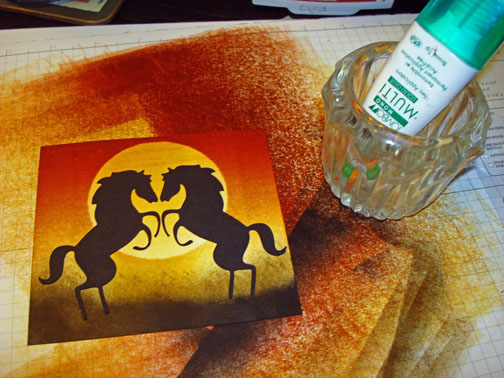
Cut two trees using Basic Black card stock and Old Olive card stock at 4.8″ using the Cricut and Cricut cartridge Bloom.
Glued the two layers together.
Added a 5″ x 6.5″ Cajun Craze Panel and a 4.75″ x 6.25″ Basic Black panel to the main image panel.
Adhered the two trees to the card stock.
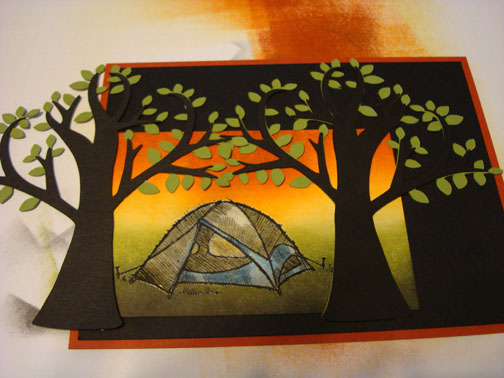
Flipped the card stock over and cut the hang over of the tree flush with the Cajun Craze card stock.
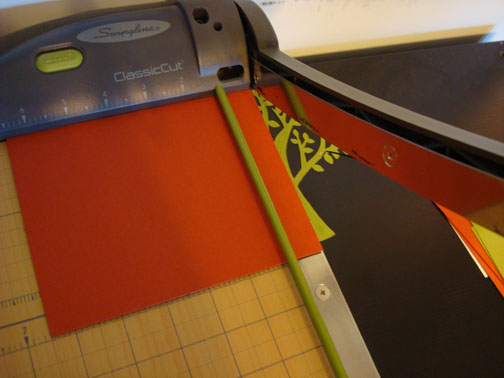
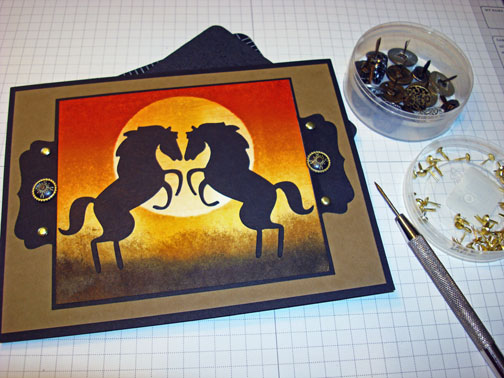
Added a 10″ x 6.5″ Whisper White card stock panel folded in half for the card.
Here is the finished card measuring 5″ x 6.5″.
May you get to enjoy nature this summer.
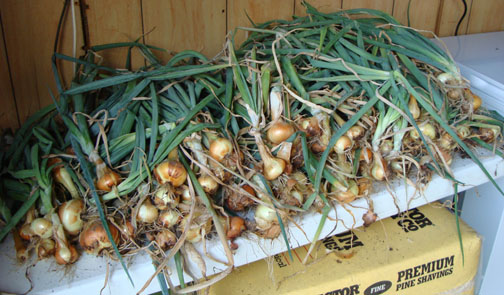
I’m off to work in my garden. Here is a sample of what I brought in this morning. Onions anyone?
Until my next post. . . . . . .
Hugs,


 Get ready for Brayer and Direct to Paper Workshops! I am coming to the following locations, click the location name for more information.
I hope you can make it to one of my workshops in 2012. I have decided not to travel after this year, so be sure to catch one this year!
Link to my Stampin’ Up website where you can order all of your must have Stampin’ Up products from me 24-7: https://michellezindorf.stampinup.net


