Category Archives: Tutorials

Simply Stars – Stampin’ Up! Tutorial #612, Mystery Hostess Winner and Blog Candy Winner!

Hey There,

Wow there is so much going on in today’s post.  Mystery Hostess Winner, Blog Candy winner and a new card tutorial.

Let’s start with my latest Mystery Hostess Winner.  I put the names of those people that used the hostess code when ordering in a hat and pulled out SUSAN LOEFFLER’S name.  With the pooled orders using the last hostess code Susan got to select $160 worth of free Stampin’ Up! product.  If you would like to participate in the next round of Mystery Hostess, please check out the details at the bottom of this post.

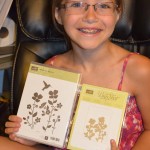
Next, Hailie Jade selected the winner of the Stampin’ Up! Wildflower Meadow blog candy.

and the winner is . . . . . . . . . . . .Mary Jarvis Futrell!

Congratulations Mary Jarvis Futrell, please e-mail your shipping address to me at [email protected] within the next 30 days so I may get this awesome blog candy out to you!

**************************************************

Now on with today’s tutorial. . . . .  . .

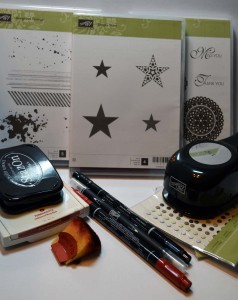
I pulled out some brand new, must have, stamp sets for today’s project.

Project Supplies:

Stamps: Stampin’ Up! Simply Stars (item #130892), Gorgeous Grunge (item #130517) and Lacy & Lovely (item #122887)

Card Stock: Stampin’ Up! So Saffron, Basic Black and the new DSP Soho Subway (item #130140)

Ink: Stampin’ Up! Cajun Craze and Stazon Jet Black

Accessories: Stampin’ Up!  1 3/4″ circle punch, Stampin’ Dimensionals, sponge, Neutrals Candy Dots, Blender Pen, Cajun Craze marker, Basic Black marker


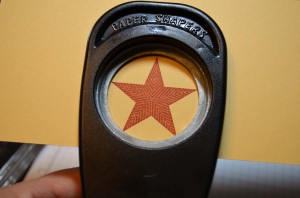
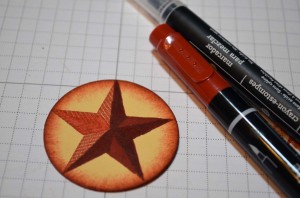
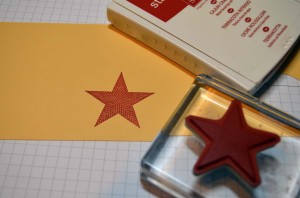
Stamped the star using Cajun Craze ink on a scrap piece of So Saffron card stock.

Punched the star out using a 1 3/4″ circle punch.


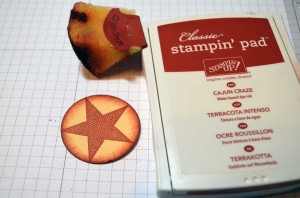
Sponged Cajun Craze ink around the edges.


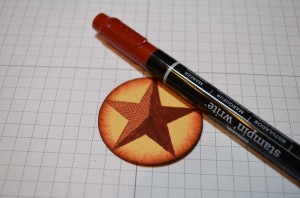
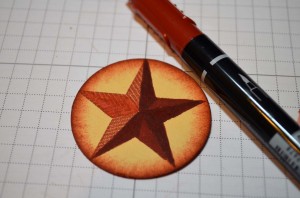
Colored Cajun Craze marker on some of the points.

Let the marker dry and then added an additional layer of Cajun Craze marker on a few of the points.

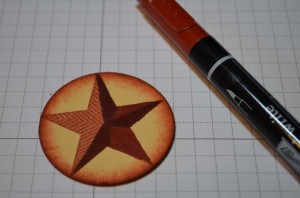
Using a Blender pen, added some Cajun Craze marker to one of the points on the left side of the star.

Colored over the darkest points on the left side of the star one more time using a Cajun Craze marker.

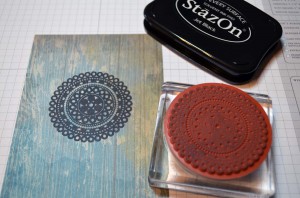
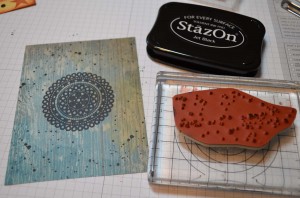
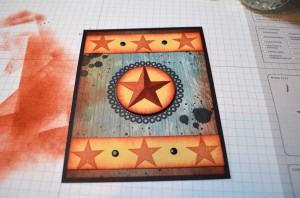
Cut a 4″ x 5.25″ piece of DSP from the Soho Subway DSP pack and stamped using a stamp from the Lacy and Lovely stamp set using Stazon Jet Black ink.

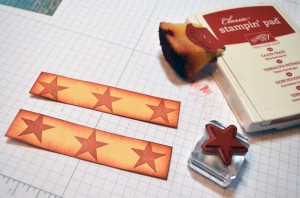
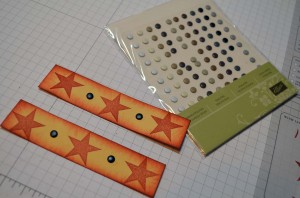
Cut (2) 3/4″ x 4″ strips of So Saffron card stock.  Stamped 3 small stars on each using Cajun Craze ink.  Sponged Cajun Craze ink around the edges of the card stock.

Added Basic Black Candy dots to the strips.

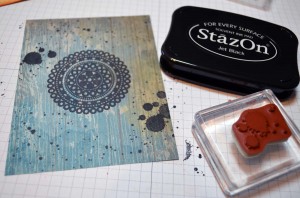
Stamped one of the Gorgeous Grunge stamps a few times on the paper using Stazon Jet Black ink.

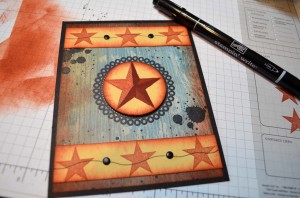
Used another one of the Gorgeous Grunge stamps with Stazon Jet Black ink.

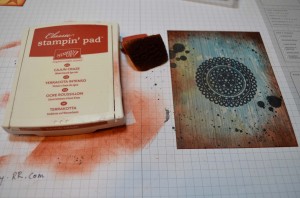
Sponged Cajun Craze ink around the edges.


Added a 4.25″ x 5.5″ piece of Basic Black card stock and a Whisper White card base.

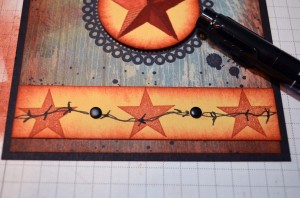
Added a squiggly line using the fine tip of a Basic Black marker through all of the small stars.

Added little dashes to look like Barbed wire and one more squiggly line.

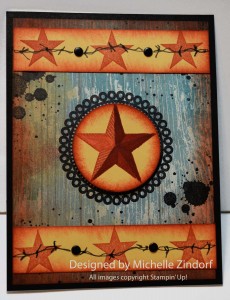
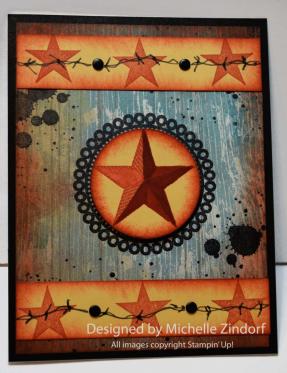
Here is the finished card measuring 4.25″ x 5.5″.

*****************************

May your day be out of this world wonderful!

Until my next post. . . . . .

Huge Hugs!

******************************************************************

Know the Code!!!!

MYSTERY HOSTESS:

With Stampin’ Up!’s announcement  of the new Hostess Code, we can now “pool” Online Orders together (place them individually, orders will ship directly to you – within the US only, but use the same hostess code). When smaller orders are put in together, the larger order qualifies for HOSTESS BENEFITS.

That means FREE STAMPS (or other products) I can SHARE with YOU!
So let’s get started with June/July’s Online Mystery Hostess Workshop!
How do you get to be part of the Mystery Hostess Workshop?
Simply use the Hostess Code below and place an order in my online store by 11:00 pm on Friday, July 5, 2013.
Important: To be part of the Online Mystery Hostess Workshop, once you add your first item to your shopping bag the hostess code must be entered just below the Special Offers section and it should say Michelle Zindorf as the Hostess.
Once all the orders are placed, on Saturday morning, July 6, 2013, I will draw ONE name to get hostess benefits on the entire order! I will email the winner to get your choices.
Your Hostess Code is: K96UED4T
Ready – Set – GO!! Start placing your orders now!… Remember, the deadline for this
event is 11:00 pm on Friday, July 5, 2013.
Please do not put the hostess code in if your merchandise order is $150 or more.  You would lose your hostess benefits that you would have coming already.

******************************************************************

Shop my online store now CLICK HERE

******************************************************************

View the 2013-2014
annual catalog online (Flash)

Annual catalog
Stampin’ Supplies
Product Guide

I have some catalogs on hand that can be ordered.  The cost is $6.50 each which includes flat rate priority shipping.  Please e-mail me at [email protected] if you would like to purchase one click ***********************************************************

Michelle’s Free Stamp Program

Don’t miss out on my Customer’s free stamp set program. Check it out!  For your order of $50 in product using me as your demonstrator you will receive one virtual token.  Order $100 in product receive two virtual tokens, etc.  After you have collected 10 virtual tokens you will receive a free current stamp set of your choosing, a value of $30 or less.

Here is a link to my online shopping page that you can shop at 24/7 (from the comfort of your home, even in your pj’s) and the products will be shipped directly to your door step from Stampin’ Up.   CLICK HERE TO SHOP.   My free stamp set program will be an on going program.  :)

***************************************************************

Learn How to Brayer

I now have an online beginner brayer video classes that will teach you how to brayer. CLICK HERE TO GET THEM.

**************************************************

Also, check out my new Zindorf Naturals Soap Page.  This stuff is oh so good for your skin.   CLICK HERE TO CHECK IT OUT.


Handmade Tag – Stampin’ Up! Tutorial #612

Hey There,

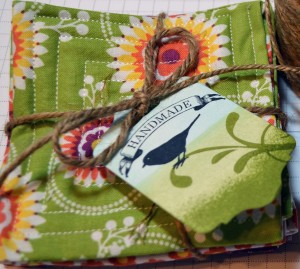
I have been busy of late making quilted coasters for my farmer’s market stand.   They needed a special tag.   You know you just don’t put this much effort into making something and then not package them well.   So, I’ve got a little tag project tutorial for you today.

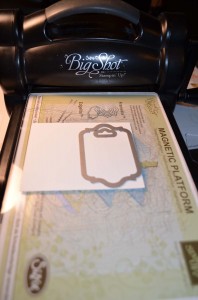
To make the tags I used the brand new and exciting magnetic platform for the Big Shot Machine.  It makes using the framelits a snap because it keeps your framelits from shifting on you.  Brilliant product! Also used the new Chalk Talk framelits.   Super awesome product to make all sorts of tags.

The complete tutorial for the tag is below.  You can check out my previous tutorial on making quilted coasters by CLICKING HERE.


**************************************************

Now on with today’s tutorial. . . . .  . .

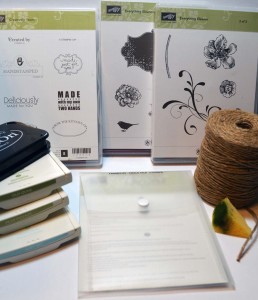
Project Supplies:

Stamps: Stampin’ Up! Everything Eleanor (item #124164) and Creatively Yours (item #122612)

Card Stock: Stampin’ Up! Whisper White

Ink: Stampin’ Up! Pear Pizzazz, Soft Sky, Old Olive and Stazon Jet Black

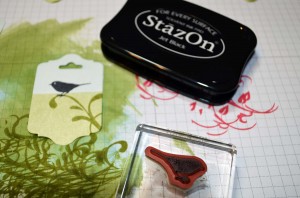
Accessories: Stampin’ Up!  Big Shot Machine, Magnetic Platform (item # 130658), sponge, Chalk Talk Framelits (item #129983)


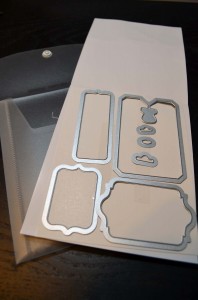
Using the Big Shot machine with the new Magnetic Platform and Chalk Talk Framelits cut out my tags using Whisper White card stock.


See the great pieces that come in the Chalk talk framelits.  You get all the little pieces that make very professional looking holes for your ribbon etc and tag shapes.   This set will get lots of use here in my craft space.  I can see using the hole pieces with my other framelits that I have in my arsenal.

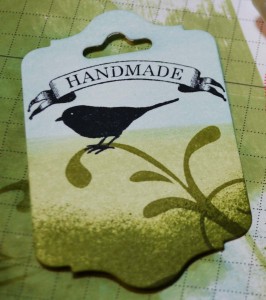
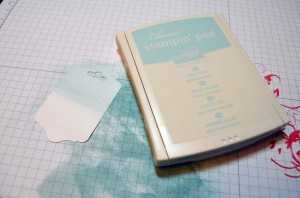
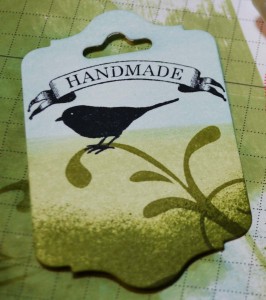
After cutting my tag, swiped the Soft Sky ink pad across the top of the tag.

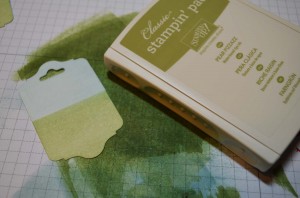
Swiped the Pear Pizzazz ink pad across the bottom of the tag.

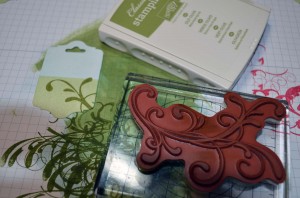
Stamped the flourish from the Everything Eleanor set using Old Olive ink.

Stamped the bird from the Everything Eleanor set using Stazon Jet Black ink.

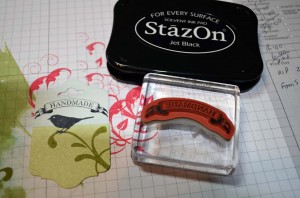
Stamped the Handmade stamp from the Creatively Yours set using Stazon Jet Black ink.

Sponged a bit of Old Olive ink at the bottom of the tag using a pouncing motion.

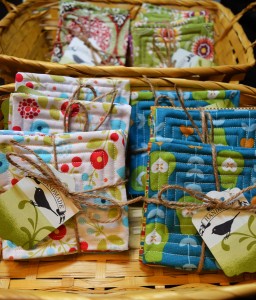
Here are my finished coaster packs.  I added the tag to them using twine.

*****************************

May your day be super special.

Until my next post. . . . . .

Huge Hugs!


******************************************************************

Know the Code!!!!  The combined workshop total is really getting up there!

MYSTERY HOSTESS:

With Stampin’ Up!’s announcement  of the new Hostess Code, we can now “pool” Online Orders together (place them individually, orders will ship directly to you – within the US only, but use the same hostess code). When smaller orders are put in together, the larger order qualifies for HOSTESS BENEFITS.

That means FREE STAMPS (or other products) I can SHARE with YOU!
So let’s get started with May’s Online Mystery Hostess Workshop!
How do you get to be part of the Mystery Hostess Workshop?
Simply use the Hostess Code below and place a minimum order of $50 (before tax and shipping) in my online store by 11:00 pm on Thursday, June 13, 2013.
Important: To be part of the Online Mystery Hostess Workshop, once you add your first item to your shopping bag the hostess code must be entered just below the Special Offers section and it should say Michelle Zindorf as the Hostess.
Once all the orders are placed, on Friday morning, June 14, I will draw ONE name to get hostess benefits on the entire order! I will call/email the winner to get your choices.
Your Hostess Code is: 3MZWCWAQ
Ready – Set – GO!! Start placing your orders now!… Remember, the deadline for this
event is 11:00 pm on Thursday, June 13, 2013.
Please do not put the hostess code in if your merchandise order is $150 or more.  You would lose your hostess benefits that you would have coming already.

******************************************************************

Shop my online store now CLICK HERE

******************************************************************

View the 2013-2014
annual catalog online (Flash)

Annual catalog
Stampin’ Supplies
Product Guide

I have some catalogs on hand that can be ordered.  The cost is $6.50 each which includes flat rate priority shipping.  Please e-mail me at [email protected] if you would like to purchase one click ***********************************************************

Michelle’s Free Stamp Program

Don’t miss out on my Customer’s free stamp set program. Check it out!  For your order of $50 in product using me as your demonstrator you will receive one virtual token.  Order $100 in product receive two virtual tokens, etc.  After you have collected 10 virtual tokens you will receive a free current stamp set of your choosing, a value of $30 or less.

Here is a link to my online shopping page that you can shop at 24/7 (from the comfort of your home, even in your pj’s) and the products will be shipped directly to your door step from Stampin’ Up.   CLICK HERE TO SHOP.   My free stamp set program will be an on going program.  :)

****************************************************************

The new Stampin’ Up! Annual Catalog is active on  May 31, 2013.  I have some on hand that can be pre-ordered.  The cost is $6.50 which includes flat rate shipping.  Please e-mail me at [email protected] if you would like to purchase one.

***************************************************************

Learn How to Brayer

I now have an online beginner brayer video classes that will teach you how to brayer. CLICK HERE TO GET THEM.

**************************************************

Also, check out my new Zindorf Naturals Soap Page.  This stuff is oh so good for your skin.   CLICK HERE TO CHECK IT OUT.


In the Wind – Stampin’ Up! Card Tutorial #611

Hey There,

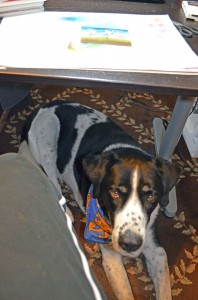
Today I am stamping at a disadvantage or advantage, whichever way you look at it.  You see, I have a 100 pound pup on my feet as I stamp, lol.   He has decided that he needs to be as close as possible this morning because his mommy is under the weather.   I’m dealing with this years case of poison Ivy, yuck!

To make myself feel better, I took a walk in my garden and visited my girls (hens).  I’ve added the pictures that I took on my stroll at the bottom of this post.  I’m the most lucky gal in the world, poison ivy or not.  I hope you too take a look around today and can feel grateful for all that you have.

***************************************************************

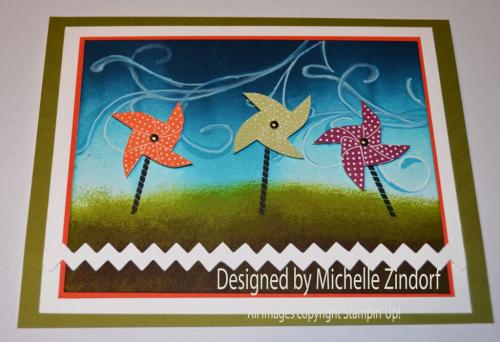
Now a bit about my card tutorial of the day.  I’ve paired up the Stampin’ Up! sets Sweets for the Sweet and Everything Eleanor.  Check it out below.

***************************************************************

I’ve added the featured card of the day to my sales page where you will also find some great deals on retired stamp sets and my brayer video.  CLICK HERE TO CHECK IT OUT

***************************************************************

Learn How to Brayer

I now have an online beginner brayer video classes that will teach you how to brayer. CLICK HERE TO GET THEM.

**************************************************

Now on with today’s tutorial. . . . .  . .

Project Supplies:

Stamps: Stampin’ Up!  Sweets for the Sweet (item #122512) and Everything Eleanor (item #124164)

Card Stock: Stampin’ Up! Whisper White, Old Olive and Tangerine Tango

Ink: Stampin’ Up! Tempting Turquoise, Early Espresso, Old Olive, Midnight Muse, Tangerine Tango, Pear Pizzazz, Rich Razzelberry and Stazon Jet Black

Accessories: Stampin’ Up!  Stampin’ Write Markers Tempting Turquoise, White Gel Pen, Stampin’ Dimensional, Sponges, Brayer, Silver Brads, Post it note, Big Shot Machine and Tasteful Trim Die


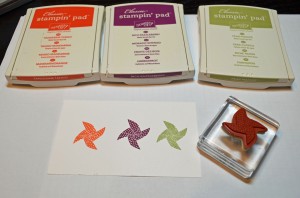
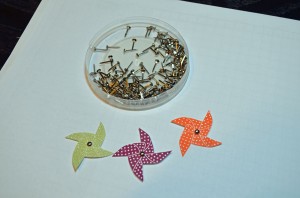
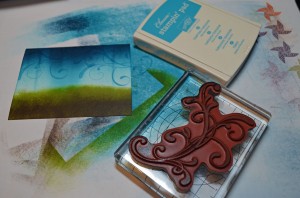
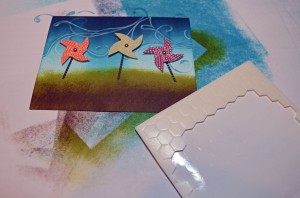
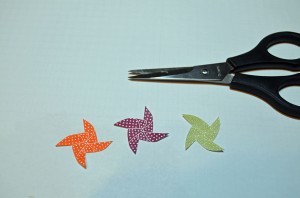
Stamped the pinwheel using Tangerine Tango, Rich Razzelberry and Pear Pizzazz on Whisper White card stock.  Cut them out and put a brad in the center of each.


Brayered Tempting Turquoise ink on a 3.5″ x 4.5″ piece of Whisper White card stock.

Brayered Midnight Muse ink on the card stock, not covering the Tempting Turquoise ink entirely.

Sponged Old Olive ink at the bottom of the card stock and then sponged Early Espresso ink at the bottom.


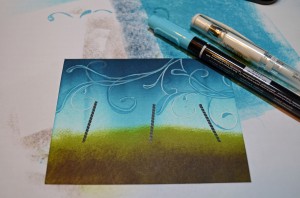
Stamped the Everything Eleanor Flourish using Tempting Turquoise ink in the sky area.

Covered most of the grassy area using a post it note and then stamped the pinwheel sticks using Stazon Jet Black ink.

Added some white highlighting around the flourish and then went over some of it with a Tempting Turquoise marker over the White gel pen to tone it down a bit.

Added the pinwheels using Stampin’ Dimensionals to pop them up.

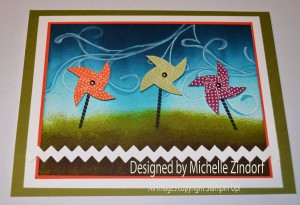
Die cut a Whisper White Rick Rack shape using the Big Shot Machine and the Tasteful Trim Die.

Tangerine Tango panel, Whisper White Panel, Old Olive panel and a Whisper White Card Base.  Here is the finished card measuring 4.25″ x 5.5″.

Before I close here is a picture walk through of what is happening here at the Zindorf Homestead.

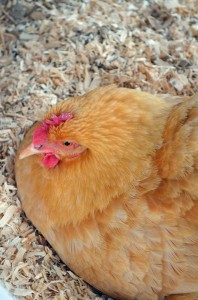
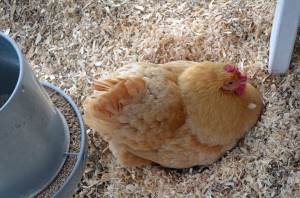
Buffy is totally a mental case right now.  She is broody and wants to sit on some eggs to hatch them.  Since we only have hens we don’t have any fertile eggs so she is totally out of luck.  Here she is totally pissed off and puffed up since I won’t let her stay in the nest 24/7 as she would like to.


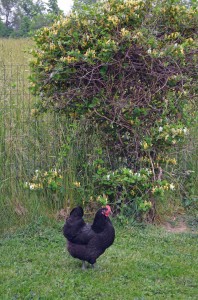
I caught Sophie out by the Honey Suckle Bush.

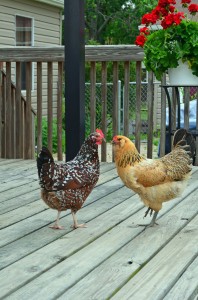
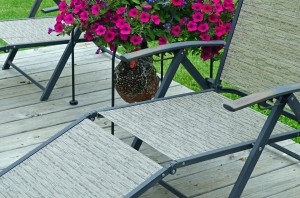
These to characters (Red and Bunny) know they are not suppose to be on the deck because they leave little unwanted packages.  But here they are just the same.  I think they are asking each other if I seen them.

I did run them off of the top deck and then turned around to find Red hiding under the table on the lower deck, lol.  She thinks I cannot see her.

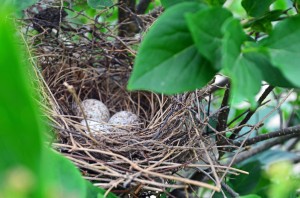
We have a pair of Cardinals nesting in our Lilac Bush.

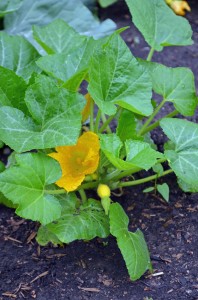
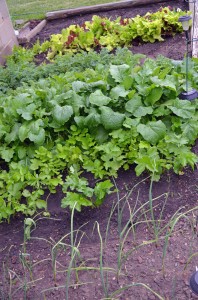
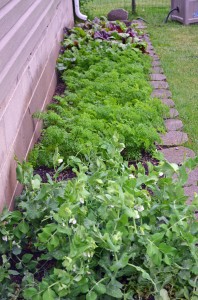
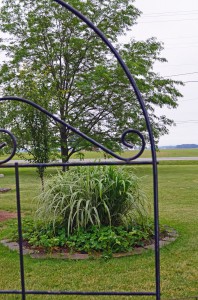
Now here is where I spend a great amount of time.  Russ and I are trying to grow as much of our own food as we can. Here is a tour of our garden.

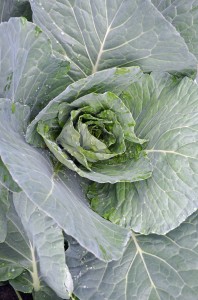
I think cabbages are one of the most beautiful veggies out there.

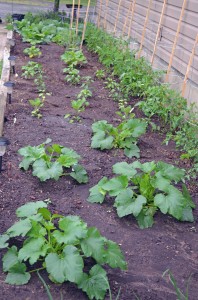
This is one of my warm weather veggie beds.  Things are coming along.  I’m growing Asparagus, cabbage, tomatoes, peppers, onions, squash, radishes and zucchini in this area.

Cold weather beds – garlic, parsnips, turnips,  kale and lettuce.

Another cold weather bed – Sugar Snap peas, Carrots, Beets and Spinach.

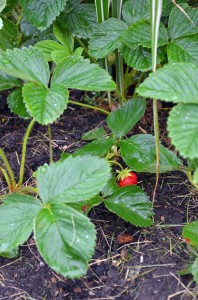
I’ve been getting about a quart a day of Strawberries from this bed, yum!

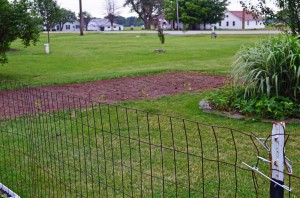
This large bed looks empty now, but I’ve planted corn, beans and cucumbers.

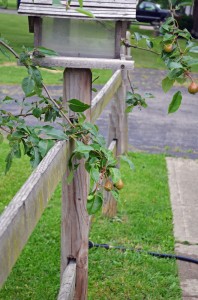
We now have pear, cherry and apple trees.   Also, we have blueberry bushes.   I’m hoping to add  peach and plum trees in the Fall.  Pear tree branches and bird feeder.  Pears are coming along.

Hope you enjoyed the tour.  🙂

*********************************

Know the Code!!!!

MYSTERY HOSTESS:

With Stampin’ Up!’s announcement  of the new Hostess Code, we can now “pool” Online Orders together (place them individually, orders will ship directly to you – within the US only, but use the same hostess code). When smaller orders are put in together, the larger order qualifies for HOSTESS BENEFITS.

That means FREE STAMPS (or other products) I can SHARE with YOU!
So let’s get started with May’s Online Mystery Hostess Workshop!
How do you get to be part of the Mystery Hostess Workshop?
Simply use the Hostess Code below and place a minimum order of $50 (before tax and shipping) in my online store by 11:00 pm on Thursday, June 13, 2013.
Important: To be part of the Online Mystery Hostess Workshop, once you add your first item to your shopping bag the hostess code must be entered just below the Special Offers section and it should say Michelle Zindorf as the Hostess.
Once all the orders are placed, on Friday morning, June 14, I will draw ONE name to get hostess benefits on the entire order! I will call/email the winner to get your choices.
Your Hostess Code is: 3MZWCWAQ
Ready – Set – GO!! Start placing your orders now!… Remember, the deadline for this
event is 11:00 pm on Thursday, June 13, 2013.
Please do not put the hostess code in if your merchandise order is $150 or more.  You would lose your hostess benefits that you would have coming already.

Until my next post. . . . . .

Huge Hugs!

Weight loss in 2013: 23.4 lbs

******************************************************************

Shop my online store now CLICK HERE

******************************************************************

View the 2013-2014
annual catalog online (Flash)

Annual catalog
Stampin’ Supplies
Product Guide

***********************************************************

Michelle’s Free Stamp Program

Don’t miss out on my Customer’s free stamp set program. Check it out!  For your order of $50 in product using me as your demonstrator you will receive one virtual token.  Order $100 in product receive two virtual tokens, etc.  After you have collected 10 virtual tokens you will receive a free current stamp set of your choosing, a value of $30 or less.

Here is a link to my online shopping page that you can shop at 24/7 (from the comfort of your home, even in your pj’s) and the products will be shipped directly to your door step from Stampin’ Up.   CLICK HERE TO SHOP.   My free stamp set program will be an on going program.  :)

****************************************************************

The new Stampin’ Up! Annual Catalog is active on  May 31, 2013.  I have some on hand that can be pre-ordered.  The cost is $6.50 which includes flat rate shipping.  Please e-mail me at [email protected] if you would like to purchase one.

***************************************************************

Learn How to Brayer

I now have an online beginner brayer video classes that will teach you how to brayer. CLICK HERE TO GET THEM.

**************************************************

Also, check out my new Zindorf Naturals Soap Page.  This stuff is oh so good for your skin.   CLICK HERE TO CHECK IT OUT.
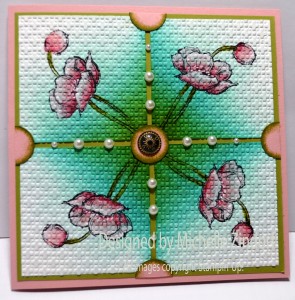
Simply Sketched Tile -Stampin’ Up! Card Tutorial #610

Hey There,

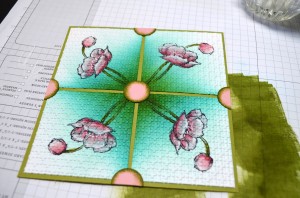
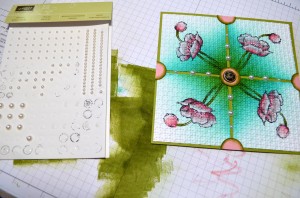
I have another card tutorial for you using the brand new Stampin’ Up! Hostess set, Simply Sketched.   Today’s tutorial shows you how to make a dramatic tile card by brayering at an angle on the 4 main image panels.  Check out my tutorial below.

***************************************************************

I’ve added the featured card of the day to my sales page where you will also find some great deals on retired stamp sets and my brayer video.  CLICK HERE TO CHECK IT OUT

***************************************************************

Learn How to Brayer

I now have an online beginner brayer video classes that will teach you how to brayer. CLICK HERE TO GET THEM.

**************************************************

Now on with today’s tutorial. . . . .  . .

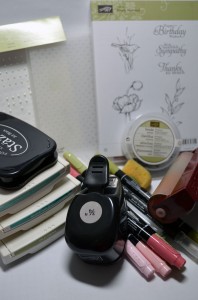
Project Supplies:

Stamps: Stampin’ Up! Hostess set Simply Sketched (item #129672)

Card Stock: Stampin’ Up! Whisper White, Old Olive and Blushing Bride

Ink: Stampin’ Up! Coastal Cabana, Bermuda Bay, Old Olive and Stazon Jet Black

Accessories: Stampin’ Up!  Stampin’ Write Markers (Blushing Bride, Pink Pirquette, Primrose Petal, Pear Pizzazz and Old Olive), White Gel Pen, Blender Pen, Sponge, Antique Brad, Brayer, Big Shot Machine, Square Lattice embossing folder and Basic Pearls


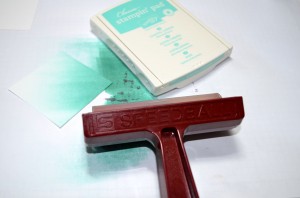
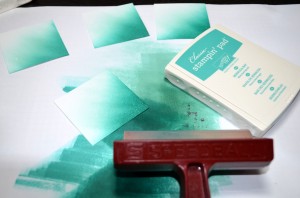
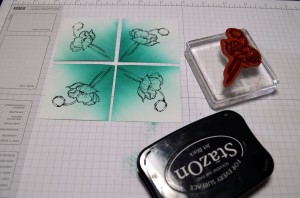
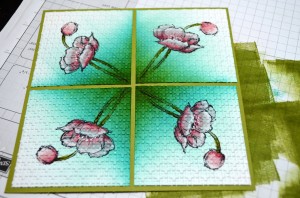
Cut 4 – 2.5″ squares and brayered Coastal Cabana ink at an angle on one corner of each pieces of card stock.

Brayered Bermuda Bay at the same angle, not covering the Coastal Cabana entirely.

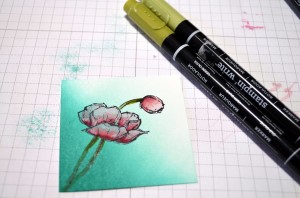
Stamped the flower image using Stazon Jet Black ink on each main image panel.

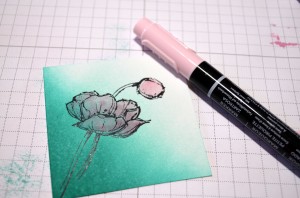
Colored the flower and bud using Pink Pirquette marker.

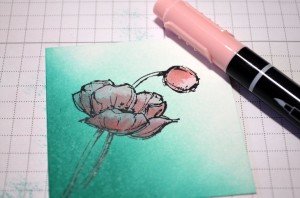
Added Blushing Bride marker to the bottom half of each flower petal and the bud.

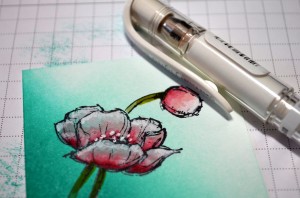
Added Primrose Petal marker to the very base of each petal and the bud and then blended it in using a Blender Pen.

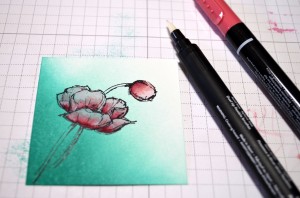
Colored the stems in using a Pear Pizzazz marker and then added Old Olive marker to the top of each stem.

Added White Gel pen dots to the stamens and then added white gel pen to the top of each petal and the bud smudging in the white gel pen with my finger  on each petal.

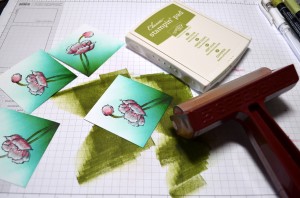
Brayered Old Olive ink at an angle on each main image panel.

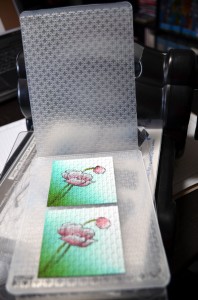
Ran them through the Big Shot Machine using the Square Lattice embossing folder.

Adhered them to a 5.25″ square piece of Old Olive card stock.

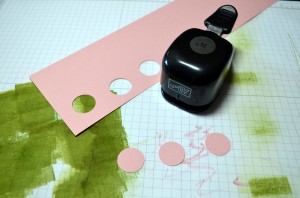
Punched 3 Blushing Bride circles using the 3/4″ circle punch.

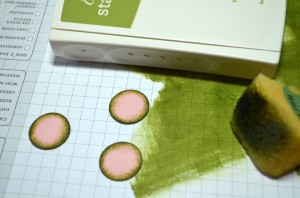
Distressed the edges using Old Olive ink.

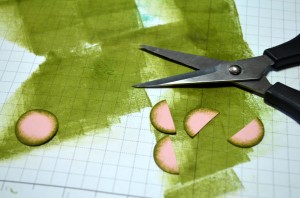
Cut 2 of the circles in half.

Added the circles to the panel.

Added Basic Pearls and an Antique Brad.

Attached it to a 5.5″ square Blushing Bride Card base.

Here is the finished card.

*********************************

Know the Code!!!!

MYSTERY HOSTESS:

With Stampin’ Up!’s announcement  of the new Hostess Code, we can now “pool” Online Orders together (place them individually, orders will ship directly to you – within the US only, but use the same hostess code). When smaller orders are put in together, the larger order qualifies for HOSTESS BENEFITS.

That means FREE STAMPS (or other products) I can SHARE with YOU!
So let’s get started with May’s Online Mystery Hostess Workshop!
How do you get to be part of the Mystery Hostess Workshop?
Simply use the Hostess Code below and place a minimum order of $50 (before tax and shipping) in my online store by 11:00 pm on Thursday, June 13, 2013.
Important: To be part of the Online Mystery Hostess Workshop, once you add your first item to your shopping bag the hostess code must be entered just below the Special Offers section and it should say Michelle Zindorf as the Hostess.
Once all the orders are placed, on Friday morning, June 14, I will draw ONE name to get hostess benefits on the entire order! I will call/email the winner to get your choices.
Your Hostess Code is: 3MZWCWAQ
Ready – Set – GO!! Start placing your orders now!… Remember, the deadline for this
event is 11:00 pm on Thursday, June 13, 2013.
Please do not put the hostess code in if your merchandise order is $150 or more.  You would lose your hostess benefits that you would have coming already.

Until my next post. . . . . .

Huge Hugs!

Weight loss in 2013: 23.4 lbs

******************************************************************

Shop my online store now CLICK HERE

******************************************************************

View the 2013-2014
annual catalog online (Flash)

Annual catalog
Stampin’ Supplies
Product Guide

***********************************************************

Michelle’s Free Stamp Program

Don’t miss out on my Customer’s free stamp set program. Check it out!  For your order of $50 in product using me as your demonstrator you will receive one virtual token.  Order $100 in product receive two virtual tokens, etc.  After you have collected 10 virtual tokens you will receive a free current stamp set of your choosing, a value of $30 or less.

Here is a link to my online shopping page that you can shop at 24/7 (from the comfort of your home, even in your pj’s) and the products will be shipped directly to your door step from Stampin’ Up.   CLICK HERE TO SHOP.   My free stamp set program will be an on going program.  :)

****************************************************************

The new Stampin’ Up! Annual Catalog is active on  May 31, 2013.  I have some on hand that can be pre-ordered.  The cost is $6.50 which includes flat rate shipping.  Please e-mail me at [email protected] if you would like to purchase one.

***************************************************************

Learn How to Brayer

I now have an online beginner brayer video classes that will teach you how to brayer. CLICK HERE TO GET THEM.

**************************************************

Also, check out my new Zindorf Naturals Soap Page.  This stuff is oh so good for your skin.   CLICK HERE TO CHECK IT OUT.


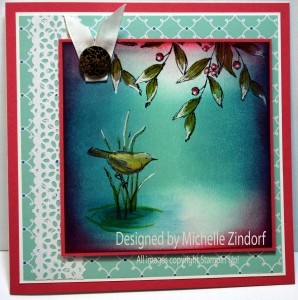
Simply Sketched Stampin’ Up! Card Tutorial #609

Hey There,

I got this Stampin’ Up! Hostess set, Simply Sketched when I pre-ordered from the new catalog a month ago and have been holding back using it until you where able to get it too, it was agony!  You can get this set with a $150 purchase or workshop total.  It’s one of my all time favorites now.  Check out my tutorial below.

***************************************************************

I’ve added the featured card of the day to my sales page where you will also find some great deals on retired stamp sets and my brayer video.  CLICK HERE TO CHECK IT OUT

***************************************************************

Learn How to Brayer

I now have an online beginner brayer video classes that will teach you how to brayer. CLICK HERE TO GET THEM.

**************************************************

Now on with today’s tutorial. . . . .  . .

Project Supplies:

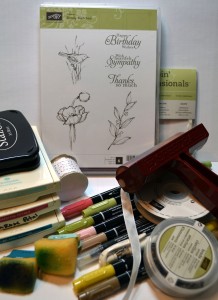
Stamps: Stampin’ Up! Hostess set Simply Sketched (item #129672)

Card Stock: Stampin’ Up! Whisper White, Primrose Petal and Stampin’ Up! Quatrefancy Specialty DSP

Ink: Stampin’ Up! Pool Party, Island Indigo, Primrose Petal and Stazon Jet Black

Accessories: Stampin’ Up!  Stampin’ Write Markers (Summer Starfruit, Pear Pizzazz, Old Olive, Crumb Cake Soft Suede, Blushing Bride, Primrose Petal), White Gel Pen, Blender Pen, Sponges, Whisper White Ribbon, Antique Brad, Brayer and Delicate Details Lace Tape


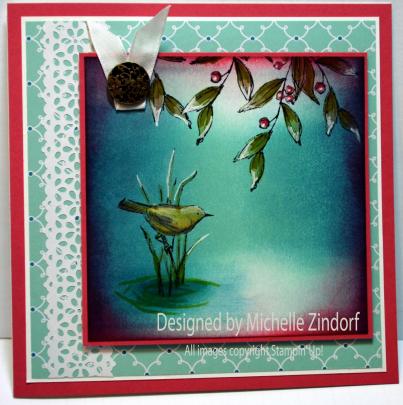
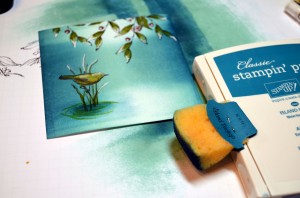
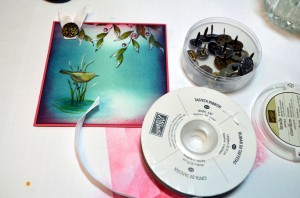
Brayered Pool Party ink on one side of a 4″ square piece of Whisper White card stock.

Brayered Pool Party ink on the opposite side of the card stock.

Brayered a little Island Indigo ink on the same sides, not covering the Pool Party ink entirely.

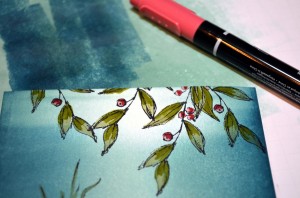
Stamped the bird stamp with and the Leaf stamp using Stazon Jet Black ink.


Colored the leaves and grasses in using a Pear Pizzazz marker.

Added Old Olive marker to the base of the leaves and the bottom of the grasses.

Colored the berries in using a Blushing Bride marker.

Added a touch of Primrose Petal marker to the base of each berry.

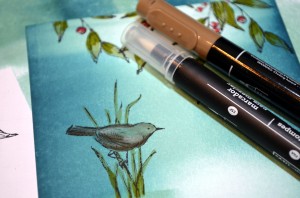
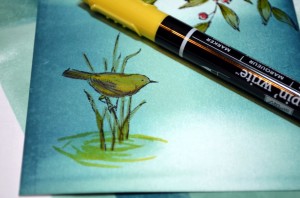
Colored in the bird using a Crumb Cake marker.

Added Soft Suede marker to the darkest areas of the bird and then blended it a bit using a Blender Pen.


Colored in the Bird using a Summer Starfruit marker.  Also, added a few water lines beneath the grasses.

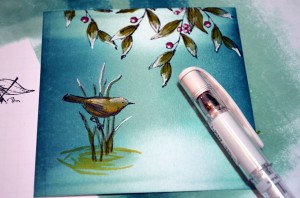
Added highlights to the leaves, grasses and the top of the bird with a White Gel Pen.  I smudged the highlight on the top of the bird with my finger while it was wet to tone it down a bit.

Sponged Island Indigo ink at the base of the grasses.

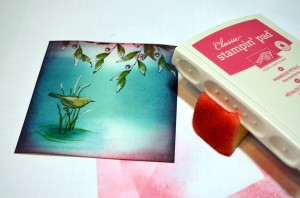
Sponged Primrose Petal ink on the edges of the card stock.

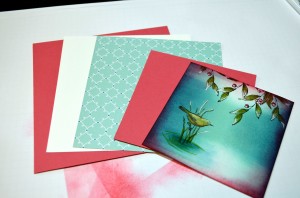
Added a 5.5″ Primrose Petal layer, 5.25″ Whisper White Layer, 5″ DSP layer and a 4 1/8″ Primrose Petal layer under the main image panel.

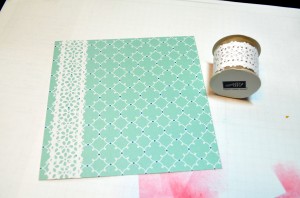
Put a strip of the Delicate Details Lace Tape on the left side of the DSP.

Adhered the smallest Primrose Petal layer to the main image panel and added a bit of Whisper White Ribbon folded over and an Antique Brad.

Put the card front together and adhered it to a Whisper White card base.

Here is the finished card measuring 5.5″ square.

*********************************

Know the Code!!!!

MYSTERY HOSTESS:

With Stampin’ Up!’s announcement  of the new Hostess Code, we can now “pool” Online Orders together (place them individually, orders will ship directly to you – within the US only, but use the same hostess code). When smaller orders are put in together, the larger order qualifies for HOSTESS BENEFITS.

That means FREE STAMPS (or other products) I can SHARE with YOU!
So let’s get started with May’s Online Mystery Hostess Workshop!
How do you get to be part of the Mystery Hostess Workshop?
Simply use the Hostess Code below and place a minimum order of $50 (before tax and shipping) in my online store by 11:00 pm on Thursday, June 13, 2013.
Important: To be part of the Online Mystery Hostess Workshop, once you add your first item to your shopping bag the hostess code must be entered just below the Special Offers section and it should say Michelle Zindorf as the Hostess.
Once all the orders are placed, on Friday morning, June 14, I will draw ONE name to get hostess benefits on the entire order! I will call/email the winner to get your choices.
Your Hostess Code is: 3MZWCWAQ
Ready – Set – GO!! Start placing your orders now!… Remember, the deadline for this
event is 11:00 pm on Thursday, June 13, 2013.
Please do not put the hostess code in if your merchandise order is $150 or more.  You would lose your hostess benefits that you would have coming already.

Until my next post. . . . . .

Huge Hugs!

Weight loss in 2013: 23.4 lbs

******************************************************************

Shop my online store now CLICK HERE

******************************************************************

View the 2013-2014
annual catalog online (Flash)

Annual catalog
Stampin’ Supplies
Product Guide

Get Your Hard Copy of the 2013-2014 Annual Catalog $6.50, which includes shipping  click  

***********************************************************

Michelle’s Free Stamp Program

Don’t miss out on my Customer’s free stamp set program. Check it out!  For your order of $50 in product using me as your demonstrator you will receive one virtual token.  Order $100 in product receive two virtual tokens, etc.  After you have collected 10 virtual tokens you will receive a free current stamp set of your choosing, a value of $30 or less.

Here is a link to my online shopping page that you can shop at 24/7 (from the comfort of your home, even in your pj’s) and the products will be shipped directly to your door step from Stampin’ Up.   CLICK HERE TO SHOP.   My free stamp set program will be an on going program.  :)

****************************************************************

The new Stampin’ Up! Annual Catalog is active on  May 31, 2013.  I have some on hand that can be pre-ordered.  The cost is $6.50 which includes flat rate shipping.  Please e-mail me at [email protected] if you would like to purchase one.

***************************************************************

Learn How to Brayer

I now have an online beginner brayer video classes that will teach you how to brayer. CLICK HERE TO GET THEM.

**************************************************

Also, check out my new Zindorf Naturals Soap Page.  This stuff is oh so good for your skin.   CLICK HERE TO CHECK IT OUT.
 

Watercolor Summer Silhouettes – Stampin’ Up! Card Tutorial #608

Hey There,

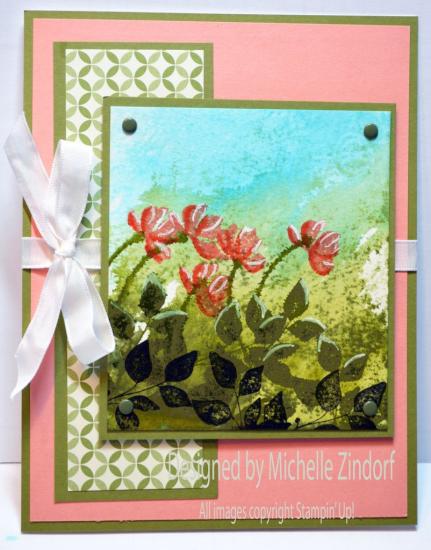
I’m sharing a super simple watercolor like background technique with you today.   Your going to flip when you try it.   This is my second card tutorial this week using the beautiful Stampin’ Up! set Summer Silhouettes (item #126447).  It’s a must have.

I’ve also thrown in a few sneak peeks from the new Stampin’ Up! catalog that will be released tomorrow, May 31, 2013.    You will be able to start ordering from it at 12:00 p.m. Mountain Time tomorrow.  Be sure to stop back tomorrow.  I’ll be putting up a link to the new catty for your view pleasure as soon as Stampin’ Up! posts it.  Just know that it ROCKS!

***************************************************************

I’ve added the featured card of the day to my sales page where you will also find some great deals on retired stamp sets and my brayer video.  CLICK HERE TO CHECK IT OUT

***************************************************************

Now on with today’s tutorial. . . . .  . .

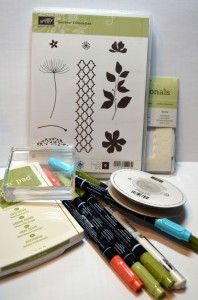
Project Supplies:

Stamps: Stampin’ Up! Summer Silhouettes (item #126447)

Card Stock: Stampin’ Up! Watercolor paper, Old Olive, Crisp Cantaloupe (sneak peek) and Gingham Garden item #129310 (sneak peek)

Ink: Stampin’ Up! Old Olive, Basic Black and Crisp Cantaloupe

Accessories: Stampin’ Up!  Stampin’ Write Markers (Tempting Turquoise, Pear Pizzazz, Old Olive, Always Artichoke and Tangerine Tango), White Gel Pen, Acrylic Block, Regals Candy Dots (item number 130932 sneak peek), Stampin’ Dimensionals and Whisper White Ribbon

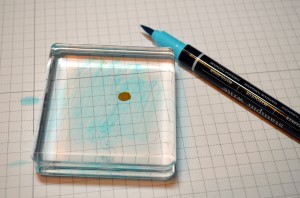
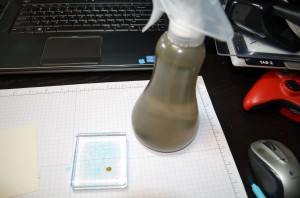
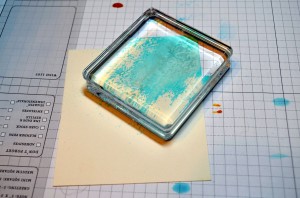
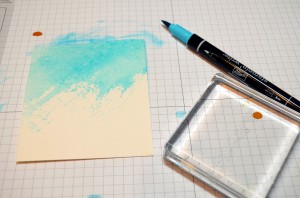
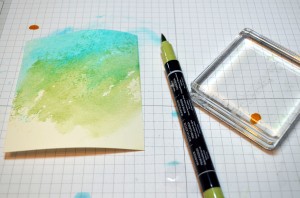
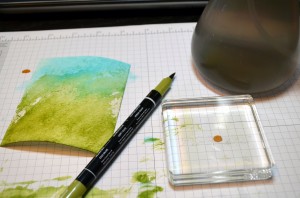
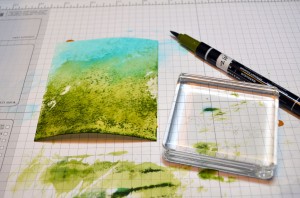
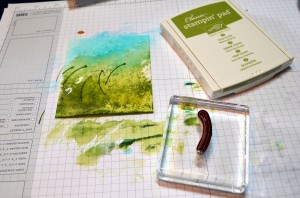
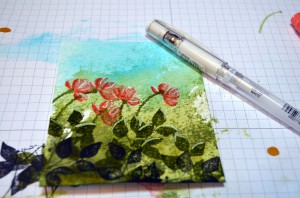
For each color in the background you will scribble your Stampin’ Write Marker on a acrylic block, spritz very lightly with water and then smear it on the watercolor paper.   The more you spritz the more diluted your color will become.  I barely spritzed.

Started with Tempting Turquoise ink and smeared in a downward motion on a 3.5″ x 4″ piece of Watercolor paper.  Repeat a couple of times for each color.


Next color Pear Pizzazz.  This was done with an upward motion.

Next color Old Olive with an upward motion.

Lastly, I added Always Artichoke.   I wanted the Artichoke to be more prominent so I did not mist my block with water.  I scribbled on the block and smeared it with an upward motion.  This leaves little dots on the watercolor paper because it will only hit the peaks of the card stock.

Stamped the flower stems using Old Olive ink.

Stamped the flowers using Crisp Cantaloupe ink.

Stamped the leaves using Old Olive ink.

Stamped the leaves at the very bottom of the card stock using Basic Black ink.

Added a bit of Tangerine Tango marker to the undersides of the flower petals.

Added some highlights to the tops of the flower petals and tops of the leaves using a White Gel pen.

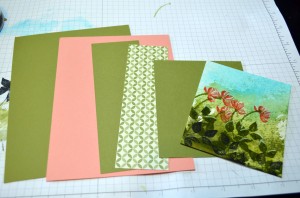
Here are my layer measurements.

Old Olive 6.5″ x 5″

Crisp Cantaloupe 6.25″ x 4.75″

Old Olive 2″ x 5.75″

Gingham Garden DSP 1.75″ x 5.5″ (sneak peek)

Old Olive 3.75″ x 4.25″

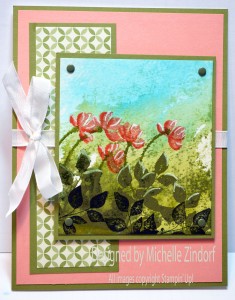
Assembled my card and added Whisper White Ribbon and Always Artichoke Candy Dots (sneak peek).

There you have it the finished card.

Urgent!   Only a few days left to pick up those Stampin’ Up! retiring stamps.  Retiring sets only available until June 3, 2013.

CLICK HERE TO SEE THE RETIRED STAMP LIST!!

CLICK HERE TO SEE THE RETIRING ACCESSORIES!!!

*********************************

Know the Code!!!!

MYSTERY HOSTESS:

With Stampin’ Up!’s announcement  of the new Hostess Code, we can now “pool” Online Orders together (place them individually, orders will ship directly to you – within the US only, but use the same hostess code). When smaller orders are put in together, the larger order qualifies for HOSTESS BENEFITS.

That means FREE STAMPS (or other products) I can SHARE with YOU!
So let’s get started with May’s Online Mystery Hostess Workshop!
How do you get to be part of the Mystery Hostess Workshop?
Simply use the Hostess Code below and place a minimum order of $50 (before tax and shipping) in my online store by 11:00 pm on Thursday, June 13, 2013.
Important: To be part of the Online Mystery Hostess Workshop, once you add your first item to your shopping bag the hostess code must be entered just below the Special Offers section and it should say Michelle Zindorf as the Hostess.
Once all the orders are placed, on Friday morning, June 14, I will draw ONE name to get hostess benefits on the entire order! I will call/email the winner to get your choices.
Your Hostess Code is: 3MZWCWAQ
Ready – Set – GO!! Start placing your orders now!… Remember, the deadline for this
event is 11:00 pm on Thursday, June 13, 2013.
Please do not put the hostess code in if your merchandise order is $150 or more.  You would lose your hostess benefits that you would have coming already.

Until my next post. . . . . .

Huge Hugs!

Weight loss in 2013: 23.4 lbs

***********************************************************

Michelle’s Free Stamp Program

Don’t miss out on my Customer’s free stamp set program. Check it out!  For your order of $50 in product using me as your demonstrator you will receive one virtual token.  Order $100 in product receive two virtual tokens, etc.  After you have collected 10 virtual tokens you will receive a free current stamp set of your choosing, a value of $30 or less.

Here is a link to my online shopping page that you can shop at 24/7 (from the comfort of your home, even in your pj’s) and the products will be shipped directly to your door step from Stampin’ Up.   CLICK HERE TO SHOP.   My free stamp set program will be an on going program.  :)

****************************************************************

The new Stampin’ Up! Annual Catalog is active on  May 31, 2013.  I have some on hand that can be pre-ordered.  The cost is $6.50 which includes flat rate shipping.  Please e-mail me at [email protected] if you would like to purchase one.

***************************************************************

Learn How to Brayer

I now have an online beginner brayer video classes that will teach you how to brayer. CLICK HERE TO GET THEM.

**************************************************

Also, check out my new Zindorf Naturals Soap Page.  This stuff is oh so good for your skin.   CLICK HERE TO CHECK IT OUT.
 

Summer Silhouettes – Stampin’ Up! Card Tutorial #607

Hey There,

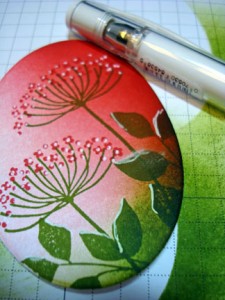
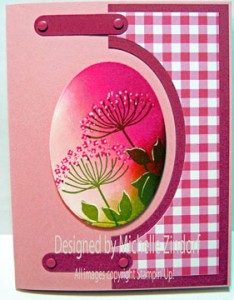
This week I will be featuring card tutorials made with the Stampin’ Up! set Summer Silhouettes.    The Queen Anne’s Lace stamp really jumped out at me.  I love to see Queen Anne’s Lace growing at the side of a country road.  So to give that country feeling I teamed the stamp set up with some brand new Stampin’ Up! designer series paper (Gingham Garden item #129310) and Regals Candy Dots item #130932) which will be in the new annual catalog that starts on May 31st.  Check out my tutorial below.
***************************************************************

I’ve added the featured card of the day to my sales page where you will also find some great deals on retired stamp sets and my brayer video.  CLICK HERE TO CHECK IT OUT

***************************************************************

Now on with today’s tutorial. . . . .  . .

Project Supplies:

Stamps: Stampin’ Up! Summer Silhouettes (item #126447)

Card Stock: Stampin’ Up! Whisper White, Primrose Petal, Blushing Bride and Gingham Garden item #129310

Ink: Stampin’ Up! Primrose Petal, Blushing Bride and Old Olive

Accessories: Stampin’ Up!  Sponge, Framelits – Oval Collection, Stampin’ Dimensionals, Brayer, White Gel Pen, Big Shot Machine, Regals Candy Dots and Word Windows Punch

Die cut the 3rd to the smallest Oval in the Framelits Oval Collection out of Whisper White card stock using the Big Shot Machine.

Brayered Blushing Bride ink at an angle on the oval.

Brayered Primrose Petal ink at an angle not covering the Blushing Bride ink entirely.

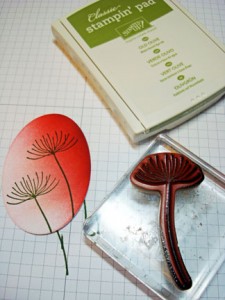
Stamped the Queen Anne’s Lace stamp using Old Olive ink twice.

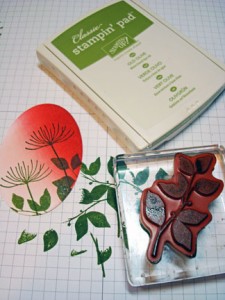
Stamped the leaves stamp twice using Old Olive ink.

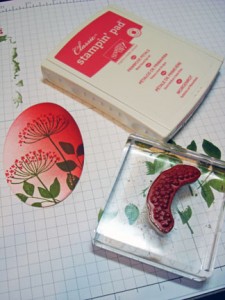
Stamped the flowers using Primrose Petal ink.

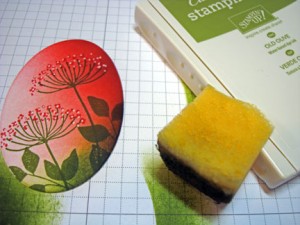
Sponged Old Olive ink at the edge of the card stock in the Leafy area.

Added White Gel Pen dots in the flowers and highlighted the leaves.

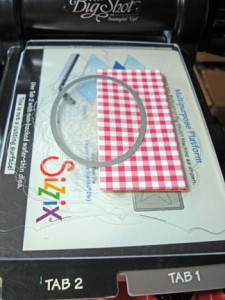
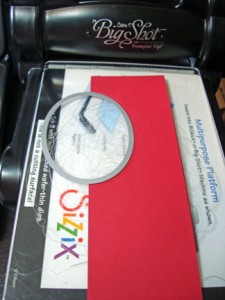
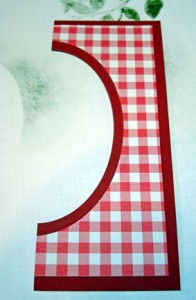
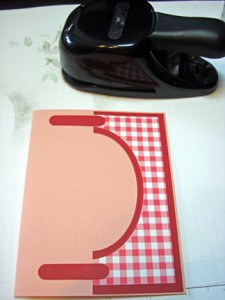
Cut a 5″ x 2.25″ piece of Gingham DSP and cut half of the oval out using the 5th to the smallest oval and the Big Shot Machine.

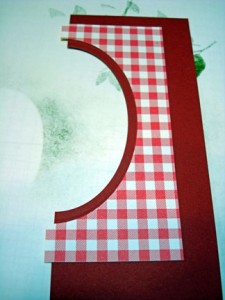
Cut a 2.5″ x 8.5″ piece of Primrose Petal card stock and cut 1/2 of the 4th to largest oval out using the Big Shot Machine.

Lined the DSP up on the Primerose Petal card stock and then cut the edges off of the card stock.


Punched two Word Window punches out of Primerose Petal card stock.  Attached the Word Window Punches, the card stock with the 1/2 ovals to a 4.25″ x 5.5″ Blushing Bride card base.

Added Primerose Petal Candy Dots and then popped the main image panel up using Stampin’ Dimensionals.

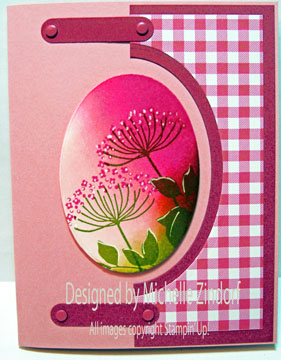
Here is the finished card.

Urgent!   Only a few days left to pick up those Stampin’ Up! retiring stamps.

CLICK HERE TO SEE THE RETIRED STAMP LIST!!

CLICK HERE TO SEE THE RETIRING ACCESSORIES!!!

*********************************

Know the Code!!!!

MYSTERY HOSTESS:

With Stampin’ Up!’s announcement  of the new Hostess Code, we can now “pool” Online Orders together (place them individually, orders will ship directly to you – within the US only, but use the same hostess code). When smaller orders are put in together, the larger order qualifies for HOSTESS BENEFITS.

That means FREE STAMPS (or other products) I can SHARE with YOU!
So let’s get started with May’s Online Mystery Hostess Workshop!
How do you get to be part of the Mystery Hostess Workshop?
Simply use the Hostess Code below and place a minimum order of $50 (before tax and shipping) in my online store by 11:00 pm on Thursday, June 13, 2013.
Important: To be part of the Online Mystery Hostess Workshop, once you add your first item to your shopping bag the hostess code must be entered just below the Special Offers section and it should say Michelle Zindorf as the Hostess.
Once all the orders are placed, on Friday morning, June 14, I will draw ONE name to get hostess benefits on the entire order! I will call/email the winner to get your choices.
Your Hostess Code is: 3MZWCWAQ
Ready – Set – GO!! Start placing your orders now!… Remember, the deadline for this
event is 11:00 pm on Thursday, June 13, 2013.
Please do not put the hostess code in if your merchandise order is $150 or more.  You would lose your hostess benefits that you would have coming already.

Until my next post. . . . . .

Huge Hugs!

Weight loss in 2013: 23.4 lbs

***********************************************************

Michelle’s Free Stamp Program

Don’t miss out on my Customer’s free stamp set program. Check it out!  For your order of $50 in product using me as your demonstrator you will receive one virtual token.  Order $100 in product receive two virtual tokens, etc.  After you have collected 10 virtual tokens you will receive a free current stamp set of your choosing, a value of $30 or less.

Here is a link to my online shopping page that you can shop at 24/7 (from the comfort of your home, even in your pj’s) and the products will be shipped directly to your door step from Stampin’ Up.   CLICK HERE TO SHOP.   My free stamp set program will be an on going program.  :)

****************************************************************

The new Stampin’ Up! Annual Catalog is active on  May 31, 2013.  I have some on hand that can be pre-ordered.  The cost is $6.50 which includes flat rate shipping.  Please e-mail me at [email protected] if you would like to purchase one.

***************************************************************

Learn How to Brayer

I now have an online beginner brayer video classes that will teach you how to brayer. CLICK HERE TO GET THEM.

**************************************************

Also, check out my new Zindorf Naturals Soap Page.  This stuff is oh so good for your skin.   CLICK HERE TO CHECK IT OUT.