Monthly Archives: March 2013

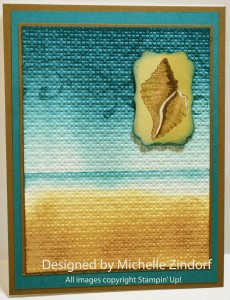
By The Tide Shell – Stampin’ Up! Card Tutorial #587

Hello There,

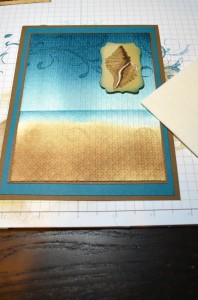
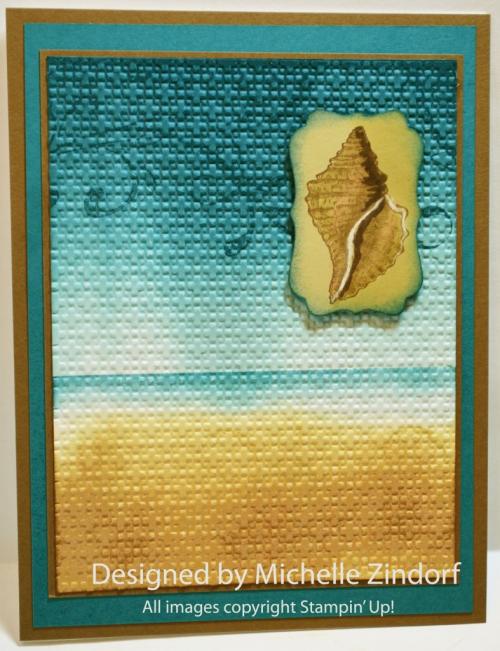
Let’s go to the beach today with this card tutorial.   I teamed up two Stampin’ Up! sets, By the Tide and Everything Eleanor, brayered background and a bit of dry embossing.  Check out the tutorial below.

********************************************

I’ve added this card to my sales page where you will also find some great deals on retired stamp sets.  CLICK HERE TO CHECK IT OUT

********************************************

Now on with today’s tutorial. . . . .  . .

Project Supplies:

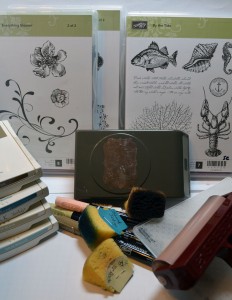
Stamps: Stampin’ Up!  By the Tide (item number 129120) and Everything Eleanor (item number 124164)

Card Stock: Stampin’ Up! Whisper White, River Rock, Soft Suede and island Indigo

Ink: Stampin’ Up! Soft Suede, Island Indigo, River Rock and Baja Breeze

Accessories: Stampin’ Up! Brayer, Sponge, Stampin’ Dimensionals, Decorative Label, White Gel Pen, Markers (Blush Blossom, Soft Suede and River Rock), Square Lattice Embossing Folder and Big Shot Machine and Post it Notes


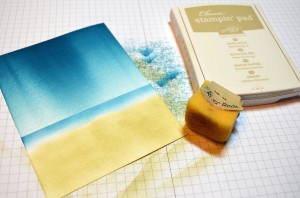
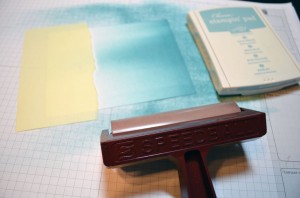
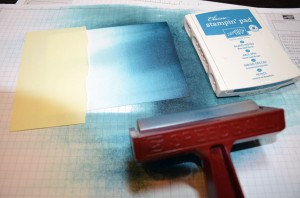
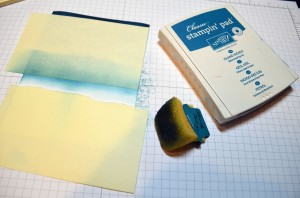
Started by masking the sand area of a 4.25″ x 5.5″ piece of Whisper White card stock with a post it note that I ripped the edge off of.   Brayered Baja Breeze and then Island Indigo ink at the top of the card stock.


Added another post it note mask and sponged Island Indigo ink at the post it note edge to create a horizon line.

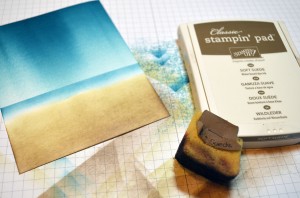
Removed both post it note masks and sponged River Rock ink at the bottom of the card stock.

Lightly sponged Soft Suede ink in the sand area.

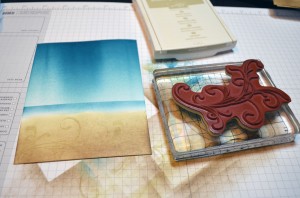
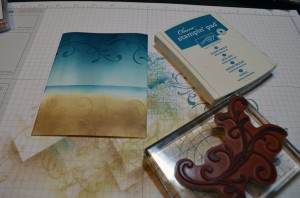
Stamped the Florish from the Everything Eleanor set using River Rock ink in the sand area and then in the sky using Island Indigo ink.


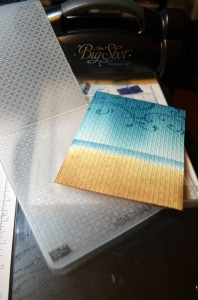
Embossed the card stock using the square lattice embossing folder and Big Shot Machine.

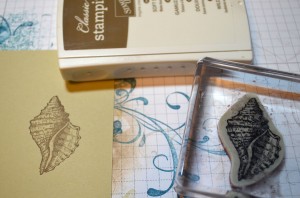
Stamped the shell from the By the Tides set on River Rock card stock using Soft Suede ink.

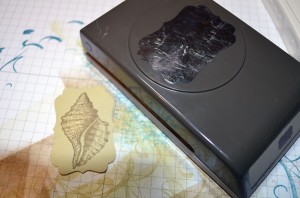
Punched the image out using the Decorative Label punch.

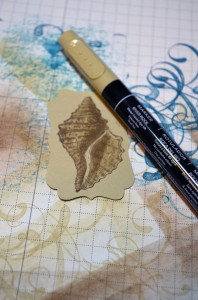
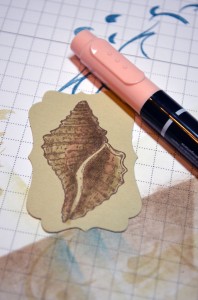
Colored the shell in using a River Rock marker.

Added Blush Blossom marker to the darker areas.

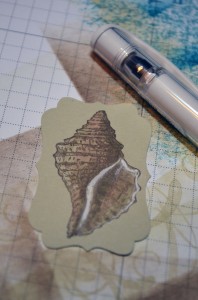
Added White Gel pen and while wet smugged it to lighten and blend it a bit.

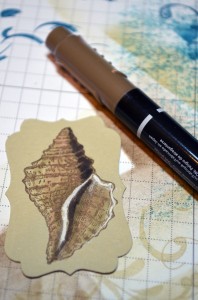
Added Soft Suede marker to the really dark areas.

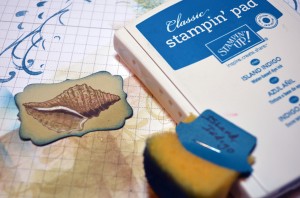
Sponged Island Indigo ink around the edges.

Added a Whisper White card base, Soft Suede panel, Island Indigo panel, Soft Suede panel, main image panel and then popped the shell image up using Stampin’ Dimensionals.

Here is the finished card measuring 5″ x 6.5″.

May your day be filled with peace and joy.

Until my next post. . . . . .

Check out the awesome things happening at Stampin’ Up! below.  There are only 7 days left to take advantage of the free Sale-a-bration products.  Hurry, don’t  miss out!

Hugs,

Weight loss in 2013:  17.5 lbs

********************************

Introducing Photopolymer by Stampin’ Up!

Always wanted to be a graphic designer?  My favorite part about design is typography. I adore type. There’s just something inherently beautiful about letterforms and what happens when you stack them to create different shapes and combine them to say different things.  So without further adieu, let me introduce you to the Designer Typeset Stamp Set. It’s based around a really great san serif font that will work well on just about any project. And then there are embellishments and shapes to take whatever you want to say to the next level. The possibilities are seriously endless.

I’ll admit, once you start playing around with the stamp set, you will have a hard time stopping!

But before we get too carried away, let’s get to talking about the benefits of photopolymer stamps. For those who are unfamiliar, let me point out a couple of things that are really cool.

First, they’re completely clear, making it oh-so-easy to stamp exactly where you want. They come unmounted, on an acetate sheet, and temporarily adhere to our clear blocks. Awesome!

Second, they are pliable. Want your arrow to shoot a certain way? No problem! Want your banner to have the perfect sag? Easy peasy! Being able to play with the shape gives you even more creative freedom.

So let’s get down to the nitty gritty. The Designer Typeset Stamp Sets in the online store starting now. So just click HERE to order yours today!

************************************************************************

NEW!  STAMPIN’ UP! ON-LINE VIDEO CLASSES. Videos, supplies lists and pdfs for 30+ simple and pretty projects.

PERFECT FOR THE BUSY STAMPER! Learn  innovative ways to get the most out of your Stampin’ Up! supplies (from stamps to the Big Shot) with clever tips and all the techniques you need to start creating with success.           Divided into six sections focused on a variety of topics, Stampin’ Up! on-line classes include videos, pdfs, and supply lists for 30+ projects. Join the fun!

BIG THUMBS UP–WAY UP! I  purchased “The Basics” class and am knocked out by the details, tips and new ideas.  Wonderful for seasoned as well as new stampers.  I just watched a video that’s part of the class on the Stamp-a-ma-jig and learned how to easily line up stamped letters once and for all–woo hoo!

CLICK  HERE TO ORDER ‘THE BASICS” CLASS $14.95

THESE ARE DOWNLOADABLE ZIP FILES.  YOU DO NOT NEED MY  DIGITAL STUDIO TO TAKE ADVANTAGE OF THE CLASS! After purchasing and downloading the class, open “Stampin’  Class–The Basics” folder and there will be six folders inside.  Click on each and enjoy!

PC Instructions
The files will be downloaded as archive files that you can then extract and save on your computer. When you click on the download link, an extraction program will automatically  launch. Choose the location where you would like to save the  files (be sure to note where you save them). Follow the  prompts on the extraction program, then navigate to the location where you saved the files. Click on the file and open.

Mac Instructions
When you click on the download link, the file will be mounted  as a drive. Once it is mounted, open the drive and drag and  drop the files to the location of your choice on your hard drive. The files can then be opened.

**************************************************

Stampin’ Up’s fabulous Spring Catalog Get your supplies to rock those Spring projects.

Sale-a-bration brochure showing the totally terrific stamps and things you can get for free with a $50 order.

***********************************************************

Michelle’s Free Stamp Program

Don’t miss out on my Customer’s free stamp set program. Check it out!  Along with a handmade thank you card from me for your $50 order you will receive a token for each $50 in product you ordered using me as your demonstrator.  After you have collected 10 tokens you will receive a free current stamp set of your choosing, a value of $39 or less.   Here is a link to my online shopping page that you can shop at 24/7 (from the comfort of your home, even in your pj’s) and the products will be shipped directly to your door step from Stampin’ Up.   CLICK HERE TO SHOP.   My free stamp set program will be an on going program.  :)

**************************************************

It’s the time of year us Stampin’ Up! Fans look forward to, it’s Sale-a-bration time!!!!  The best time of year to get your Stampin’ Up! products.  Why you ask?

Shop and receive a free Sale-a-bration product for every $50 you spend.  CLICK HERE TO CHECK OUT THE SALE-A-BRATION PRODUCTS! This is a long brocure so be sure to scan right when viewing. . . . .

CLICK HERE TO SHOP NOW

***********************************************************************

Join Stampin’ Up! during Sale-a-bration and chose $156.50 in product in your kit for just $99.  That’s 25% more product!   Start a business or just enjoy being a demonstrator to receive the 20% discount.

CLICK HERE TO LEARN MORE!

*************************************************

It’s a Magical Paper Escape Every Month!

Check this out, you can now get a monthly kit called Paper Pumpkin from Stampin’ Up! that includes exclusive stamps and everything you will need for a great project.  You can get more info on this great product at www.mypaperpumpkin.com They even have a try me kit!  You won’t want to miss out on even one of these kits. . . . . . .  Please select me as your demonstrator when placing your order.

********************************************

Have you checked out the great clearance rack at Stampin’ Up!  CLICK HERE


Dapper Watches – Stampin’ Up! Tutorial #586

Hello There,

Don’t you just love that you can create a card that captures some one’s personality using your stamps.

For instance, my youngest son, Mitch (Officer VanHoose to most) is quite the fashion bug and has a Fossil watch to match every outfit he wears.  Unlike his mother, who wears the same jewelry each and everyday, lol.   Mitch even has a watch case to show off his large collection.  I wonder who he got the collecting bug from, hmmmmmm.

Anyhow, this card is for Mitch’s 30th birthday that is coming up.  I’m safe to post this card prior to his birthday on my blog since he doesn’t read it, lol.  If I want my son’s to see something I have to put it on face book, text it to them, etc.   Sound familiar to you?

Now, if you know Mitch, mums the word!

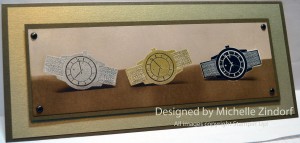
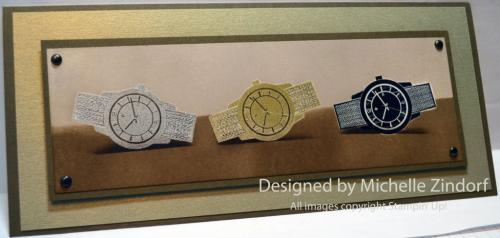
Today’s card tutorial features the emboss resist technique, shadows for depth and a brayered background.   The watch is a stamp from the Stampin’ Up! set, Dapper Dad (item number 129198). It’s in the fabulous Stampin’ Up! Spring Catalog.

********************************************

I’ve added one of these cards to my sales page where you will also find some great deals on retired stamp sets.  CLICK HERE TO CHECK IT OUT

********************************************

Now on with today’s tutorial. . . . .  . .

Project Supplies:

Stamps: Stampin’ Up!  Dappler Dad

Card Stock: Stampin’ Up! Whisper White, Soft Suede and Brushed Gold

Ink: Stampin’ Up! Crumb Cake, Basic Black, Soft Suede and Early Espresso.  Also used is Encore Gold and Silver inks.

Accessories: Stampin’ Up! Brayer, Sponge, Soft Suede Marker, Brass brads, clear embossing powder, heat gun, Versamarker and Stampin’ Dimensionals

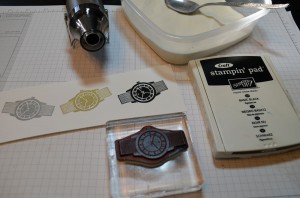
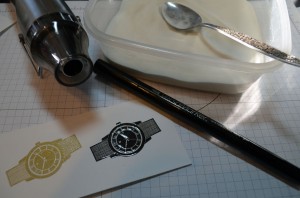
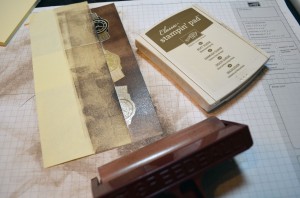
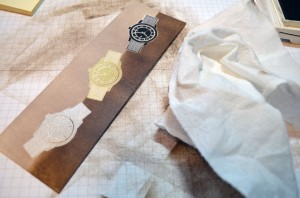
Stamped on a 2.5″ x 7″ piece of whisper white card stock 3 watches using Encore Silver, Encore Gold and Stampin’ Up! Craft Basic Black inks.  Heat embossed each watch after stamping it using clear embossing powder and a heat gun.

Colored over the black watch with a Versamarker and heat embossed it again to protect the white of the paper in the image. Note, I did this only to the Black watch.

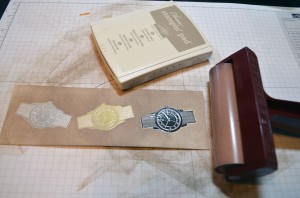
Brayered Crumb Cake ink all over the card stock.

Masked the wall portion of the scene using two post it notes and then brayered Soft Suede ink in the unmasked area.

Removed the post it notes and carefully wiped the ink off of the embossed images using a paper towel.

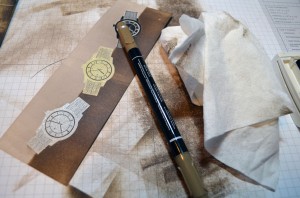
Colored over the gold and silver watches using a Soft Suede marker to turn the white in the designs to Soft Suede.   Carefully wiped any marker off of the embossed images.  Be careful not to smear the marker onto your background.

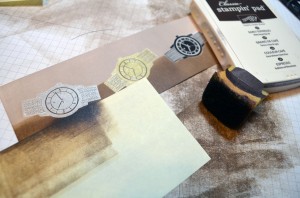
Placed a Post it note under the edge of the watches and sponged a shadow using Early Espresso ink.

Layered the main image panel with Soft Suede, Brushed Gold and then Soft Suede.   Before adhering, added brass brads to the main image panel.  Also, added a Whisper White card base.

Here is the finished card measuring 4″ x 9″.

May your creations make someone feel extra special.

Until my next post. . . . . .

Check out the awesome things happening at Stampin’ Up! below.  There are only 8 days left to take advantage of the free Sale-a-bration products.  Hurry, don’t  miss out!

Hugs,

Weight loss in 2013:  17.5 lbs

********************************

Introducing Photopolymer by Stampin’ Up!

Always wanted to be a graphic designer?  My favorite part about design is typography. I adore type. There’s just something inherently beautiful about letterforms and what happens when you stack them to create different shapes and combine them to say different things.  So without further adieu, let me introduce you to the Designer Typeset Stamp Set. It’s based around a really great san serif font that will work well on just about any project. And then there are embellishments and shapes to take whatever you want to say to the next level. The possibilities are seriously endless.

I’ll admit, once you start playing around with the stamp set, you will have a hard time stopping!

But before we get too carried away, let’s get to talking about the benefits of photopolymer stamps. For those who are unfamiliar, let me point out a couple of things that are really cool.

First, they’re completely clear, making it oh-so-easy to stamp exactly where you want. They come unmounted, on an acetate sheet, and temporarily adhere to our clear blocks. Awesome!

Second, they are pliable. Want your arrow to shoot a certain way? No problem! Want your banner to have the perfect sag? Easy peasy! Being able to play with the shape gives you even more creative freedom.

So let’s get down to the nitty gritty. The Designer Typeset Stamp Sets in the online store starting now. So just click HERE to order yours today!

************************************************************************

NEW!  STAMPIN’ UP! ON-LINE VIDEO CLASSES. Videos, supplies lists and pdfs for 30+ simple and pretty projects.

PERFECT FOR THE BUSY STAMPER! Learn  innovative ways to get the most out of your Stampin’ Up! supplies (from stamps to the Big Shot) with clever tips and all the techniques you need to start creating with success.           Divided into six sections focused on a variety of topics, Stampin’ Up! on-line classes include videos, pdfs, and supply lists for 30+ projects. Join the fun!

BIG THUMBS UP–WAY UP! I  purchased “The Basics” class and am knocked out by the details, tips and new ideas.  Wonderful for seasoned as well as new stampers.  I just watched a video that’s part of the class on the Stamp-a-ma-jig and learned how to easily line up stamped letters once and for all–woo hoo!

CLICK  HERE TO ORDER ‘THE BASICS” CLASS $14.95

THESE ARE DOWNLOADABLE ZIP FILES.  YOU DO NOT NEED MY  DIGITAL STUDIO TO TAKE ADVANTAGE OF THE CLASS! After purchasing and downloading the class, open “Stampin’  Class–The Basics” folder and there will be six folders inside.  Click on each and enjoy!

PC Instructions
The files will be downloaded as archive files that you can then extract and save on your computer. When you click on the download link, an extraction program will automatically  launch. Choose the location where you would like to save the  files (be sure to note where you save them). Follow the  prompts on the extraction program, then navigate to the location where you saved the files. Click on the file and open.

Mac Instructions
When you click on the download link, the file will be mounted  as a drive. Once it is mounted, open the drive and drag and  drop the files to the location of your choice on your hard drive. The files can then be opened.

**************************************************

Stampin’ Up’s fabulous Spring Catalog Get your supplies to rock those Spring projects.

Sale-a-bration brochure showing the totally terrific stamps and things you can get for free with a $50 order.

***********************************************************

Michelle’s Free Stamp Program

Don’t miss out on my Customer’s free stamp set program. Check it out!  Along with a handmade thank you card from me for your $50 order you will receive a token for each $50 in product you ordered using me as your demonstrator.  After you have collected 10 tokens you will receive a free current stamp set of your choosing, a value of $39 or less.   Here is a link to my online shopping page that you can shop at 24/7 (from the comfort of your home, even in your pj’s) and the products will be shipped directly to your door step from Stampin’ Up.   CLICK HERE TO SHOP.   My free stamp set program will be an on going program.  :)

**************************************************

It’s the time of year us Stampin’ Up! Fans look forward to, it’s Sale-a-bration time!!!!  The best time of year to get your Stampin’ Up! products.  Why you ask?

Shop and receive a free Sale-a-bration product for every $50 you spend.  CLICK HERE TO CHECK OUT THE SALE-A-BRATION PRODUCTS! This is a long brocure so be sure to scan right when viewing. . . . .

CLICK HERE TO SHOP NOW

***********************************************************************

Join Stampin’ Up! during Sale-a-bration and chose $156.50 in product in your kit for just $99.  That’s 25% more product!   Start a business or just enjoy being a demonstrator to receive the 20% discount.

CLICK HERE TO LEARN MORE!

*************************************************

It’s a Magical Paper Escape Every Month!

Check this out, you can now get a monthly kit called Paper Pumpkin from Stampin’ Up! that includes exclusive stamps and everything you will need for a great project.  You can get more info on this great product at www.mypaperpumpkin.com They even have a try me kit!  You won’t want to miss out on even one of these kits. . . . . . .  Please select me as your demonstrator when placing your order.

********************************************

Have you checked out the great clearance rack at Stampin’ Up!  CLICK HERE
 

Stampin’ Up! Language of Friendship Blog Candy Winner

And the blog candy winner is. . . .. . . . . . .drum roll, please. . . . . . . . . . . . . . . . . . . . .

Carole Philpot, who wrote “I am such a fan and cannot tell you how many of my cards you have inspired. Thank you. Please enter me to win the wonderful stamp set.”

CONGRATUATIONS!!! Carole, please e-mail your shipping address to [email protected] within 30 days so I can get this set in the mail to you.

Thanks to all for playing along!

Until my next post. . . . . .

Check out the awesome things happening at Stampin’ Up! below.  There are only 10 days left to take advantage of the free Sale-a-bration products.  Hurry, don’t  miss out!

Hugs,

Weight loss in 2013:  16 lbs

********************************

Introducing Photopolymer by Stampin’ Up!

Always wanted to be a graphic designer?  My favorite part about design is typography. I adore type. There’s just something inherently beautiful about letterforms and what happens when you stack them to create different shapes and combine them to say different things.  So without further adieu, let me introduce you to the Designer Typeset Stamp Set. It’s based around a really great san serif font that will work well on just about any project. And then there are embellishments and shapes to take whatever you want to say to the next level. The possibilities are seriously endless.

I’ll admit, once you start playing around with the stamp set, you will have a hard time stopping!

But before we get too carried away, let’s get to talking about the benefits of photopolymer stamps. For those who are unfamiliar, let me point out a couple of things that are really cool.

First, they’re completely clear, making it oh-so-easy to stamp exactly where you want. They come unmounted, on an acetate sheet, and temporarily adhere to our clear blocks. Awesome!

Second, they are pliable. Want your arrow to shoot a certain way? No problem! Want your banner to have the perfect sag? Easy peasy! Being able to play with the shape gives you even more creative freedom.

So let’s get down to the nitty gritty. The Designer Typeset Stamp Sets in the online store starting now. So just click HERE to order yours today!

************************************************************************

NEW!  STAMPIN’ UP! ON-LINE VIDEO CLASSES. Videos, supplies lists and pdfs for 30+ simple and pretty projects.

PERFECT FOR THE BUSY STAMPER! Learn  innovative ways to get the most out of your Stampin’ Up! supplies (from stamps to the Big Shot) with clever tips and all the techniques you need to start creating with success.           Divided into six sections focused on a variety of topics, Stampin’ Up! on-line classes include videos, pdfs, and supply lists for 30+ projects. Join the fun!

BIG THUMBS UP–WAY UP! I  purchased “The Basics” class and am knocked out by the details, tips and new ideas.  Wonderful for seasoned as well as new stampers.  I just watched a video that’s part of the class on the Stamp-a-ma-jig and learned how to easily line up stamped letters once and for all–woo hoo!

CLICK  HERE TO ORDER ‘THE BASICS” CLASS $14.95

THESE ARE DOWNLOADABLE ZIP FILES.  YOU DO NOT NEED MY  DIGITAL STUDIO TO TAKE ADVANTAGE OF THE CLASS! After purchasing and downloading the class, open “Stampin’  Class–The Basics” folder and there will be six folders inside.  Click on each and enjoy!

PC Instructions
The files will be downloaded as archive files that you can then extract and save on your computer. When you click on the download link, an extraction program will automatically  launch. Choose the location where you would like to save the  files (be sure to note where you save them). Follow the  prompts on the extraction program, then navigate to the location where you saved the files. Click on the file and open.

Mac Instructions
When you click on the download link, the file will be mounted  as a drive. Once it is mounted, open the drive and drag and  drop the files to the location of your choice on your hard drive. The files can then be opened.

**************************************************

Stampin’ Up’s fabulous Spring Catalog Get your supplies to rock those Spring projects.

Sale-a-bration brochure showing the totally terrific stamps and things you can get for free with a $50 order.

***********************************************************

Michelle’s Free Stamp Program

Don’t miss out on my Customer’s free stamp set program. Check it out!  Along with a handmade thank you card from me for your $50 order you will receive a token for each $50 in product you ordered using me as your demonstrator.  After you have collected 10 tokens you will receive a free current stamp set of your choosing, a value of $39 or less.   Here is a link to my online shopping page that you can shop at 24/7 (from the comfort of your home, even in your pj’s) and the products will be shipped directly to your door step from Stampin’ Up.   CLICK HERE TO SHOP.   My free stamp set program will be an on going program.  :)

**************************************************

It’s the time of year us Stampin’ Up! Fans look forward to, it’s Sale-a-bration time!!!!  The best time of year to get your Stampin’ Up! products.  Why you ask?

Shop and receive a free Sale-a-bration product for every $50 you spend.  CLICK HERE TO CHECK OUT THE SALE-A-BRATION PRODUCTS! This is a long brocure so be sure to scan right when viewing. . . . .

CLICK HERE TO SHOP NOW

***********************************************************************

Join Stampin’ Up! during Sale-a-bration and chose $156.50 in product in your kit for just $99.  That’s 25% more product!   Start a business or just enjoy being a demonstrator to receive the 20% discount.

CLICK HERE TO LEARN MORE!

*************************************************

It’s a Magical Paper Escape Every Month!

Check this out, you can now get a monthly kit called Paper Pumpkin from Stampin’ Up! that includes exclusive stamps and everything you will need for a great project.  You can get more info on this great product at www.mypaperpumpkin.com They even have a try me kit!  You won’t want to miss out on even one of these kits. . . . . . .  Please select me as your demonstrator when placing your order.

********************************************

Have you checked out the great clearance rack at Stampin’ Up!  CLICK HERE
Morning Sun – Stampin’ Up! Card Tutorial #585

Good Morning!

I love those mornings when I can get right out of bed and head to my stampin’ space to create and everything flows smoothly and I come up with a card that I am pleased with.  Today has been such a morning, whoohooo!

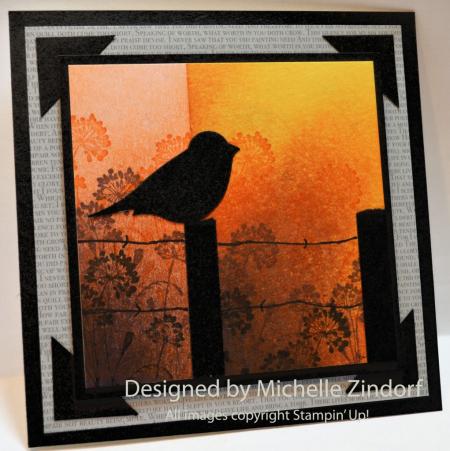
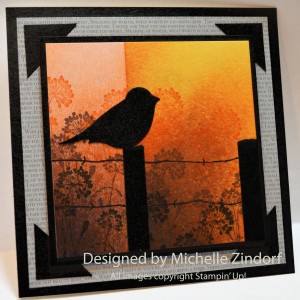
I decided to do a background starting with two different colors of card stock to add visual interest, a little stamp layering for the background and a great bird punch was used.   Check out my tutorial for this card below.

Check out and enter my blog candy give away, CLICK HERE.  The drawing is tomorrow 3/12/13.

********************************************

I’ve added this card to my sales page where you will also find some great deals on retired stamp sets.  CLICK HERE TO CHECK IT OUT

********************************************

Now on with today’s tutorial. . . . .  . .

Project Supplies:

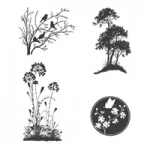
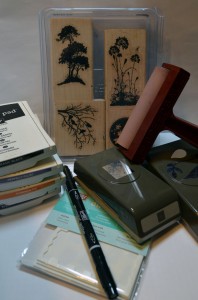
Stamps: Stampin’ Up!  Serene Silhouettes

Card Stock: Stampin’ Up! Pretty in Pink, Daffodil Delight and Basic Black

Ink: Stampin’ Up! Basic Black, Pumpkin Pie, Perfect Plum and Elegant Eggplant

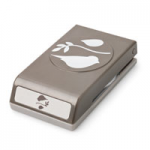
Accessories: Stampin’ Up! Bird Punch

Stampin’ Dimensionals, Brayer, 1″ square punch, Basic Black marker and Designer Series Paper from the Patterns Stack (Neutral Collection)


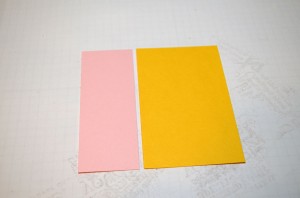
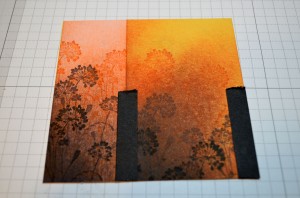
Started with a 1.5″ x 4″ piece of Pretty in Pink card stock and a 2.5″ x 4″ piece of Daffodil Delight card stock.

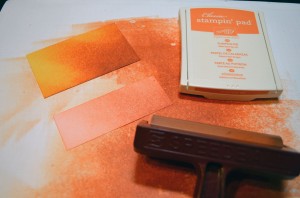
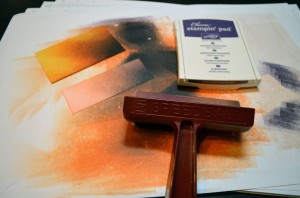
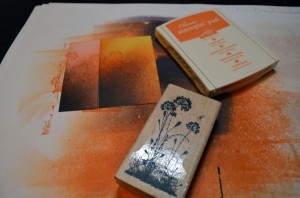
Brayered Pumpkin Pie ink at an angle on each piece of card stock.

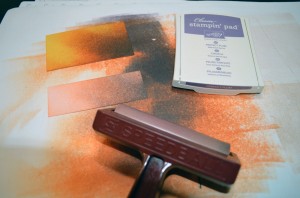
Brayered Perfect Plum ink at an angle on each of the pieces of card stock.

Brayered Elegant Eggplant at an angle on each of the pieces of card stock.

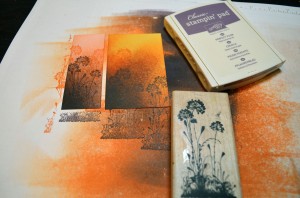
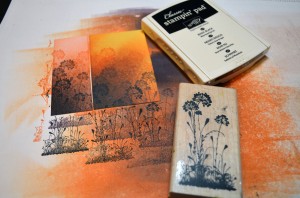
Stamped the flowers from Stampin’ Up’s Nature Silhouettes set using Pumpkin Pie ink, then stamped them a bit lower using Perfect Plum ink and then lower still using Basic Black ink.


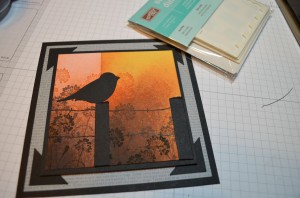
Added a couple of strips of Basic Black card stock ripped at the top edge for posts.

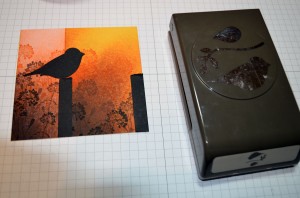
Punched this great bird out of Basic Black card stock and added to the top of the first post.

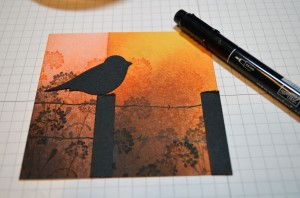
Added a couple of lines for barbed wire using a Basic Black marker.

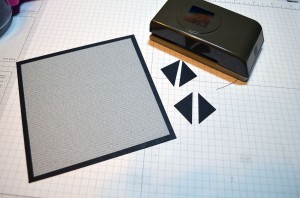
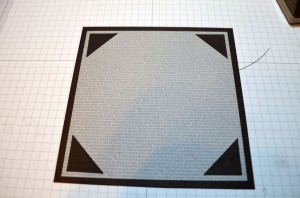
Added a 5.25″ x 10.25″ Whisper White card base (folded in half), a 5.25″ square piece of Basic Black and a 5″ square piece of DSP from the Neutrals Collection Paper Stack.  Punched (2) 1″ squares from Basic Black card stock and then cut them in half and added them as accents.


Matted my main image panel with a 4 1/8″ square piece of Basic Black card stock and them popped the panels up using Stampin’ Dimensionals.

Here is the finished card measuring 5.25″ square.

May you feel the sun on your face today.

Until my next post. . . . . .

Check out the awesome things happening at Stampin’ Up! below.  There are only 11 days left to take advantage of the free Sale-a-bration products.  Hurry, don’t  miss out!

Hugs,

Weight loss in 2013:  16 lbs

********************************

Introducing Photopolymer by Stampin’ Up!

Always wanted to be a graphic designer?  My favorite part about design is typography. I adore type. There’s just something inherently beautiful about letterforms and what happens when you stack them to create different shapes and combine them to say different things.  So without further adieu, let me introduce you to the Designer Typeset Stamp Set. It’s based around a really great san serif font that will work well on just about any project. And then there are embellishments and shapes to take whatever you want to say to the next level. The possibilities are seriously endless.

I’ll admit, once you start playing around with the stamp set, you will have a hard time stopping!

But before we get too carried away, let’s get to talking about the benefits of photopolymer stamps. For those who are unfamiliar, let me point out a couple of things that are really cool.

First, they’re completely clear, making it oh-so-easy to stamp exactly where you want. They come unmounted, on an acetate sheet, and temporarily adhere to our clear blocks. Awesome!

Second, they are pliable. Want your arrow to shoot a certain way? No problem! Want your banner to have the perfect sag? Easy peasy! Being able to play with the shape gives you even more creative freedom.

So let’s get down to the nitty gritty. The Designer Typeset Stamp Sets in the online store starting now. So just click HERE to order yours today!

************************************************************************

NEW!  STAMPIN’ UP! ON-LINE VIDEO CLASSES. Videos, supplies lists and pdfs for 30+ simple and pretty projects.

PERFECT FOR THE BUSY STAMPER! Learn  innovative ways to get the most out of your Stampin’ Up! supplies (from stamps to the Big Shot) with clever tips and all the techniques you need to start creating with success.           Divided into six sections focused on a variety of topics, Stampin’ Up! on-line classes include videos, pdfs, and supply lists for 30+ projects. Join the fun!

BIG THUMBS UP–WAY UP! I  purchased “The Basics” class and am knocked out by the details, tips and new ideas.  Wonderful for seasoned as well as new stampers.  I just watched a video that’s part of the class on the Stamp-a-ma-jig and learned how to easily line up stamped letters once and for all–woo hoo!

CLICK  HERE TO ORDER ‘THE BASICS” CLASS $14.95

THESE ARE DOWNLOADABLE ZIP FILES.  YOU DO NOT NEED MY  DIGITAL STUDIO TO TAKE ADVANTAGE OF THE CLASS! After purchasing and downloading the class, open “Stampin’  Class–The Basics” folder and there will be six folders inside.  Click on each and enjoy!

PC Instructions
The files will be downloaded as archive files that you can then extract and save on your computer. When you click on the download link, an extraction program will automatically  launch. Choose the location where you would like to save the  files (be sure to note where you save them). Follow the  prompts on the extraction program, then navigate to the location where you saved the files. Click on the file and open.

Mac Instructions
When you click on the download link, the file will be mounted  as a drive. Once it is mounted, open the drive and drag and  drop the files to the location of your choice on your hard drive. The files can then be opened.

**************************************************

Stampin’ Up’s fabulous Spring Catalog Get your supplies to rock those Spring projects.

Sale-a-bration brochure showing the totally terrific stamps and things you can get for free with a $50 order.

***********************************************************

Michelle’s Free Stamp Program

Don’t miss out on my Customer’s free stamp set program. Check it out!  Along with a handmade thank you card from me for your $50 order you will receive a token for each $50 in product you ordered using me as your demonstrator.  After you have collected 10 tokens you will receive a free current stamp set of your choosing, a value of $39 or less.   Here is a link to my online shopping page that you can shop at 24/7 (from the comfort of your home, even in your pj’s) and the products will be shipped directly to your door step from Stampin’ Up.   CLICK HERE TO SHOP.   My free stamp set program will be an on going program.  :)

**************************************************

It’s the time of year us Stampin’ Up! Fans look forward to, it’s Sale-a-bration time!!!!  The best time of year to get your Stampin’ Up! products.  Why you ask?

Shop and receive a free Sale-a-bration product for every $50 you spend.  CLICK HERE TO CHECK OUT THE SALE-A-BRATION PRODUCTS! This is a long brocure so be sure to scan right when viewing. . . . .

CLICK HERE TO SHOP NOW

***********************************************************************

Join Stampin’ Up! during Sale-a-bration and chose $156.50 in product in your kit for just $99.  That’s 25% more product!   Start a business or just enjoy being a demonstrator to receive the 20% discount.

CLICK HERE TO LEARN MORE!

*************************************************

It’s a Magical Paper Escape Every Month!

Check this out, you can now get a monthly kit called Paper Pumpkin from Stampin’ Up! that includes exclusive stamps and everything you will need for a great project.  You can get more info on this great product at www.mypaperpumpkin.com They even have a try me kit!  You won’t want to miss out on even one of these kits. . . . . . .  Please select me as your demonstrator when placing your order.

********************************************

Have you checked out the great clearance rack at Stampin’ Up!  CLICK HERE
Stampin’ Up! Language of Friendship Blog Candy!

I do believe that Miss Sophie was the last one to announce blog candy.   So I think it is Miss Bunny’s turn.. . . . .

Oops!  Miss Bunny is apparently hard at work making my breakfast, so we will turn it over to Miss Red.

Oh yes, Miss Red is ready to give away a brand new Stampin’ Up! Language of Friendship stamp set.

Now here is the deal. . . .

All  you need to do to enter your name in the drawing is leave a comment below telling me to enter you.  If you are getting this blog post via e-mail you will need to Click Here and then leave a comment on this post.

Miss Red will select a winner using a random number generator on Tuesday, March 12, 2013.

Lucas, wants to remind you that you cannot win unless you enter.    So enter away!   Bow wow.

Now that is all for today.  The end. . . . .

Have a great weekend!

Until my next post. . . . . .

Hugs,

and the gang!

Weight loss in 2013:  16 lbs

********************************

Introducing Photopolymer by Stampin’ Up!

Always wanted to be a graphic designer?  My favorite part about design is typography. I adore type. There’s just something inherently beautiful about letterforms and what happens when you stack them to create different shapes and combine them to say different things.  So without further adieu, let me introduce you to the Designer Typeset Stamp Set. It’s based around a really great san serif font that will work well on just about any project. And then there are embellishments and shapes to take whatever you want to say to the next level. The possibilities are seriously endless.

I’ll admit, once you start playing around with the stamp set, you will have a hard time stopping!

But before we get too carried away, let’s get to talking about the benefits of photopolymer stamps. For those who are unfamiliar, let me point out a couple of things that are really cool.

First, they’re completely clear, making it oh-so-easy to stamp exactly where you want. They come unmounted, on an acetate sheet, and temporarily adhere to our clear blocks. Awesome!

Second, they are pliable. Want your arrow to shoot a certain way? No problem! Want your banner to have the perfect sag? Easy peasy! Being able to play with the shape gives you even more creative freedom.

So let’s get down to the nitty gritty. The Designer Typeset Stamp Sets in the online store starting now. So just click HERE to order yours today!

************************************************************************

NEW!  STAMPIN’ UP! ON-LINE VIDEO CLASSES. Videos, supplies lists and pdfs for 30+ simple and pretty projects.

PERFECT FOR THE BUSY STAMPER! Learn  innovative ways to get the most out of your Stampin’ Up! supplies (from stamps to the Big Shot) with clever tips and all the techniques you need to start creating with success.           Divided into six sections focused on a variety of topics, Stampin’ Up! on-line classes include videos, pdfs, and supply lists for 30+ projects. Join the fun!

BIG THUMBS UP–WAY UP! I  purchased “The Basics” class and am knocked out by the details, tips and new ideas.  Wonderful for seasoned as well as new stampers.  I just watched a video that’s part of the class on the Stamp-a-ma-jig and learned how to easily line up stamped letters once and for all–woo hoo!

CLICK  HERE TO ORDER ‘THE BASICS” CLASS $14.95

THESE ARE DOWNLOADABLE ZIP FILES.  YOU DO NOT NEED MY  DIGITAL STUDIO TO TAKE ADVANTAGE OF THE CLASS! After purchasing and downloading the class, open “Stampin’  Class–The Basics” folder and there will be six folders inside.  Click on each and enjoy!

PC Instructions
The files will be downloaded as archive files that you can then extract and save on your computer. When you click on the download link, an extraction program will automatically  launch. Choose the location where you would like to save the  files (be sure to note where you save them). Follow the  prompts on the extraction program, then navigate to the location where you saved the files. Click on the file and open.

Mac Instructions
When you click on the download link, the file will be mounted  as a drive. Once it is mounted, open the drive and drag and  drop the files to the location of your choice on your hard drive. The files can then be opened.

**************************************************

Stampin’ Up’s fabulous Spring Catalog Get your supplies to rock those Spring projects.

Sale-a-bration brochure showing the totally terrific stamps and things you can get for free with a $50 order.

***********************************************************

Michelle’s Free Stamp Program

Don’t miss out on my Customer’s free stamp set program. Check it out!  Along with a handmade thank you card from me for your $50 order you will receive a token for each $50 in product you ordered using me as your demonstrator.  After you have collected 10 tokens you will receive a free current stamp set of your choosing, a value of $39 or less.   Here is a link to my online shopping page that you can shop at 24/7 (from the comfort of your home, even in your pj’s) and the products will be shipped directly to your door step from Stampin’ Up.   CLICK HERE TO SHOP.   My free stamp set program will be an on going program.  :)

**************************************************

It’s the time of year us Stampin’ Up! Fans look forward to, it’s Sale-a-bration time!!!!  The best time of year to get your Stampin’ Up! products.  Why you ask?

Shop and receive a free Sale-a-bration product for every $50 you spend.  CLICK HERE TO CHECK OUT THE SALE-A-BRATION PRODUCTS! This is a long brocure so be sure to scan right when viewing. . . . .

CLICK HERE TO SHOP NOW

***********************************************************************

Join Stampin’ Up! during Sale-a-bration and chose $156.50 in product in your kit for just $99.  That’s 25% more product!   Start a business or just enjoy being a demonstrator to receive the 20% discount.

CLICK HERE TO LEARN MORE!

*************************************************

It’s a Magical Paper Escape Every Month!

Check this out, you can now get a monthly kit called Paper Pumpkin from Stampin’ Up! that includes exclusive stamps and everything you will need for a great project.  You can get more info on this great product at www.mypaperpumpkin.com They even have a try me kit!  You won’t want to miss out on even one of these kits. . . . . . .  Please select me as your demonstrator when placing your order.

********************************************

Have you checked out the great clearance rack at Stampin’ Up!  CLICK HERE


Horse Silhouette – Stampin’ Up! Card Tutorial #584

Hey Friend,

Happy Friday!

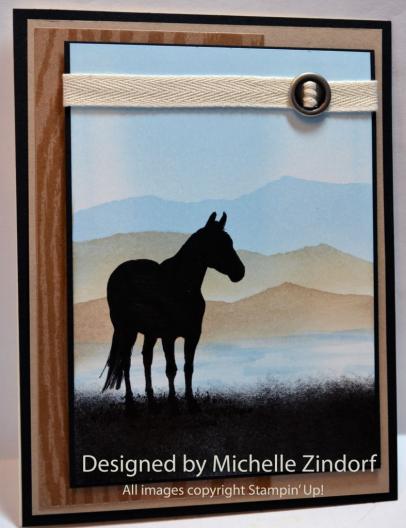
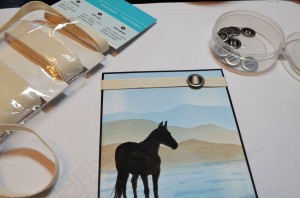
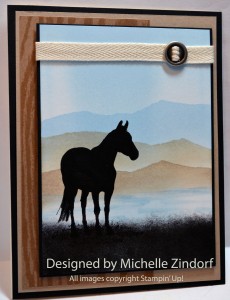
Going a little Western on my card tutorial for today.  Check it out, I used the beautiful horse image from the Stampin’ Up! Horse Frontier set, but put a twist on it.   I colored the horse in to create a silhouette for this scene.  I think it works perfectly!   Added some mountains and a river too.

Check out the tutorial for this card below.

********************************************

I’ve added this card to my sales page where you will also find some great deals on retired stamp sets.  CLICK HERE TO CHECK IT OUT

********************************************

Now on with today’s tutorial. . . . .  . .

Project Supplies:

Stamps: Stampin’ Up!  Horse Frontier

Card Stock: Stampin’ Up! Whisper White, Basic Black and Crumb Cake

Ink: Stampin’ Up! Basic Black, Bashful Blue, Sahara Sand and Crumb Cake

Accessories: Stampin’ Up! sponges, Aqua Painter, Twill Tape, Ribbon Slide, Stampin’ Dimensionals, Basic Black maker, Natural Composition Specialty Designer Paper. , Brayer and a Post it Note

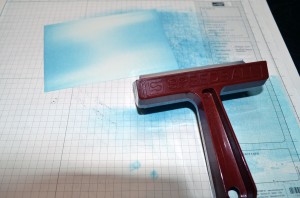
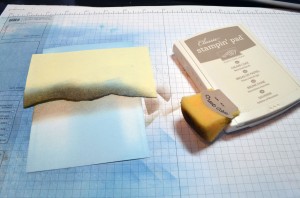
Started with a 4″ x 5.5″ piece of Whisper White card stock and brayered Bashful Blue at the bottom and top.

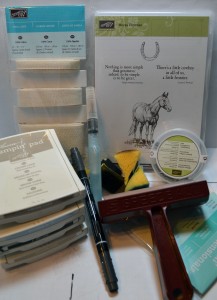
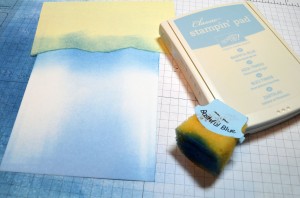
Ripped a post it note in to create a mask for my mountains.   Masked the sky and sponged about 1″ of Bashful Blue ink to create the mountains farthest from the foreground.

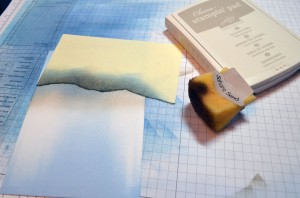
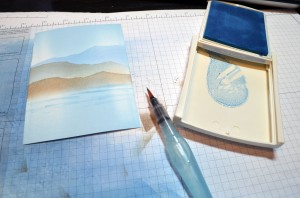
Moved the post it note down and to the right and sponged in Sahara Sand ink.

Moved the post it note down again and centered it.  Sponged Crumb Cake ink in for this layer of mountains.

Removed the mask and added water lines using Bashful Blue ink and an Aqua Painter.

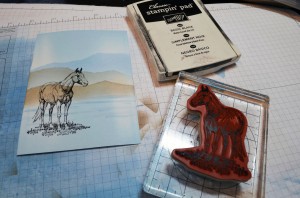
Stamped the horse with Basic Black ink.

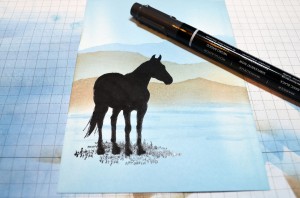
Colored the horse in using a Basic Black marker.

Sponged Basic Black ink at the bottom of the card stock using a pouncing motion to create the ground.

Added a Basic Black panel and some twill tape that has been run through a Ribbon Slide.

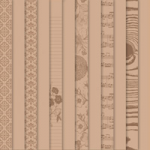
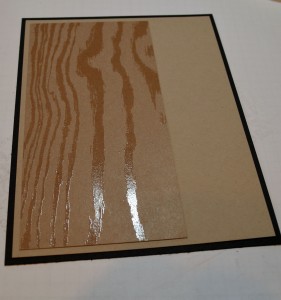
Here are the back panels, 10″ x 6.5″ Very Vanilla Card stock base, 5″ x 6.5″ Basic Black, 4.75″ x 6.25″ Crumb Cake and then a 3″ x 6″ piece of Stampin’ Up! Natural Composition Specialty Designer Paper. This paper Rocks!  The image is shiny and raised on the paper.  You will fall in love with it when you see it in person.

Here is the finished card measuring 5″ x 6.5″

May your weekend be extra special.

I’m starting my weekend out by having dinner tonight with my Sister-n-laws.  I have 5 of them and it’s awesome fun when we get together.

Until my next post. . . . . .

Check out the awesome things happening at Stampin’ Up! below.  There are only 14 days left to take advantage of the free Sale-a-bration products.  Hurry, don’t  miss out!

Hugs,

Weight loss in 2013:  16 lbs

********************************

Introducing Photopolymer by Stampin’ Up!

Always wanted to be a graphic designer?  My favorite part about design is typography. I adore type. There’s just something inherently beautiful about letterforms and what happens when you stack them to create different shapes and combine them to say different things.  So without further adieu, let me introduce you to the Designer Typeset Stamp Set. It’s based around a really great san serif font that will work well on just about any project. And then there are embellishments and shapes to take whatever you want to say to the next level. The possibilities are seriously endless.

I’ll admit, once you start playing around with the stamp set, you will have a hard time stopping!

But before we get too carried away, let’s get to talking about the benefits of photopolymer stamps. For those who are unfamiliar, let me point out a couple of things that are really cool.

First, they’re completely clear, making it oh-so-easy to stamp exactly where you want. They come unmounted, on an acetate sheet, and temporarily adhere to our clear blocks. Awesome!

Second, they are pliable. Want your arrow to shoot a certain way? No problem! Want your banner to have the perfect sag? Easy peasy! Being able to play with the shape gives you even more creative freedom.

So let’s get down to the nitty gritty. The Designer Typeset Stamp Sets in the online store starting now. So just click HERE to order yours today!

************************************************************************

NEW!  STAMPIN’ UP! ON-LINE VIDEO CLASSES. Videos, supplies lists and pdfs for 30+ simple and pretty projects.

PERFECT FOR THE BUSY STAMPER! Learn  innovative ways to get the most out of your Stampin’ Up! supplies (from stamps to the Big Shot) with clever tips and all the techniques you need to start creating with success.           Divided into six sections focused on a variety of topics, Stampin’ Up! on-line classes include videos, pdfs, and supply lists for 30+ projects. Join the fun!

BIG THUMBS UP–WAY UP! I  purchased “The Basics” class and am knocked out by the details, tips and new ideas.  Wonderful for seasoned as well as new stampers.  I just watched a video that’s part of the class on the Stamp-a-ma-jig and learned how to easily line up stamped letters once and for all–woo hoo!

CLICK  HERE TO ORDER ‘THE BASICS” CLASS $14.95

THESE ARE DOWNLOADABLE ZIP FILES.  YOU DO NOT NEED MY  DIGITAL STUDIO TO TAKE ADVANTAGE OF THE CLASS! After purchasing and downloading the class, open “Stampin’  Class–The Basics” folder and there will be six folders inside.  Click on each and enjoy!

PC Instructions
The files will be downloaded as archive files that you can then extract and save on your computer. When you click on the download link, an extraction program will automatically  launch. Choose the location where you would like to save the  files (be sure to note where you save them). Follow the  prompts on the extraction program, then navigate to the location where you saved the files. Click on the file and open.

Mac Instructions
When you click on the download link, the file will be mounted  as a drive. Once it is mounted, open the drive and drag and  drop the files to the location of your choice on your hard drive. The files can then be opened.

**************************************************

Stampin’ Up’s fabulous Spring Catalog Get your supplies to rock those Spring projects.

Sale-a-bration brochure showing the totally terrific stamps and things you can get for free with a $50 order.

***********************************************************

Michelle’s Free Stamp Program

Don’t miss out on my Customer’s free stamp set program. Check it out!  Along with a handmade thank you card from me for your $50 order you will receive a token for each $50 in product you ordered using me as your demonstrator.  After you have collected 10 tokens you will receive a free current stamp set of your choosing, a value of $39 or less.   Here is a link to my online shopping page that you can shop at 24/7 (from the comfort of your home, even in your pj’s) and the products will be shipped directly to your door step from Stampin’ Up.   CLICK HERE TO SHOP.   My free stamp set program will be an on going program.  :)

**************************************************

It’s the time of year us Stampin’ Up! Fans look forward to, it’s Sale-a-bration time!!!!  The best time of year to get your Stampin’ Up! products.  Why you ask?

Shop and receive a free Sale-a-bration product for every $50 you spend.  CLICK HERE TO CHECK OUT THE SALE-A-BRATION PRODUCTS! This is a long brocure so be sure to scan right when viewing. . . . .

CLICK HERE TO SHOP NOW

***********************************************************************

Join Stampin’ Up! during Sale-a-bration and chose $156.50 in product in your kit for just $99.  That’s 25% more product!   Start a business or just enjoy being a demonstrator to receive the 20% discount.

CLICK HERE TO LEARN MORE!

*************************************************

It’s a Magical Paper Escape Every Month!

Check this out, you can now get a monthly kit called Paper Pumpkin from Stampin’ Up! that includes exclusive stamps and everything you will need for a great project.  You can get more info on this great product at www.mypaperpumpkin.com They even have a try me kit!  You won’t want to miss out on even one of these kits. . . . . . .  Please select me as your demonstrator when placing your order.

********************************************

Have you checked out the great clearance rack at Stampin’ Up!  CLICK HERE


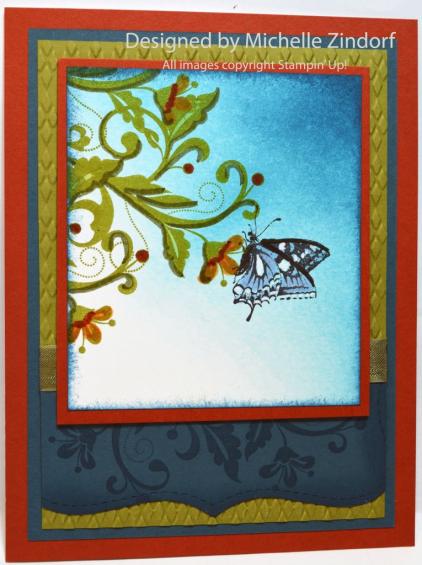
Butterfly & Vine – Stampin’ Up! Card Tutorial #583

Hey There,

I’ve got a card tutorial today for a card that can be used for many occasions.   Think Sympathy, birthday, thinking of you.  You get the picture.

If you follow my blog than you have probably realized I seldom put a sentiment on my cards.  I don’t like to limit their use until I know exactly what occasion I am going to use if for and then I put a sentiment on the inside.

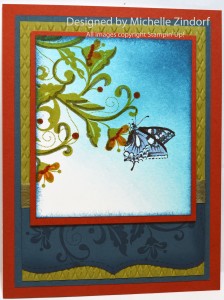
This tutorial shows how brayering at an angle gives you a great light effect in your scene.  Add the Butterfly from the Stampin’ Up! Nature Walk set and Flowers from the Stampin’ Up! set Flowering Flourishes and your sure to have a winning creation.

Check out the tutorial for this card below.

********************************************

I’ve added this card to my sales page where you will also find some great deals on retired stamp sets.  CLICK HERE TO CHECK IT OUT

********************************************

Now on with today’s tutorial. . . . .  . .

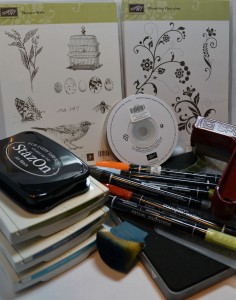
Project Supplies:

Stamps: Stampin’ Up!  Flowering Flourishes (item #126367) and Nature Walk (item #121997)

Card Stock: Stampin’ Up! Whisper White, Cajun Craze, Not Quite Navy and Old Olive

Ink: Stampin’ Up! Old Olive, Not Quite Navy, Tempting Turquoise and StazOn Jet Black

Accessories: Stampin’ Up! sponge, Always Artichoke Seam Binding, Argyle Embossing Folder, Top Note Die, Big Shot Machine, Brayer, Markers (Certainly Celery, Cajun Craze, Pumpkin Pie, Always Artichoke and Bashful Blue) and White Gel Pen

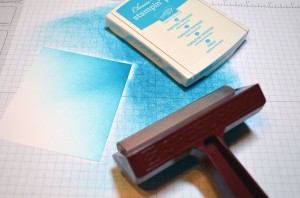
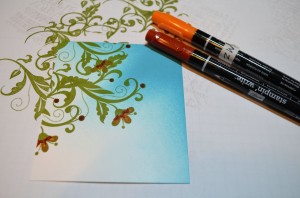
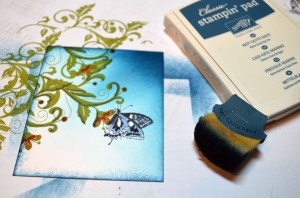
Started with a 3.5″ x 4.25″ piece of Whisper White card stock and brayered Tempting Turquoise ink at an angle off of the top right corner.

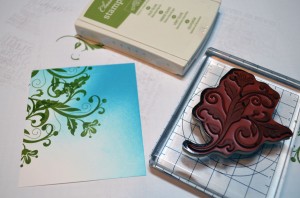
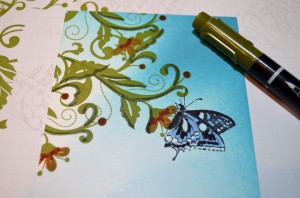
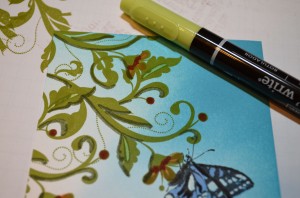
Stamped the flourish from the Stampin’ Up! set Flowering Flourishes (item #126367) using Old Olive ink three times.

Colored the flowers in with a Pumpkin Pie marker and then added Cajun Craze marker at the base of each flower.

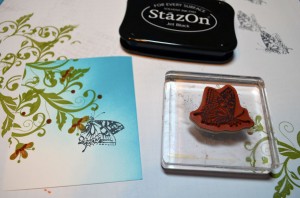
Stamped the Butterfly from the Stampin’ Up! Nature Walk set (item number 121997) using StazOn Jet Black ink.  Try to stamp the Butterflies’ feet so they touch the flower.

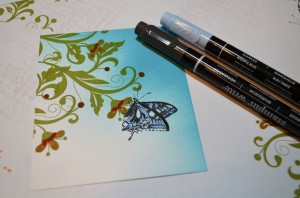
Colored the Butterfly in with Bashful Blue ink and darkened some of the Basic Black lines using a Basic Black marker.

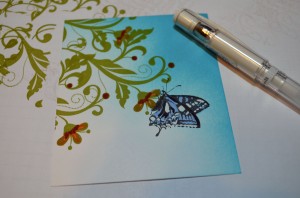
Colored in the dots on the wings using a White Gel Pen.  This really makes them pop.

Added a shadow to the underside of the flourishes using an Always Artichoke marker.

Added Certainly Celery Marker to the middle of the large leaves.

Sponged Not Quite Navy ink in the top right corner and then sponged it around the edges of the main image panel.

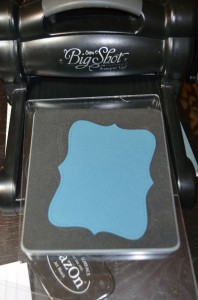
Die cut a Top Note Die out of Not Quite Navy card stock using the Big Shot Machine.

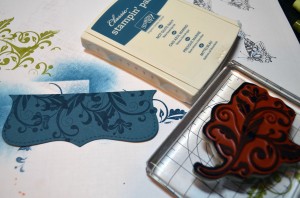
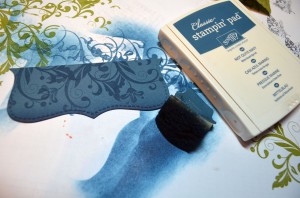
Cut the die cut in half and stamped the flourished twice using Not Quite Navy ink.

Sponged Not Quite Navy ink at the bottom of the top note.

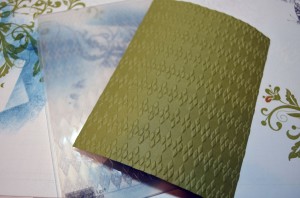
Cut a 4.25 x 5.75″ piece of Old Olive card stock and embossed it using the Argle Embossing folder and the Big Shot Machine.

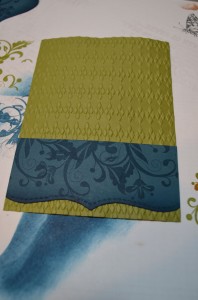
Added the top not to the bottom of the Old Olive panel and cut the sides off of the Top note so they are even with the Old Olive panel.

Added 2 Cajun Craze Panels, 1 Not Quite Navy panel and Always Artichoke Seam Binding.  Popped the main image panel and Cajun Craze panel underneith it up using Stampin’ Dimensionals.

Also added a Whisper White card base.

Here is the finished card measuring 5″ x 6.5″.

May your day be filled with all those you love.

Until my next post. . . . . .

Check out the awesome things happening at Stampin’ Up! below.  There are only 22 days left to take advantage of the free Sale-a-bration products.

Hugs,

Weight loss in 2013:  15 lbs

********************************

Introducing Photopolymer by Stampin’ Up!

Always wanted to be a graphic designer?  My favorite part about design is typography. I adore type. There’s just something inherently beautiful about letterforms and what happens when you stack them to create different shapes and combine them to say different things.  So without further adieu, let me introduce you to the Designer Typeset Stamp Set. It’s based around a really great san serif font that will work well on just about any project. And then there are embellishments and shapes to take whatever you want to say to the next level. The possibilities are seriously endless.

I’ll admit, once you start playing around with the stamp set, you will have a hard time stopping!

But before we get too carried away, let’s get to talking about the benefits of photopolymer stamps. For those who are unfamiliar, let me point out a couple of things that are really cool.

First, they’re completely clear, making it oh-so-easy to stamp exactly where you want. They come unmounted, on an acetate sheet, and temporarily adhere to our clear blocks. Awesome!

Second, they are pliable. Want your arrow to shoot a certain way? No problem! Want your banner to have the perfect sag? Easy peasy! Being able to play with the shape gives you even more creative freedom.

So let’s get down to the nitty gritty. The Designer Typeset Stamp Sets in the online store starting now. So just click HERE to order yours today!

************************************************************************

NEW!  STAMPIN’ UP! ON-LINE VIDEO CLASSES. Videos, supplies lists and pdfs for 30+ simple and pretty projects.

133385L

PERFECT FOR THE BUSY STAMPER! Learn  innovative ways to get the most out of your Stampin’ Up! supplies (from stamps to the Big Shot) with clever tips and all the techniques you need to start creating with success.           Divided into six sections focused on a variety of topics, Stampin’ Up! on-line classes include videos, pdfs, and supply lists for 30+ projects. Join the fun!

BIG THUMBS UP–WAY UP! I  purchased “The Basics” class and am knocked out by the details, tips and new ideas.  Wonderful for seasoned as well as new stampers.  I just watched a video that’s part of the class on the Stamp-a-ma-jig and learned how to easily line up stamped letters once and for all–woo hoo!

CLICK  HERE TO ORDER ‘THE BASICS” CLASS $14.95
THESE ARE DOWNLOADABLE ZIP FILES.  YOU DO NOT NEED MY  DIGITAL STUDIO TO TAKE ADVANTAGE OF THE CLASS! After purchasing and downloading the class, open “Stampin’  Class–The Basics” folder and there will be six folders inside.  Click on each and enjoy!

PC Instructions
The files will be downloaded as archive files that you can then extract and save on your computer. When you click on the download link, an extraction program will automatically  launch. Choose the location where you would like to save the  files (be sure to note where you save them). Follow the  prompts on the extraction program, then navigate to the location where you saved the files. Click on the file and open.

Mac Instructions
When you click on the download link, the file will be mounted  as a drive. Once it is mounted, open the drive and drag and  drop the files to the location of your choice on your hard drive. The files can then be opened.

**************************************************

Stampin’ Up’s fabulous Spring Catalog Get your supplies to rock those Spring projects.

Sale-a-bration brochure showing the totally terrific stamps and things you can get for free with a $50 order.

***********************************************************

Michelle’s Free Stamp Program

Don’t miss out on my Customer’s free stamp set program. Check it out!  Along with a handmade thank you card from me for your $50 order you will receive a token for each $50 in product you ordered using me as your demonstrator.  After you have collected 10 tokens you will receive a free current stamp set of your choosing, a value of $39 or less.   Here is a link to my online shopping page that you can shop at 24/7 (from the comfort of your home, even in your pj’s) and the products will be shipped directly to your door step from Stampin’ Up.   CLICK HERE TO SHOP.   My free stamp set program will be an on going program.  :)
**************************************************

It’s the time of year us Stampin’ Up! Fans look forward to, it’s Sale-a-bration time!!!!  The best time of year to get your Stampin’ Up! products.  Why you ask?

Shop and receive a free Sale-a-bration product for every $50 you spend.  CLICK HERE TO CHECK OUT THE SALE-A-BRATION PRODUCTS! This is a long brocure so be sure to scan right when viewing. . . . .

CLICK HERE TO SHOP NOW

***********************************************************************

Join Stampin’ Up! during Sale-a-bration and chose $156.50 in product in your kit for just $99.  That’s 25% more product!   Start a business or just enjoy being a demonstrator to receive the 20% discount.

CLICK HERE TO LEARN MORE!
*************************************************

It’s a Magical Paper Escape Every Month!

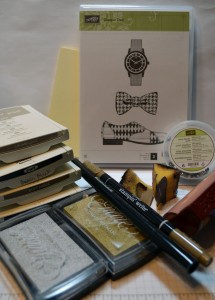
Check this out, you can now get a monthly kit called Paper Pumpkin from Stampin’ Up! that includes exclusive stamps and everything you will need for a great project.  You can get more info on this great product at www.mypaperpumpkin.com They even have a try me kit!  You won’t want to miss out on even one of these kits. . . . . . .  Please select me as your demonstrator when placing your order.

********************************************

Have you checked out the great clearance rack at Stampin’ Up!  CLICK HERE