Monthly Archives: October 2012

Freezing Homemade Pizza

Hello There,

I am in Arizona for the weekend but I had this post prepared a head of time so it would post while I am on the road.   Enjoy!

************************************************************************

I love homemade pizza and when I make it I make a few extra to freeze for an easy, easy dinner or lunch.  It’s so easy to freeze and taste way better than the store bought frozen pizzas at about a 3rd of the cost.  Can’t beat it!

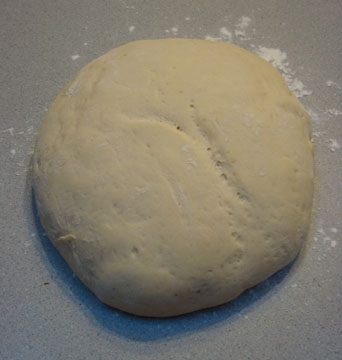
Started by making up 2 lbs of bread dough in my bread machine.  This gave me enough dough to make 4 personal pizzas and a large 12″.

Here is the ingredients for 1 lbs, I doubled the recipe.

3/4 cup water

2 cups all purpose flour (you can add 1/2 wheat flour if you prefer)

1/2 teaspoon salt

1 1/2 tablespoons olive oil

2 teaspoons sugar

2 teaspoons active dry yeast

Added ingredients to bread machine, and select dough setting.  When done, mound dough on a floured counter top, cover with a towel and let rest for 10 minutes.  Now it is ready for dividing.    Use 1/3 of it for Large Pizza and then cut the rest in 4 pieces for the personal sized ones.

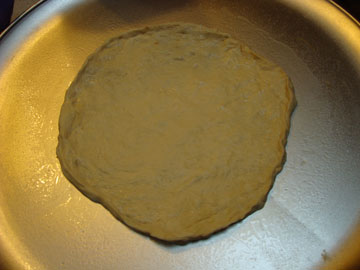
Sprayed my pizza pans with cooking spray, spread the dough on to the pizza pans.  I cook two at a time.

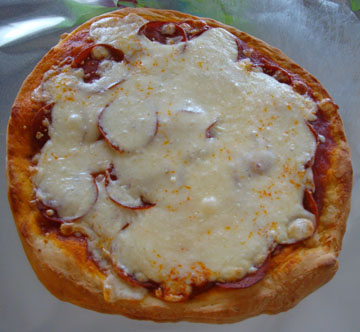
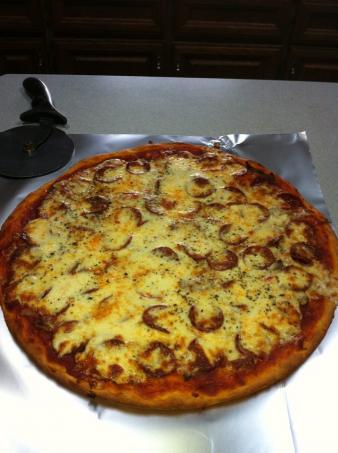
Added my sauce and whatever I have on hand in the fridge.  I just had pepperoni and mushrooms when I made these.  You can be creative here.  Cooked for 7 minutes at 450 degrees and then added cheese for 3 more minutes of cooking.   You want to under cook your pizzas a bit so they don’t get over done on cooking day.

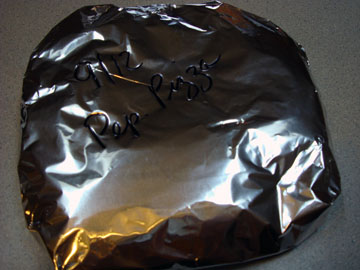
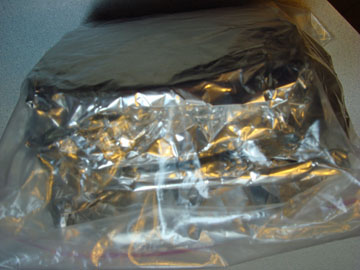
Wrap you pizzas to freeze in plastic wrap and then heavy alumium foil.  Label your pizzas with date and what it is on the foil using a Sharpie marker.  Put the 4 personal pizzas in a 2 gallon freezer bag and then into the freezer they go.


On cooking day, place the frozen pizza on your pizza pan and bake at 350 degrees until middle is hot and cheese is slightly browned, 10-15 minutes.  Enjoy!

*********************************************************************************

CLICK HERE TO SEE THE LATEST STAMPIN’ UP! PROMOTION AND TO SHOP NOW!


Stampin’ Up! is selling single stamps from 3 stamp sets on a trial bases until January 2, 2012.  Check out the flyers at the links below.

WORD PLAY

PERFECTLY PENNED

SEASONAL SAYINGS

Also, Merry Christmas from Stampin’ Up!

Don’t miss out on my Customer free stamp set program. Check it out!  Along with a handmade thank you card from me for your order you will receive a token for each $50 in product you ordered using me as your demonstrator.  After you have collected 10 tokens you will receive a free current stamp set of your choosing, a value of $39 or less.   Here is a link to my online shopping page that you can shop at 24/7 (from the comfort of your home, even in your pj’s) and the products will be shipped directly to your door step from Stampin’ Up:   CLICK HERE TO SHOP.   My free stamp set program will be an on going program.  :)

The new Stampin’ Up! Holiday Catalog is now in effect.  I love all of Stampin’ Up’s products, but the new catalog just blew me away (CLICK HERE TO VIEW THE HOLIDAY CATALOG).  I especially love the coordinating products that you can get as a bundle at a discount.    Gotta love a discount, right?  Especially for those products to make your holiday gifts and cards.

Want a new annual catalog shipped to you?     I will be happy to send you one.  The catalog is free, but there is a $5 shipping charge.   Note, I will only sell or ship within the United States do to Stampin’ Up! policies.  Please contact me at [email protected].  Payment can be sent via Paypal or check.

You can join my Stampin’ Up! team and become a Stampin’ Up! Demonstrator now for the great new price of $99, and you can create your own kit, CLICK HERE TO CHECK IT OUT.  Contact me whether you want to start your own business or just enjoy the 20% discount on products.

*****************************************************************************

Until my next post.. . . . .

Hugs,


Get ready for Brayer and Direct to Paper Workshops!  I am coming to the following locations, click the location name for more information.

Scottsdale, Arizona

Sacramento, California

Stamp the Day Away – West Alexandria, Ohio – Non-Brayering Event

Staley, North Carolina

St. Petersburg, Florida

Newburge, Indiana

I hope you can make it to one of my workshops in 2012.  I have decided not to travel after this year, so be sure to catch one now!

Link to my Stampin’ Up website where you can order all of your must have Stampin’ Up products from me 24-7: https://michellezindorf.stampinup.net

A Bit of Nature – Tutorial #539

Hello There,

I’m off to Arizona today, but before I fly out I wanted to post a tutorial for you.

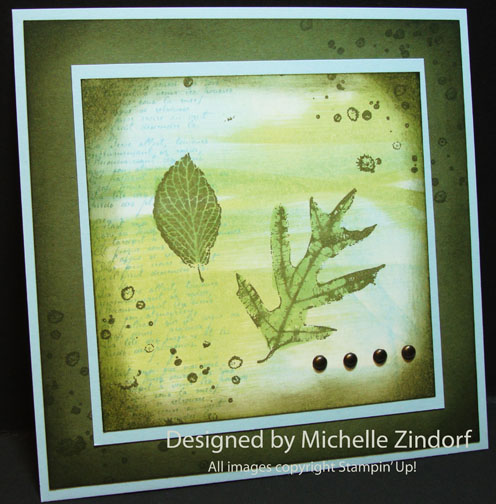
Today’s card goes together quickly, only uses one stamp set (Stampin’ Up’s French Foliage) and a bit of the technique, Direct to Paper for the background.   You can find the complete tutorial below.

*********************************************************************************

CLICK HERE TO SEE THE LATEST STAMPIN’ UP! PROMOTION AND TO SHOP NOW!


Stampin’ Up! is selling single stamps from 3 stamp sets on a trial bases until January 2, 2012.  Check out the flyers at the links below.

WORD PLAY

PERFECTLY PENNED

SEASONAL SAYINGS

Also, Merry Christmas from Stampin’ Up!

Don’t miss out on my Customer free stamp set program. Check it out!  Along with a handmade thank you card from me for your order you will receive a token for each $50 in product you ordered using me as your demonstrator.  After you have collected 10 tokens you will receive a free current stamp set of your choosing, a value of $39 or less.   Here is a link to my online shopping page that you can shop at 24/7 (from the comfort of your home, even in your pj’s) and the products will be shipped directly to your door step from Stampin’ Up:   CLICK HERE TO SHOP.   My free stamp set program will be an on going program.  :)

The new Stampin’ Up! Holiday Catalog is now in effect.  I love all of Stampin’ Up’s products, but the new catalog just blew me away (CLICK HERE TO VIEW THE HOLIDAY CATALOG).  I especially love the coordinating products that you can get as a bundle at a discount.    Gotta love a discount, right?  Especially for those products to make your holiday gifts and cards.

Want a new annual catalog shipped to you?     I will be happy to send you one.  The catalog is free, but there is a $5 shipping charge.   Note, I will only sell or ship within the United States do to Stampin’ Up! policies.  Please contact me at [email protected].  Payment can be sent via Paypal or check.

You can join my Stampin’ Up! team and become a Stampin’ Up! Demonstrator now for the great new price of $99, and you can create your own kit, CLICK HERE TO CHECK IT OUT.  Contact me whether you want to start your own business or just enjoy the 20% discount on products.

*****************************************************************************

Now on with today’s tutorial. . . . .  . .

Card Supplies:

Stampin’ Up! Stamps: French Foliage (item number 121166)

Card Stock: Stampin’ Up! Whisper White, Bashful Blue and Always Artichoke

Ink: Stampin’ Up! Certainly Celery, Bashful Blue and Always Artichoke

Accessories: Stampin’ Up! Sponge, Metallic Brads, Certainly Celery Marker, Piercing tools to line up and start brads.

Are you getting inspiration from this blog?   One way you can help support it is to order your Stampin’ Up products through me.   Click HERE to place an order and have your order delivered directly to your door step from Stampin’ Up!

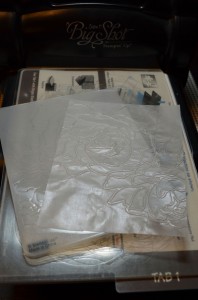
Cut a piece of Waxed Paper the size of the embossing folder and then embossed it using the Manhattan Flower Embossing Folder and Big Shot Machine.


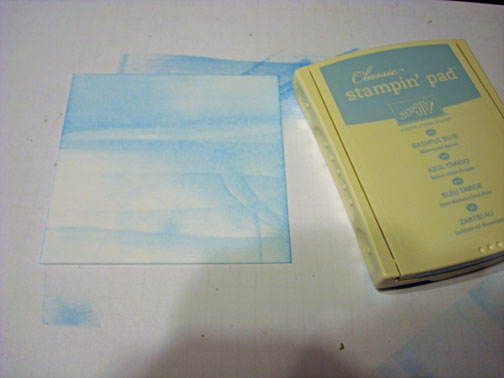
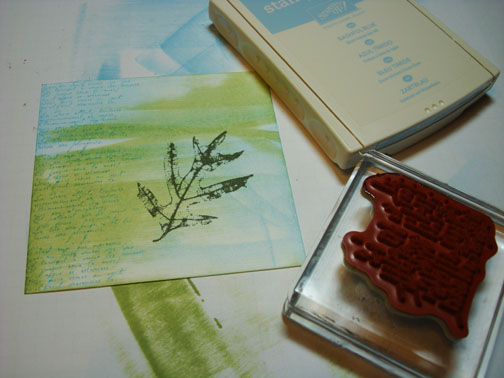
Started with a 4″ square piece of Whisper White card stock.  Smeared very lightly Bashful Blue ink across the card stock.

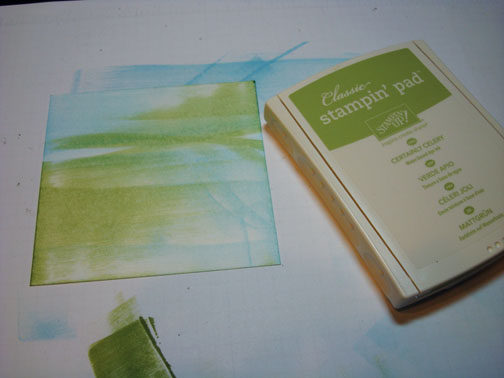
Smeared Certainly Celery ink across the card stock, very lightly.

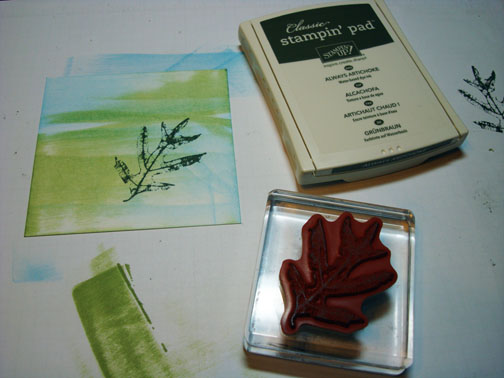
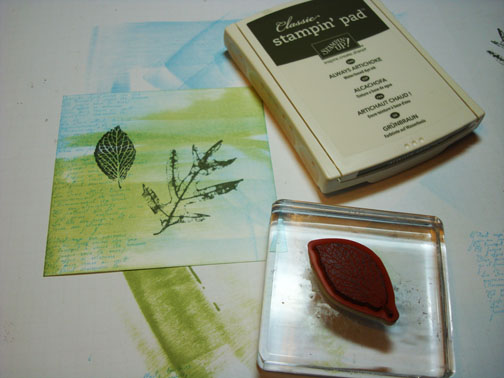
Stamped the leaf using Always Artichoke ink.

Stamped the words down the left side of the card stock using Bashful Blue ink.

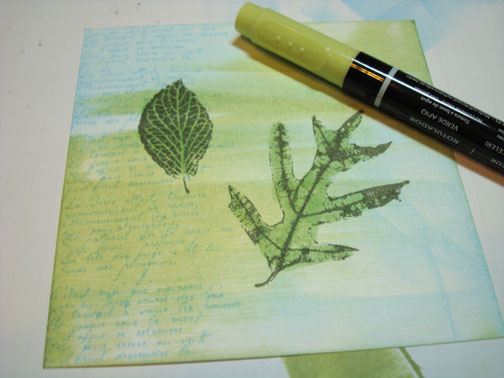
Stamped the small leaf using Always Artichoke ink.

Colored the leaves in using a Certainly Celery marker.


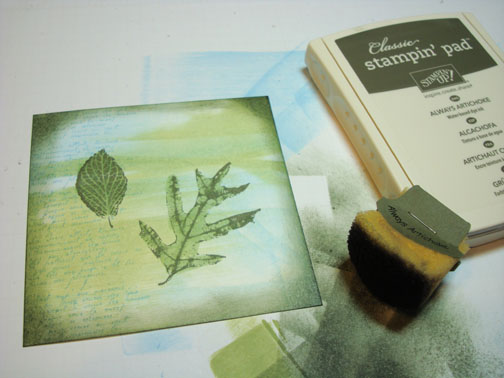
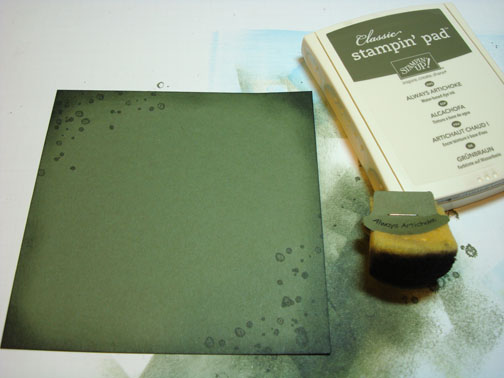
Sponged Always Artichoke ink around the edges of the card stock getting heavy on the corners.

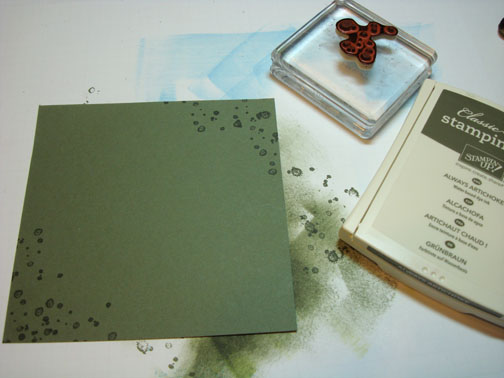
Stamped the spots stamp at the bottom left and top right of a 5.25″ square piece of Always Artichoke card stock.

Sponged Always Artichoke ink at the edges of the card stock.

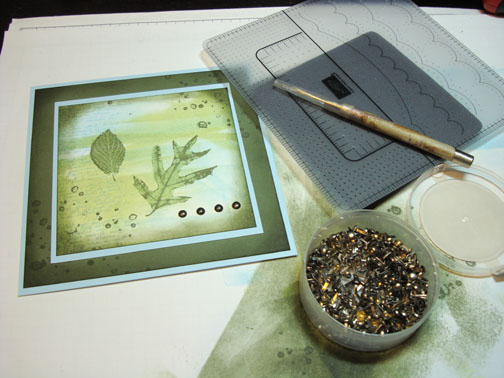
Stamped the spots on the main image panel top right and bottom left corners.  Added a 5.5″ square Bashful Blue panel and a 4.25″ square piece of Bashful Blue card stock.   Pieced holes in the card stock using the template and piercing tool so my brads would be spaced correctly.  Added Metallic Brads.

Added a 5.5″ Whisper White card base.

Here is the finished card measuring 5.5″.

May you be in touch with a bit of nature today.

Until my next post.. . . . .

Hugs,


Get ready for Brayer and Direct to Paper Workshops!  I am coming to the following locations, click the location name for more information.

Scottsdale, Arizona

Sacramento, California

Stamp the Day Away – West Alexandria, Ohio – Non-Brayering Event

Staley, North Carolina

St. Petersburg, Florida

Newburge, Indiana

I hope you can make it to one of my workshops in 2012.  I have decided not to travel after this year, so be sure to catch one now!

Link to my Stampin’ Up website where you can order all of your must have Stampin’ Up products from me 24-7: https://michellezindorf.stampinup.net
Blog Candy! Stampin’ Up! Autumn Occasions

How about some blog candy today.  Can you say “YES, no calory candy”.

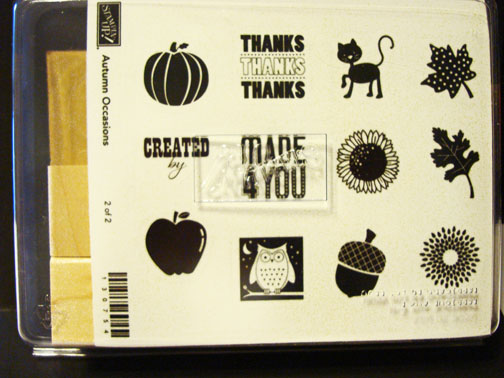
I have a set that you just cannot purchase from Stampin’ Up!  It is the Autumn Occasions Incentive stamp set.  Only demonstrators can purchase it.  But I am giving it away.  Just in time for those Autumn cards you want to create.

All you have to do to put your name in the hat is leave a comment here on this blog post telling me to enter you.  I will select the winner using a random number generator on Tuesday, October 9, 2o12.

If you are receiving this blog update via e-mail, please CLICK HERE and then leave your comment at the bottom of the actual blog post.

Good Luck!

******************************************************************

Just a Share. . . .  .

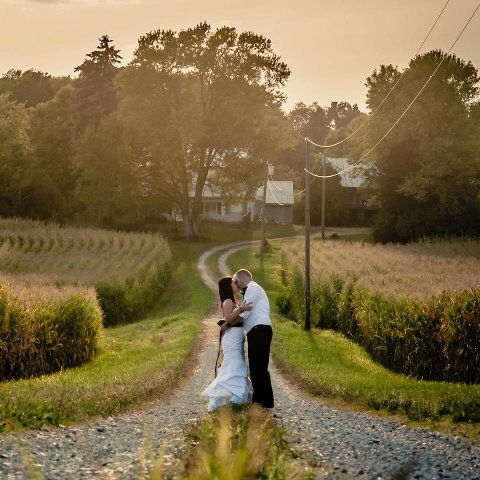
This is a photo from my youngest son, Mitchell’s and my new daughter-n-law, Jamie’s Wedding.  So lovely!

May all your dreams come true today!

Until my next post.. . . . .

Hugs,


Get ready for Brayer and Direct to Paper Workshops!  I am coming to the following locations, click the location name for more information.

Scottsdale, Arizona

Stamp the Day Away – West Alexandria, Ohio – Non-Brayering Event

Sacramento, California

Staley, North Carolina

St. Petersburg, Florida

Newburge, Indiana

I hope you can make it to one of my workshops in 2012.  I have decided not to travel after this year, so be sure to catch one now!

Link to my Stampin’ Up website where you can order all of your must have Stampin’ Up products from me 24-7: https://michellezindorf.stampinup.net
 

Want to Stamp the Day Away

Hey There,

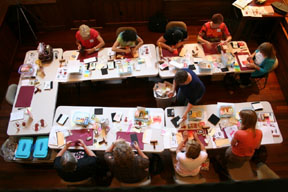
I am inviting you to come stamp the day away with me at my West Alexandria, Ohio home on Saturday, October 27, 2012.

It’s a day of stamping fun and friends (new and old), very informal.   You can bring your own projects to work on or you can make a few Christmas projects I will have for us to create.  We will be having a blast from 8:00 a.m. to 10:00 p.m.   Come by for the entire time or just a few hours.

I will need to know if you are going to join us by October 21st and if you plan on creating the projects I have planned.  There will be a small supply fee of $10 if you are not bringing your own projects to work on.  I will also need to know if you are attending since there is not unlimited seating.

You can contact me at 937-344-1312 or via e-mail at [email protected].

top-viewjpg.jpg

Okay, so you are wondering where on earth West Alexandria, Ohio is?  Well it is 25 minutes West of Dayton, Ohio,  1 hour 15 minutes from Cincinnati, Ohio, 1 hour 30 minutes from Columbus, Ohio and 30 minutes East of Richmond, Indiana.  We are a small farm town with one traffic light in the middle of our 2 block town.    We have a fantastic Tea House you will want to visit for lunch or eat at the new restaurant in town, Buckeye Jake’s Eatery.  Make it a girls day out!

If you live in the area I would love to get to know you and have the opportunity to create with you.
Hugs,


Wax Resist Rose – Tutorial #538
Hey There,

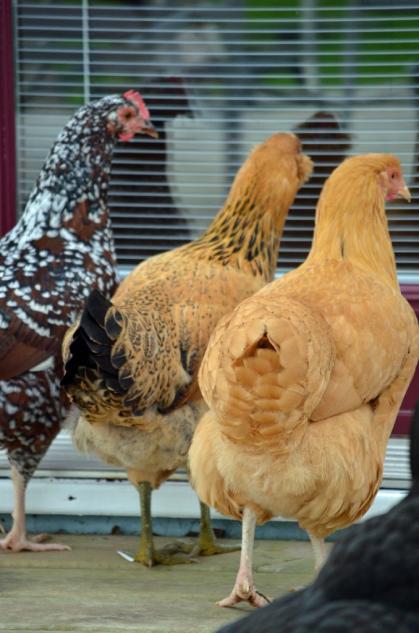
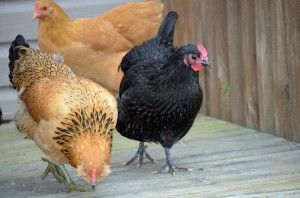
I just came in from outside.  I’ve been letting these characters run around outside of their chicken run for about an hour a day.  We have about an acre for them to run around in and, of course, this is what they do.  They run up on the deck and look in the door.  I think they are looking for Russ, hoping he will come out with some tasty meal worms, lol.

You can try to shoo them off of the deck, but they all just run to the opposite side, lol.

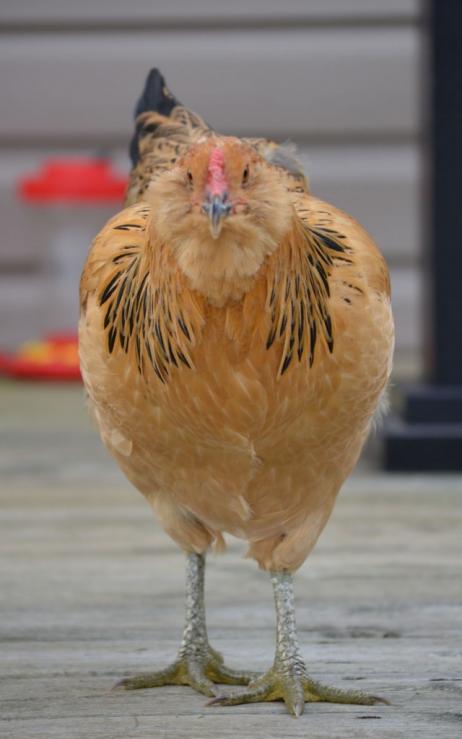
Then you get this look from Bunny!  What do you imagine she is thinking?  Maybe she should have those funny symbol characters in  a bubble above her head.  Really, she is super sweet.  Before you ask, we have not had an egg sighting yet, sigh.

***********************************************************************************************

Now let’s get down to business. . . . .

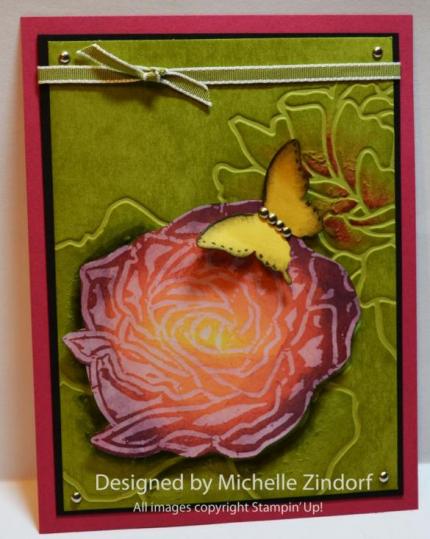
I have a Waxed Paper Resist card tutorial for you today.  Check it out below.

************************************************************************************

CLICK HERE TO SEE THE LATEST STAMPIN’ UP! PROMOTION AND TO SHOP NOW!

Don’t miss out on my Customer free stamp set program. Check it out!  Along with a handmade thank you card from me for your order you will receive a token for each $50 in product you ordered using me as your demonstrator.  After you have collected 10 tokens you will receive a free current stamp set of your choosing, a value of $39 or less.   Here is a link to my online shopping page that you can shop at 24/7 (from the comfort of your home, even in your pj’s) and the products will be shipped directly to your door step from Stampin’ Up:   CLICK HERE TO SHOP.   My free stamp set program will be an on going program.  :)

The new Stampin’ Up! Holiday Catalog is now in effect.  I love all of Stampin’ Up’s products, but the new catalog just blew me away (CLICK HERE TO VIEW THE HOLIDAY CATALOG).  I especially love the coordinating products that you can get as a bundle at a discount.    Gotta love a discount, right?  Especially for those products to make your holiday gifts and cards.

Want a new annual catalog shipped to you?     I will be happy to send you one.  The catalog is free, but there is a $5 shipping charge.   Note, I will only sell or ship within the United States do to Stampin’ Up! policies.  Please contact me at [email protected].  Payment can be sent via Paypal or check.

You can join my Stampin’ Up! team and become a Stampin’ Up! Demonstrator now for the great new price of $99, and you can create your own kit, CLICK HERE TO CHECK IT OUT.  Contact me whether you want to start your own business or just enjoy the 20% discount on products.

*****************************************************************************

Now on with today’s tutorial. . . . .  . .

Card Supplies:

Card Stock: Stampin’ Up! Glossy White, Lucky Limeade, Basic Black, Daffodil Delight and Rose Red

Ink: Stampin’ Up! Daffodil Delight, Rose Red, Bravo Burgundy, Basic Black and Elegant Eggplant

Accessories: Stampin’ Up! Sponge, brayer, Stampin’ Dimensionals, Mini Silver Brads, Old Olive Ribbon, Elegant Butterfly Punch, Manhattan Flower Embossing Folder, Big Shot Machine, Stampin’ Dimensionals, Blender Pen, Old Olive, Rose Red and Pink Pirouette Markers

Are you getting inspiration from this blog?   One way you can help support it is to order your Stampin’ Up products through me.   Click HERE to place an order and have your order delivered directly to your door step from Stampin’ Up!

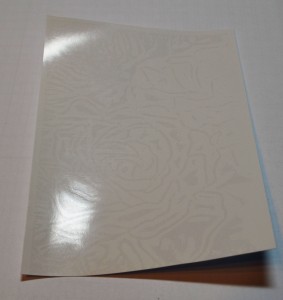
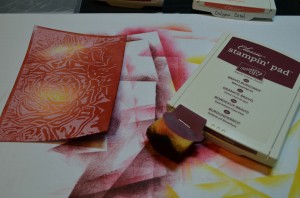
Cut a piece of Waxed Paper the size of the embossing folder and then embossed it using the Manhattan Flower Embossing Folder and Big Shot Machine.

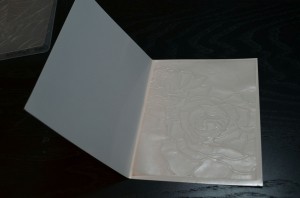
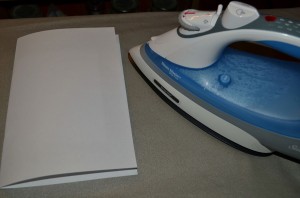
Cut a 11 x 4.25 piece of glossy card stock and folded it in half, shiny sides facing each other.  Put the waxed paper inside and iron the card stock with a piece of copy paper over it.  Have your iron on the cotton setting with no steam.  Keep your iron moving the entire time you are ironing.  It will only take a moment.


Cut the glossy paper in half.

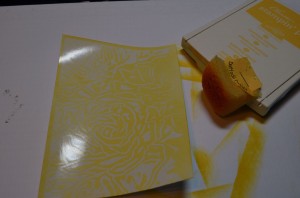
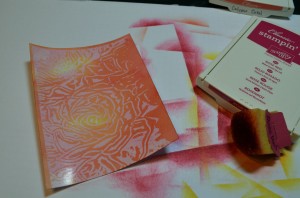
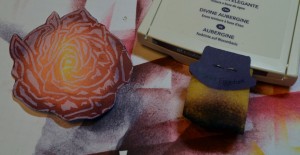
Sponged Daffodil Delight ink, Rose Red ink and then Bravo Burgundy ink on the card stock.

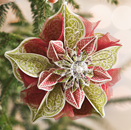
It was at this point that I decided to not use the card stock as my background, but in stead put the rose up front and center.  🙂

Cut out the large flower and sponged Elegant Eggplant on the edges of the rose.

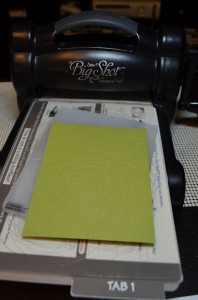
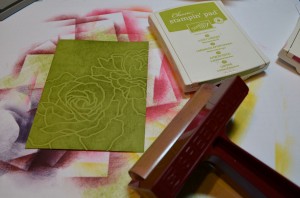
Cut a 3 7/8″ x 5 1/8″ piece of Lucky Limeade card stock.  Embossed it using the Manhattan Flower Embossing folder.

Brayered Lucky Limeade ink over the top of the card stock to make the embossing pop.

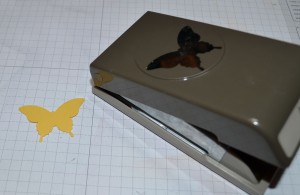
Punched a butterfly using the Elegant Butterfly punch.

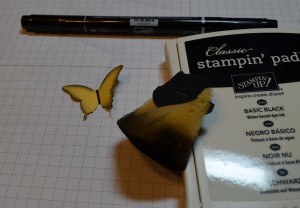
Sponged Basic Black ink around the edges and put Basic Black marker dots on the wing edges and a Basic Black marker line for the body.

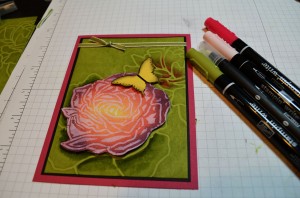
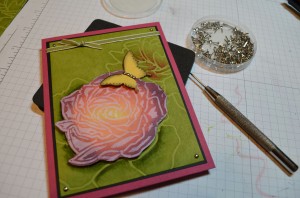
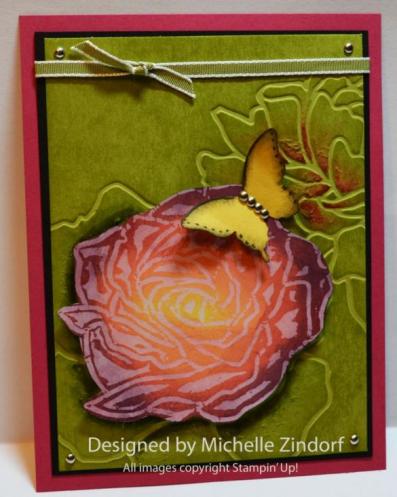
Added a Rose Red panel, Basic Black Panel, Old Olive Ribbon.  Also added Old Olive marker on some of the petals on the Old Olive panel and blended them with a Blender Pen.  Added Rose Red marker to the small flower petals and blended them in with a Pink Pirouette Marker.

Popped the Rose and Butterfly up using Stampin’ Dimensionals.  Added mini silver brads at the Old Olive panel corners and down the Butterfly’s body.

Lastly, added a Whisper White card base.

Here is the finished card measuring 4.25″ x 5.5″.


May your day be filled with all the things that bring you joy.

Until my next post.. . . . .

Hugs,


Get ready for Brayer and Direct to Paper Workshops!  I am coming to the following locations, click the location name for more information.

Scottsdale, Arizona

Sacramento, California

Staley, North Carolina

St. Petersburg, Florida

Newburge, Indiana

I hope you can make it to one of my workshops in 2012.  I have decided not to travel after this year, so be sure to catch one now!

Link to my Stampin’ Up website where you can order all of your must have Stampin’ Up products from me 24-7: https://michellezindorf.stampinup.net