
Hey There,
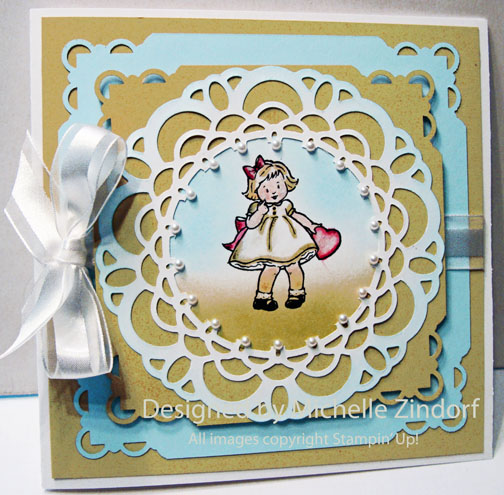
I have another valentine for you today. This one highlights the great new Large Paper Doily Die cut that is in the new Stampin’ Up! Occasions Mini Catalog. I know, this card is rather girlie for me. Every great once in a while I want to break out the frills. Valentine’s Day is a great occasion for that, don’t you think? Plus, I have a very girlie, 8 year old grand daughter, grin.
Let’s get right into this tutorial. . . .
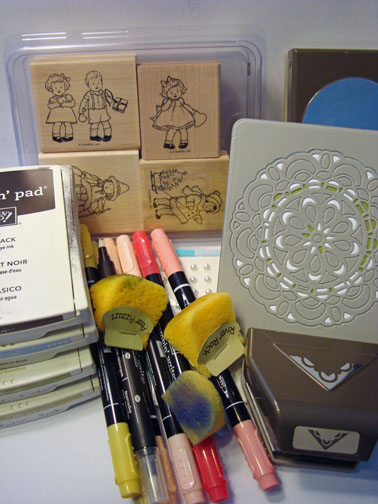
Supplies:
Stamps: Stampin’ Up! Greeting Card Kids
Card Stock: Stampin’ Up! Whisper White, Bashful Blue and River Rock
Ink: Stampin’ Up! Basic Black, Bashful Blue, Pear Pizzazz and River Rock
Accessories: Stampin’ Up! Sponges, Basic Pearl Jewels, Whisper White Ribbon, Big Shot Machine, Large Paper Doily Die Cut, Blender Pen, 2.5″ Circle Punch, Corner Punch
Want a free copy of the current Stampin’ Up! Occasions Mini Catalog? Just e-mail your address to [email protected] and I will get one right out to you. Get your copy of the 2011-2012 Stampin’ Up! Idea Book & Catalog by sending $9.95 to me at P.O. box 116, West Alexandria, Ohio 45381 or via paypal to [email protected], shipping is free. ![]() Are you getting inspiration from this blog? One way you can help support it is to order your Stampin’ Up products through me. Click HEREto place an order and have your order delivered directly to your door step from Stampin’ Up! Want to become a Stampin’ Up Demonstrator , receive a 20% discount on product and earn instant income on orders, get to purchase products before they are released to the public? Consider being part of my Stampin’ Up Team and start your own business or become a Hobby Demo just for the discount. Click HERE for more information.
Are you getting inspiration from this blog? One way you can help support it is to order your Stampin’ Up products through me. Click HEREto place an order and have your order delivered directly to your door step from Stampin’ Up! Want to become a Stampin’ Up Demonstrator , receive a 20% discount on product and earn instant income on orders, get to purchase products before they are released to the public? Consider being part of my Stampin’ Up Team and start your own business or become a Hobby Demo just for the discount. Click HERE for more information.
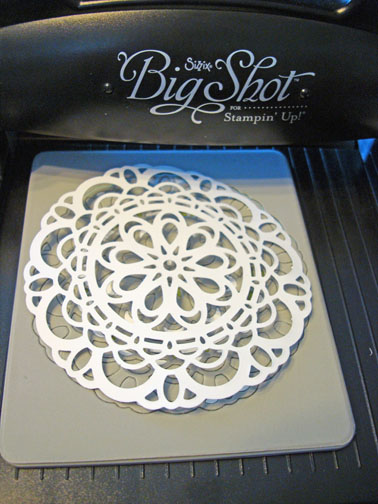
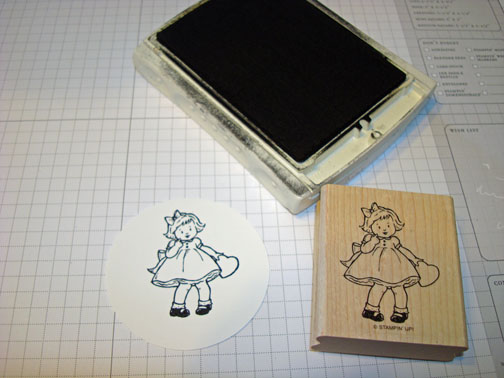
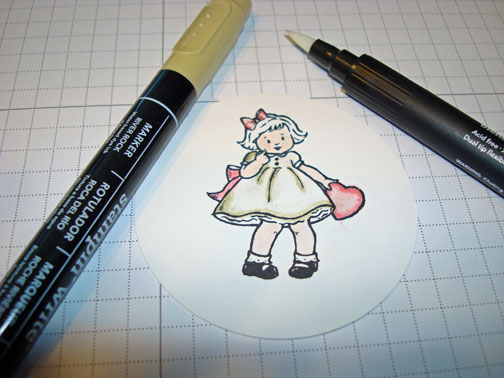
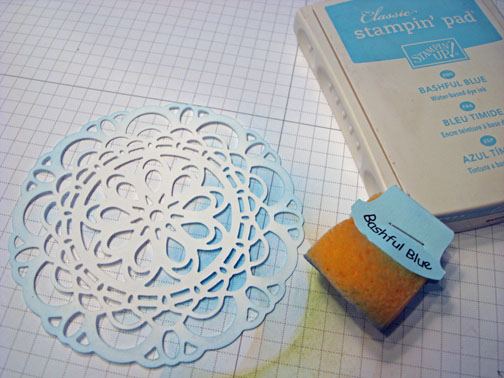
Die cut the Large Paper Doily out of Whisper White card stock using the Big Shot Machine.
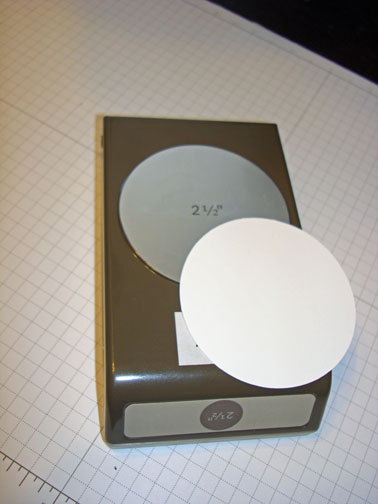
Punched a 2 1/2″ circle from Whisper White card stock.
Stamp the girl on the circle using Basic Black ink.
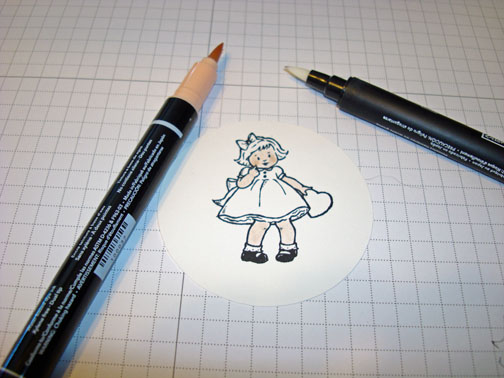
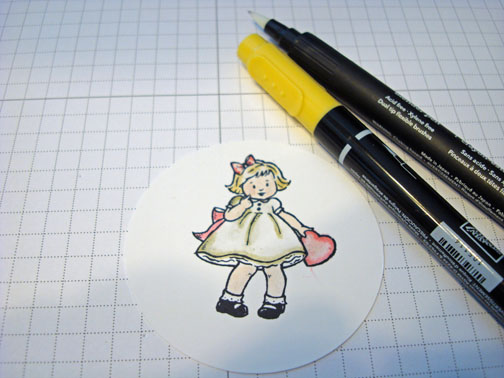
Colored the girls skin using a Blush Blossom marker and a Blender pen. Tip: Tap the point of the blender pen on the point of the marker to pick up the color.
Added Blushing Bride color to the Bow in her hair and the heart using the blender pen.
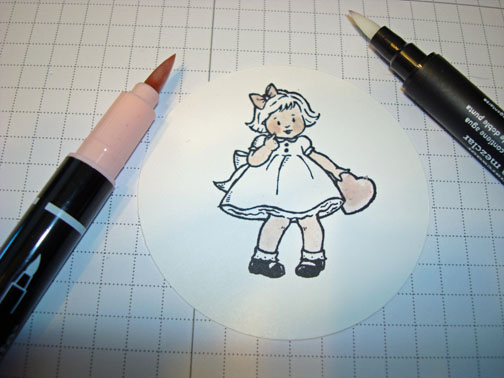
Added Regal Rose color to the bows and heart using the blender pen.
Added River Rock color to her dress using the blender pen.
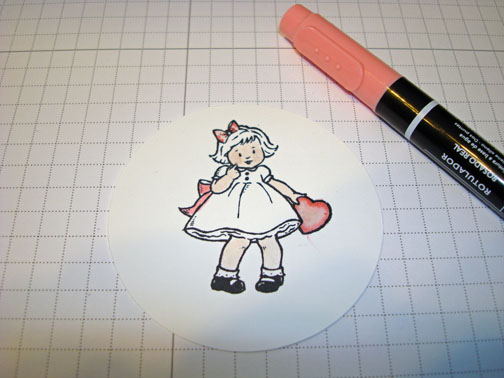
Added So Saffron color to her hair using the blender pen.
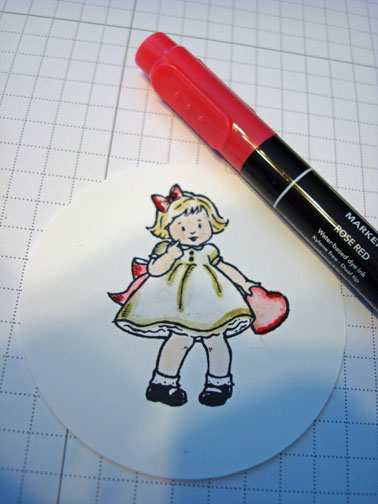
Added just a touch or two of Rose Red using the blender pen.
Sponged River Rock ink at the bottom of the card stock.

Added Pear Pizzazz ink at the bottom of the card stock not covering the River Rock entirely.
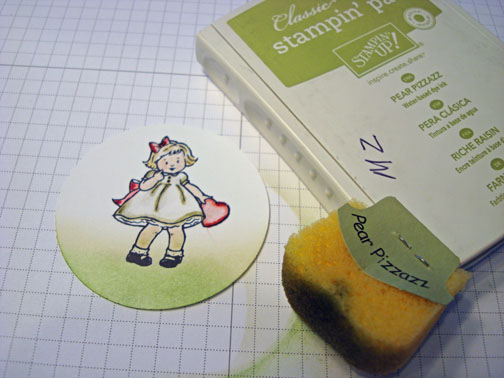
Sponged Bashful Blue ink around the girl in the sky area.
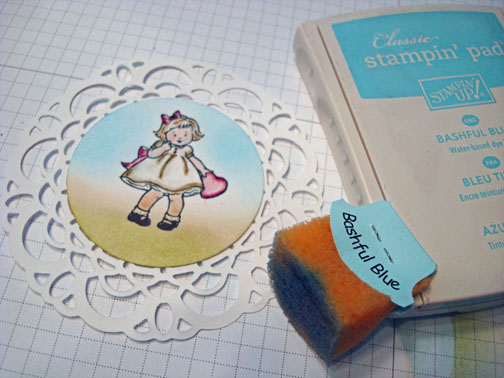
Sponged Bashful Blue ink on the edge of the Doily Die cut.
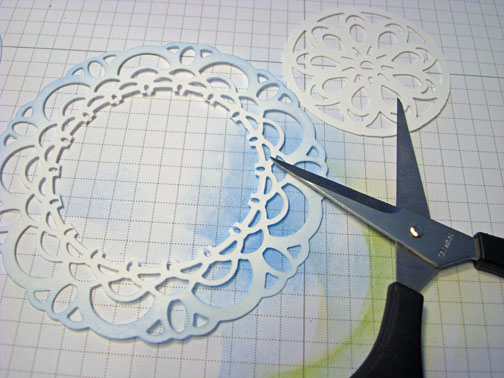
Cut out the center of the die cut.
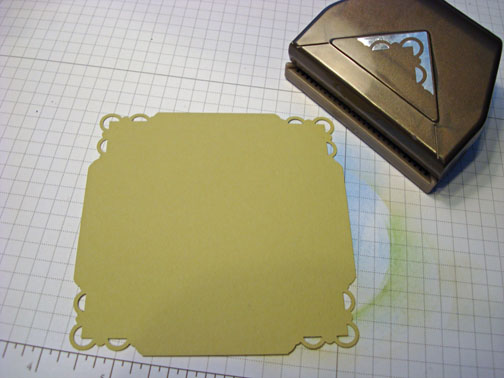
Punched the corners of a River Rock and Bashful Blue Panel using the corner punch.
Started assembling my card adding Stampin’ Dimensionals and Whisper White ribbon.
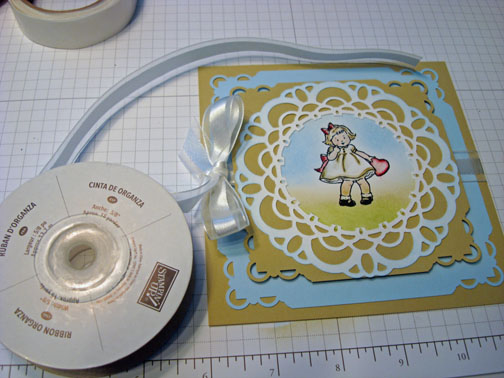
Added a River Rock panel and Whisper White card panel. Also added Basic Pearl Jewels.
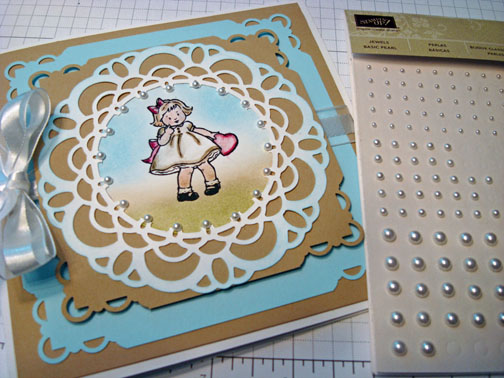
Here is the finished card measuring 5.5″ square.
May your day be filled with fine things.
Until my next post. . . . . . .
Hugs,


 Get ready for Brayer and Direct to Paper Workshops! I am coming to the following locations, click the location name for more information.
Dayton, Ohio – Direct to Paper Workshops
Dayton, Ohio – Brayer Workshops
Sparta, New Jersey (Sold Out)
Post Falls, Idaho (outside of Coeurd’Alene)
Sand Lake, Michigan (just North of Grand Rapids)
Longmont (Gunbarrel), Colorado
Here is a link to my workshop calendar where you can see all of my travel schedule and to get info on beginner and advanced Brayer workshops, along with the newly added Direct to Paper Workshop: https://zindorf.splitcoaststampers.com/workshop-calendar
Don’t see a workshop in your State? Interested in hosting the workshops in your area Click HERE to get hostess information.
Link to my Stampin’ Up website where you can order all of your must have Stampin’ Up products from me 24-7: https://michellezindorf.stampinup.net
7 responses to “Girlie Valentine – Tutorial #481”