
Note: I have updated my items for sale page. Click here to check it out or click “Items for Sale” at the top of the page. Hugs!
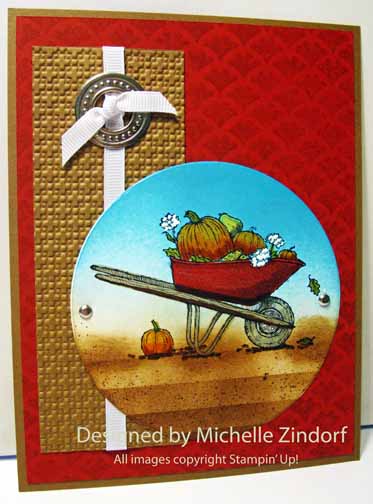
Somebody, please, please help me! I’m totally addicted to this new Stampin’ Up! set “Always Thankful” that can be found in the new Stampin’ Up! Holiday Mini Catalog. This is a great set to do some coloring with. Hang out and see how this card was created.
You can check out the totally wonderful holiday stamps and accessories from Stampin’ Up! by CLICKING HERE. Want a free copy of the Holiday Mini Catalog? E-mail me at [email protected] (include your mailing address in your e-mail, please) and I will get one out to you. Please remember, you can order from me 24/7 by CLICKING HERE and your order will be shipped directly to your doorstep straight from Stampin’ Up!
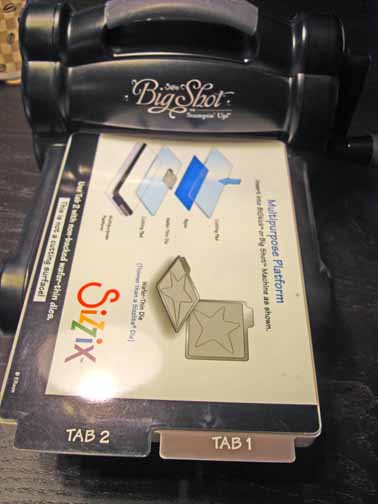
ANNOUNCEMENT, ANNOUNCEMENT! I want to let everyone know as of today, September 8, 2011 through October 31, 2011 you can get a chance to win a free brand new Big Shot Die Cut Machine worth $99.95. If you don’t know what the big shot is all about, here is a link for you to drool over it, lol CLICK HERE. Believe me you will want to win this Die Cut Machine!

How to enter. . . . Every person that orders Stampin’ Up! products through my Stampin’ Up Web Site (CLICK HERE TO SHOP) until October 31, 2011 will receive 1 entry for each $25 increment of products purchased. So if you place a product order that totals $50 that is 2 chances to win! How about those beans. I love giving things away!
I will announce the winner on November 1, 2011. I hope you can get excited about that, I am.
Now let’s start today’s tutorial. . . .
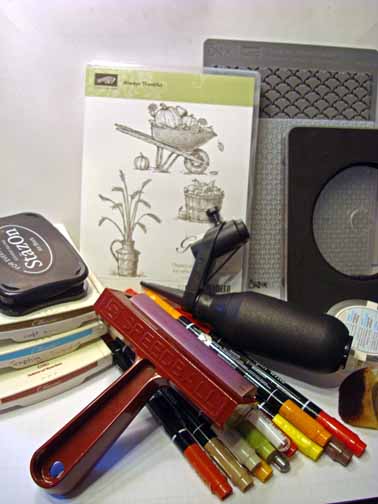
Supplies:
| Stamps: Stampin’ Up! Always Thankful |
| Paper: Stampin’ Up! Whipser White, Cherry Cobbler and Soft Suede |
| Ink: Stampin’ UP! Soft Suede, Tempting Turquoise,Cherry Cobber and Stazon Jet Black |
| Accessories: Stampin’ Up! Sponge, Brayer, Sprtizer, Gumbo Grommet, Clear Circle Die, Big Shot Machine, Fancy Fan Letter Press, Square Lattice Embossing Folder, Stampin’ Up Markers, White Ribbon, Whisper White Ribbon, White and Silver Gel Pens, Post it Note |
| Techniques: Brayering, Masking |
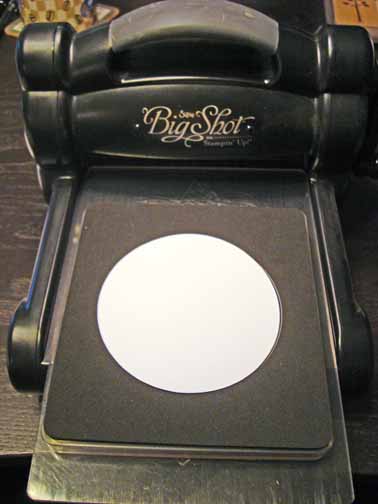
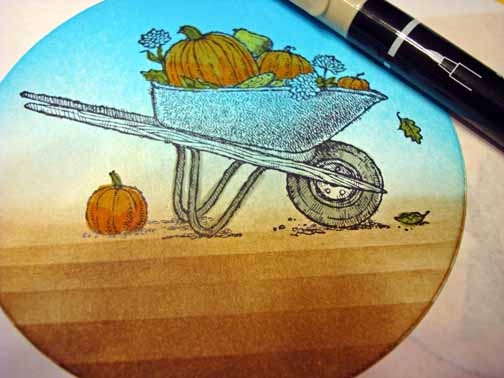
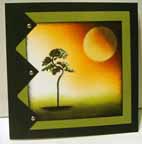
Cut a large Circle out of Whisper White card stock the Clear Circle die and the Big Shot Machine.
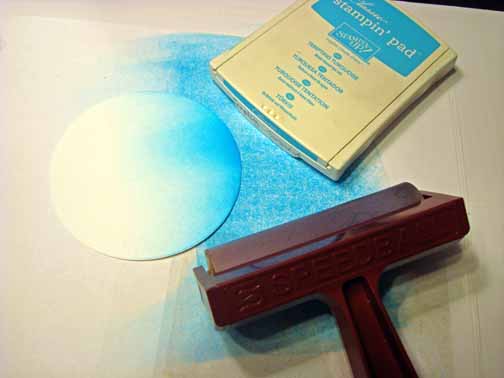
Brayered Tempting Turquoise ink at the top of the card stock.
Brayered Soft Suede ink at the bottom of the card stock.
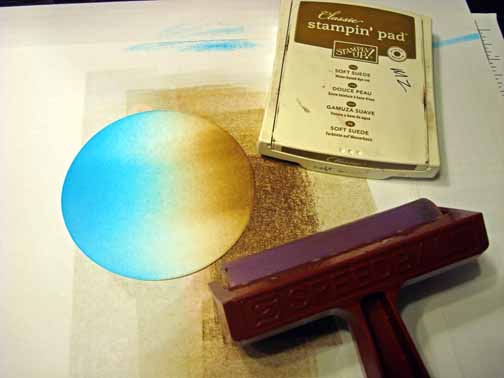
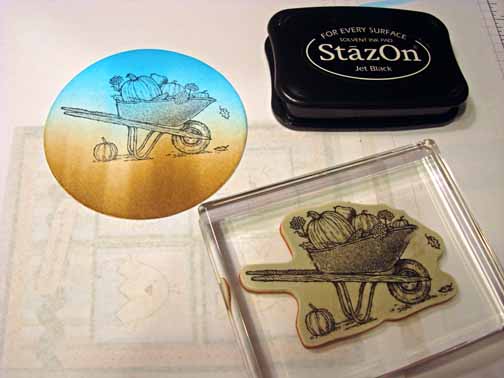
Stamped the Always Thankful stamp using Jet Black StazOn ink.
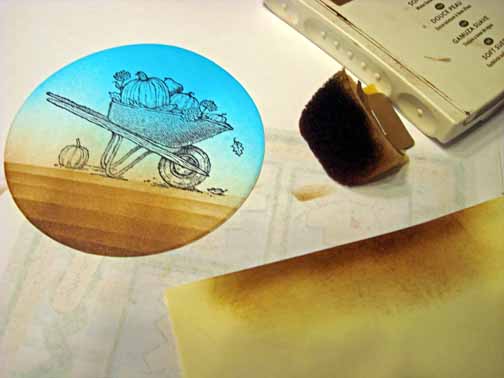
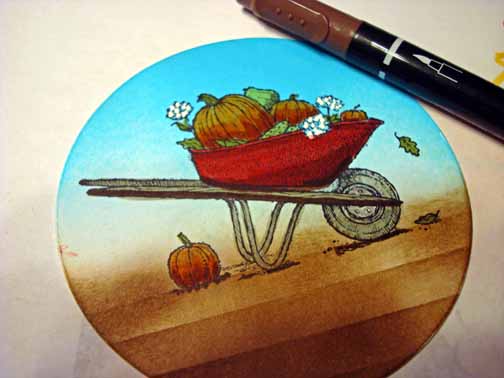
Masked the top of the card stock using a post it note and sponged Soft Suede ink at the post it note edge to create a field line.
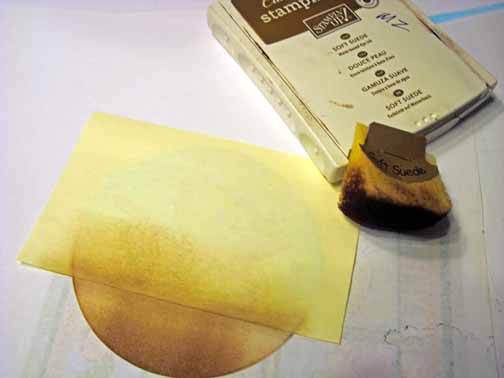
Keep moving the post it note mask down a bit and sponge to create the rest of the field lines.
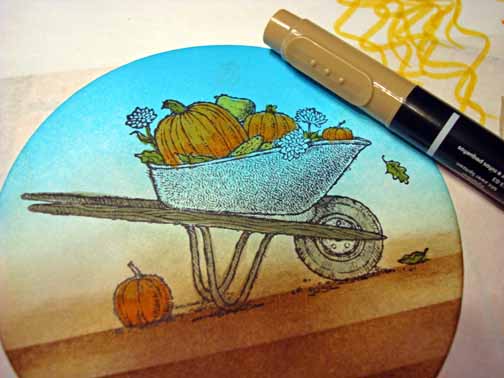
Colored the pumpkins in using a More Mustard marker.
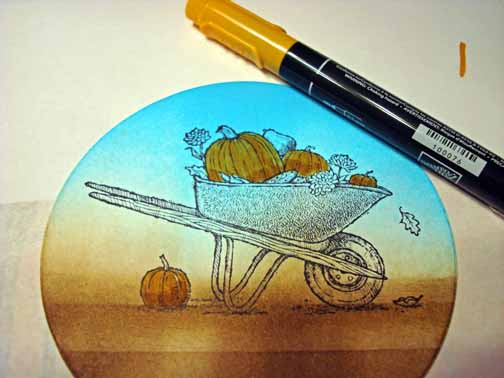
Colored the squash and corn in using a Daffodil Delight marker.
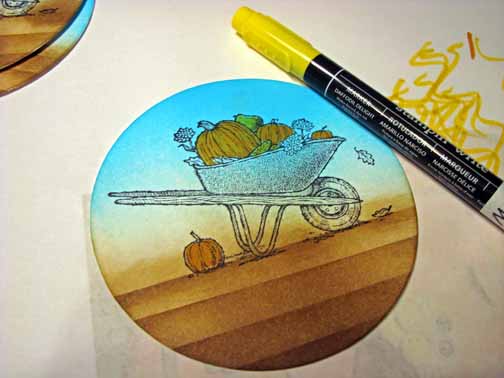
Colored the bottom of the pumpkins in using a Pumpkin Pie Marker.
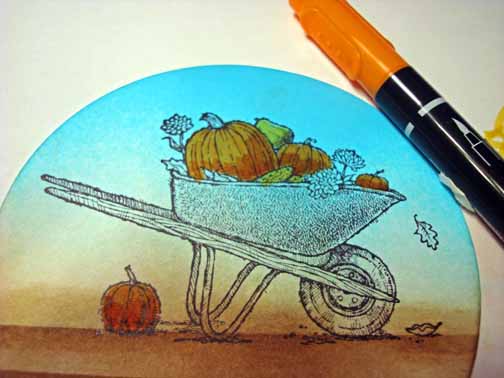
Colored the leaves and stems in using an Old Olive marker.
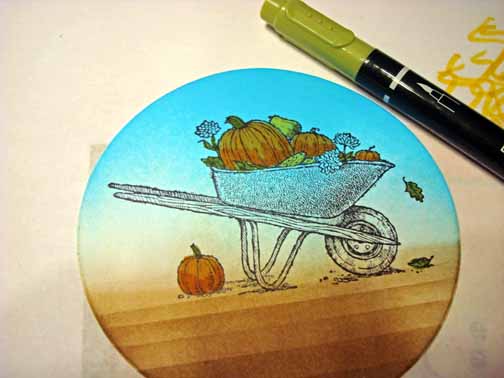
Colored in the wheel using Sahara Sand marker.
Colored the wood handles in using a Crumb Cake Marker.
Added White Gel Pen to the flowers and Silver Gel pen to the center of the wheel.
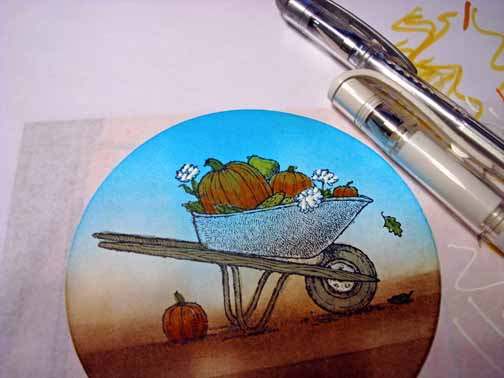
Colored the Wheel Barrel in using a Real Red marker. Added Cherry Cobbler marker to the bottom of the wheel barrel.
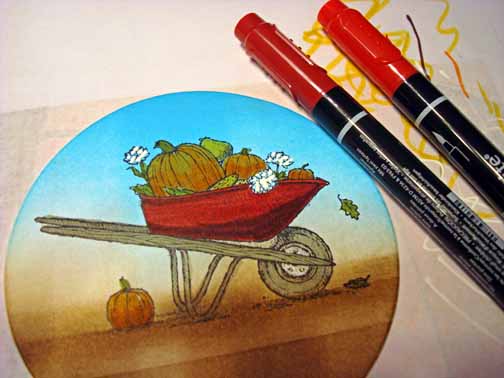
Added Cajun Craze marker to the very bottoms of the pumpkins.
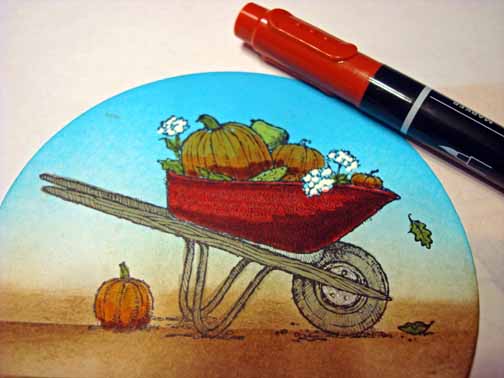
Added Chocolate Chip marker to the bottom of the wood rails, the wheel barrel and the ground.
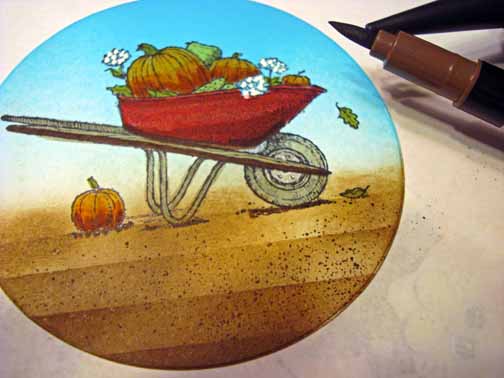
Using the Spritzer and a Chocolate Chip marker, added speckles to the ground area.
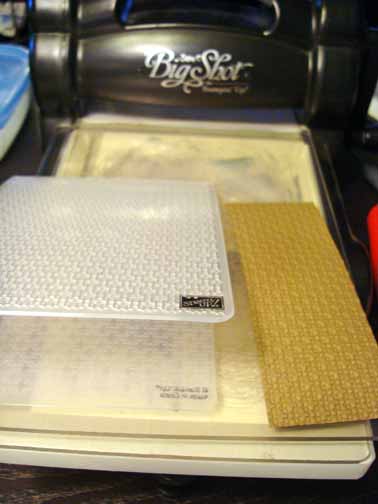
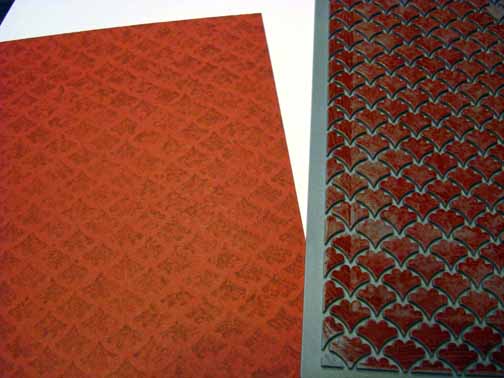
Embossed a 6.25″ x 2″ piece of Soft Suede Card stock using the Big Shot Machine and the Square Lattice Embossing Folder.
Inked up the Fancy Fan Letterpress with Cherry Cobbler ink and put a 4.75″ x 6.25″ piece of Cherry Cobbler card stock on top of it. You can run this through the Big Shot Machine, but I wanted it to be a little lighter in color so I just used my Brayer and rolled over the back side of the card stock to transfer the color onto it.
Assembled the card by adding a 5″ x 6.5″ piece of Soft Suede card stock, Whisper White Ribbon, silver brads and Jumbo Grommet.
Here is the finished card measuring 5″ x 6.5″

May your day be full of Blue skies and soft breezes.
Until my next post. . . . .
Hugs,

 Get ready for Brayer Workshops! I am coming to the following locations, click the location name for more information.
Leesburg, Florida Sold Out
Sand Lake, Michigan (just North of Grand Rapids)
Longmont (Gunbarrel), Colorado
Here is a link to my workshop calendar where you can see all of my travel schedule and to get info on beginner and advanced Brayer workshops, along with the newly added Direct to Paper Workshop: https://zindorf.splitcoaststampers.com/workshop-calendar
Don’t see a workshop in your State? Interested in hosting the workshops in your area Click HERE to get hostess information.
Link to my Stampin’ Up website where you can order all of your must have Stampin’ Up products from me 24-7: https://michellezindorf.stampinup.net
11 responses to “The Harvest – Tutorial #451”