Good Morning All,
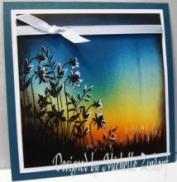
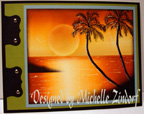
Just for a change of pace I thought I would use a totally different color combo than my normal blues and greens. I do love using shades of browns to get an old time feel. Add a bit of peach and pink and it starts looking like an antique photo that has been tinted.
Let’s get started. . . . . .
Supplies:
| Stamps: Stampin’ Up! Lovely As a Tree |
| Paper: Stampin’ Up! Whisper White, Basic Black and Soft Suede |
| Ink: Stampin’ Up! Early Espresso, Soft Suede, Sahara Sand and Basic Black |
| Accessories: Stampin’ Up! Sponges, Brayer, White Gel Pen,Markers – Blush Blossom, Pink Pirouette, Soft Suede, Early Espesso, Gold Brads, Clear Embossing Powder, Heat Gun, 1″ Circle and Word Window Punches, Post it Notes, Piercing Tools |
 My Stampin’ Up customers that order $50 in Stampin’ Up merchandise will receive this handmade card though March 31, 2011.
Don’t forget it is Sale-a-bration time at Stampin’ Up. Receive a free Sale-a-bration set for each $50 in merchandise purchased. Click HERE to place an order. Your order will be shipped directly to your door step from Stampin’ Up!
The Stampin’ Up USA Idea book and Catalog is here. For your copy, please send a check for $9.95 to Michelle Zindorf, P.O. Box 116, West Alexandria, OH 45381 or send it via paypal to [email protected] USA only. My current customers will receive a new Occasions Mini Catalog automatically from me. Not a current customer and want a free copy of the new Occasions Mini Catalog ? E-mail your mailing address to [email protected] and I will get one in the mail to you. ![]() Are you getting inspiration from this blog? One way you can help support it is to order your Stampin’ Up products through me. Click HERE to place an order. Want to become a Stampin’ Up Demonstrator , receive a 20% discount on product and earn instant income on orders? Consider being part of my Stampin’ Up Team and start your own business or become a Hobby Demo just for the discount. Click HERE for more information.
Are you getting inspiration from this blog? One way you can help support it is to order your Stampin’ Up products through me. Click HERE to place an order. Want to become a Stampin’ Up Demonstrator , receive a 20% discount on product and earn instant income on orders? Consider being part of my Stampin’ Up Team and start your own business or become a Hobby Demo just for the discount. Click HERE for more information.
Started with a 4″ x 5″ piece of Whisper White card stock, stamped the trees, on each side of the card stock, without inking the grassy area of the stamp using Basic Black Craft ink (Pigment). Heat embossed the images using clear embossing powder.
Colored the tree tops using a Blush Blossom marker.
Tapped in a bit of Pink Pirouette marker in the middle of the trees.
colored over the marker using a Versamark marker and then heat embossed the images using clear embossing powder and a heat gun. This potects the color in the trees and will resist ink put on for our background.
Punched a 1″ circle from a scrap piece of card stock.
Put the hole in the card stock where I want my moon and colored the Moon in with Blush Blossom marker. Added some Pink Pirouette marker to the left side of the moon. Colored the moon in with Versamark marker and heat embossed the image using clear embossing powder and a heat gun.
Now that our trees and moon are protected with embossing we can brayer over them and they will resist the ink.
Brayered Sahara Sand ink at the top and the bottom of the card stock.
Ripped a post it note in a mountain shape and put it on my card stock to mask the sky.
Sponged Soft Suede ink in the mountain shape.
Added Early Espresso ink to the top of the mountain.
Unmasked the sky. Ripped a creek shaped piece of post it note and masked the creek area.
Ripped another post it note and masked the sky and mountain.
Sponged Soft Suede in the unmasked area.
Added Early Espresso ink in the top 1/2 of the unmasked area.
Sponged a bit of Basic Black ink at the very top of the unmasked area.
Removed the post it notes and gently wiped my embossed images off using a paper towel.
Put a line of Early Espresso marker at the top of creek and extended the tree trunks.
Lightly Sponged Early Espresso ink at the bottom half of the creek.
Brayered Early Espresso ink at the top of the card stock. Wiped my embossed images off again.
Added White Gel pen dots to the trees to add a bit of sparkle.
Added a few rock shapes and water lines in the creek using a Soft Suede marker.
Punched 2 Basic Black Word Window punches and held them together and one end off of them.
Added 2 Basic Black panels, 1 Soft Suede panel, word window punches and gold brads.
Here is the finished card measuring 5″ x 6.5″.
May your day be filled with all that pleases you.
Until my next post. . . . . . . . . . .
Hugs,
Michelle
 Get ready for Brayer Workshops! I am coming to the following locations, click the location name for more information.
Syracuse (Bridgeport), New York
Owings Mills, Maryland (Baltimore Area)
Staley , North Carolina (South of Greensboro)
Jefferson, Louisiana (New Orleans Area)
Here is a link to my workshop calendar where you can see all of my travel schedule and to get info on beginner and advanced Brayer workshops: https://zindorf.splitcoaststampers.com/workshop-calendar
Don’t see a workshop in your State? Interested in hosting the workshops in your area in 2012? Click HERE to get hostess information.
Link to my Stampin’ Up website where you can order all of your must have Stampin’ Up products from me 24-7: https://michellezindorf.stampinup.net
Link to my Scentsy website where you can order the best smelling, safest wickless candles from me 24-7: https://zindorf.scentsy.us/Home
Donate cards to the Give Thanks Project and help out Cancer Patients. CLICK HERE TO HELP


17 responses to “Mountain Creek – Tutorial #404”