

Happy Friday! I’m home this weekend. With all of the traveling I’ve been doing it seems a little strange. 🙂
After many inquiries, I want to give you an update regarding my husband Russ’ health. He is doing so much better. Although he still has an irregular heart beat, his heart rate is where it should be. He is being treated with medication for now to try to straighten things out. Thank you again for keeping him in your thoughts. I just think his heart beats faster when I’m around, lol. 🙂
Now back to business. Today’s tutorial is quite girly with all the pink and I have been dying to use the Little Bit of Magic set. So here is my little scene with it.
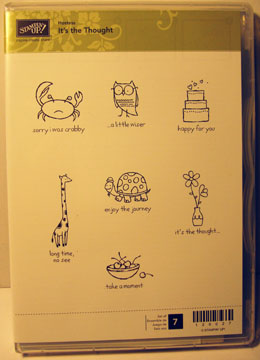
Before we get started on the tutorial I want to announce today’s blog candy. Check it out, it is a brand new Stampin’ Up! Clear Mount Hostess set “It’s the Thought.

All you have to do to be enter to win this set is leave me a comment on this blog post telling me to enter you. If you are getting this blog update via e-mail you will need to click HERE and then leave a comment. Please no e-mail entries.
I will select the winner on Monday, July 12, 2010 using a Random Number Generator. Good Luck Everyone!
Let’s get started on that tutorial. . . . . . .
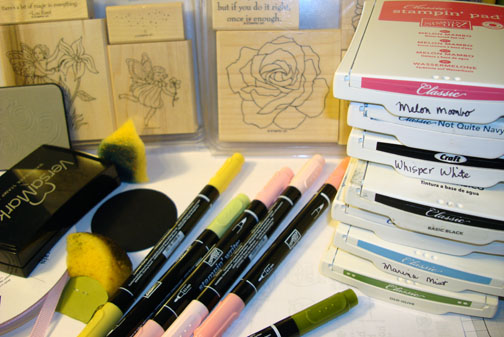
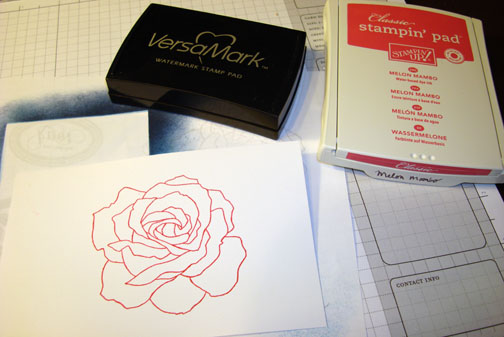
Supplies:
| Stamps: Stampin’ Up! Fifth Avenue Floral and Little Bit of Magic |
| Paper: Stampin’ Up! Whisper White, Old Olive, Marina Mist and Not Quite Navy |
| Ink: Stampin’ Up! Melon Mambo, Not Quite Navy, Whisper White, Basic Black, Night of Navy, Marina Mist and Old Olive |
| Accessories: Stampin’ Up! sponges, Pretty in Pink Ribbon, Markers (Pretty in Pink, Pink Pirouette, Regal Rose, Certainly Celery, So Saffron and Old Olive), Versamark Pad, Circle Scissors, Scribble Swirles Die and Bit Shot Machine |
The brand new USA Idea book and Catalog is here. For your copy, please send a check for $9.95 to Michelle Zindorf, P.O. Box 116, West Alexandria, OH 45381 or send it via paypal to [email protected] USA only. Want a copy of the Summer Mini Catalog? E-mail your mailing address to [email protected] and I will get one in the mail to you. ![]() Are you getting inspiration from this blog? One way you can help support it is to order your Stampin’ Up products through me. Click HERE to place an order. Click HERE to check out the Stampin’ Up! catalogs. Want to become a Stampin’ Up Demonstrator , receive a 20% discount on product and earn instant income on orders? Consider being part of my Stampin’ Up Team and start your own business. Click HERE for more information.
Are you getting inspiration from this blog? One way you can help support it is to order your Stampin’ Up products through me. Click HERE to place an order. Click HERE to check out the Stampin’ Up! catalogs. Want to become a Stampin’ Up Demonstrator , receive a 20% discount on product and earn instant income on orders? Consider being part of my Stampin’ Up Team and start your own business. Click HERE for more information.
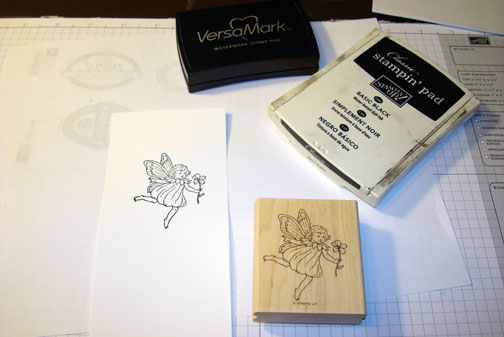
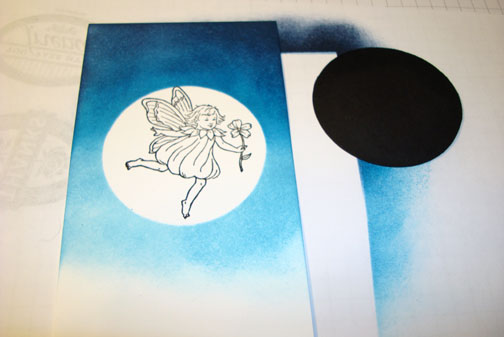
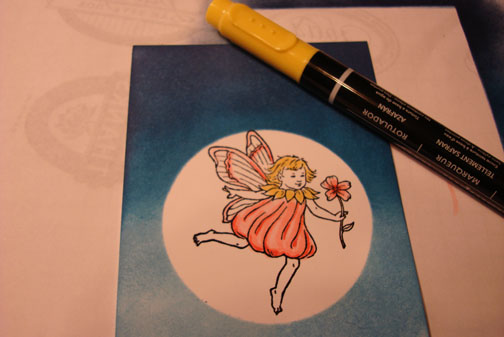
On a 3″ x 5.5″ piece of Whisper White stamped the fairy by first loading my stamp with Versamark and then with Basic Black ink before stamping it.
Heat embossed the image using clear embossing powder and a heat gun.
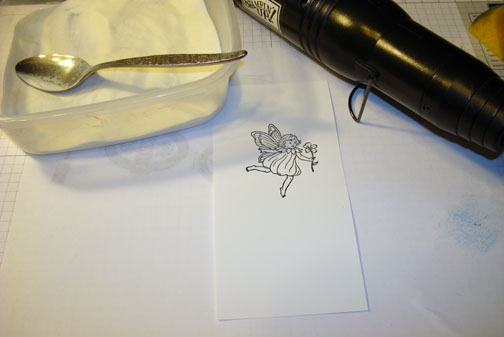
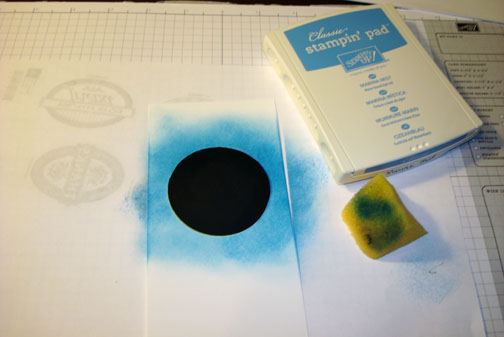
Masked over the fairy with a 2.25″ card stock circle. I cut the circle using my Circle Scissors.

Holding the mask in place, sponged Marina Mist ink on the card stock.
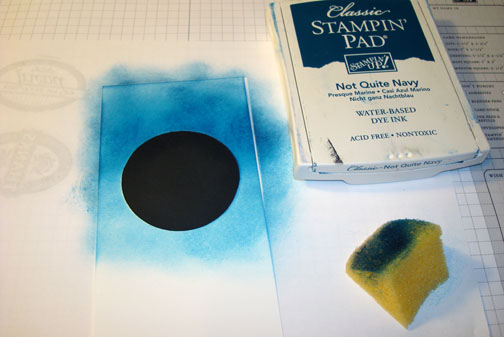
Sponged Not Quite Navy ink on, not covering the Marina Mist ink entirely.
Sponged Night of Navy at the top of the card stock.
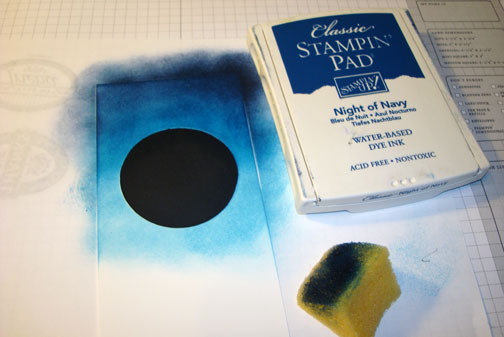
Removed the mask.
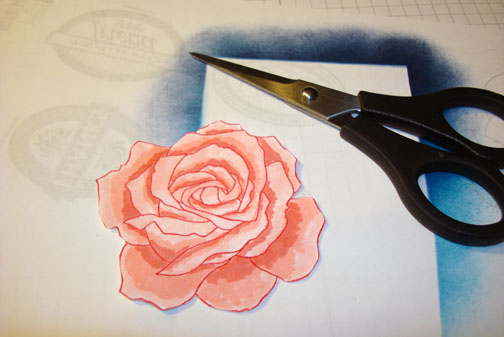
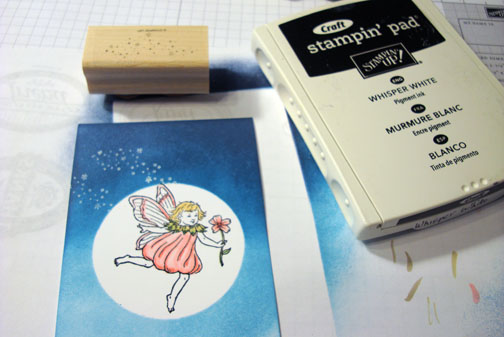
On a separate piece of Whisper White card stock, stamped the rose by first loading my stamp with Versamark and then Melon Mambo ink before stamping it. Heat embossed the rose using clear embossing powder and a heat gun.
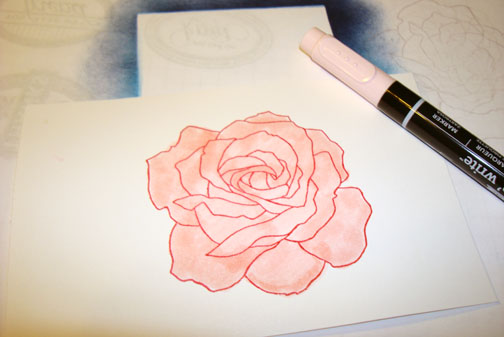
Colored in the Rose using a Pink Pirouette marker.
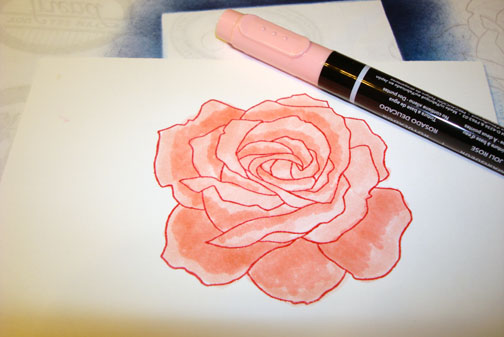
Added Pretty in Pink marker.
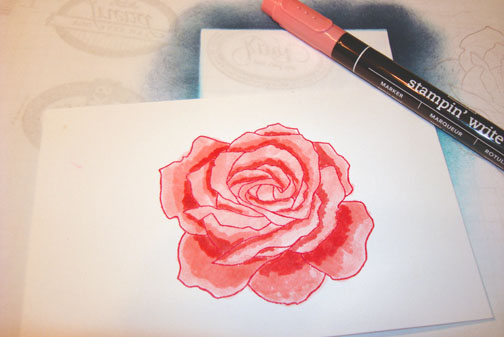
Added Regal Rose Marker.
Cut the rose out.
Added Pink Pirouette Marker to the Fairy and her flower.
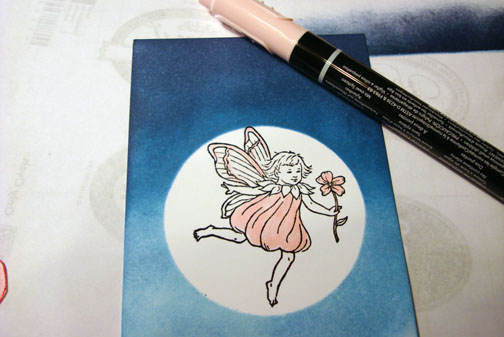
Added Pretty in Pink marker to the folds of her dress and the center of the flower.
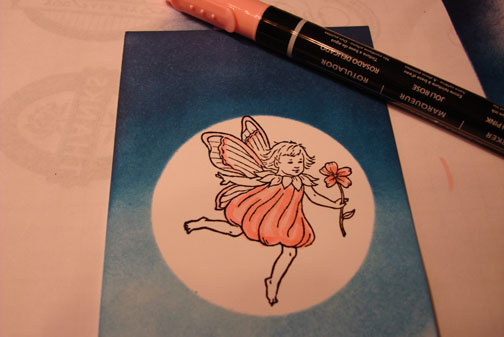
Added a bit of Regal Rose marker to the darkest areas.
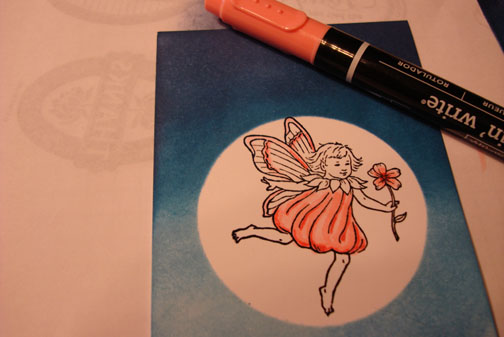
Colored her collar and hair in with a So Saffron Marker.
Added Certainly Celery marker to the tips of her collar.
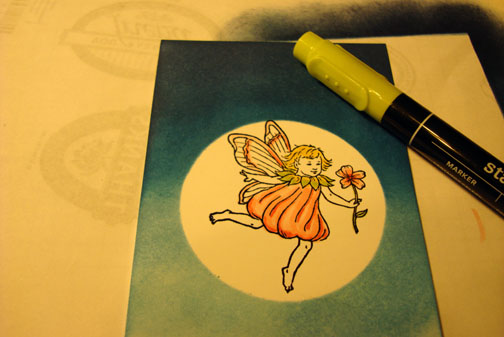
Stamped the fairy dust with Whisper White ink. Added just a dot of Old Olive ink to the tips of her collar.
Assembled the card front by adding Old Olive, Marina Mist and Not Quite Navy card stock panels. Added Pretty in Pink ribbon and Scribbles Swirls Die cuts from Old Olive card stock. Cut the Scribbles Swirls Dies using my Big Shot Machine.
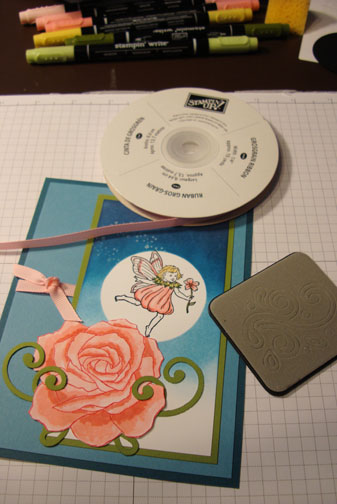
Sponged Old Olive ink at the bottom of the card front.
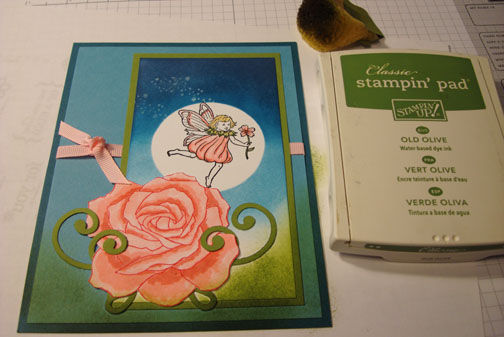
Sponged Not Quite Navy ink at the top of the card front and finished assembling the card.
Here it is finished measuring 5″ x 6.5″.
May your weekend be absolutely Magical.
Until my next post. . . . . .
Hugs,
Michelle
 Get ready for Brayer Workshops! I am coming to the following locations, click the location name for more information.
Kenova (Huntington), West Virginia
Piedmont, Alabama (Near GA border close to Cedartown)
Auburn, Washington (near Seattle)
Here is a link to my workshop calendar where you can see all of my travel schedule and to get info on beginner and advanced Brayer workshops: https://zindorf.splitcoaststampers.com/workshop-calendar
Link to my Stampin’ Up website where you can order all of your must have Stampin’ Up products from me 24-7: https://michellezindorf.stampinup.net
Frequently asked questions answers: https://zindorf.splitcoaststampers.com/frequently-asked-questions/
264 responses to “Fifth Avenue Magic – Tutorial #346 and Blog Candy”