
Boy is my rear dragging today. Why does that happen when you have such a big list of things to accomplish? lol. Is it the list that makes your rear drag? Actually it could be that I had a 12 hour drive home yesterday from Minnesota to Ohio. It was so well worth it though. The ladies in my Brayer Workshops in Minnesota were all wonderful people and great stampers. You all rock!
I have just a couple of things to announce before I start on today’s tutorial.
Number one, I will be teaching my Brayer Workshops in Virginia Beach, Virginia this February. Click HERE for more info.
Number Two, I have a blog winner to announce. The winner of the Stampin’ Up! Nature Silhouettes set is . . . . . . . . . . . .
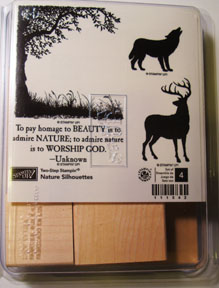
Michelle B. aka JustPaintingAround who wrote: “Yes, please enter me in the drawing for this fab set! This is a fabulous piece! I love your direct to paper techniques as much as your brayering! Thanks for the continual inspiration!”
Michelle, congratulations! Please e-mail your address to [email protected] within 30 days and I will get this wonderful set out to you.
Thanks to all who played along. Wish I had a set for each of you. Keep playing though. You just might be the winner next time.
Now let’s get started on today’s tutorial. . . .
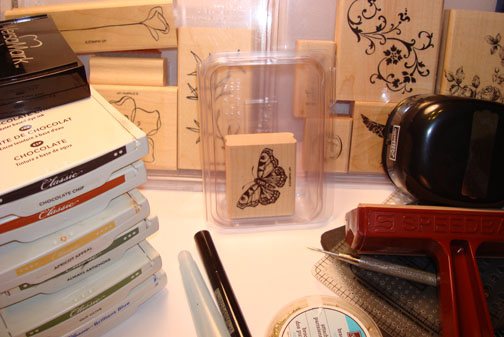
Supplies:
| Stamps: Stampin’ Up! All a Flutter, Elements of Style and Embrace Life |
| Paper: Stampin’ Up! Whisper White, Chocolate Chip, Always Artichoke and Brilliant Blue |
| Ink: Stampin’ Up! Brilliant Blue, Old Olive, Always Artichoke, Apricot Appeal, Dusty Durango and Chocolate Chip |
| Accessories: Stampin’ Up! sponge, piercing tools, aqua painter, Versamark pad and marker, gold brads, label punch, clear embossing powder, heat gun and brayer |
Live in the USA and need a copy of the Summer Mini Catalog? E-mail your mailing address to [email protected] and I will get one in the mail to you. ![]() Are you getting inspiration from this blog? One way you can help support it is to order your Stampin’ Up products through me. Click HERE to place an order. Click HERE to check out the Stampin’ Up! catalogs. Want to become a Stampin’ Up Demonstrator , receive a 20% discount on product and earn instant income on orders? Consider being part of my Stampin’ Up Team and start your own business. Click HERE for more information.
Are you getting inspiration from this blog? One way you can help support it is to order your Stampin’ Up products through me. Click HERE to place an order. Click HERE to check out the Stampin’ Up! catalogs. Want to become a Stampin’ Up Demonstrator , receive a 20% discount on product and earn instant income on orders? Consider being part of my Stampin’ Up Team and start your own business. Click HERE for more information.
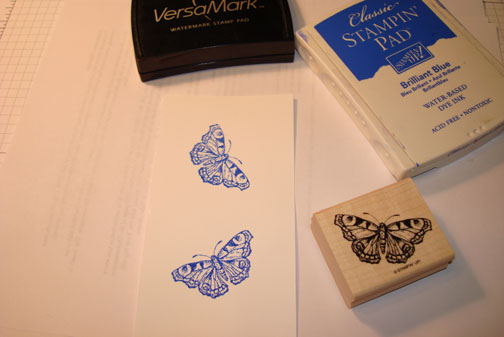
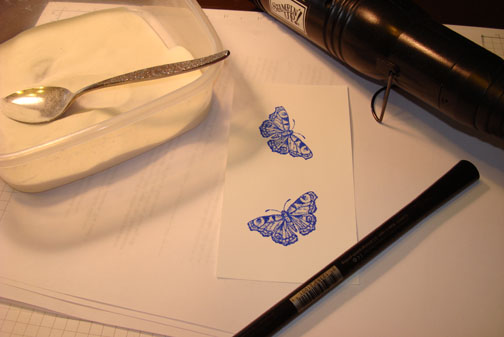
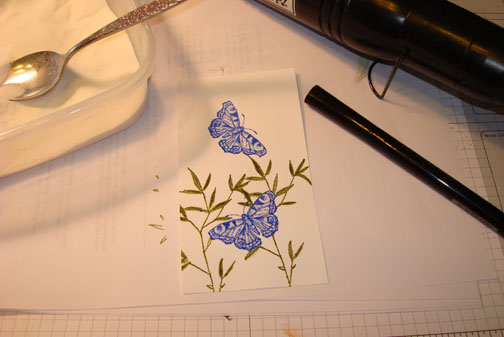
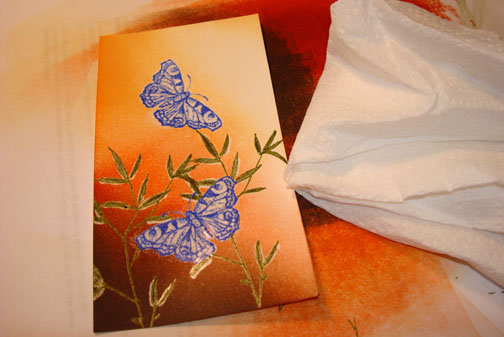
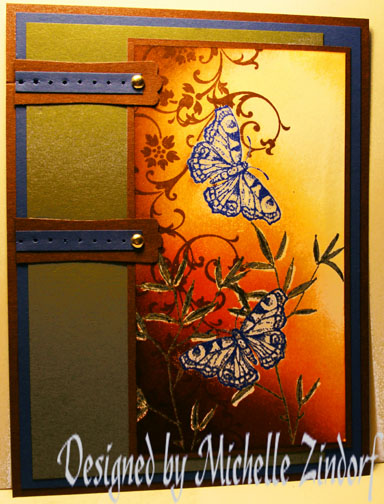
Stamped Butterflies on a 3″ x 5.5″ piece of Whisper White card stock by first loading my stamp with Versamark and then with Brilliant Blue ink before stamping.
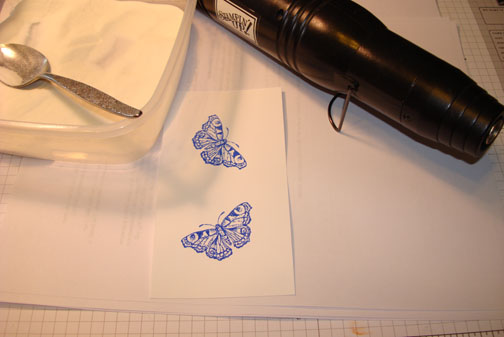
Heat embossed the images using clear embossing powder and a heat gun.
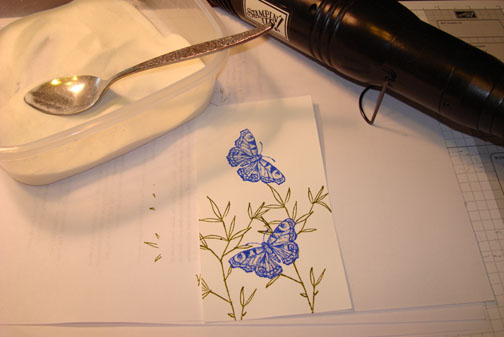
Colored over the butterflies with Versamark and then heat embossed the images using clear embossing powder and a heat gun. Now the Butterflies are protected and will resist the ink that is stamped and brayered over them.
Stamped the foliage by first loading the stamp with Versamark and then with Old Olive ink before stamping it. Heat embossed the images using clear embossing powder and a heat gun.
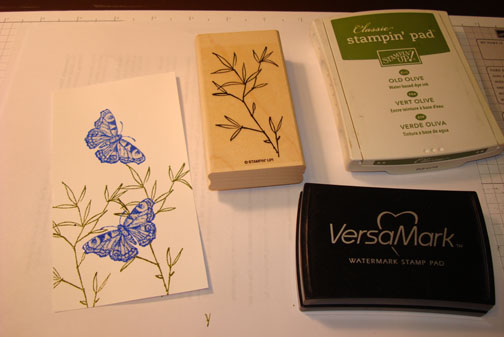
Colored the leaves in using an Aqua Painter and Always Artichoke ink.
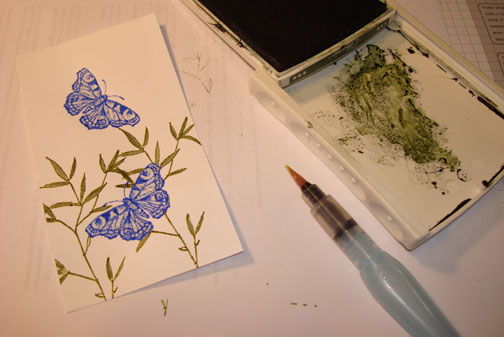
Colored over the Always Artichoke leafs with a Versamark marker and heat embossed the images using clear embossing powder and a heat gun.
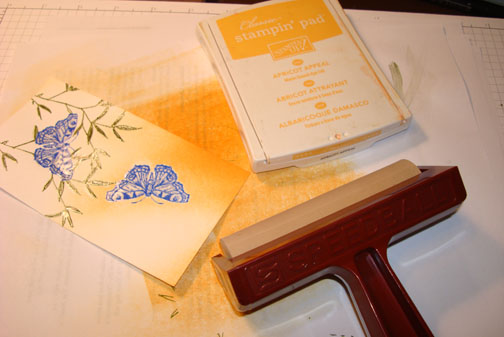
Brayered Apricot Appeal ink on the top left corner of the card stock.
Brayered Dusty Durango ink on the bottom left corner of the card stock.
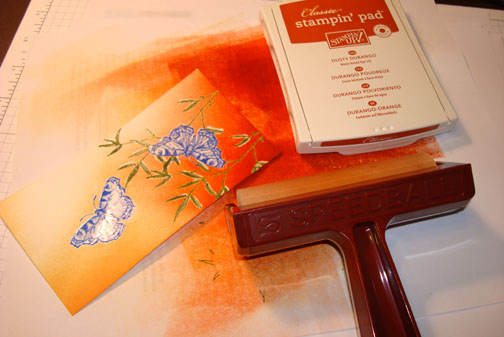
Brayered Chocolate Chip ink on the bottom left corner of the card stock, not covering all of the Dusty Durango ink.
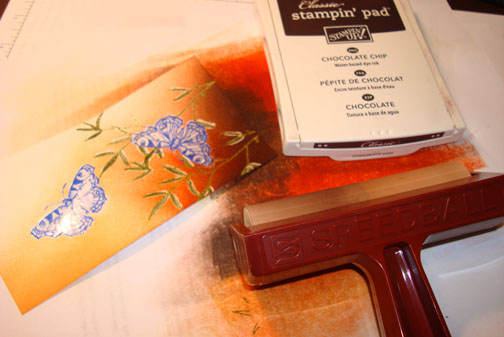
Wiped the ink off of the embossed images using a paper towel.
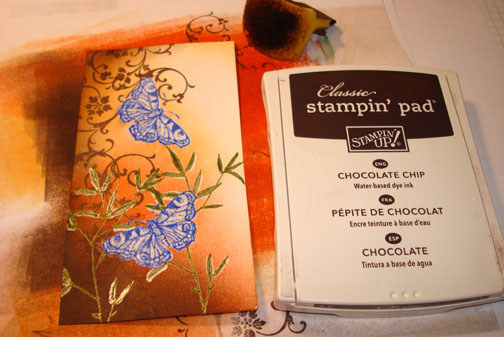
Stamped the flourish stamp using Chocolate Chip ink.
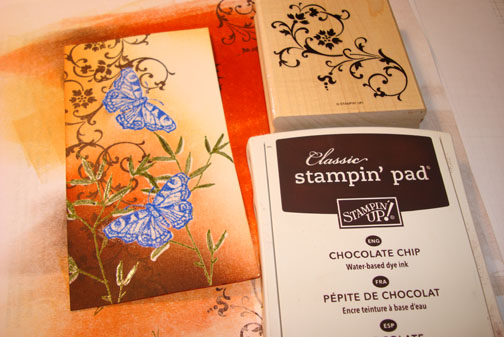
Sponged a bit of Chocolate Chip ink on the left side of the card stock.
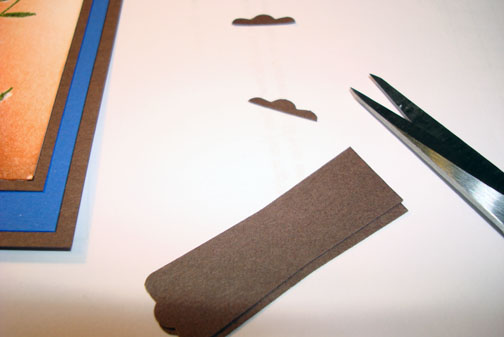
Punched a couple labels out of Chocolate Chip card stock.
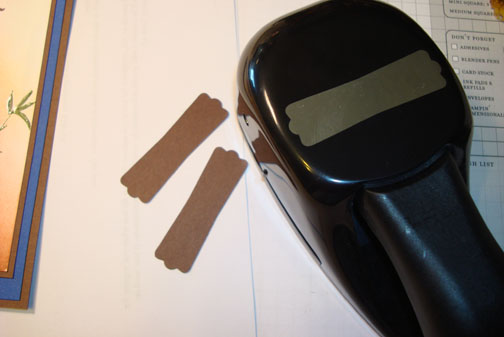
Held them together and snipped the end off off one side.
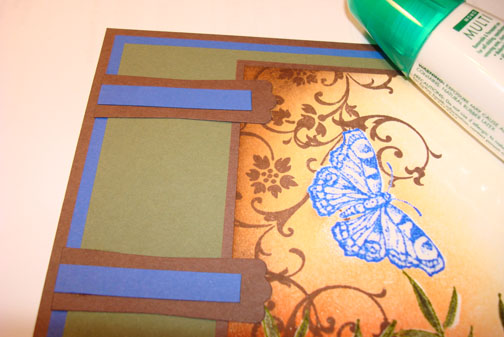
Added Chocolate Chip and Brilliant Blue panels, the label punches and a thin strip of Brilliant Blue card stock to the top of the punches.
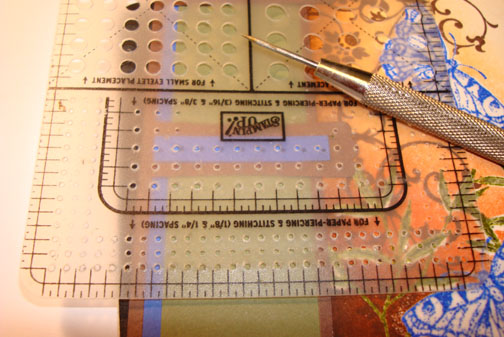
Pierced holes in the strips of Brilliant Blue using piercing tools.
Added a couple of gold brads.
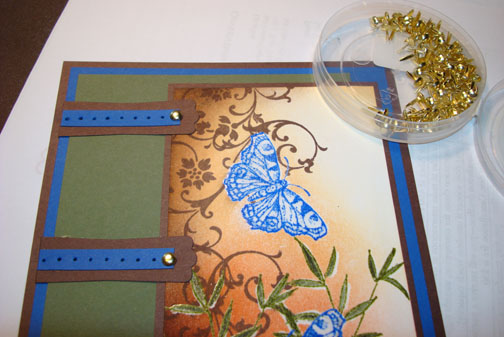
Here is the finished card measuring 5″ x 6.5″.
May your day be spent doing the things that you love.
Until my next post. . . . . . . .
Hugs,
Michelle
 Get ready for Brayer Workshops! I am coming to the following locations, click the location name for more information.
North Chili, New York (near Rochester)
Kenova (Huntington), West Virginia
Piedmont, Alabama (Near GA border close to Cedartown)
Auburn, Washington (near Seattle)
Here is a link to my workshop calendar where you can see all of my travel schedule and to get info on beginner and advanced Brayer workshops: https://zindorf.splitcoaststampers.com/workshop-calendar
Link to my Stampin’ Up website where you can order all of your must have Stampin’ Up products from me 24-7: https://michellezindorf.stampinup.net
Frequently asked questions answers: https://zindorf.splitcoaststampers.com/frequently-asked-questions/
23 responses to “Evening Flight – Tutorial #339”