
Cheers Everyone, to the next 300 tutorials! Thank you to all of you readers that left me such heartfelt comments on the post for tutorial #300. I love, love, love stamping and the very best thing about it is being able to share it with so many wonderful people.
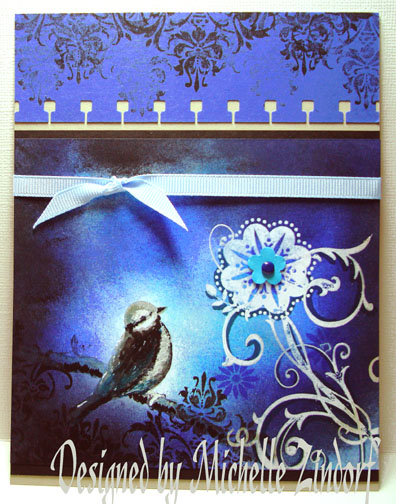
Here is a little blue number for you today that shows the depth you can get by layering colors of ink.
I organized my sponges yesterday and I could not wait to use them, lol.
Let’s get started.
Supplies:
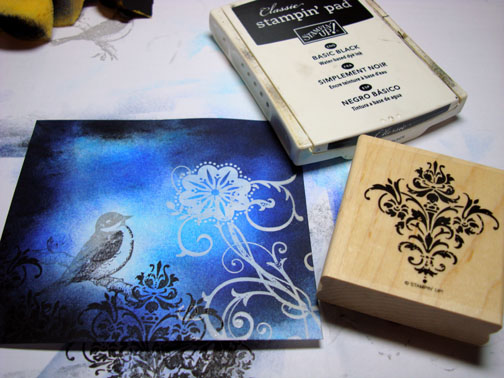
| Stamps: Stampin’ Up Friends 24-7 and Baroque Motifs |
| Paper: Stampin’ Up! Whisper White, Basic Black, Brilliant Blue and Sahara Sand |
| Ink: Stampin’ Up! Basic Black, Brilliant Blue, Going Gray, Bashful Blue, Night of Navy and Tempting Turquoise |
| Accessories: Stampin’ UP Spiral Punch, Trio Flower Punch, Sponges, Sahara Sand, Not Quite Navy, Bashful Blue and Basic Black marker, White Gel Pen, Bashful Blue Marker, Clear embossing powder, heat gun, Versamark Pad |
Don’t forget to request your copy of the new Stampin’ Up Occasions mini catalog and Sale-a-bration mini. Just e-mail me your address and I will be glad to send you a set for free.
The new Occasions mini catalog can also be viewed on-line here: https://204.228.150.61/catalogs/20091231/OccasionsMini10_US.pdf
The New Sale-a-Bration Mini Catalog can also be viewed on-line here:https://204.228.150.61/catalogs/20091231/SAB_10_US.pdf
Are you getting inspired and enjoying this blog. One way you can help support it is to order your Stampin’ Up products through me. You can order from me 24-7 from this link: https://michellezindorf.stampinup.net or e-mail me at [email protected].
Want to become a Stampin’ Up Demonstrator and earn instant income? Consider being part of my Stampin’ Up Team and start your own business.

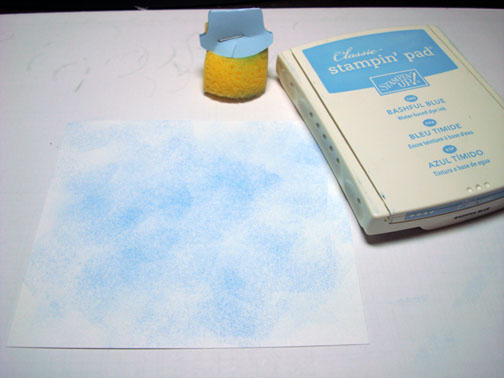
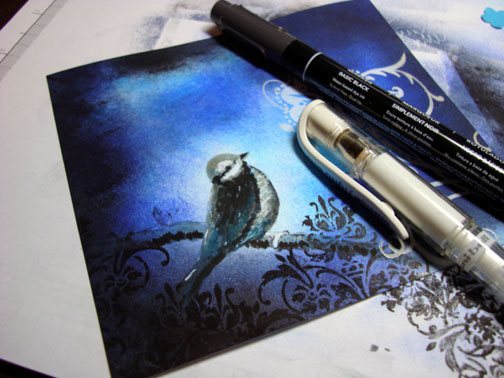
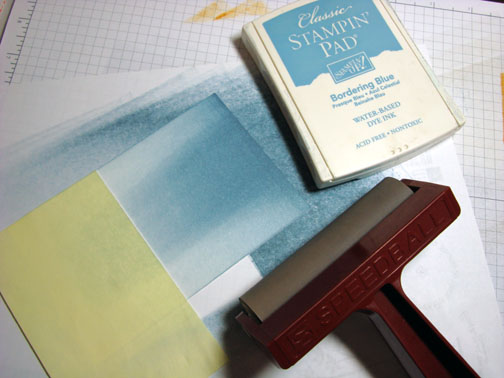
On a 4.5″ x 5″ piece of Whisper White card stock, pounced Bashful Blue ink with a sponge all over the card stock.
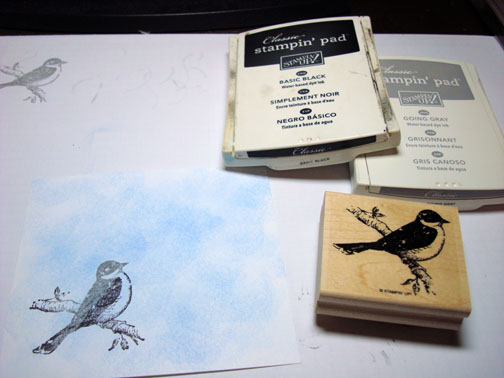
Stamped the bird image from the Stampin’ Up! set “Friends 24-7” by loading with Going Gray ink and then tapping my Basic Black ink pad on the bottom half of the stamp before stamping it.
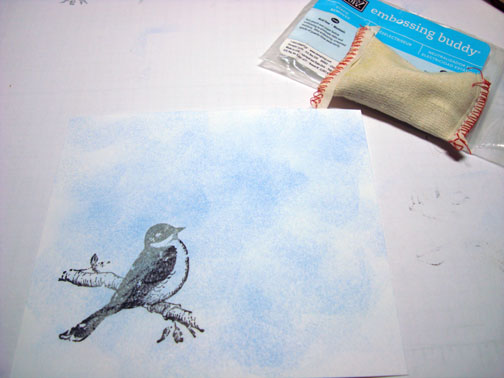
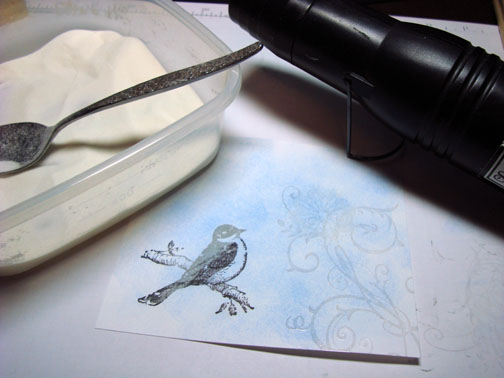
I used my heat gun to dry the ink on the card stock and then used my Embossing buddy on the card stock also. This was to make sure that the embossing powder in the next steps will not stick to the bird image or the blue ink that was sponged on.
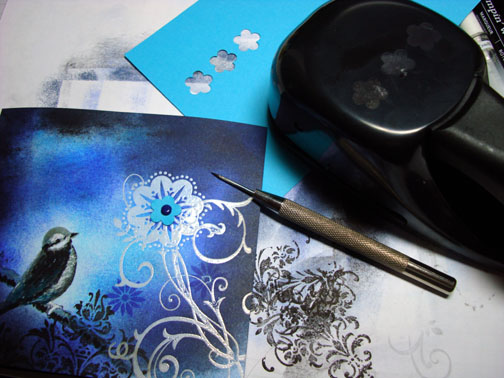
Stamped the Flower stamp from the Stampin’ Up! set “Baroque Motifs” with Versamark only and then heat embossed the image using clear embossing powder and a heat gun.
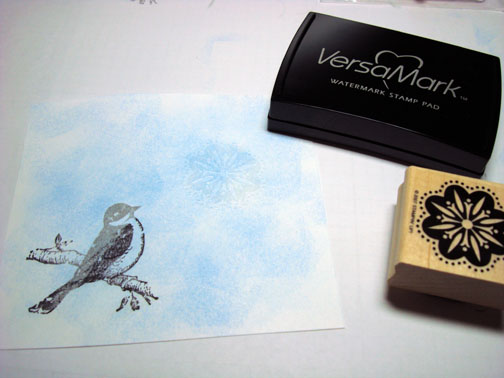

Stamped the Flourish from the “Baroque Motifs” using Versamark only. Heat embossed the flourish using clear embossing powder and a heat gun.

Pounced on Tempting Turquoise ink using a sponge.
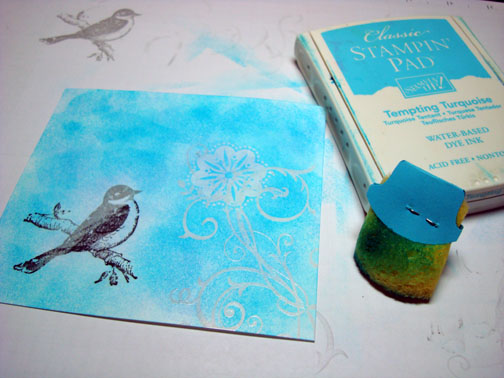
Pounced on Brilliant Blue ink using a sponge.

Pounced on Night of Navy ink with a sponge.
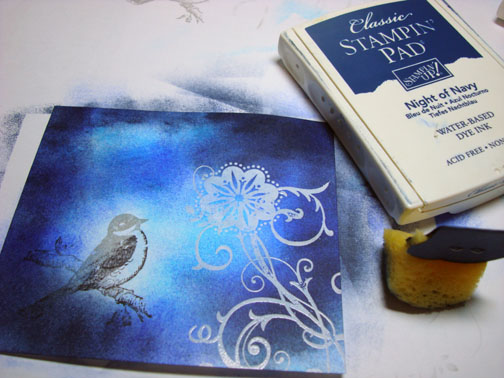
Pounced on Basic Black ink using a sponge.

Wiped the ink off of the embossed images using cotton towel.
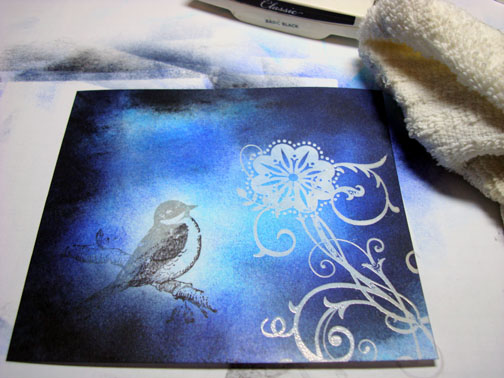
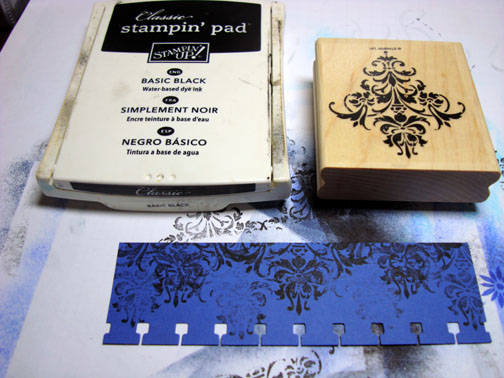
Stamped the Flourish from the “Friends 24-7” set using Basic Black ink on the bottom of the card stock a few times.
Stamped a couple of the little flowers from the set “Baroque Motifs” using Brilliant Blue ink.

Added Sahara Sand marker to the bird.
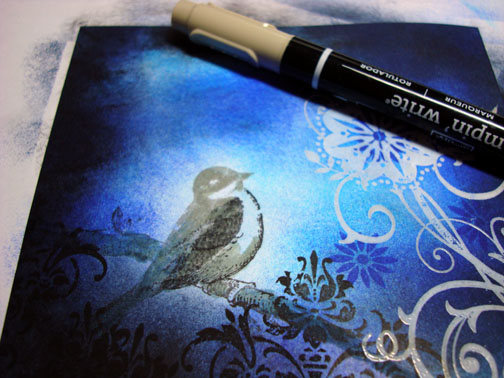
Added a little Bashful Blue marker to the bird.
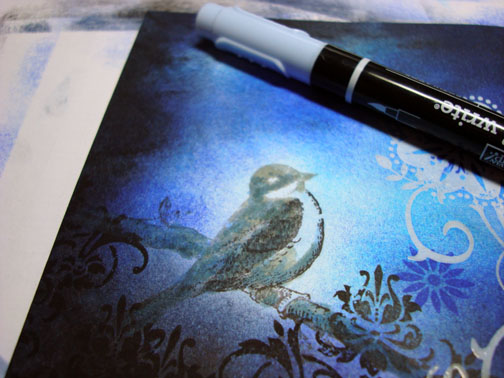
Added a little Not Quite Navy to the birds wing and underside. This left a few hard lines, so to tone things down, went over the bird image again with the Sahara Sand marker.

Added Basic Black marker to the wing,head and tail. Also added some sketchy lines of White Gel Pen to the birds head, chest and a tiny bit to the back.
Punched a small Tempting Turquoise flower for the center of my embossed flower. Added a Night of Navy brad to the center.
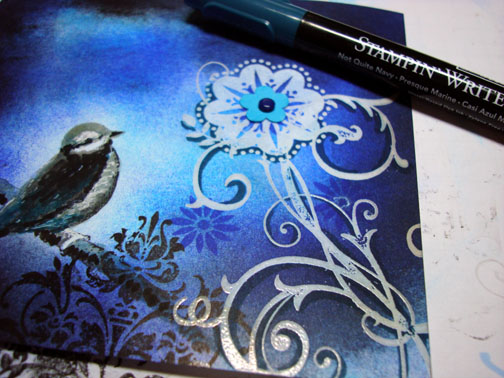
Traced the underside of the flourish with a Not Quite Navy marker to add a shadow to it. Wiped the marker off of the embossed image, where went over it.
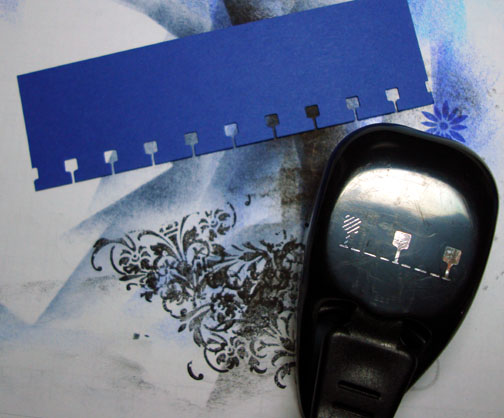
Using the Spiral punch, punched the edge of a 5″ x 1.5″ piece of Brilliant Blue.
Stamped the flourish image with Basic Black ink three times across the top of the card stock. Stamped a few of the same image really lightly further down the card stock.
Assembled the card using a 5″ x 6.5″ piece of Sahara Sand as the base of my card front. Added a Bashful Blue ribbon to the front.
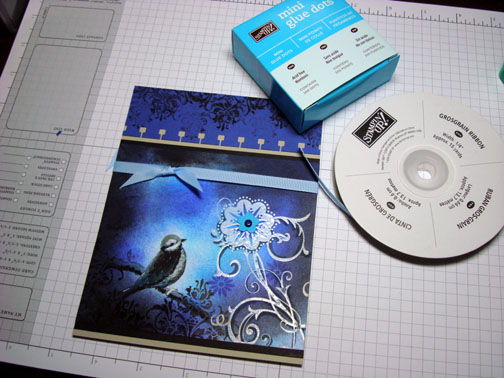
Here is the finished card measuring 5″ x 6.5″.
I hope you try layering and building up ink to get some depth in your projects.
May your day be one filled with peace and serentity.
Until my next post. . . . . . . . . . . . ..
Hugs,
Michelle
 Get ready for Brayer Workshops! I am coming to:
Monroe, Louisiana (just a couple of seats left)
Jacksonville, Florida
St. Louis, Missouri
Mechanicsville, Virginia
Raleigh, North Carolina
Colleyville, Texas
Colorado Springs, Colorado
Boise area of Meridian, Idaho
Riverside, California (Southern California)
Salem, Oregon
Wheaton, Illinois
St. Cloud, Minnesota
Rockville, Maryland
North Chili, New York (near Rochester)
New Johnsonville, Tennessee
Kenova (Huntington), West Virginia
Helena, Montana
Middleburg Heights, Ohio
Venice, Florida
Grinnell, Iowa
Piedmont, Alabama (Near GA border close to Cedartown)
Auburn, Washington (near Seattle)
Elk Grove Village, Illinois
Savannah, Georgia
Atlanta, Georgia
North Liberty, Indiana
Saledad, California
Here is a link to my workshop calendar where you can see all of my travel schedule and to get info on beginner and advanced Brayer workshops: https://zindorf.splitcoaststampers.com/workshop-calendar
Link to my Stampin’ Up website where you can order all of your must have Stampin’ Up products from me 24-7: https://michellezindorf.stampinup.net
Frequently asked questions answers: https://zindorf.splitcoaststampers.com/frequently-asked-questions/
27 responses to “A Little Birdy – Tutorial #301”