
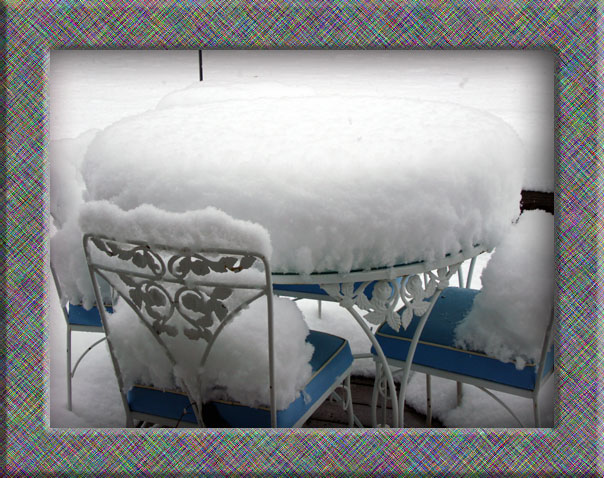
Brrrr, it is a bit chilly outside today. We received a few inches of snow and it just looks cold out. 🙂 But I am snug as a bug in my stamping room so I created a card that will hopefully warm you up a bit wherever you are today.
But before I start today’s tutorial let me announce the lucky winner of the Stampin’ Up! Asian Artistry stamp set blog candy. The winner is. . . . . . .
elaine E who wrote “well, I probably don’t stand a chance to win the Asian Artistry set. I do love Oriental cards, and make a lot of them. Have not been able to get this set…………..so would really love to win it.
But anyway, I have to say, I can’t believe how you make the swirl effect on this card! How creative!! Can I borrow your muse, when you take a break? LOL
Congratulations Elaine E, please e-mail your mailing address to [email protected] within the next 30 days and I will pop this great set in the mail to you.
Thanks to all who played along. Keep trying, someone has to win and it could be you next week!
One more thing, I updated my sales page with some retired used stamps I am selling. If you want to check it out here is a link: https://zindorf.splitcoaststampers.com/things-for-sale/
Now on with the tutorial . . . . .
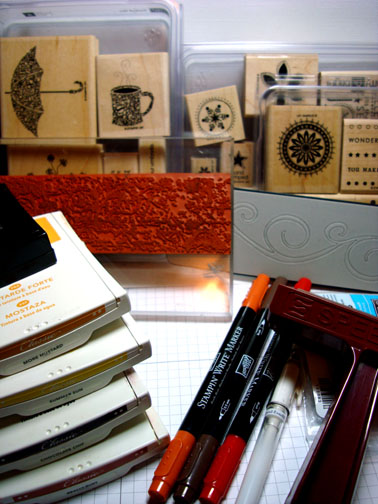
Supplies:
| Stamps: Stampin’ Up Font of You, Boho Backgrounds, Season of Joy, Very Vintage Wheel |
| Paper: Stampin’ Up Whisper White, Pumpkin Pie and Chocolate Chip |
| Ink: Stampin’ Up More Mustard, Summer Sun, Chocolate Chip and Really Rust |
| Accessories: Stampin’ Up Markers Really Rust and Chocolate Chip, White Gel Pen, Embossing Buddy, Brayer, Sponges, Clear embossing powder, Heat gun, Versamark pad, Post it note, clear acrylic Block, Swirly Die and Big Shot Machine |
The new Stampin’ Up! 43 page Occasions Mini Catalog and Sale-a-Bration catalog will be out January 5, 2010. E-mail me your address if you want a set for free and you are a resident of the USA. If you are a customer of mine you will automatically get a set from me. ![]()
Are you getting inspired and enjoying this blog. One way you can help support it is to order your Stampin’ Up products through me. You can order from me 24-7 from this link: https://michellezindorf.stampinup.net or e-mail me at [email protected]. If you are within the United States. Want a copy 2009-2010 Stampin’ Up Catalog for $9.95 with free shipping, just e-mail me at [email protected] and I will get one in the mail to you. Want to become a Stampin’ Up Demonstrator and earn instant income? Consider being part of my Stampin’ Up Team. Also check out the Stampin’ Up specials, click this link to check it out: https://www.stampinup.net/esuite/home/michellezindorf/promotions
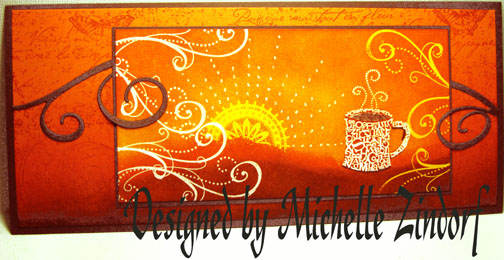
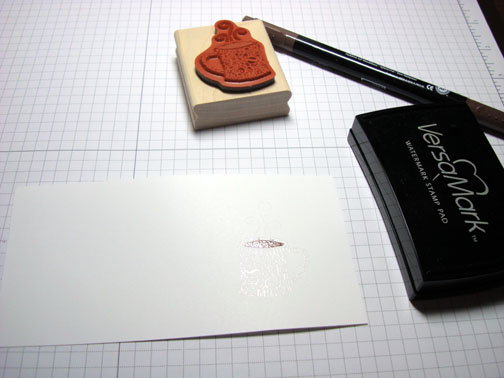
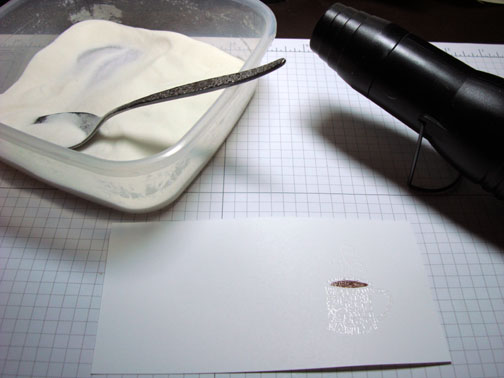
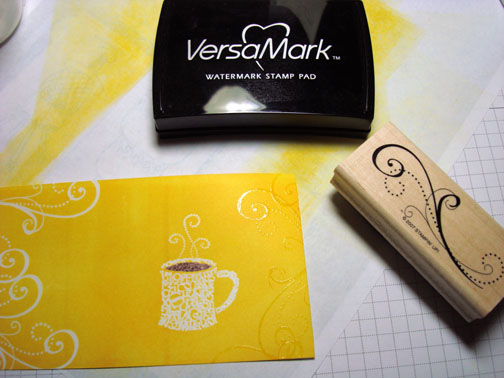
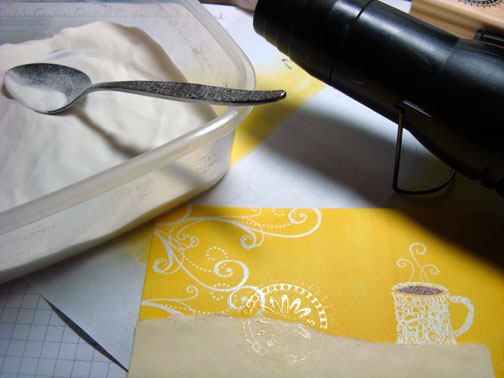
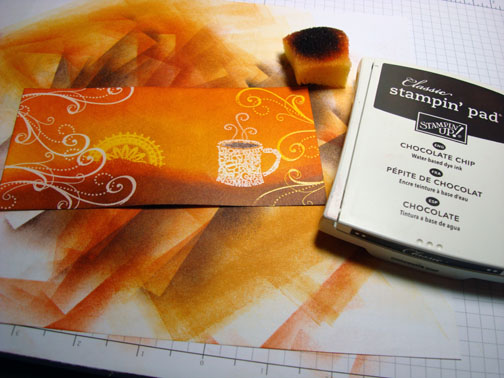
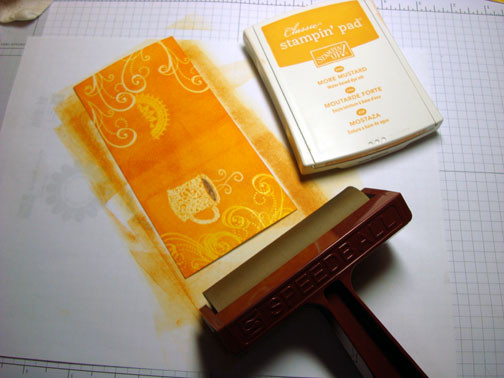
On a 3″ x 6″ piece of Whisper White card stock, stamped the coffee cup using Versamark only. Heat embossed the image using clear embossing powder and a heat gun.
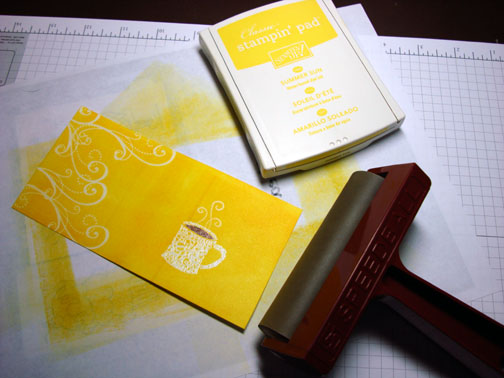
Stamped the Flourish from the “Season of Joy” set 4 times on the left hand side of the card stock using Versamark only and heat embossed the images using clear embossing powder.


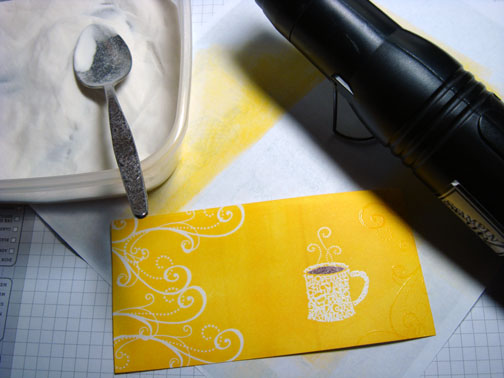
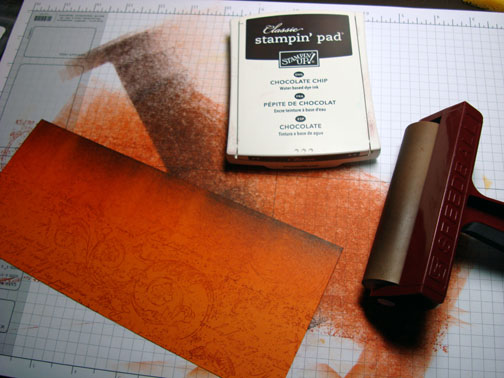
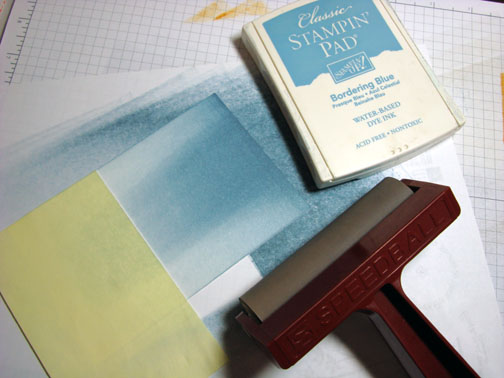
Brayered Summer Sun ink all over the card stock.
Wiped the ink from the embossed images using a cotton towel.
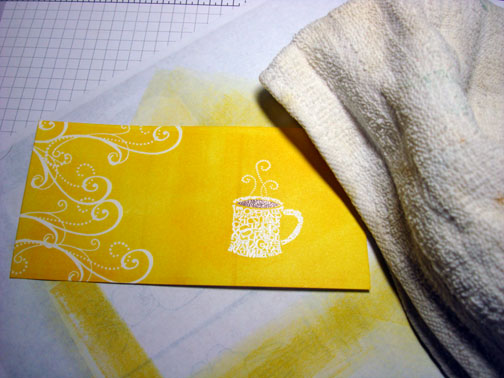
Heated the card stock with my heat gun to dry the Summer Sun ink and then used my Embossing Buddy all over the card stock. You will definately not want to skip this step or the embossing powder in the next steps will stick all over your card stock.
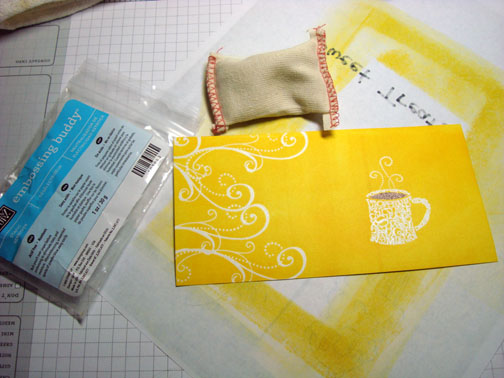
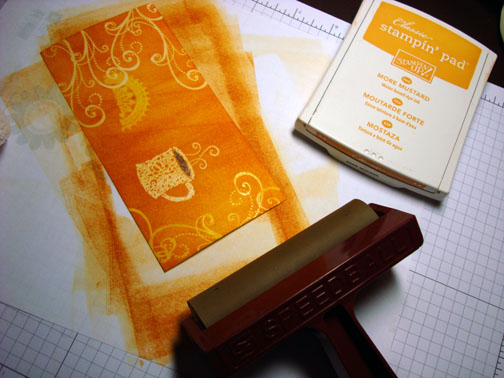
Stamped the Flourish with Versamark only on the Right hand side of the card stock and then heat embossed the images using clear embossing powder and a heat gun.
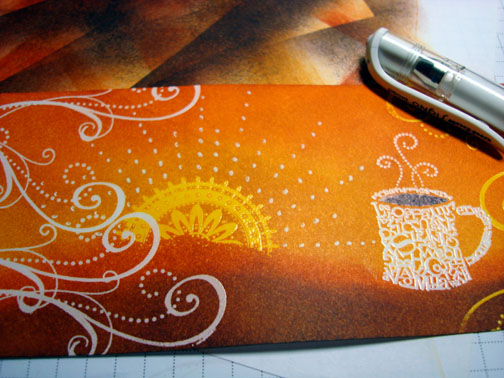
Tore a post it note in a hill shape and masked the bottom of the card stock with it.
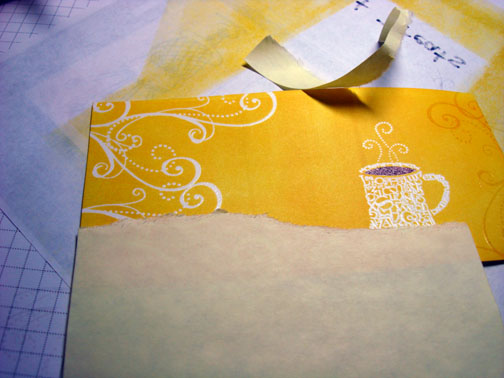
Stamped the Stamp from the “Boho Backgrounds” set half on the post it note and half off using Versamark only. Heat embossed the image using clear embossing powder and a heat gun.
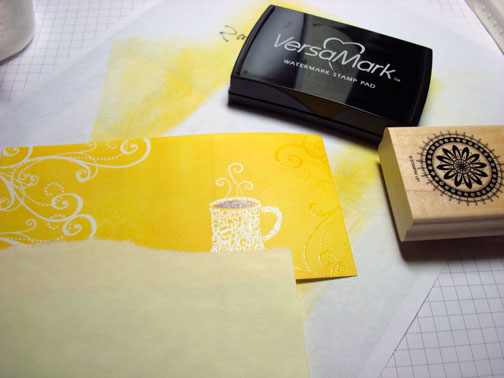
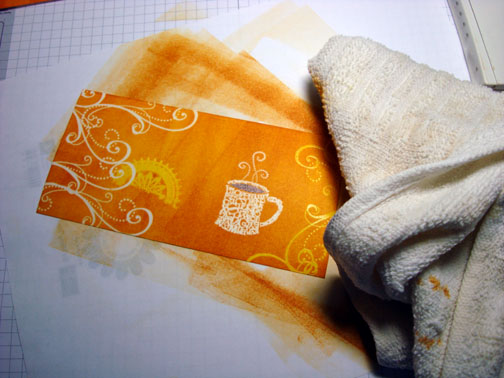
Removed the post it note mask and brayered More Mustard ink all over the card stock.
Wiped the ink from the embossed images using a cotton towel.
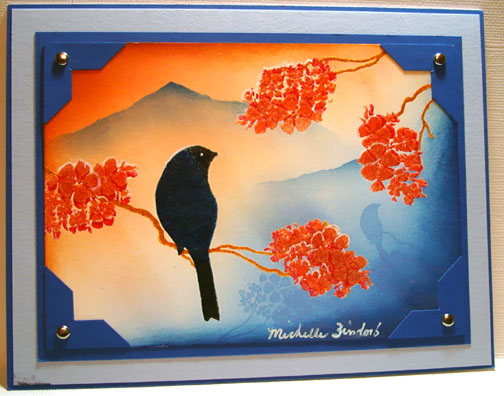
Sponge Really Rust ink heavily at the bottom of the card stock to create a hill that goes up to the sun. Also sponged Really Rust ink lightly in the sky area at the top of the card stock.
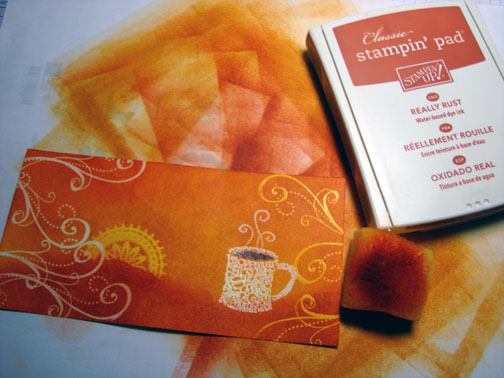
Sponged Chocolate Chip ink at the bottom of the card stock, not covering the Really Rust ink entirely.
Made rows of dots with a gel pen to simulate sun rays.
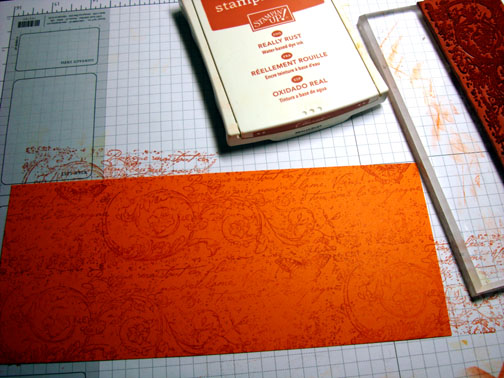
Cut a 3 7/8″ x 8 7/8″ piece of Pumpkin Pie card stock and stamped the new Very Vintage Wheel over the card stock using Really Rust ink. This new stamp is in the new Occasions Stampin’ Up Mini that will be in effect January 5, 2010. The Very Vintage stamp is a Jumbo Wheel, but I like to unmount mine and use them as stamps. If you want more information on unmounting Wheels, here is a link to a post showing you how I do it: https://zindorf.splitcoaststampers.com/2009/07/28/tool-time-unmounting-wheels/
By the way, I love, love, love this Wheel and will be using this in my backgrounds very often.
Brayered Really Rust ink at the bottom of the card stock.
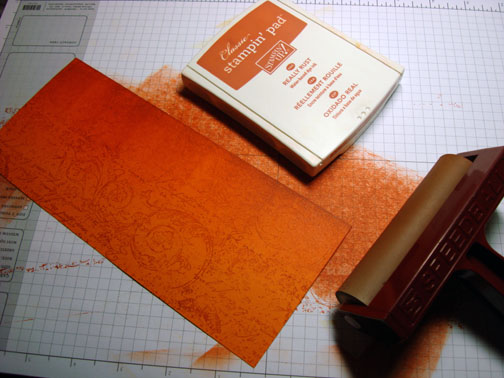
Brayered Chocolate Chip ink at the bottom of the card stock, not covering the Really Rust ink entirely.
Used the Swirly Die, Chocolate Chip card stock and my Big Shot Die Cut machine to create this die cut.
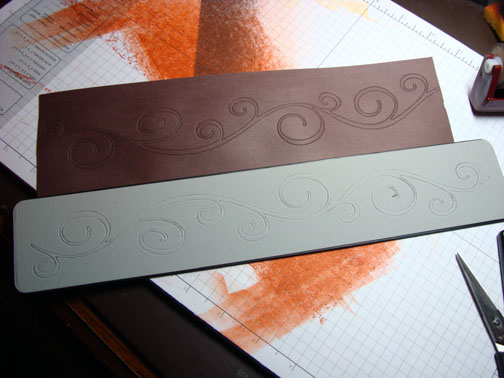
Punched it out and Glued it on the card stock. Glued all of it down but the two large swirls that I want to go on top of my main image panel.
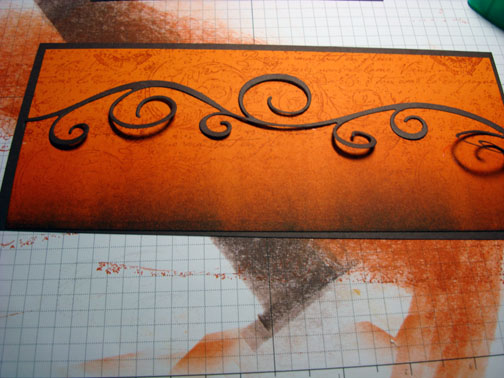
Glued the main image panel on and the Swirls were glued down on top of it.
Decided to darken the coffee cup. Colored over the coffee cup with a Really Rust marker and wiped the ink off of the embossed image. Added a dark shadow at the bottom of the coffee cup and the handle using a Chocolate Chip marker.
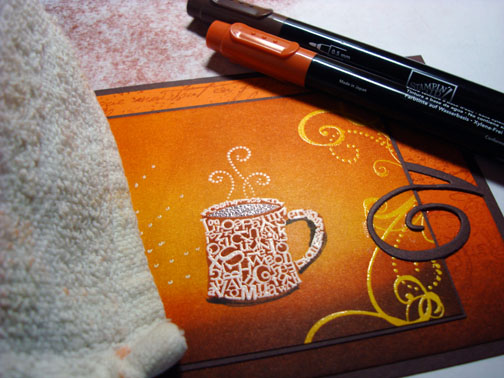
Here is the finished card measuring 4″ x 9″. This size card fits into a #10 size business envelope that is very economical to pick up at an office supply store.
Well I hope this card warmed you a bit.
May your day be overflowing with peace and love.
Until my next post. . . . . . .
Happy Holidays and Hugs,
Michelle
Get ready for Brayer Workshops! I am coming to:
2010
Dayton, Ohio at Marco Paper
Phoenix, Arizona
Monroe, Louisiana
Jacksonville, Florida
St. Louis, Missouri
Mechanicsville, Virginia
Raleigh, North Carolina
Colleyville, Texas
Colorado Springs, Colorado
Boise area of Meridian, Idaho
Riverside, California (Southern California)
Salem, Oregon
Wheaton, Illinois
St. Cloud, Minnesota
Rockville, Maryland
North Chili, New York (near Rochester)
New Johnsonville, Tennessee
Kenova (Huntington), West Virginia
Helena, Montana
Middleburg Heights, Ohio
Venice, Florida
Grinnell, Iowa
Piedmont, Alabama (Near GA border close to Cedartown)
Auburn, Washington (near Seattle)
Elk Grove Village, Illinois
Savannah, Georgia
Atlanta, Georgia
North Liberty, Indiana
Saledad, California
Here is a link to my workshop calendar where you can see all of my travel schedule and to get info on beginner and advanced Brayer workshops: https://zindorf.splitcoaststampers.com/workshop-calendar
Link to my Stampin’ Up website where you can order all of your must have Stampin’ Up products from me 24-7: https://michellezindorf.stampinup.net
Frequently asked questions answers: https://zindorf.splitcoaststampers.com/frequently-asked-questions/
18 responses to “Sunrise Coffee – Tutorial #289”