
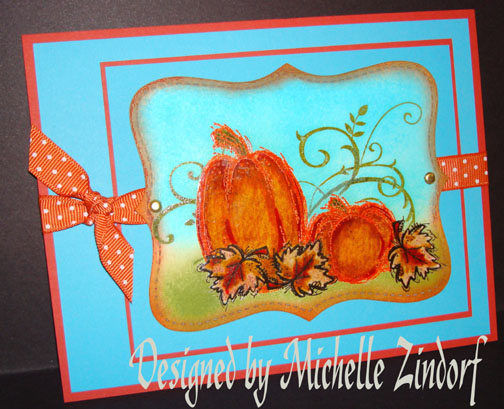
I have a little Autumn scene for you today. The main set used today is a Stampin’ Up set Autumn Harvest, item number 110372, $17.95. I teamed it up with a Stampin’ Up set Baroque Motifs and used the flourish as pumpkin vines. Check it out. 🙂
Let’s get started. . . .
Supplies:
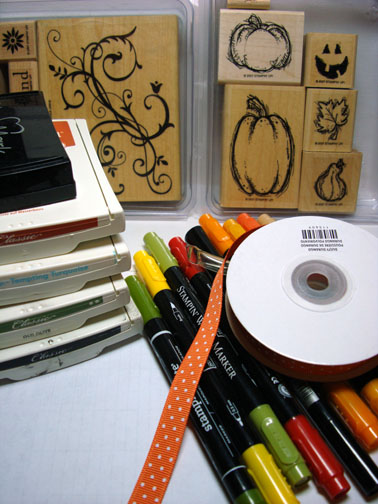
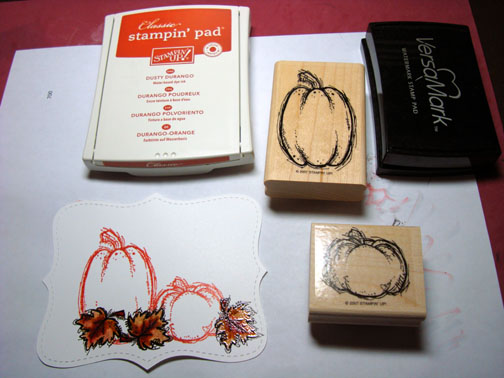
| Stamps: Stampin’ Up Autumn Harvest & Baroque Motifs |
| Paper: Stampin’ Up Whisper White, Dusty Durango & Tempting Turquoise |
| Ink: Stampin’ UP Dusty Durango, Tempting Turquoise, Old Olive & Basic Black |
| Accessories: Stampin’ Up Markers, Sponges, Piercing Tool, Gold Brads, Dusty Durango Polka Dot Ribbon, Big Shot Die Cut Machine, Top Note Die, Versamark Pad & Marker, Clear embossing Powder, Heat Gun |
Want a free 39 page, Stampin’ Up Mini catalog? If you are a resident of the United States, just e-mail your mailing address to me and I will get one in the mail to you. Are you inspired by this Blog? One way you can help support this blog is by ordering your Stampin’ Up products through me. You can order from me 24-7 from this link: https://michellezindorf.stampinup.net or e-mail me at [email protected] If you are within the United States. Want a copy of the brand new 2009-2010 Stampin’ Up Catalog for $9.95 with free shipping, just e-mail me at [email protected] and I will get one in the mail to you. Want to become a Stampin’ Up Demonstrator and earn instant income? Consider being part of my Stampin’ Up Team. Also check out the Stampin’ Up specials, click this link to check it out: https://www.stampinup.net/esuite/home/michellezindorf/promotions
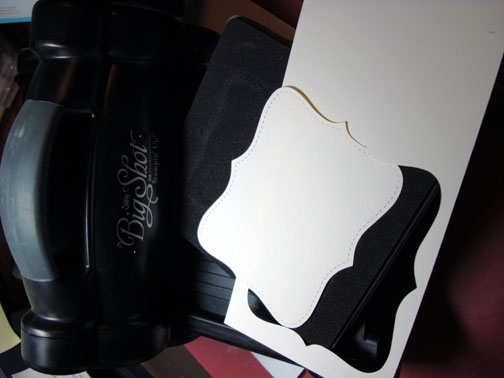
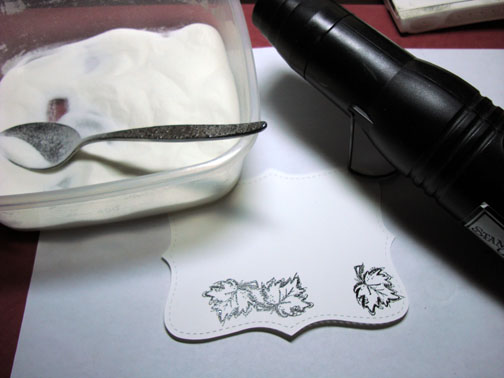
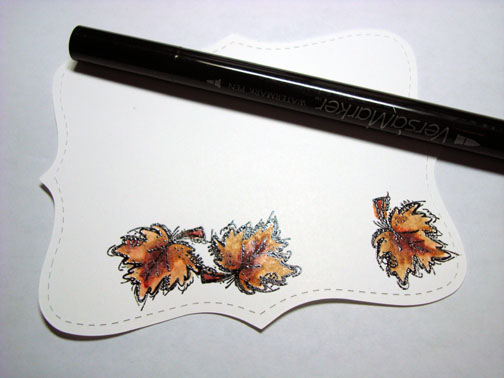
Used my Big Shot Dye Cut Machine and the Top Note Die to cut out this shape with Whisper White Card stock.
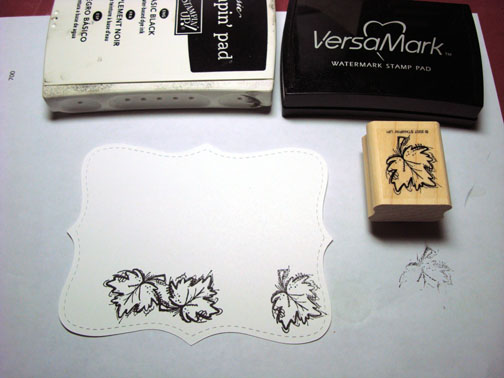
Stamped the leaf from the Autumn Harvest set by first loading my stamp with Versamark and then with Basic Black ink before stamping it on the card stock. Stamped all three images loading the stamp each time with Versamark and ink. Heat embossed the images using clear embossing powder and a heat gun.
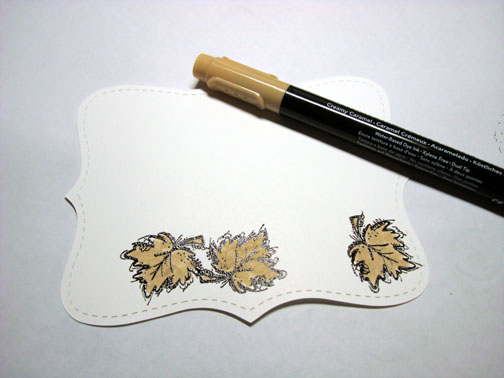
Colored the leaves in with a Creamy Caramel marker.
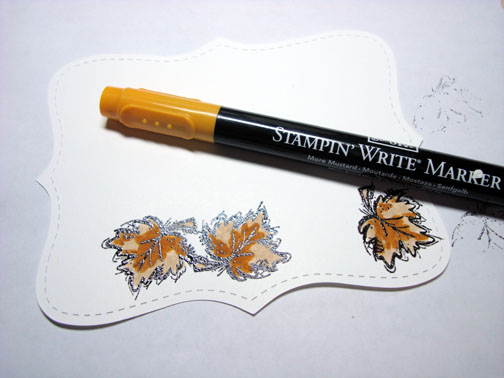
Added More Mustard marker to the leaves.
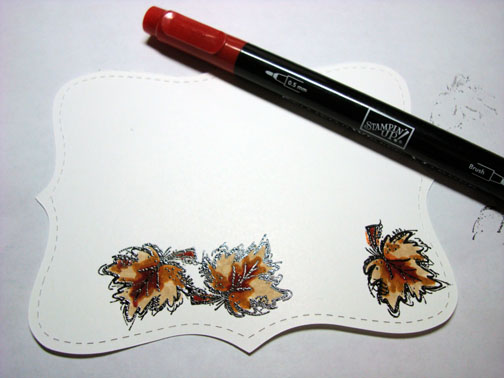
Added a bit of Real Red Marker to the center of the leaves.
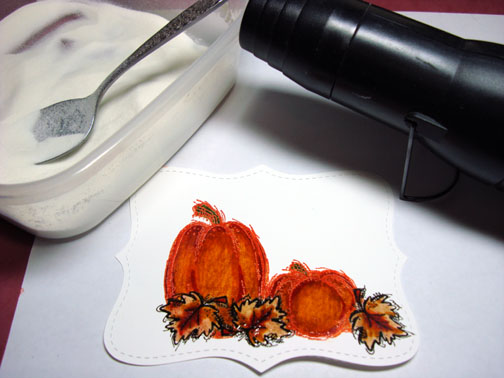
Colored over the leaves, staying within the embossed lines with a Versamark marker. Heat embossed the images using clear embossing powder and a heat gun.
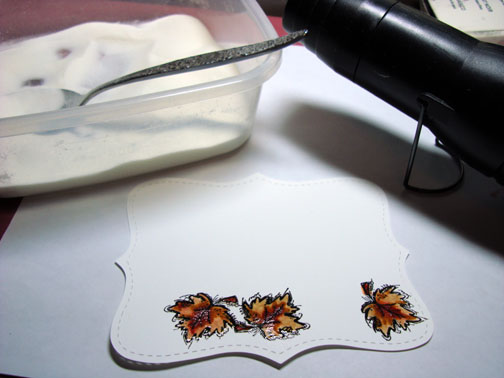
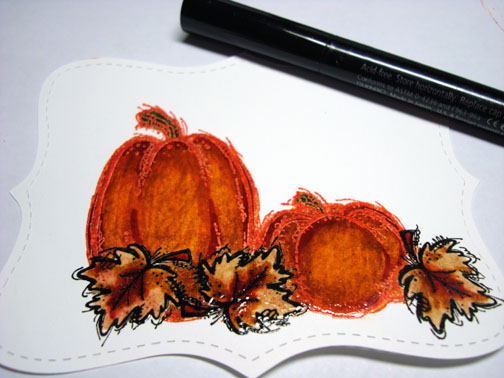
Stamped the two pumpkins from the Autumn Harvest set by first loading the stamps with Versamark and then with Dusty Durango ink before stamping them. Heat embossed the images using clear embossing powder and a heat gun.

Colored in the pumpkins with a More Mustard marker.
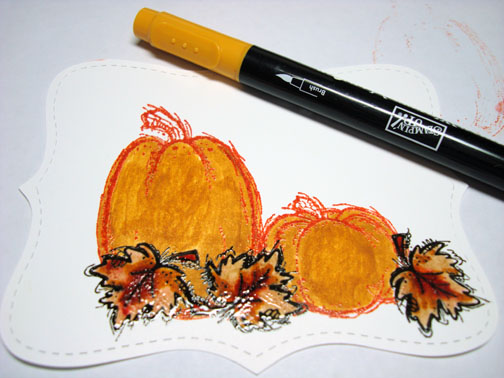
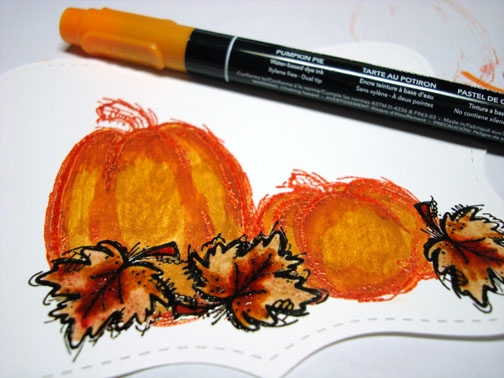
Added Pumpkin Pie Marker.
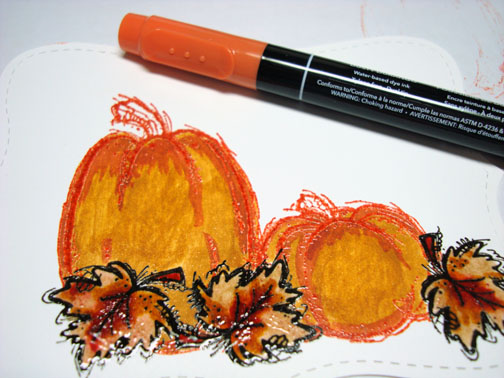
Added Real Red marker.

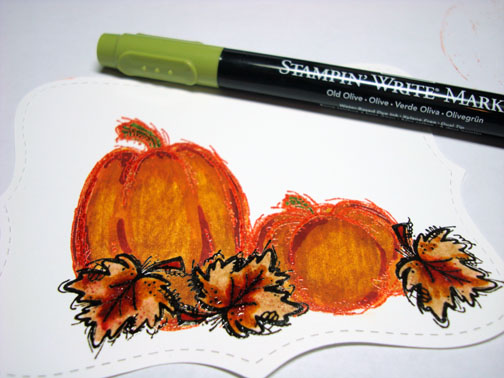
Colored in the Pumpkin stems with an Old Olive marker.
I wanted to brighten up the Pumpkins a bit so I colored over the pumpkins with a Summer Sun marker.
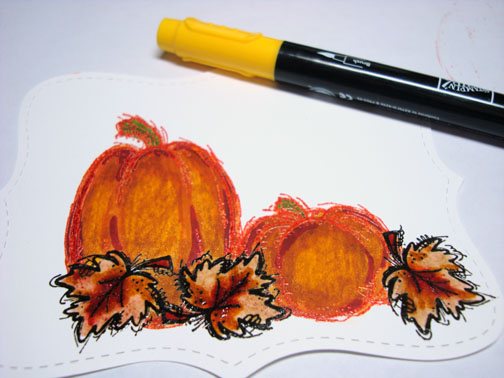
Colored over the pumpkins with a Versamark marker and heat embossed the images using clear embossing powder and a heat gun.
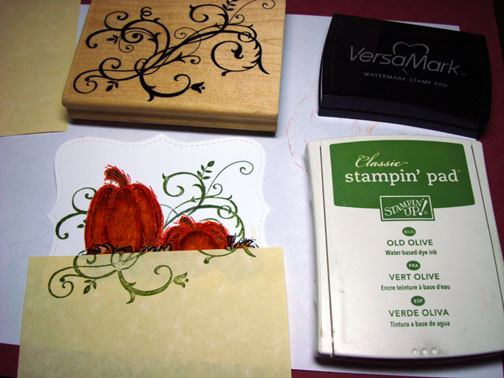
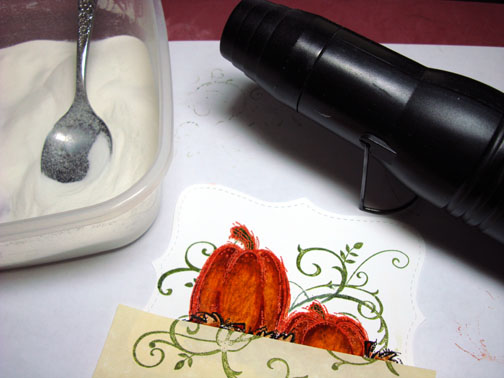
Masked the bottom of the card stock with a post it note. Stamped the Flourish from the Stampin’ Up set Baroque Motifs by first loading the stamp with Versamark and then with Old Olive ink before stamping it. Heat embossed the image using clear embossing powder and a heat gun. Note I kept the post it note on while heat embossing to keep the embossing powder from sticking to the residue left by the post it note.
Sponged Old Olive ink at the bottom of the card stock.
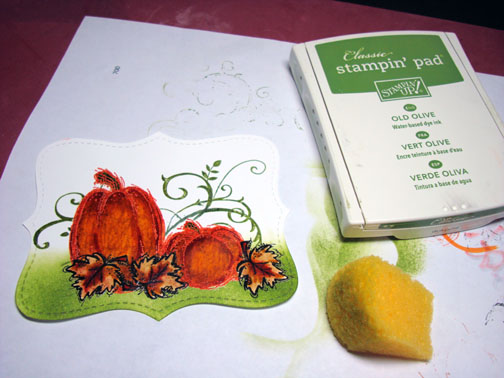
Sponged Tempting Turquoise ink at the top of the card stock.
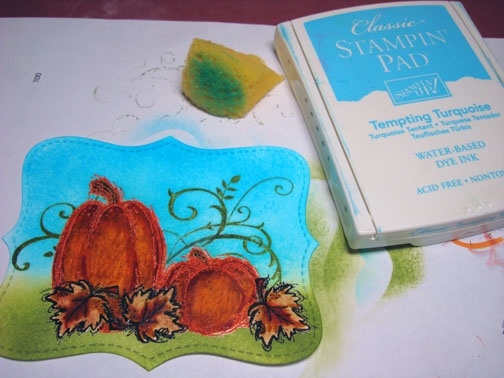
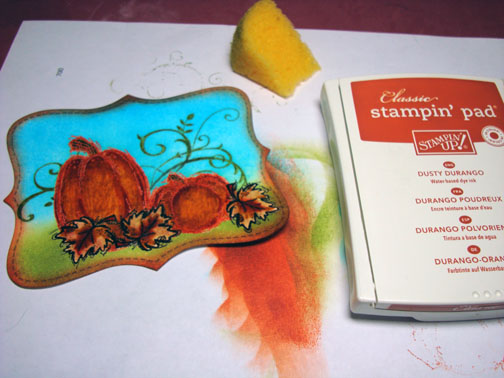
Sponged Dusty Durango ink around the outside edge of the card stock.
Added Tempting Turquoise and Dusty Durango panels, Dusty Durango Polka Dot Ribbon and two Gold Brads. Here is the finished card measuring 5″ x 6.5″.
May your day be one of the happiest of your life.
Until my next post. . . . . .
Huge Hugs,
Michelle
 Get ready for Brayer Workshops! I am coming to:
Broomfield, Colorado
Moore, Oklahoma
Nashville, Indiana
Portland, Michigan
2010
Dayton, Ohio at Marco Paper
Phoenix, Arizona
Monroe, Louisiana
Jacksonville, Florida St. Louis, MissouriMechanicsville, VirginiaRaleigh, North Carolina Colleyville, Texas
Colorado Springs, Colorado
Boise area of Meridian, Idaho
Riverside, California (Southern California)
Salem, Oregon
Wheaton, Illinois
St. Cloud, Minnesota
Rockville, Maryland
North Chili, New York (near Rochester)
New Johnsonville, Tennessee
Kenova, West Virginia
Helena, Montana
Middleburg Heights, Ohio
Venice, Florida
Ginnell, Iowa
Piedmont, Alabama
Auburn, Washington (near Seattle)
Elk Grove Village, Illinois
Here is a link to my workshop calendar where you can see all of my travel schedule and to get info on beginner and advanced Brayer workshops: https://zindorf.splitcoaststampers.com/workshop-calendar
Link to my Stampin’ Up website where you can order all of your must have Stampin’ Up products from me 24-7: https://michellezindorf.stampinup.net
Frequently asked questions answers: https://zindorf.splitcoaststampers.com/frequently-asked-questions/
5 responses to “Pumpkin Patch – Tutorial #271”