
Hey there everyone, I’m back from Arkansas. Thank you Linda Carson for hosting me while I was there. Also thank you to the wonderful ladies that attended my workshops. I had a great time.

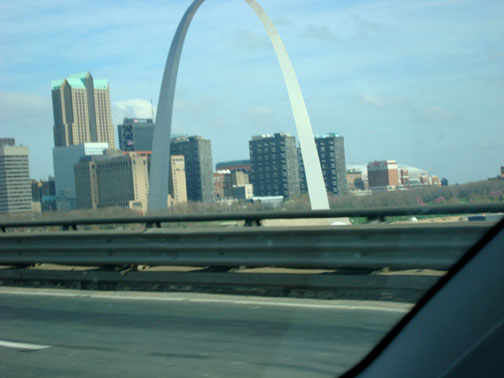
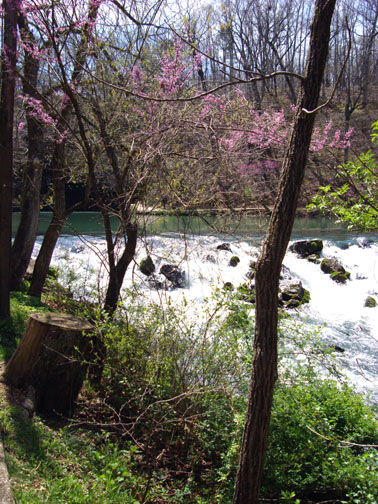
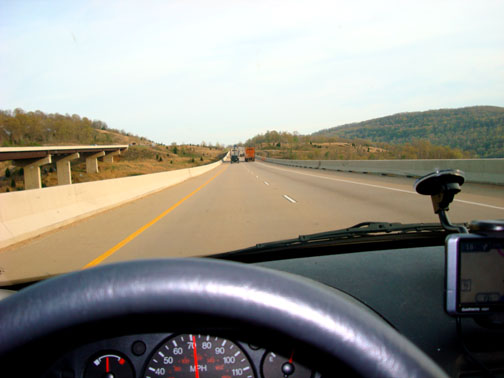
I drove 12 hours to reach Arkansas. Here are a few sites that I seen along the way. A couple of these where taken as I was doing 70 miles an hour down the Inter State, lol. Don’t do this!
St. Louis
Maramec Springs Park in Missouri

Open Road . . . . . . . . .
I took lots and lots of pictures, but I will not bore you with them. Let’s get on to more important stuff like the Blog Candy winner. . . .
The random number generator selected. . . . . . . . . . . . .. . . . . .
Dawn Frost who wrote “Have fun driving for 12 hours tomorrow. I hate driving more than 2 hours at a time! My hat goes off to you. Thank you so much for a chance to win some blog candy. Have fun at your workshop.”
Congratulations Dawn, please e-mail your address to mzindorf@ aim.com and I will pop these in the mail to you.
Thanks to all 435 of you that played along! As always I wish I had a set to send each of you.
Now on with the tutorial 🙂
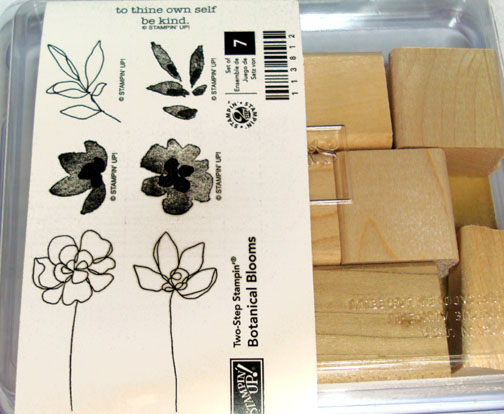
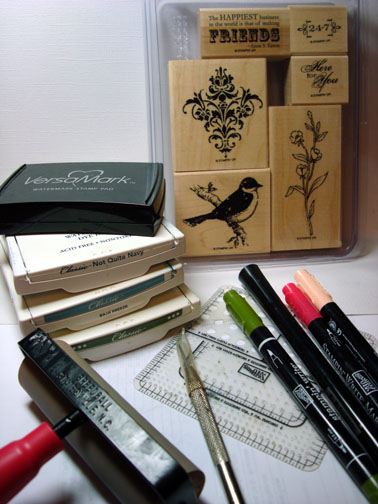
Supplies:
| Stamps: Stampin’ Up Friends 24-7 |
| Paper: Stampin’ Up Baja Breeze, Not Quite Navy and Whisper White |
| Ink: Stampin’ Up Not Quite Navy, Baja Breeze, Always Artichoke |
| Accessories: Brayer, Clear embossing powder, Heat Gun, Stampin’ Up Markers, Piercing Tools and Stampin’ Up Mat Pack, Versmark Marker and Pad, Photo Corner Punch, Brads |
Please don’t forget you can order your Stampin’ Up products from me 24-7 from this link: https://michellezindorf.stampinup.net or e-mail me at [email protected] if you are within the United States. Also, please consider being part of my Stampin’ Up Team. We have valuable monthly meetings in Miamisburg, Ohio.
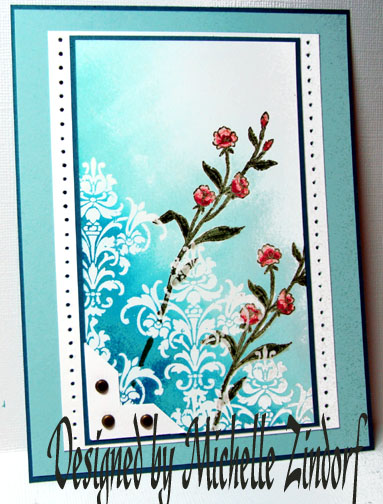
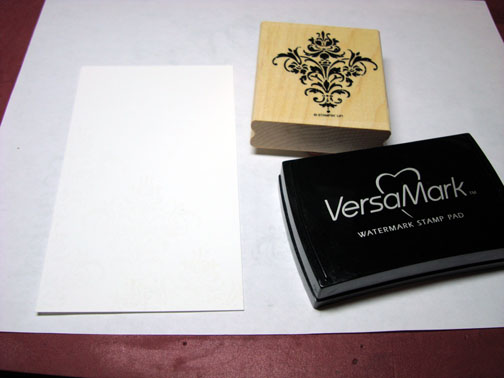
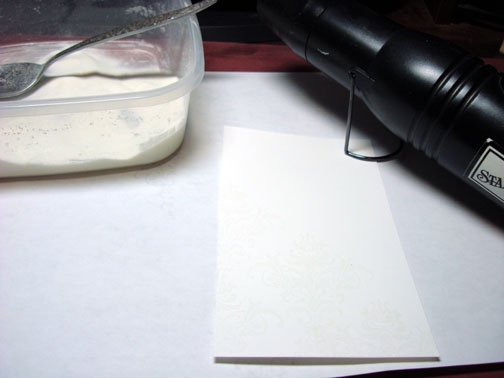
Stamped Flourish 5 times with Versamark only on a 3.25″ x 5.5″ piece of Whisper White card stock. Heat embossed embossed the images using clear embossing powder and a heat gun.
Stamped the flowers twice by first loading the stamp with Versamark and then Always Artichoke ink before stamping.
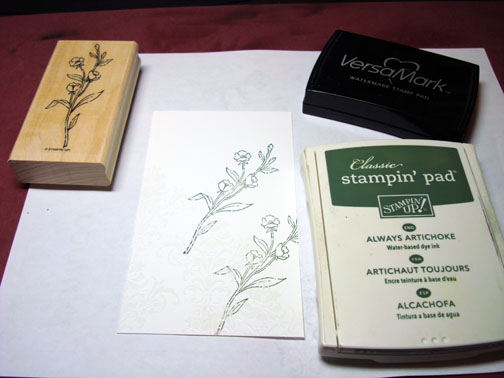
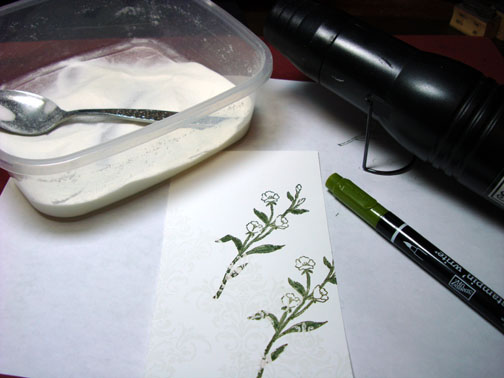
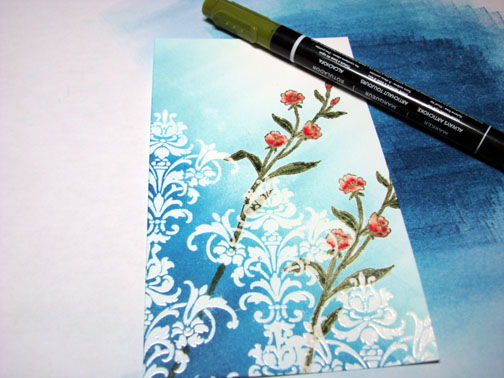
Heat embossed the flower images using clear embossing powder and a heat gun. Colored the stems and leaves with an Old Olive marker.
Colored the flowers in with a Blush Blossom marker.
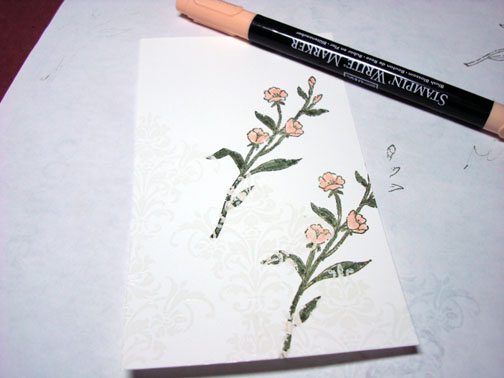
Added Rose Red marker to the flowers.
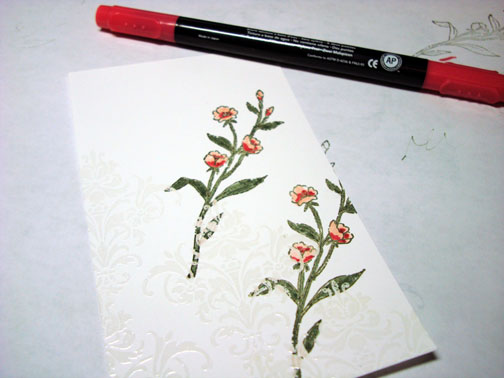
Went over the flowers again with the Blush Blossom marker to blend the two colors together.
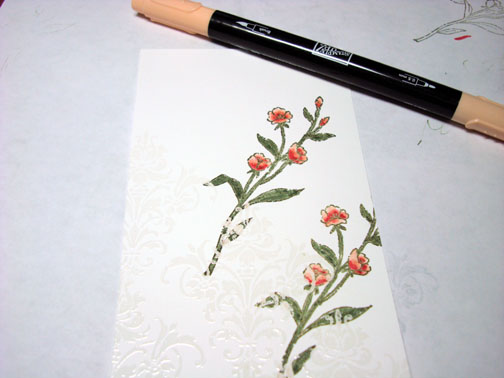
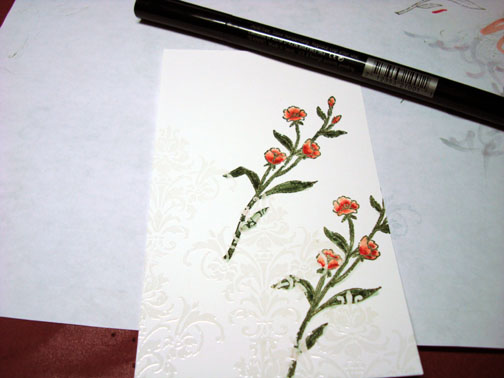
Colored over the flowers, leaves and stems with a Versamark marker and then heat embossed the images using clear embossing powder and a heat gun.
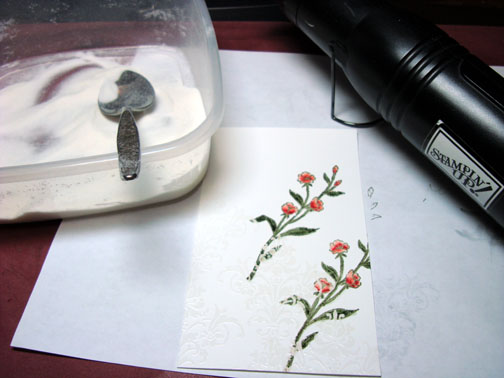
Brayered Baja Breeze ink on the card stock at an angle.
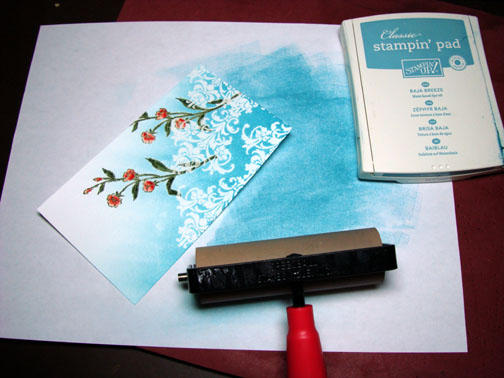
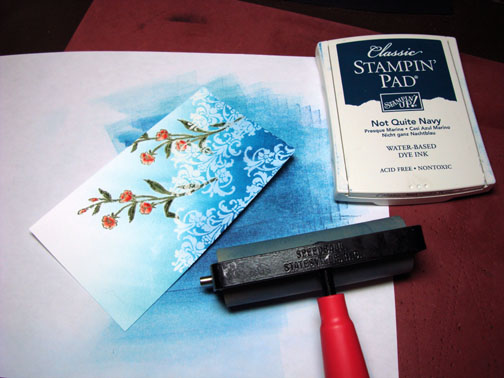
Brayered Not Quite Navy ink on the card stock at an angle, not covering the Baja Breeze ink entirely.
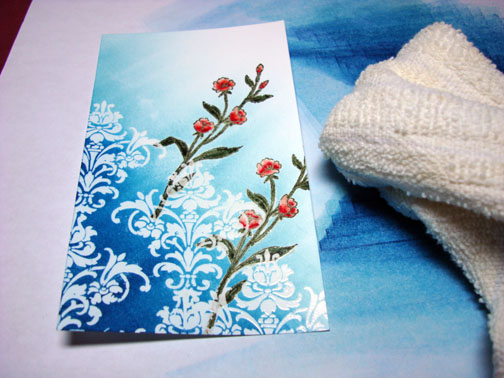
Wiped the ink off of my embossed images with an old cotton cloth.
Extended my flower stem with an Old Olive Marker.
Assembled card front and added a white punched Photo Corner, brads and pierced along each side of my white panel using a piercing tool and Stampin’ Up Mat Pack.

Here is the finished card measuring 5″ x 6.5″.
May your day be full of sweet smelling blossoms!
Until my next post. . . . . . . . . . . . .
Hugs,
Michelle
Get ready for Brayer Workshops! I am coming to:

Dayton, Ohio
Savannah, Georgia
Covington, Indiana
Buffalo, Minnesota
Webster, New York
New Johnsonville, Tennessee
Stoughton, Wisconsin
Castro Valley, California
Yardley, Pennsylvania (near Philadelphia)
Knox, Maine
Broomfield, Colorado
Lynchburg, Virginia
Columbia, Missouri
Portland, Michigan
Here is a link to my workshop calendar where you can see all of my travel schedule and to get info on beginner and advanced Brayer workshops: https://zindorf.splitcoaststampers.com/workshop-calendar
Link to my Stampin’ Up website were you can order all of your must have Stampin’ Up products from me 24-7: https://michellezindorf.stampinup.net
Here is a link to all of my tutorials: https://zindorf.splitcoaststampers.com/tutorials-ive-written/
Frequently asked questions answers: https://zindorf.splitcoaststampers.com/frequently-asked-questions/
20 responses to “Pink & Blue Floral – Tutorial #201 and a Blog Candy Winner”