
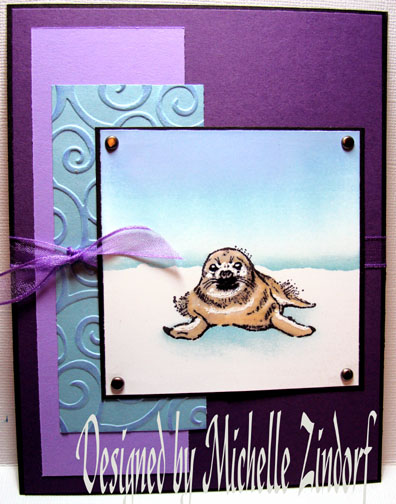
Happy Sunday! If you haven’t notice this week I have been working with some old retired sets from Stampin’ Up. Some I will be parting with shortly. This baby seal from the 2003 Stampin’ Up set Cold Weather Friends is a favorite of mine, but I am saying farewell to it. Check out my sale page, there is a tab at the top of my blog or you can click this link: https://zindorf.splitcoaststampers.com/things-for-sale/ First come first serve.
That being said, let’s get stamping!
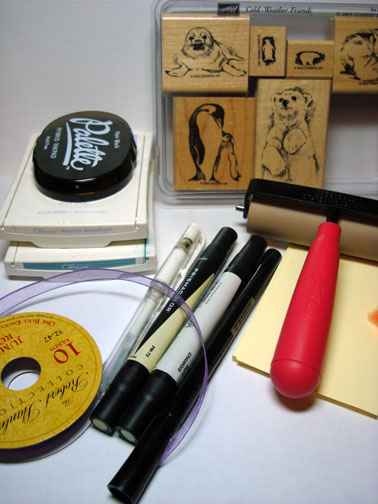
Supplies:
| Paper: Stampin’ Up Whisper White, Baja Breeze, Lavender Lace, Elegant Eggplant |
| Ink: Stampin’ Up Almost Amethyst, Baja Breeze, Palette Noir Black |
| Accessories: Prismacolor Markers, Brayer, White Gel Pen, Versamark marker, Purple Ribbon, Sponge, Post it Note, Fine Detail Clear Embossing Powder, Heat Gun |
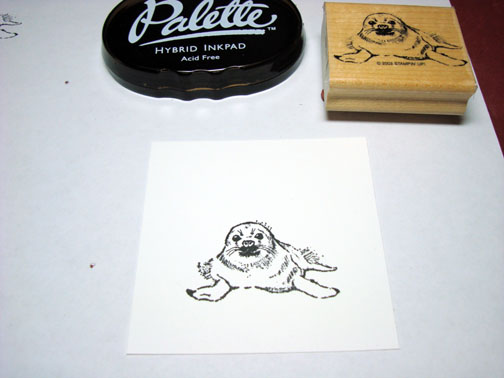
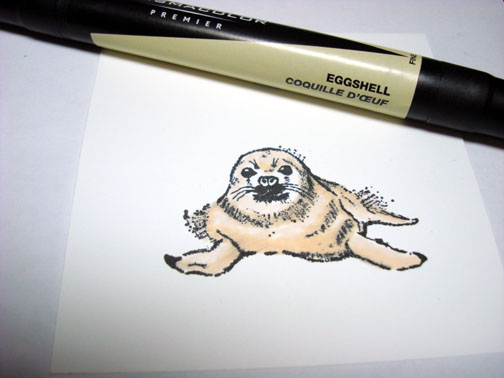
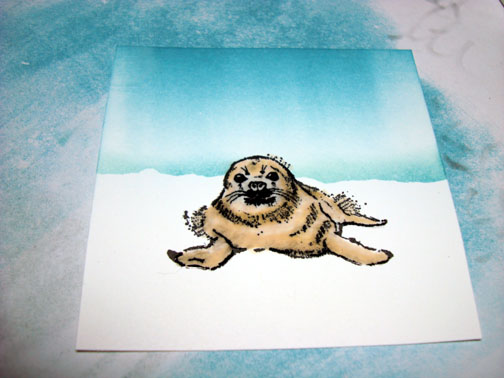
Stamped the image with Palette Hybrid Noir Black ink on a 3.5″ square piece of Whisper White card stock.
Colored the image with a Buff Prismacolor Marker.
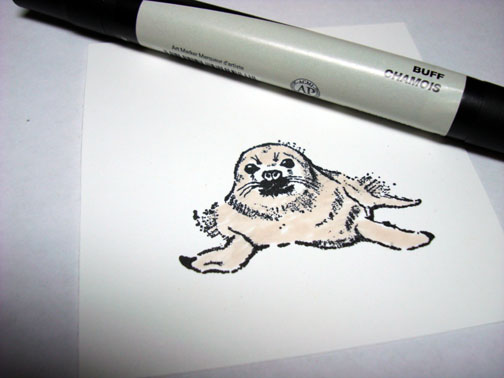
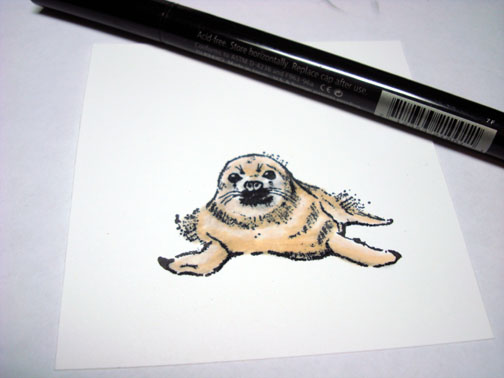
Added Eggshell Prismacolor marker to the underside of the seal and to the dark areas.
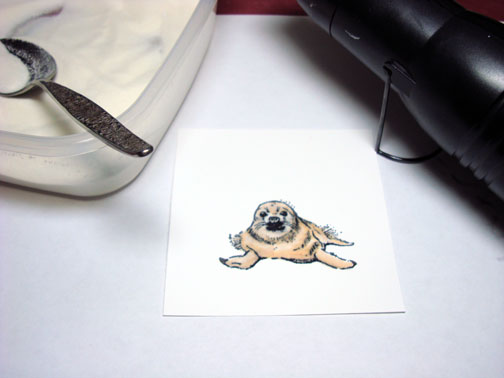
Colored over the entire image with a Versamark Marker and heat embossed using fine detail clear embossing powder and a heat gun.
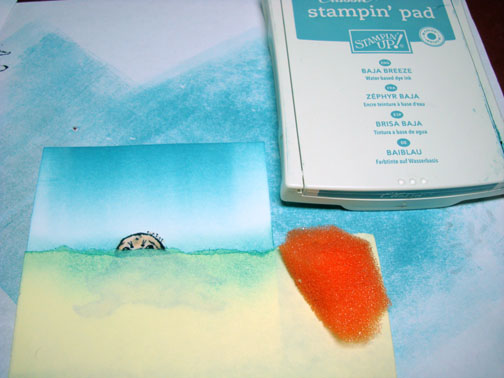
Brayered the top half of the card stock with Baja Breeze ink.
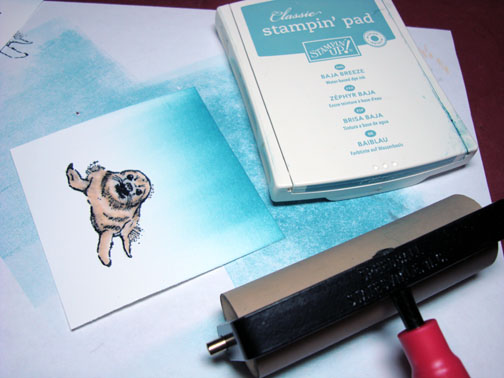
Ripped through the stick edge of a post it note and used it as a mask for the bottom half of the card stock.
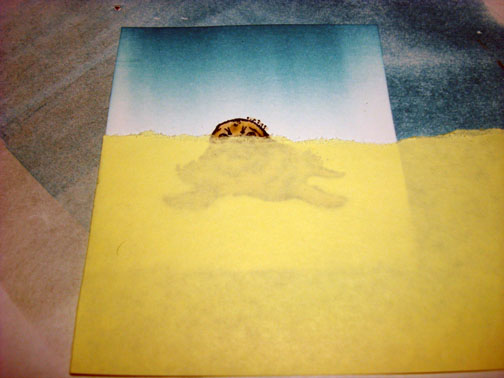
Sponged Baja Breeze ink right at the post it note edge.
Removed the post it note. Ahhhhh, just look at him. .. . . . . . , lol.
Sponge a bit of Baja Breeze ink around the bottom of the seal to create a shadow effect.
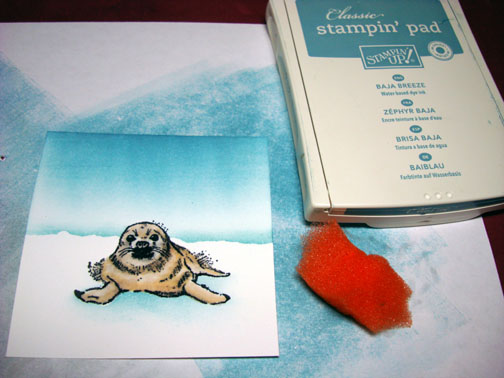
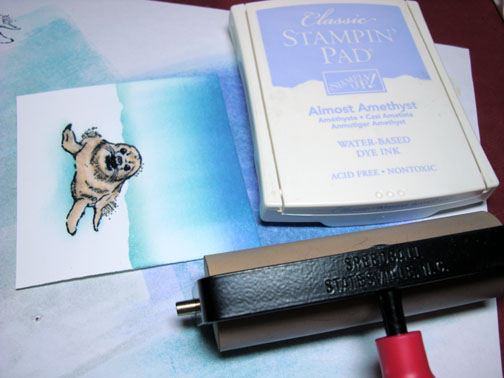
Decided to Brayer Almost Amethyst ink at the top of the card stock not covering the Baja Breeze ink entirely to give a bit of interest to the sky.
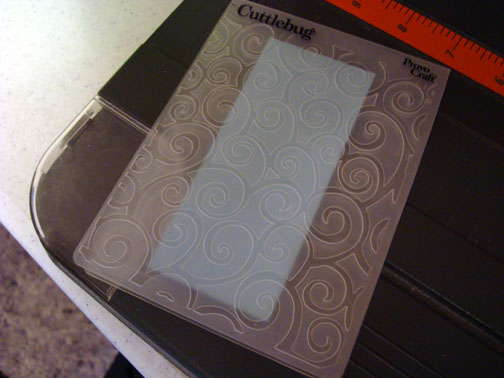
Cut a 2″ x 5.25″ piece of Baja Breeze card stock and used the swirl cuttlebug folder to emboss it.
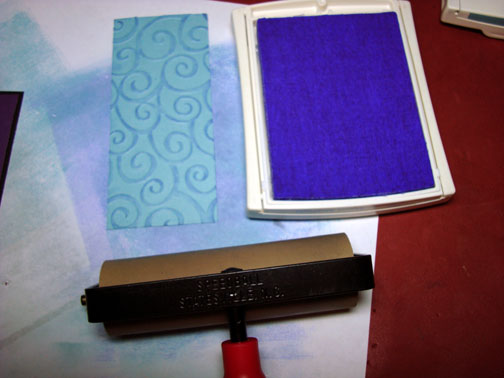
Brayered Almost Amethyst ink over the card stock to make the swirls stand out more.
Assembled card and added some white back to the main image with a White Gel pen. Yes that’s right, you can use white gel pen on top of an embossed image. 🙂
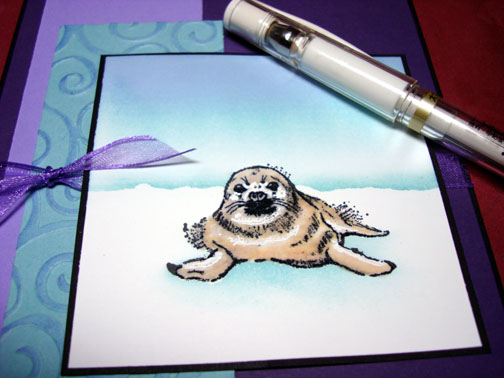
Here is the finished card measuring 5 1/8″ x 6 5/8″.
May your day be filled with sweet images that make you happy.
Until my next post. . . . ..
Hugs,
Michelle
Links to all my tutorials can be found here: https://zindorf.splitcoaststampers.com/tutorials-ive-written/
Here is a link to my workshop calendar if you want to get info on beginner and advanced Brayer workshops: https://zindorf.splitcoaststampers.com/workshop-calendar
Frequently asked questions answers: https://zindorf.splitcoaststampers.com/frequently-asked-questions/
33 responses to “Sweet Baby Seal – Tutorial #166”