
For those of you who follow my blog, you probably know that I have been having heat embossing withdrawals, lol. I think I’m addicted to clear embossing powder and the emboss resist technique. I got my fix with this card.
Let’s get started. 🙂
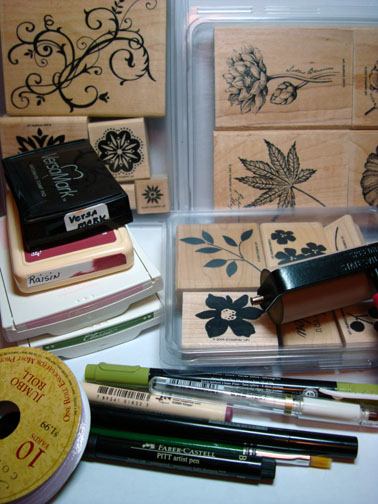
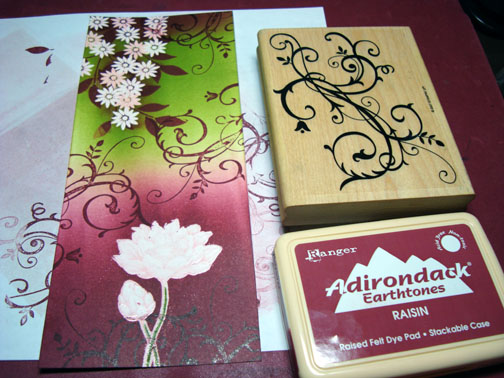
Supplies:
| Stamps: Stampin’ Up Baroque Motifs, Oriental Garden & Best Blossoms |
| Paper: Stampin’ Up Whisper White, Pink Pirquette & Basic Black |
| Ink: Stampin’ Up Pink Pirquette, Old Olive, Adirondack Raisin |
| Accessories: Versamark Pad and Marker, Brayer, Ribbon, Silver Brads, Old Olive Marker, Raisin Marker, Black marker, White Gel Pen, Fine Detail Clear Embossing Powder, Heat Gun, Small Paint Brush |
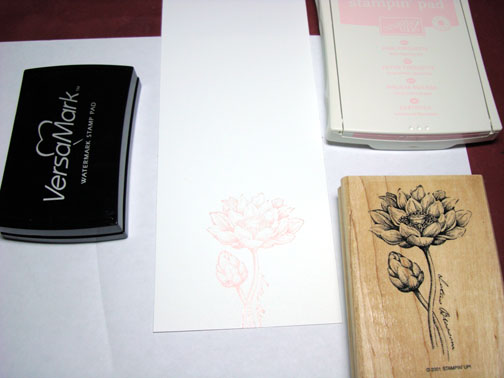
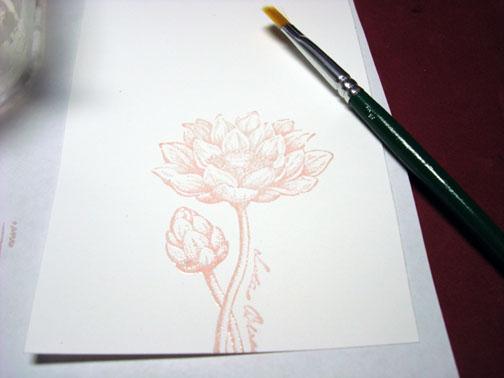
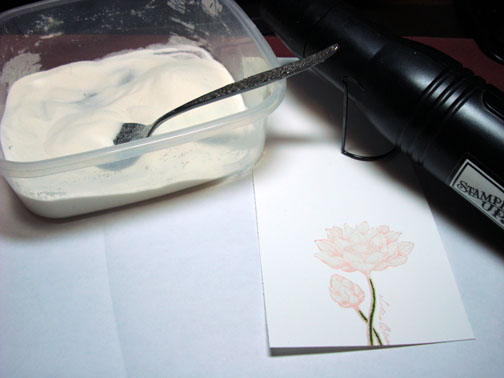
Loaded my Lotus flower stamp with Versamark and then Pink Pirquette ink before stamping it on a 3.5″ x 8.5″ piece of Whisper White card stock.
Applied fine detail clear embossing powder.
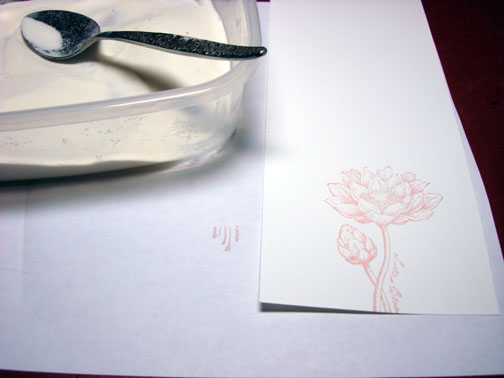
Tip, before heating the embossing powder I swept the embossing powder off of the card stock with a small paintbrush where the wording is. This will omit the wording later when I put dark ink around the flower. I also use this small paint brush to brush away stray embossing powder on the card stock before heating.
Colored in the stem of the image with an Olive Marker.
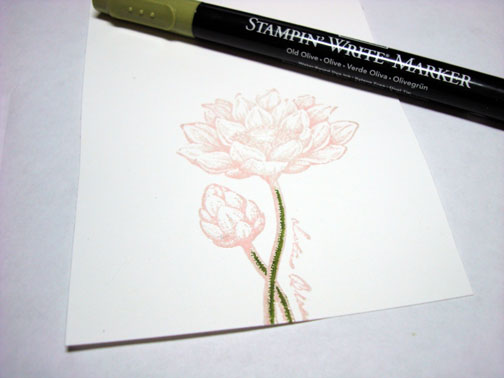
Colored over the entire image with a Versamark marker. I did this in order to retain the white parts of the flower where the card stock shows through. I also went over the stem with the Versamark marker.
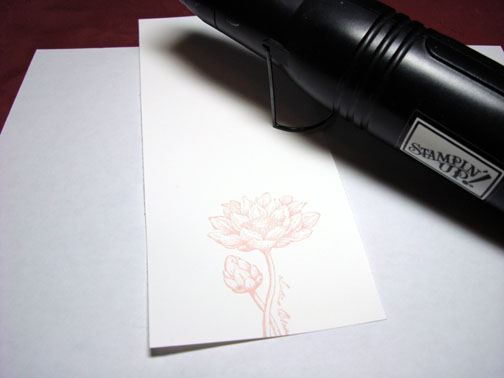
Heat embossed the entire image using fine detail embossing powder and a heat gun.
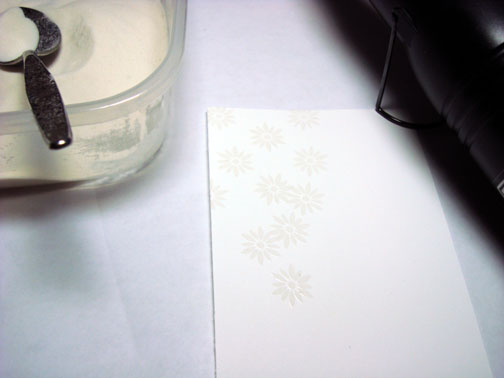
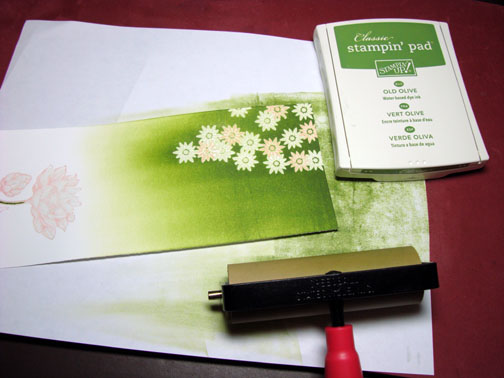
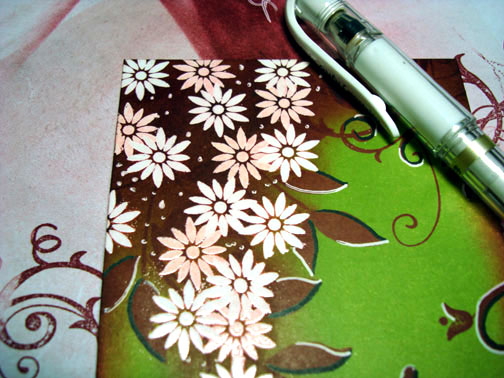
Stamped a few flower in the upper left hand corner of the card stock using Versamark only. Sorry they are very hard to see at this point.
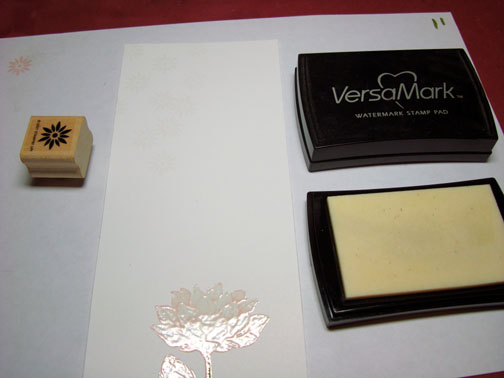
I heat embossed the flowers using clear embossing powder and a heat gun.
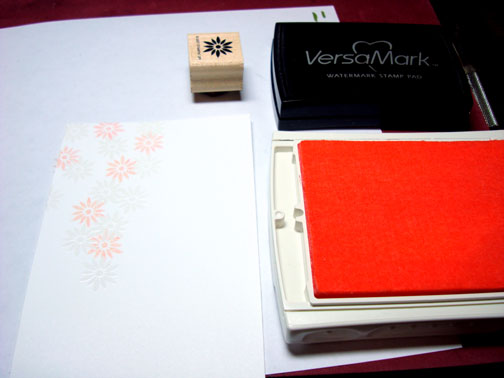
Stamped some more flowers in the left hand corner of the card stock by first loading my stamp with Versamark and then Pink Pirquette ink before stamping. Heat embossed the pink flowers using clear embossing powder and a heat gun.
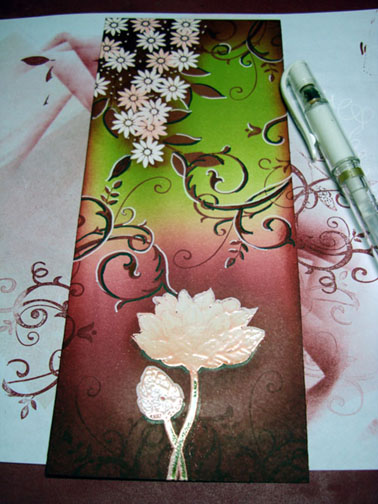
Brayered over the top 1/2 of the card stock with Old Olive ink.
Brayered over the bottom half of the card stock with Raisin ink.
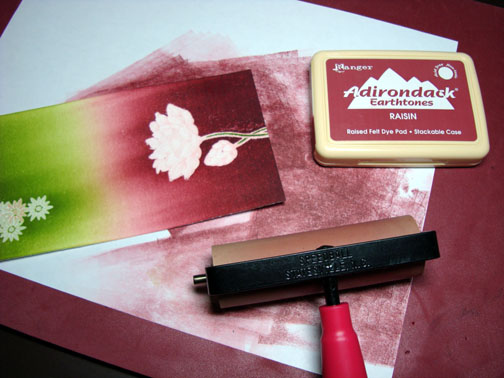
Brayered a bit of Raisin ink at the very top of the card stock.
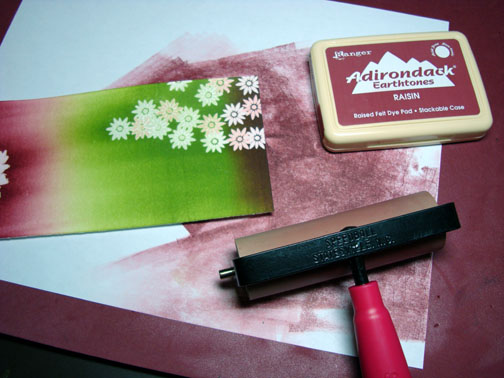
Over stamped the small flowers with the leaf image using Raisin ink.
Let the ink dry for a moment and then I wiped the ink off of the embossed images using an old cotton dish towel.

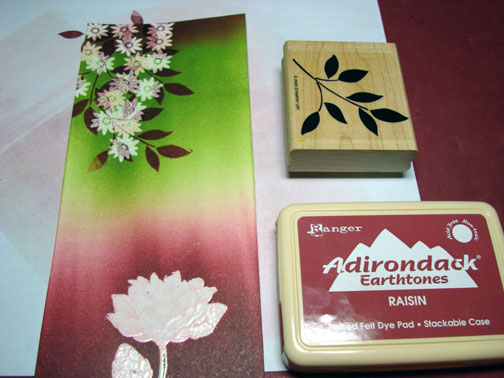
Stamped the flourishes with Raisin ink.
Wiped off the embossed images again with a cotton dish towel.

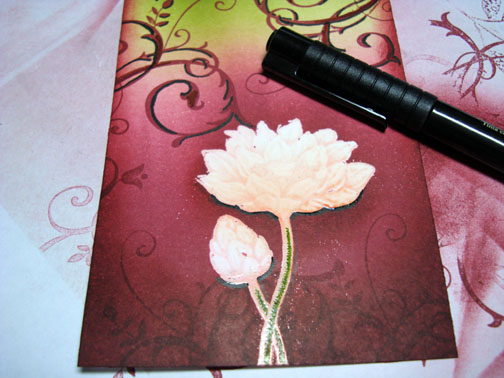
Out lined the bottom of the Lotus flower with a Raisin Marker to create a shadow.
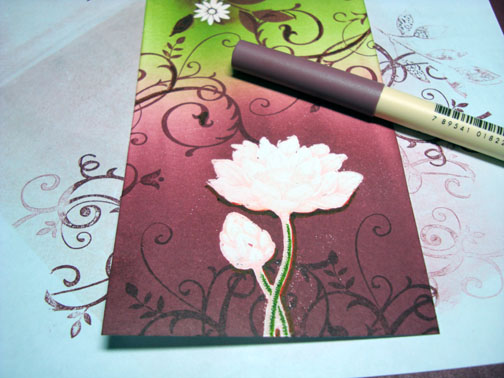
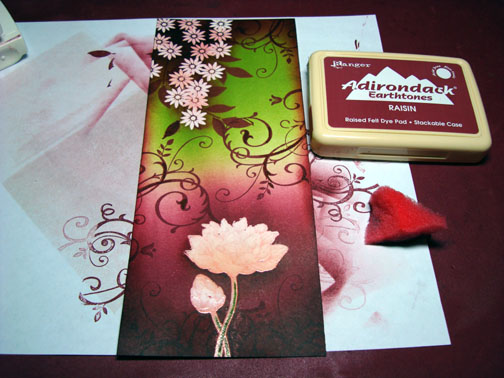
Sponged Raisin ink heavily around the outside edge of the card stock, behind the small flowers and around the Lotus flower.
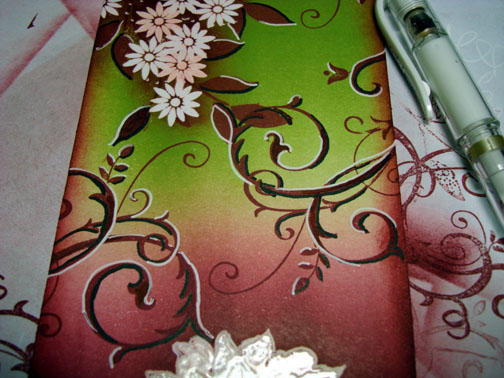
Outlined one side of some of the flourishes and leaves with a black marker.
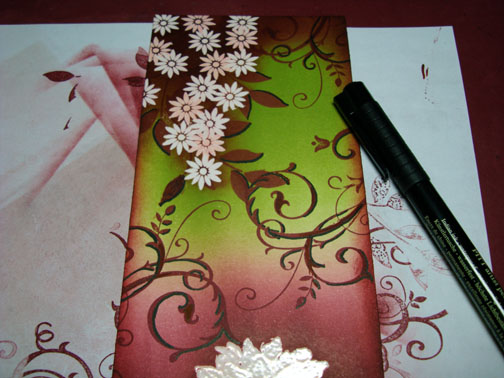
Outlined the opposite side of the flourishes and leaves with a white gel pen to create highlights.
Added dots in the small flower area with a White Gel Pen.
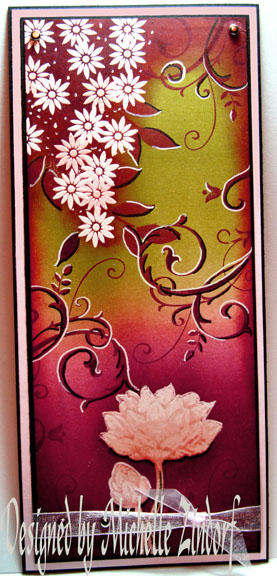
Assembled the panels, added ribbon and silver brads. Here is the finished card measuring 4″ x 9″.
I hope this tutorial has inspired you to get out your clear embossing powder and do a little emboss resisting of your own.
May your day be filled with fragrant beauty.
Until my next post. . . . . . . . . . . .
Hugs,
Michelle
Links to all my tutorials can be found here: https://zindorf.splitcoaststampers.com/tutorials-ive-written/
Here is a link to my workshop calendar if you want to get info on beginner and advanced Brayer workshops: https://zindorf.splitcoaststampers.com/workshop-calendar
Frequently asked questions answers: https://zindorf.splitcoaststampers.com/frequently-asked-questions/
Pingback: valeriovaz.com » Bookmarks for January 2nd through January 6th
Pingback: An attempt at a brayered background « Card Capers with Jan