
Well I don’t know if they follow the Daylight Savings Time Change in your area of the world, but in Ohio we had to put our clocks back 1 hour last Sunday. Let me tell you what this does to me.
I normally wake at around 3:30 to 4:00 a.m. in the morning. I don’t own an alarm clock. I rely on my internal clock. When the time changes, my internal clock doesn’t and I wake up at 2:30 to 3:00 a.m. until my internal clock adjusts. Even for me that is way, way to early. So, for the next week or two I will try to force myself to stay a wake later in the evening to try to straighten my clock out. 🙂
But this morning I was wide a wake at 2:30 a.m.. So what’s a girl to do when she can’t sleep, well color a snowman, of course! Even though it is in the 70’s here for the next few days, not normal for Ohio in November. I guess I’m just screwed up all the way around, lol.
This adorable snowman is by Fire Cracker Designs by Pamela. Here is a link to their online store:
I decided to give this snowman a homespun feel this morning.
Let’s get started on the tutorial 🙂
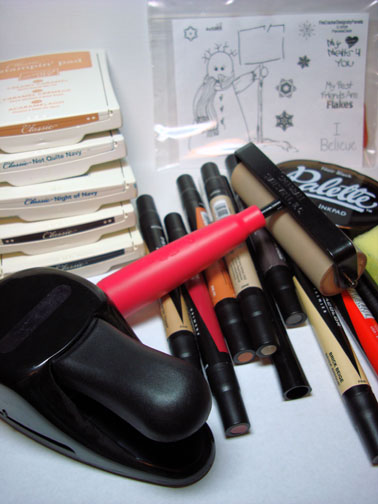
Supplies:
| Stamps: Fire Cracker Designs by Pamela |
| Paper: Stampin’ Up Very Vanilla, Bravo Burgundy & Creamy Caramel |
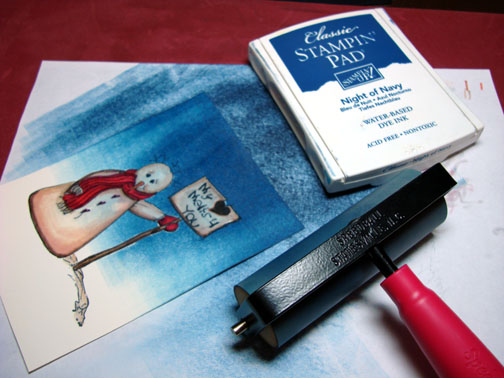
| Ink: Stampin’ Up Creamy Caramel, Not Quite Navy, Night of Navy, Chocolate Chip & Basic Black, Palette Noir Black |
| Accessories: Prismacolor Markers, Black fine tip marker, White Gel Pen, Versamark Marker, Clear Embossing Powder, Brayer, Sponges, Word Window Punch, Heat Gun |
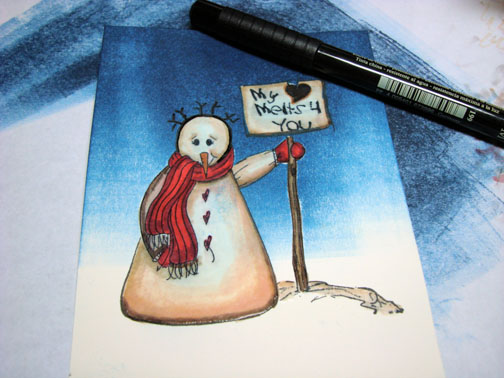
Stamped Snowman on a 4″ x 5.5″ piece of Very Vanilla card stock with Palette Noir Black ink.
For those of you who follow my blog, you thought I was going to say Whisper White didn’t you?
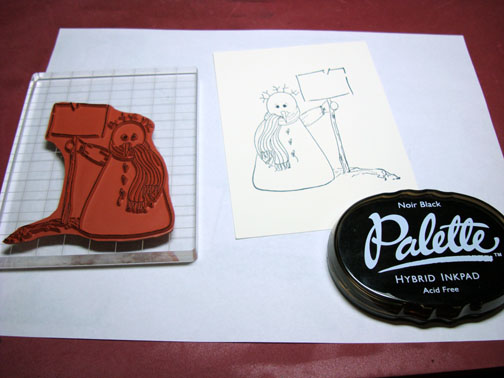
Stamped the Sentiment on the sign with Palette Noir Black ink.

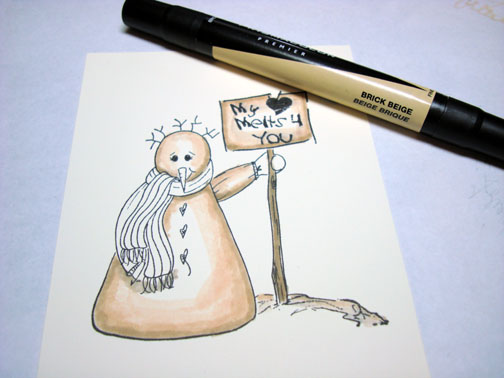
Colored the snowman with a Prismacolor Brick Beige marker.
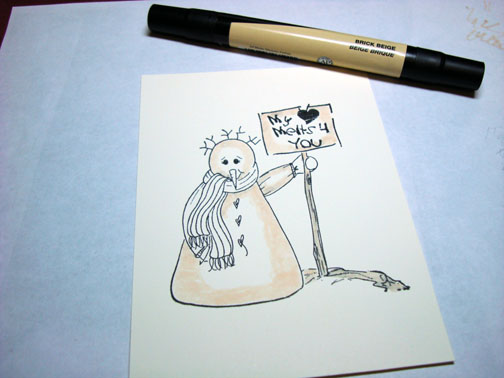
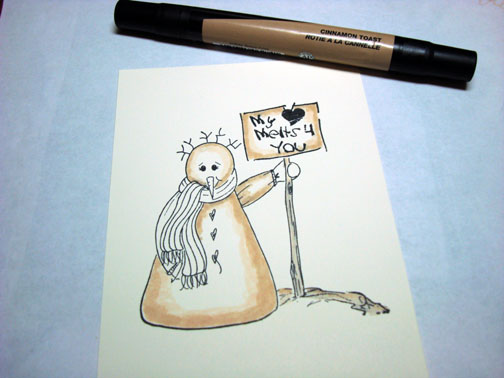
Added Cinnamon Toast marker.
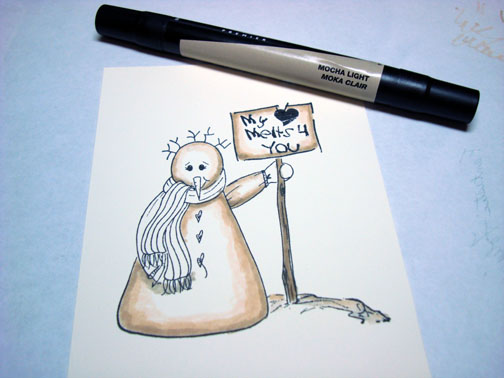
Added Mocha Light marker.
Went over the layers of marker with the Brick Beige marker to blend them a bit.
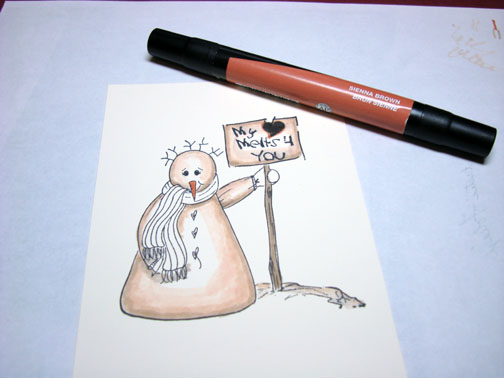
Colored the nose with Sienna Brown marker.
Colored the scarf and mittens in with Crimson Red marker.
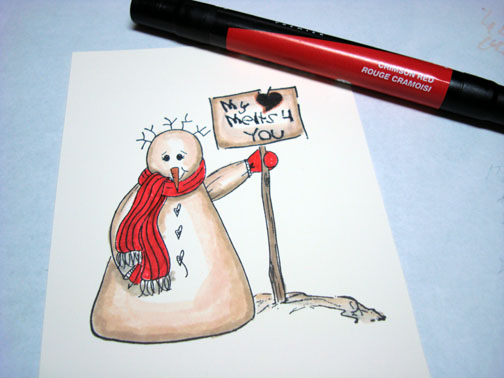
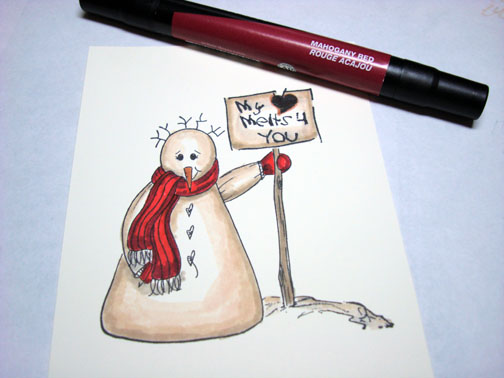
Added Mahogany Red to the scarf and mittens.
Added Cocoa Bean marker to the darkest areas of the sign and snowman edges.

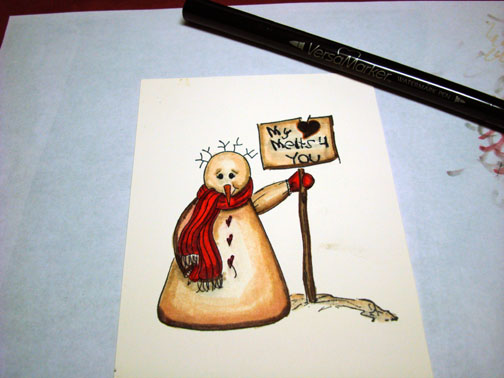
Colored over the images with Versamark marker. Be careful with this step, the colors will smear so color your light colors first and work toward the dark, cleaning your Versamark marker tip often on your scrap paper.
Note how the Versamark changes the color of the snowman and sign. You can count on Versamark to make your images a shade or two darker.
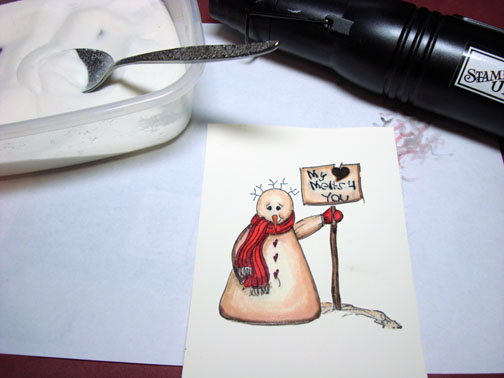
Heat embossed the images using clear embossing powder and heat gun.
Brayered Not Quite Navy at the top of the card stock.

Brayered Night of Navy at the top of the card stock, not covering the Not Quite Navy entirely.
I wiped the brayered ink from the snowman the best I could with a paper towel, but my snowman is stained a bit. Oh well he just looks a bit more rustic now. 🙂
Defined the snowman’s hair a bit with a black fine tip marker.
Ripped the edge off of a scrap piece of card stock to use as a mask.
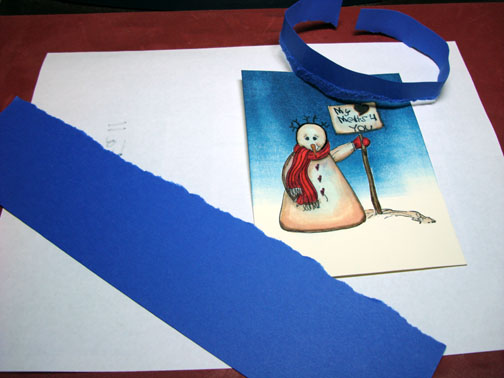
Held the mask in place and sponged Creamy Caramel ink at the mask edge.
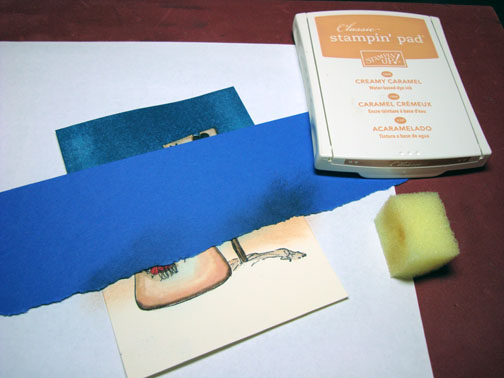
Added a bit of Chocolate Chip ink at the mask edge, not covering the Creamy Caramel ink entirely.
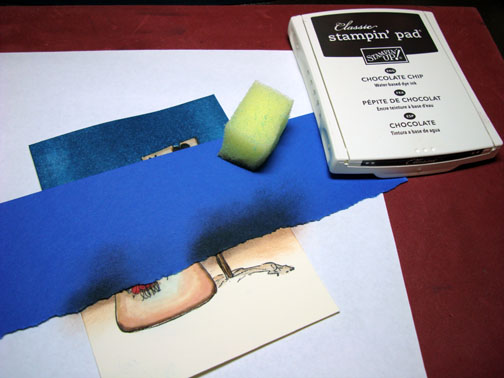
Removed the mask. See, I now have a horizon line.
Moved the masked down to the bottom of the card stock and repeated sponging the Caramel ink and the Chocolate Chip ink at the mask edge to create a hill in the snow.

Removed the mask and sponge just a bit of Chocolate chip ink under the snowman to create a shadow.
Used the fine tip black marker again to add dimension to the sign and snowman by putting a line under the snowman and under the sign and to the right of the sign and sign post.

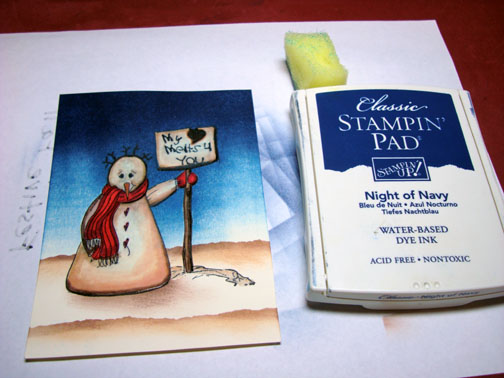
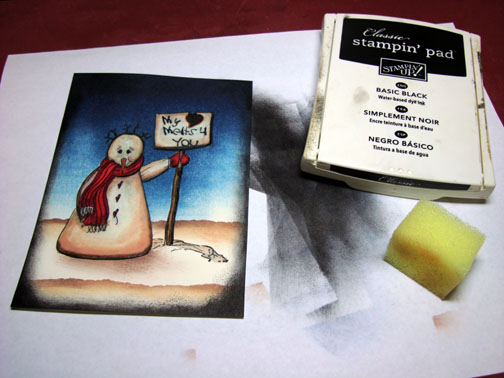
Sponged Night of Navy ink at the top of the card stock to really darken it.
Sponged Black ink around the entire main image panel.
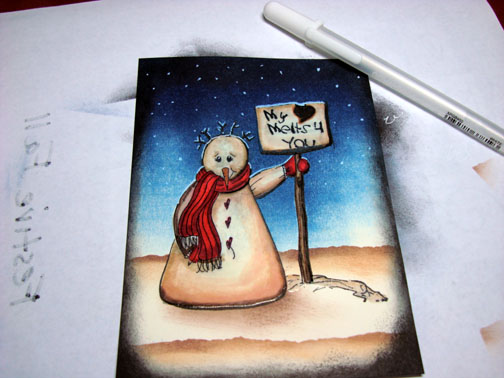
Added dots in the sky and highlights to the top of the snowman and the sign with a White Gel pen.
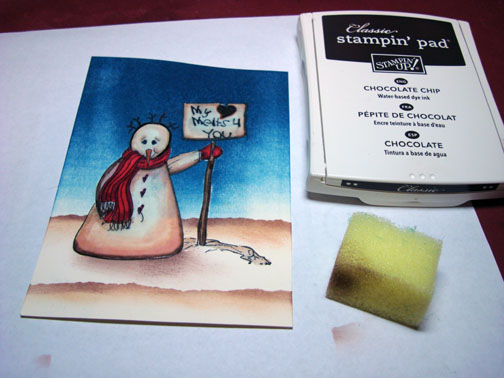
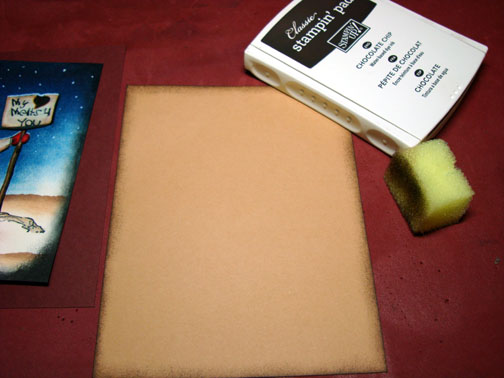
Sponged around a Creamy Caramel panel with Chocolate chip ink.
Punched to word panel punches out of Bravo Burgundy card stock. Stacked them together and cut one end off of them.
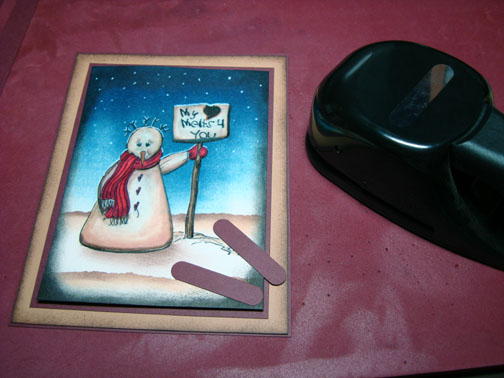

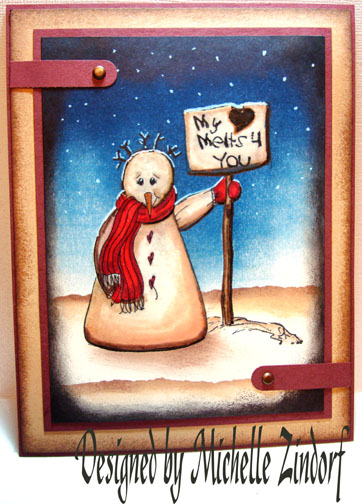
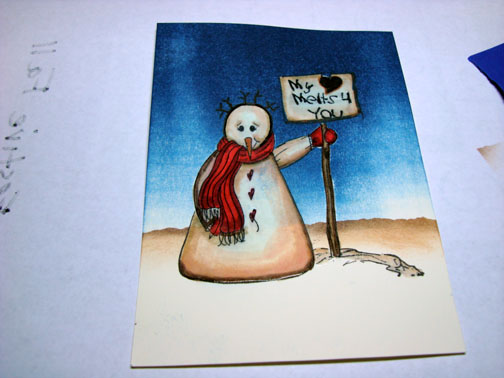
Assembled my card added the punches and some copper brads. Here is the completed card measuring 5″ x 6.5″.
Here’s hoping your internal clock is ticking perfectly today!
Oh Yeah! For those of you who are in the United States of America, GET OUT THERE AND VOTE!!!! That’s where I am headed right now.
Until my next post. . . . . . . . . . .
Hugs,
Michelle
Links to all my tutorials can be found here: https://zindorf.splitcoaststampers.com/tutorials-ive-written/
Here is a link to my workshop calendar if you want to get info on beginner and advanced Brayer workshops: https://zindorf.splitcoaststampers.com/workshop-calendar
Frequently asked questions answers: https://zindorf.splitcoaststampers.com/frequently-asked-questions/
45 responses to “Homespun Snowman – Tutorial #143”