
Autumn, Autumn, Autumn, I love Autumn! This past weekend had the most perfect temperatures, warm during the day, the sky was blue the nights were cool. We had family over for a Bonfire Saturday night. Nothing fancy, just a big pot of Chili and grilled hotdogs. Lots of hugs and laughter. It was perfect!
Of course, I am in the mood for Autumn, hence the tutorial today of these whirling leaves.
Let’s get started. 🙂
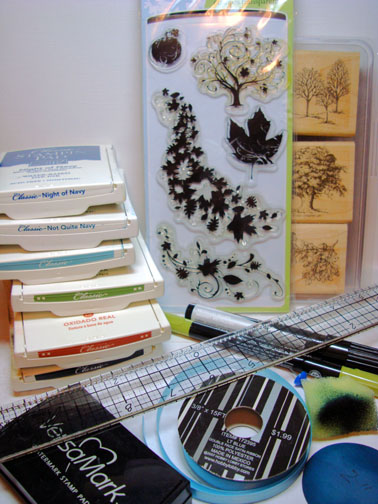
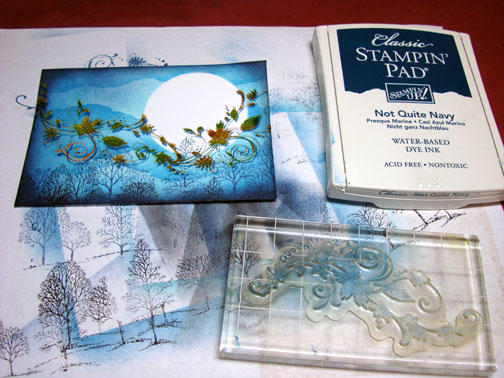
Supplies:
| Stamps: Inkadinkado “Fall Season” & Stampin’ Up “Lovely as a Tree” |
| Paper: Stampin’ Up Baja Breeze, Basic Black, Whisper White |
| Ink: Stampin’ Up Night of Navy, Not Quite Navy, Baja Breeze, Old Olive, Really Rust, Basic Black |
| Accessories: Tim Holtz Ruler, Push Pin, Ribbon, Silver Brads, Prismacolor Metallic Silver Marker, Coluzzle Circle Template, Sponge, Versamark Pad, Fine Detail Clear Embossing Powder, Heat Gun |
Stamped the leaves twice by first loading my stamp with Versamark, then loading it with Old Olive ink, used the corner of my Really Rust ink pad to add a touch of Rust on the leaves before stamping the stamp on a 3.5″ x 5″ piece of Whisper White card stock.
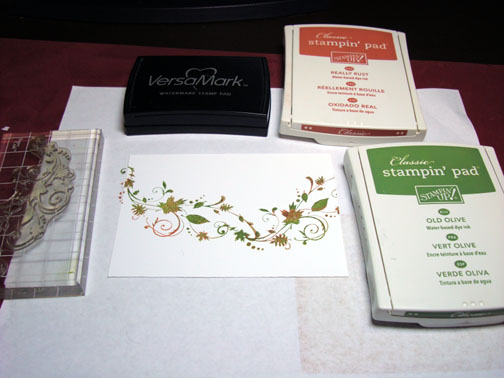
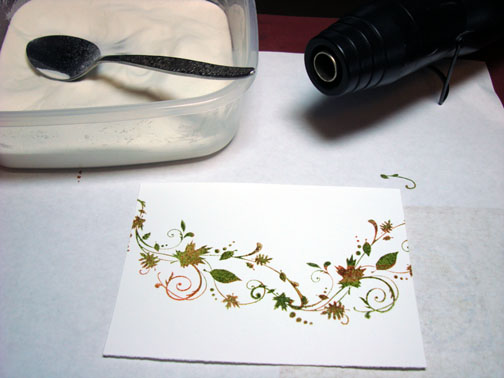
Heat embossed the images using fine detail clear embossing powder and a heat gun.
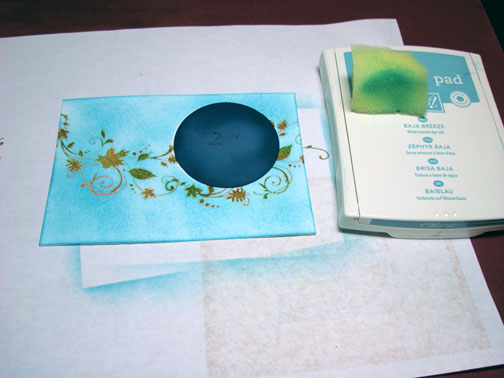
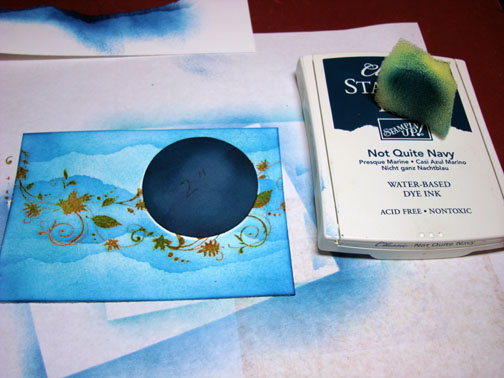
A long time ago I cut various circles of card stock out with my Coluzzle and I keep these and use them over and over again for masks. The card stock mask I’m using for this piece is 2″.

Holding my mask in place I sponge Baja Breeze ink all over the card stock using a circular motion.
Note: The more ink you use when sponging the less blotchy your sponging will look.
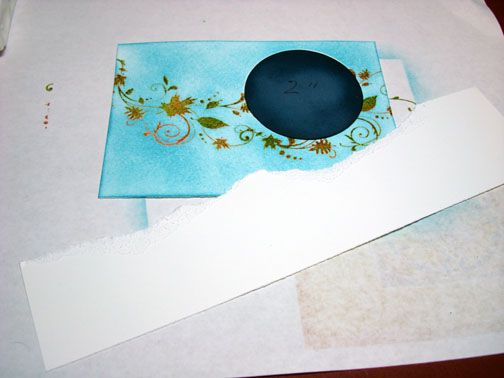
Ripped a piece of card stock to use as a mask.
Note: I ripped a much longer piece of card stock than I thought I would need so I can move it around and not have the same pattern each time.
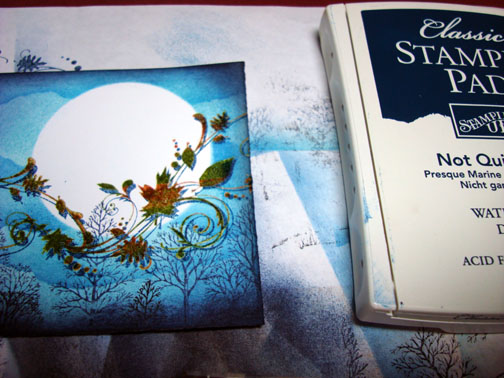
Held my masks in place and sponged Not Quite Navy lightly at the masks edge.
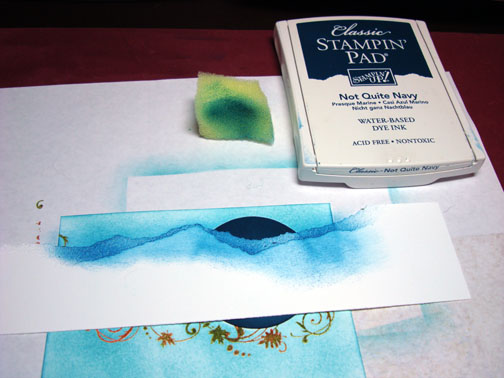
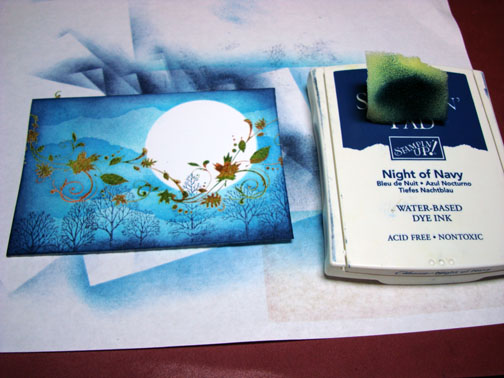
Moved the mask and repeated.
I kept moving the mask and sponging Not Quite Navy until I got the look I wanted.
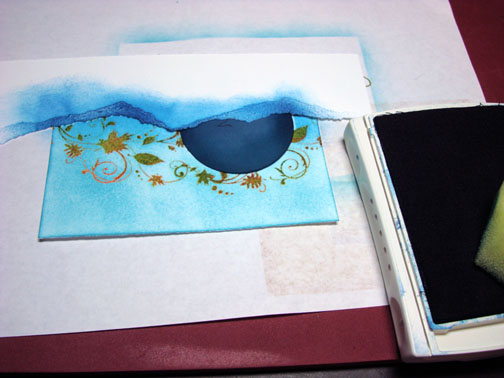
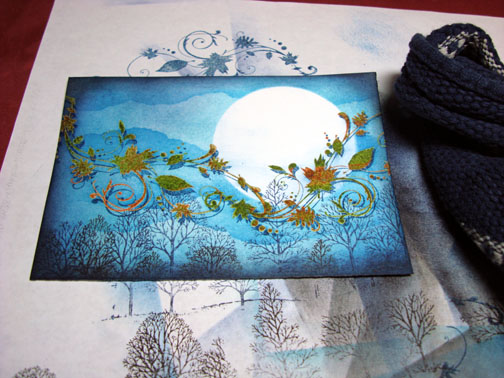
Removed the mask for the moon too. Stamped the trees at the bottom of the card stock with Night of Navy ink.

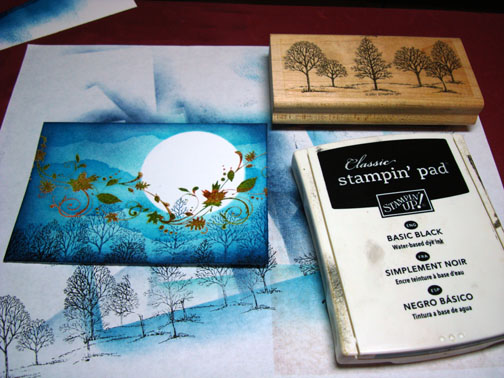
Sponged Night of Navy ink around the edge of the card stock.
Added some trees with Black ink and sponged Black ink on the very edge of the card stock.
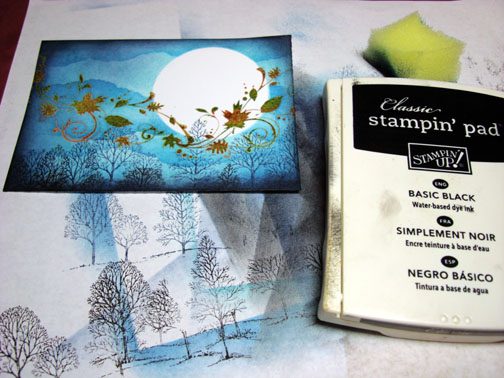
Over Stamped the whirling leaves with Not Quite Navy and a little off center from my original stamping of them to create a shadow.
Be careful with this step. Wiped the Not Quite Navy ink from the embossed leaves. If you use a swiping motion, from left to right with your rag, it will give you streaks across your moon.
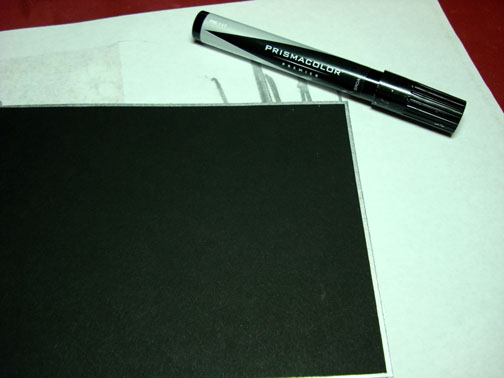
Added Silver to the edge of my piece by holding a Prismacolor Metallic Silver marker half on the card stock and half on the scrap paper and pulling it straight down the edge.

Did the same thing with the Silver Marker again only on my 5″ x 6.5″ bottom panel of black card stock.
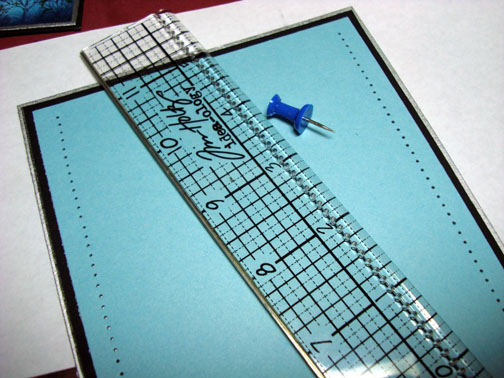
Added a panel of Baja Breeze card stock to the black card stock and pierced holes in the top and bottom of it with a Tim Holtz Ruler and a push pin.
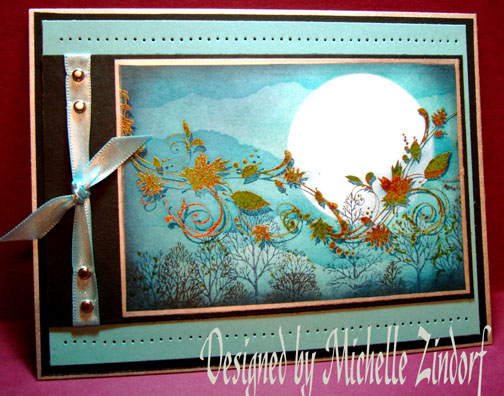
Assembled my card front and added ribbon and brads. Here it is finished measuring 5″ x 6.5.
I hope this tutorial has inspired you to try a different approach to getting some variation in your skies.
May your day be filled with sunshine and perfect temperatures.
Until my next post. . . . . . . . . . . . .
Hugs,
Michelle
Links to all my tutorials can be found here: https://zindorf.splitcoaststampers.com/tutorials-ive-written/
Here is a link to my workshop calendar if you want to get info on beginner and advanced Brayer workshops: https://zindorf.splitcoaststampers.com/workshop-calendar
59 responses to “Whirling Leaves of Autumn – Tutorial #133”