
Happy Monday! Well I’m trying to start the week off with a good attitude, so I’ll say again, Happy Monday! Hope everyone had a super wonderful weekend.
Today’s tutorial features a stamp sheet by Innovative Stamp Creations “Friendship”. Here is a link to their online store, check them out: https://www.innovativestampcreations.com/ischomepage.html
Let’s get started. 🙂
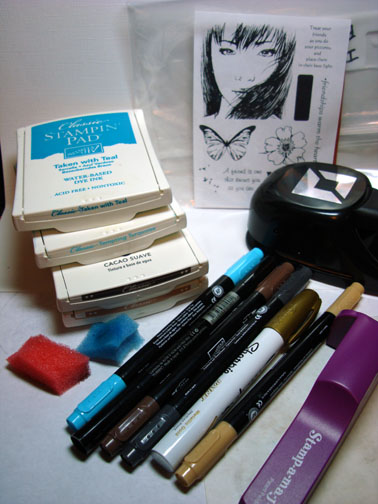
Supplies:
| Stamps: Innovative Stamp Creations “Friendship” |
| Paper: Stampin’ Up Cool Caribbean, Take with Teal & Chocolate Chip |
| Ink: Stampin’ Up Taken with Teal, Tempting Turquoise, Close to Cocoa & Creamy Caramel |
| Accessories: Stamp-a-ma-jig, Photo Corner Punch, Sponges, Sharpie Gold Paint Marker, Stampin Up markers, Versamark Marker, Fine Detail Clear embossing Powder, Heat Gun, Cuttlebug embossing folde |
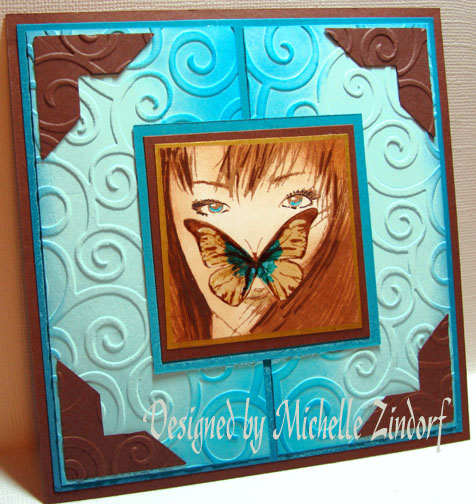
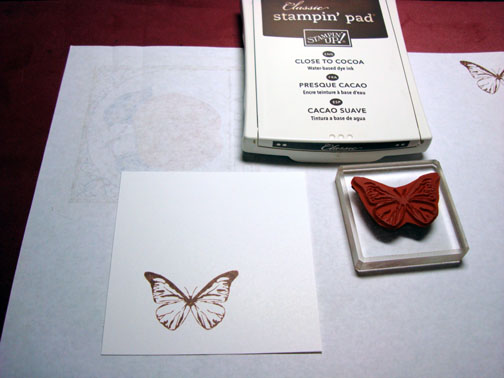
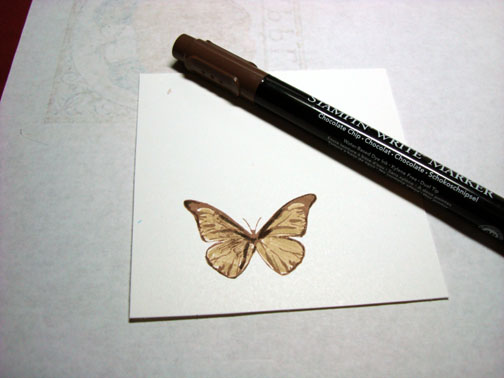
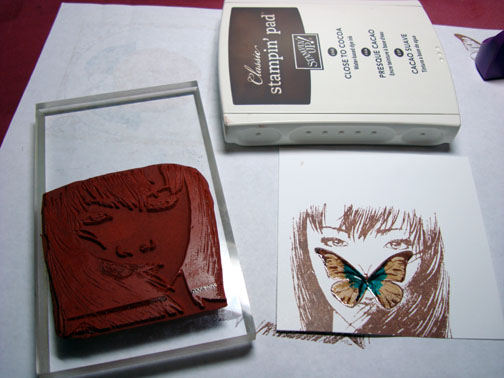
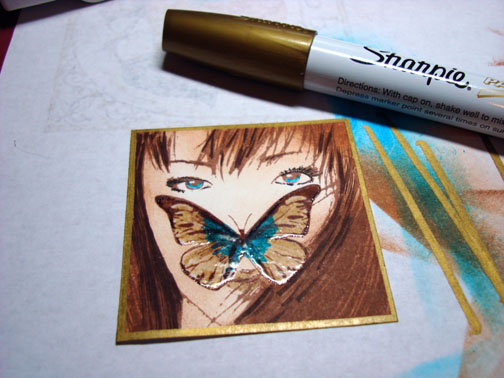
Stamped butterfly on Whisper White card stock using Close to Cocoa ink.
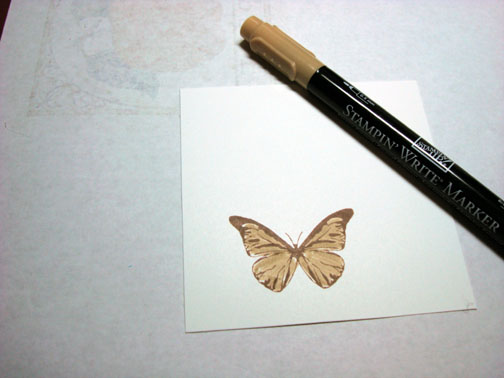
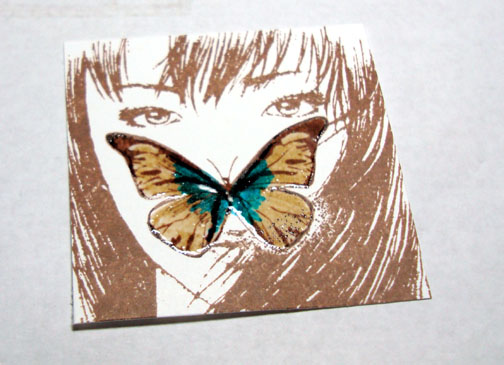
Colored the butterfly with a Creamy Caramel marker.
Added some darker touches with a Chocolate Chip marker.
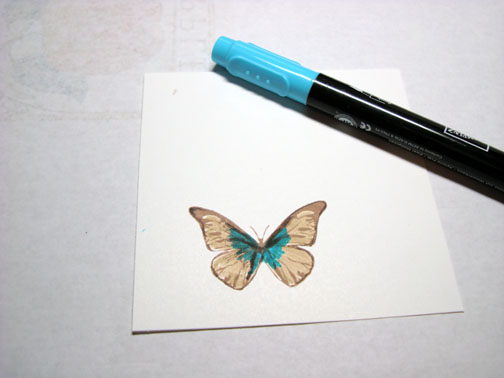
Colored the inside of the wings with a Tempting Turquoise marker.
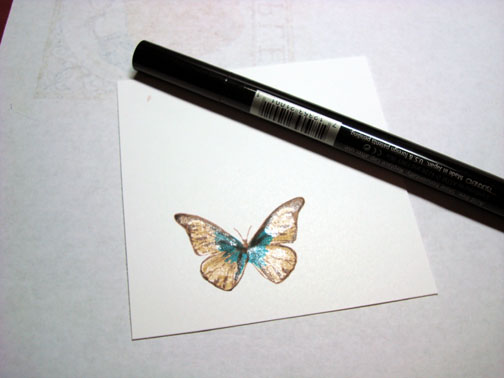
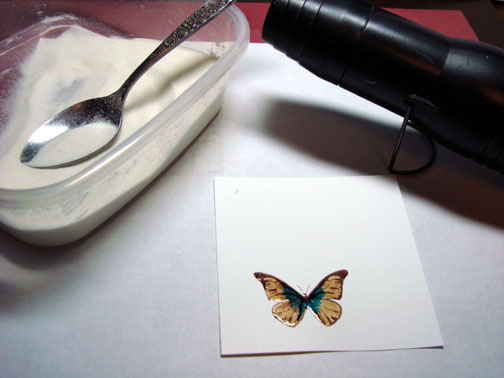
Colored over the image with a Versamark marker and heat embossed using fine detail clear embossing powder and a heat gun.
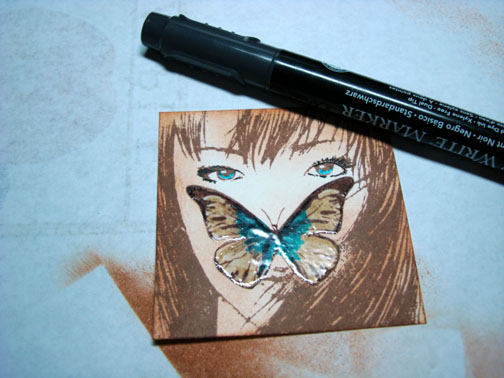
Stamped the face over the embossed image using a Stamp-a-ma-jig for placement and Close to Cocoa ink.
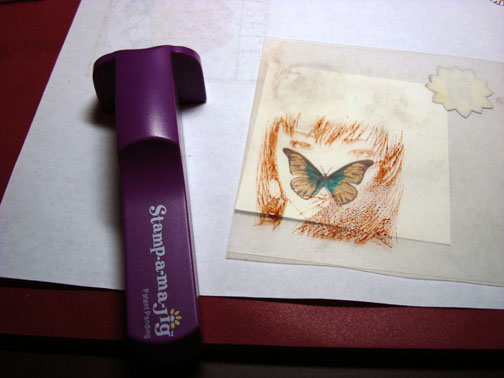
Cropped panel down to 2 3/8″ square.
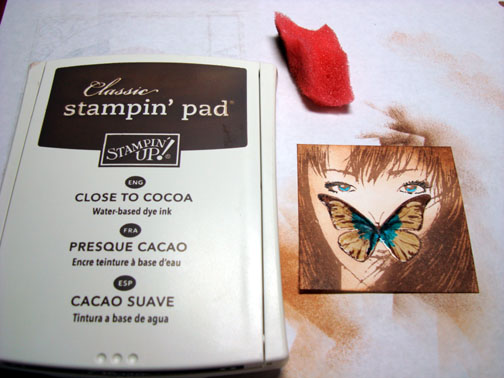
Sponged on Creamy Caramel ink being darker toward the outside of the panel getting lighter toward the inside.
I used a circular motion with the sponge starting on the outside edge.
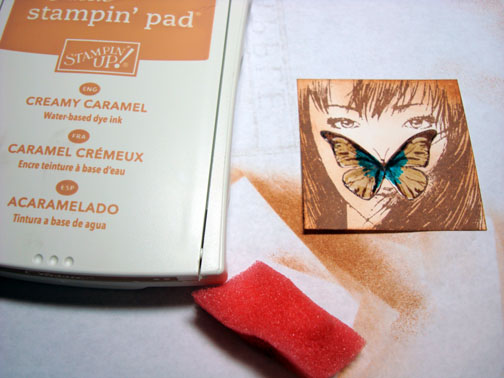
Colored the eyes with a Tempting Turquoise marker.
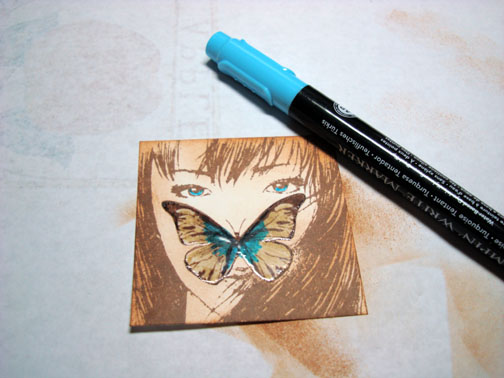
Used a black marker to define the eyelashes.
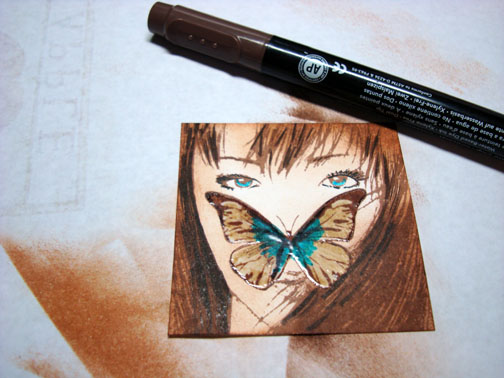
Sponged Close to Cocoa ink around the outside edge in the hair areas.
Added some streaks of Chocolate chip marker to the hair closest to the face.
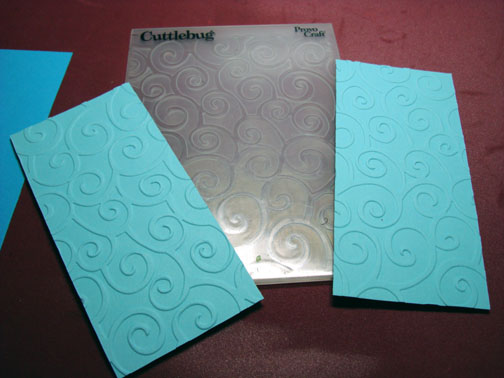
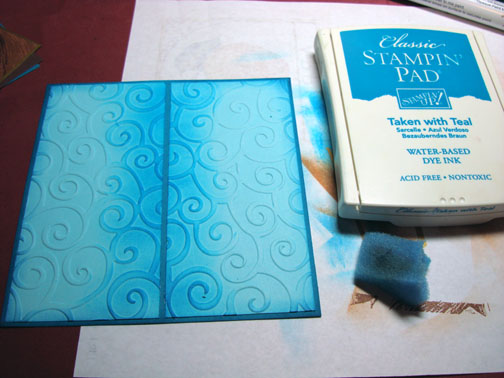
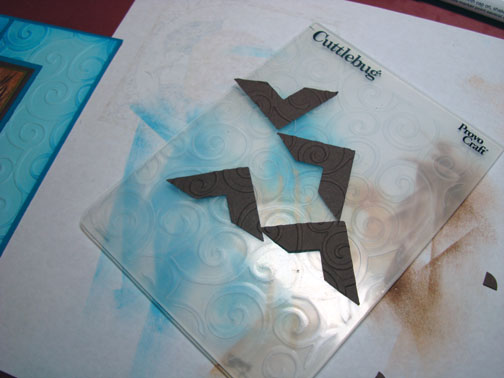
Cut two panels 5″ x 2.5″ out of Cool Caribbean card stock. Yep, I’m still using up my Cool Caribbean card stock although it is retired. No sense wasting it.
Embossed the panels with a Cuttlebug folder.
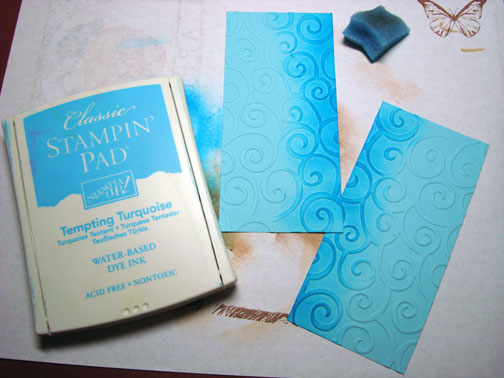
Sponged Tempting Turquoise ink on one side of each panel.
Edged the main image panel with a Sharpie Gold Paint marker.
Adhered the Tempting Turquoise panels to a panel of Taken with Teal card stock. Sponged Taken with Teal ink around the out side edge.
Punched for photo corners out of Chocolate Chip ink.
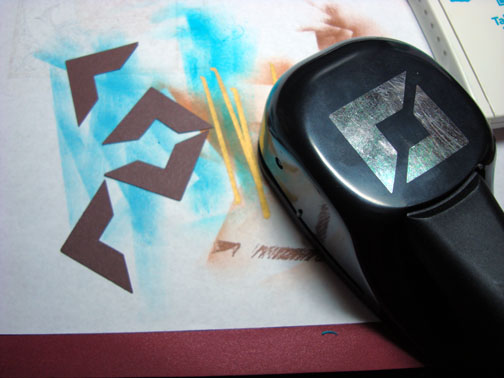
Embossed them with the Cuttlebug folder.
Assembled card and here it is finished measuring 5 3/8″ x 5 3/8″.
May your day be filled with wonderful things!
Until my next post. . . . . . . . . . .
Hugs,
Michelle
Follow this link to see all of my tutorials: https://zindorf.splitcoaststampers.com/tutorials-ive-written/
31 responses to “Madame Butterfly – Tutorial”