
Hello Everyone! I’m just trying to make it through this week. Next week I am on vacation from my real job and my husband and I have rented a cabin in the Hocking Hills Region of Ohio for a few days at the beginning of the week and then on July 31st I’m off to sunny California for my first ever workshops. Let me tell you, I’M EXCITED!!!!
But in the mean time, I checked out the Sketch Challenge SC186 this morning on Split Coast Stampers and decided to play along. 🙂 Here is the link to the challenge if you want to play too: https://www.splitcoaststampers.com/forums/showthread.php?t=366251
Let’s get started with tutorial 94! 🙂
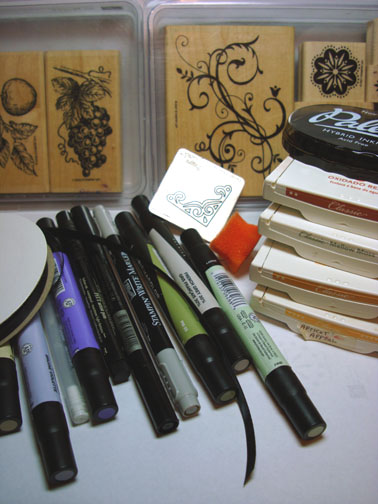
Supplies:
| Stamps: Stampin’ Up Sun Ripened II & Baroque Motifis |
| Paper: Stampin’ Up Whisper White, Basic Black & Mellow Moss, Basic Grey Design paper |
| Ink: Stampin’ Up Really Rust, Mellow Moss, More Mustard & Apricot Appeal, Palette Noir Black |
| Accessories: Black Ribbon, Copper Brads, Clear embossing Powder, Heat Gun, Versamark Marker, Prismacolor Markers, Faber Castell Black fine point maker, Going Gray marker, Sponge, Cuttlebug Corner Die |
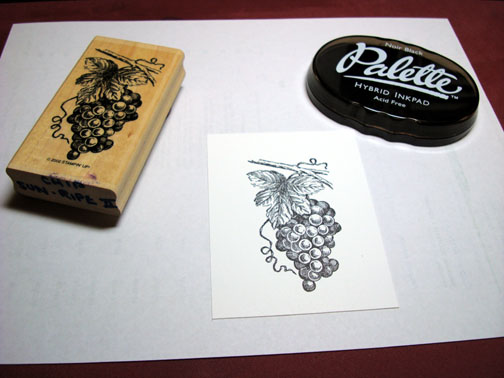
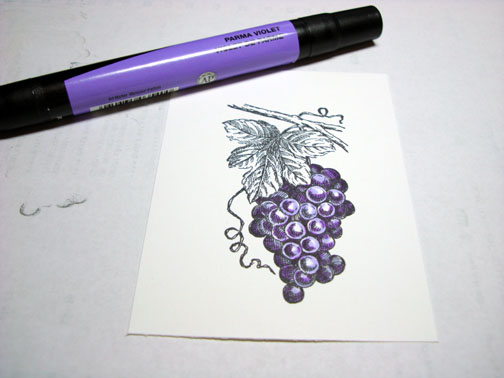
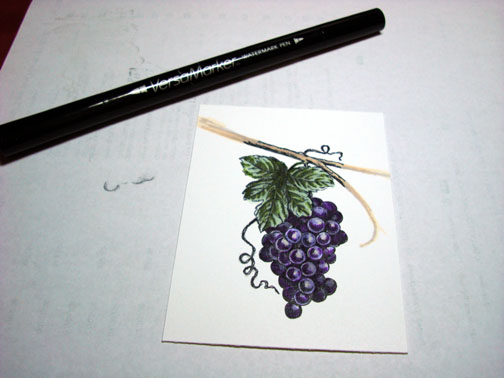
Stamped grapes with Palette Noir Black ink on a 3″ x 4″ piece of Whisper White card stock. Note: I use Palette ink because it tends not to smear when using solvent based markers.
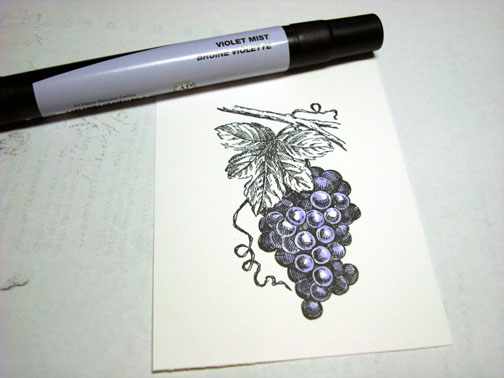
Colored the grapes with a Prismacolor Violet Mist Marker.
Colored the shadow parts of the graps with a Parma Violet marker.
Colored the leaf with a Mint Cream marker.

Colored the shadow parts of the leaf with a Light Olive Green marker.
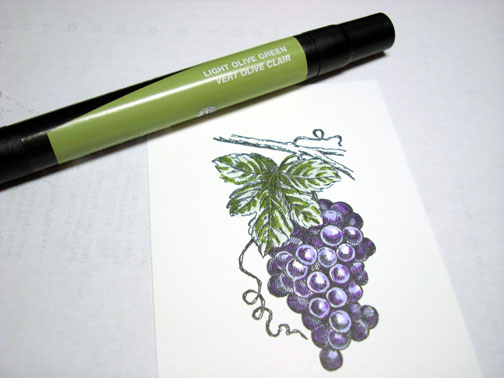
Went over the entire leaf again with the Mint Cream marker to blend it some.

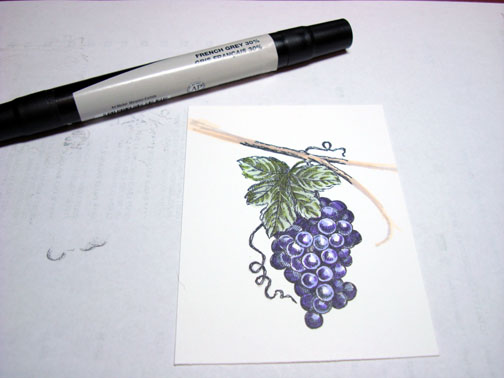
Colored the stem with an Eggshell marker and extended the stem some too.
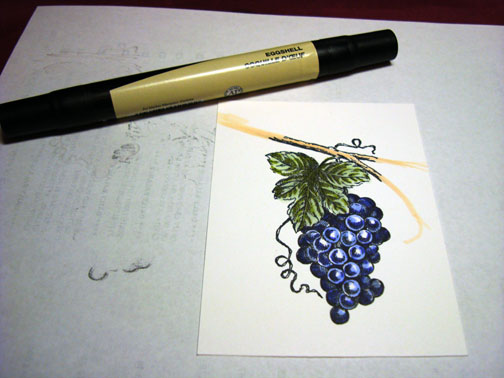
Added some French Grey 30% marker to the stem.
Colored over the entire image with a Versamark Marker and then heat embossed the image with clear embossing powder and a heat gun.
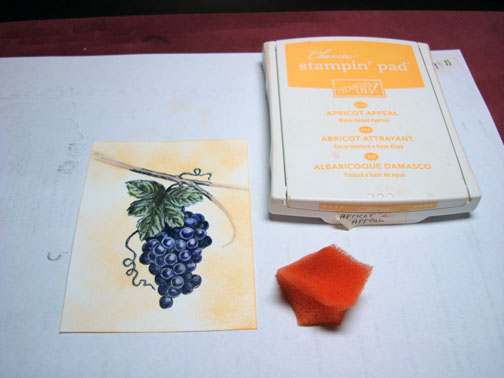
Sponged on Apricot Appeal ink.
Sponged on More Mustard ink being more heavy with it on the right side.
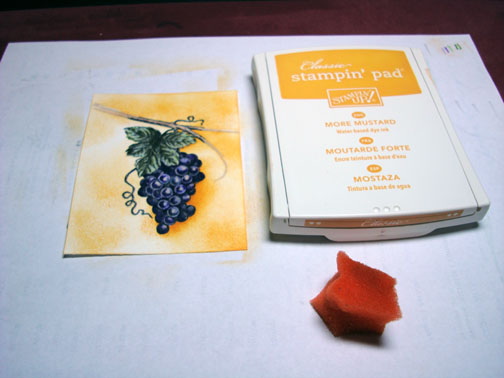
Sponged on Really Rust ink being heavy with it on the right side.

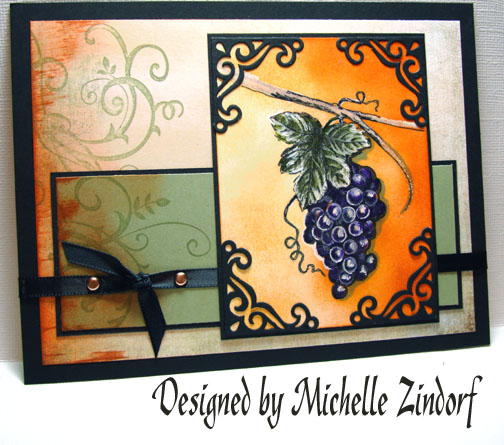
Added a layer of Basic Black card stock and Cuttlebug Corners.
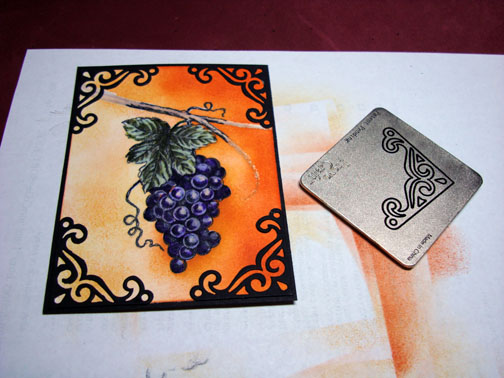
Added a thick line of Going Gray to the right side of the grapes and leaf to create a shadow. Then added a very fine line along the right side of the grapes, leaf and under the branch.
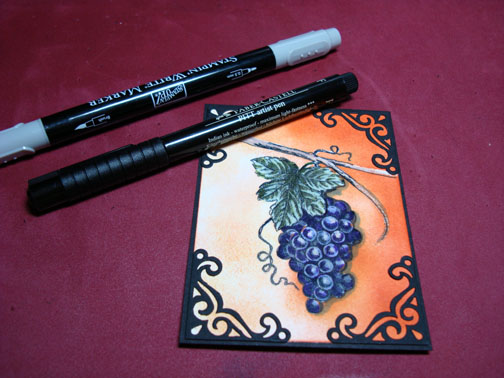
Added highlights to the grapes and leaf with a white gel pen. (Love white gel pens!) Now that makes those grapes pop!
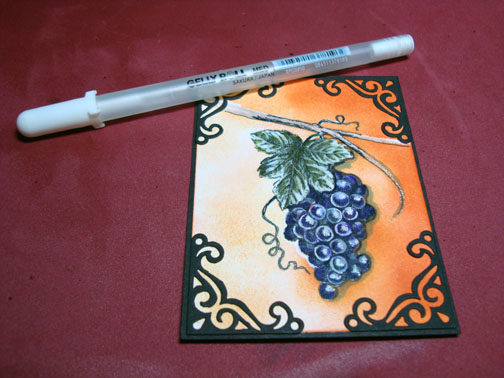
Sponge a bit of Really Rust ink on the left side of my two panels. Also dragged the card stock across the Really Rust ink pad at the left edge.

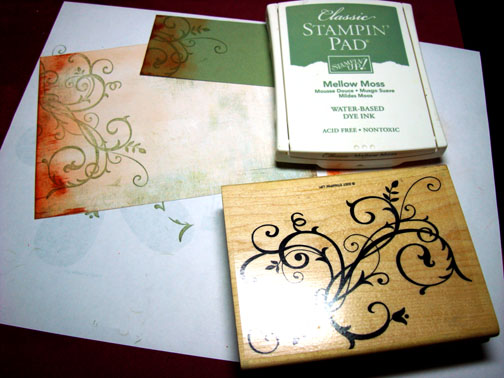
Stamped the flourish with Mellow Moss ink on the left side of the panels.
Assembled card and added two copper brads. Here it is finished measuring 5″ x 6.5″.
May your day be filled with wonderful highlights and sweet fruit!
Until my next post. . . . . . . . . .
Hugs,
Michelle
36 responses to “SC186 Grapes – Tutorial”