
Happy Fourth of July Everyone!
This morning I decided to make my Granddaughter’s Birthday card. She is a girlie, girl for sure. Loves, loves, loves pink! So what do you put on a Girlie Girl’s card, pink dresses, of course.
These images are from Rupa Shevde’s set “Retro Boutique” that can be purchased from Gina K. Design’s online store found here: https://www.ginakdesigns.com/
Let’s get started on the tutorial. 🙂
Supplies:
| Stamps: Rupa Shevde’s “Retro Boutique” from Gina K. Designs |
| Paper: Stampin’ Up Whisper White, Basic Black, Old Olive Cameo Coral |
| Ink: Stampin’ Up Basic Black, Old Olive & Always Artichoke, Palette Noir Black, Adirondack Lettuce |
| Accessories: Prismacolor Markers, White Gel Pen, Versamark marker, clear embossing powder, heat gun, Going Grey marker, Black marker, Sponge, Adhesive Rhinestones |

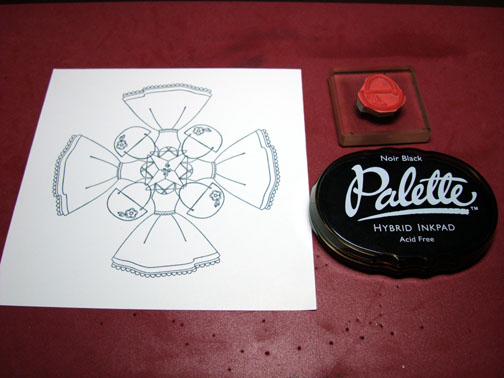
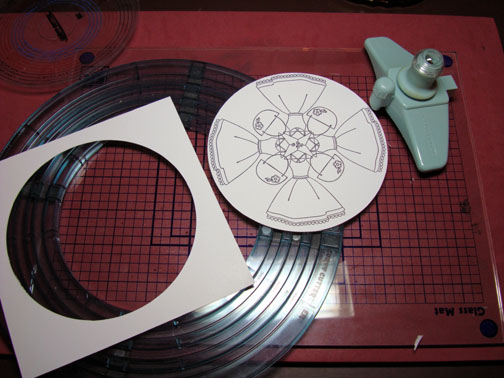
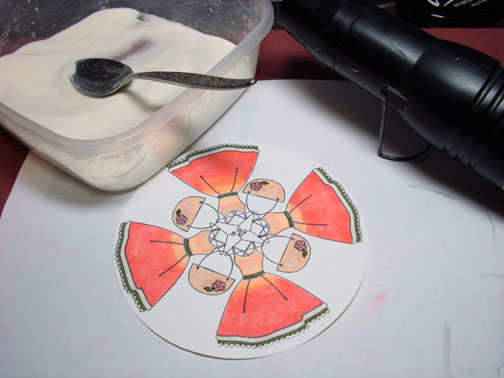
Stamped the dresses on a 6″x 6″ piece of Whisper White Card stock with Palette Noir Black ink.
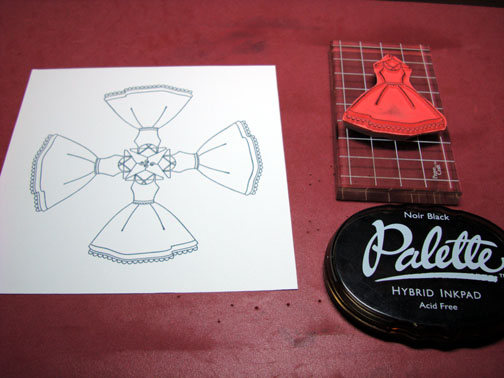
Stamped the four purses using Palette Noir Black ink.
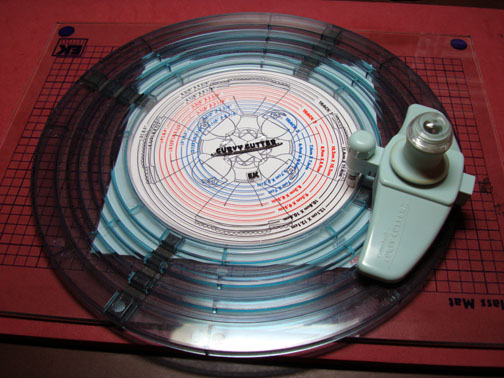
Used my Curvy Cutter and cut it out into a 5″ circle.
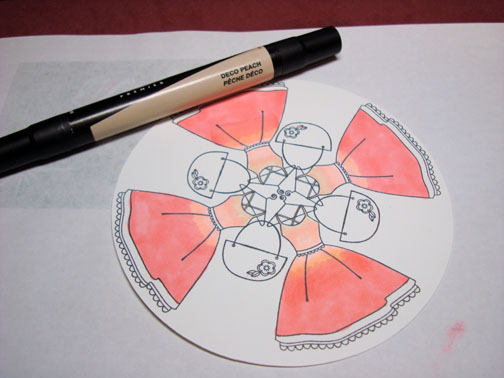
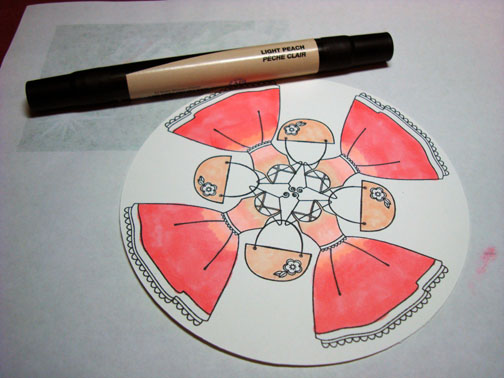
Colored the dresses on at a time using these 3 colors of Prismacolor Markers in this order, Light Peach, Deco Peach, Blush Pink. With solvent based markers, you want to work fast to try to avoid hard lines. If you do get a hard line, try going over the hard line with the lightest color to blend it some.
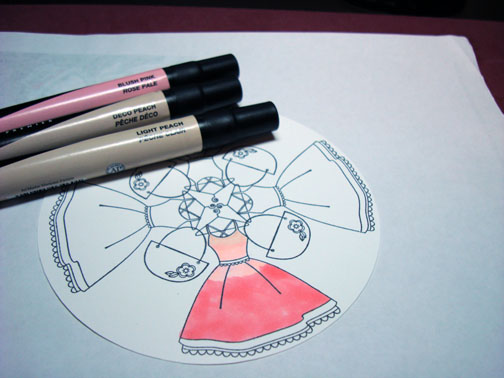
I blended my hard lines between the Blush Pink & Deco Peach by going over it with Deco Peach again.
Colored the purses with Light Peach.
Added Blush pink to the purse flowers.
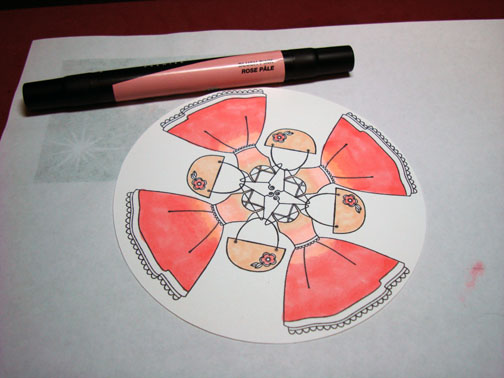
Colored the leaves on the purse with Light Olive Green.
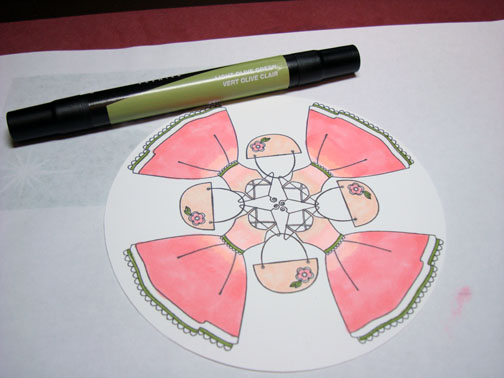
Colored all the images with Versamark marker and heat embossed the using clear embossing powder and a heat gun. I found it is easiest to work one image at a time, coloring with Versamark and then heat embossing before going to the next image.
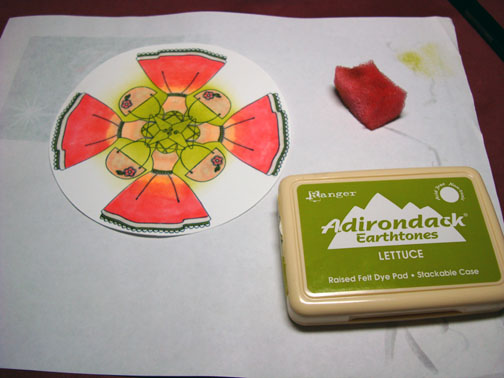
Now that your images are heat embossed they will resist ink.
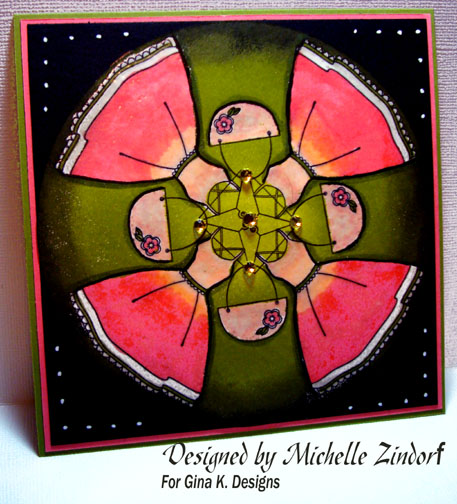
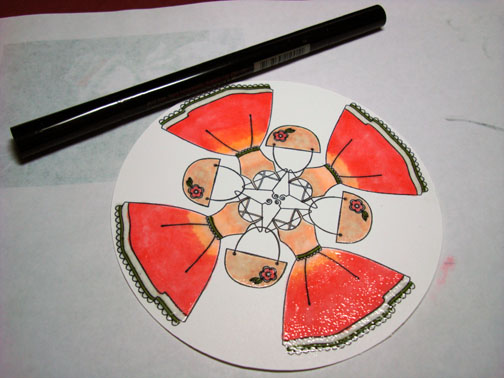
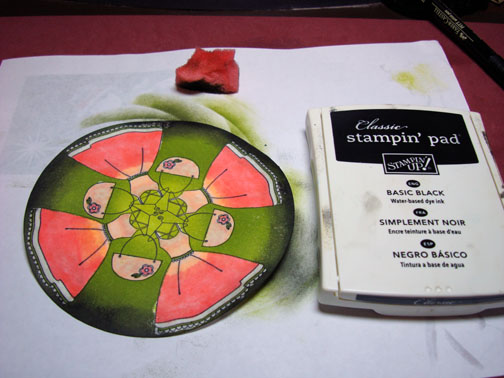
Sponged in a circular motion, Lettuce ink in the center of the card stock.
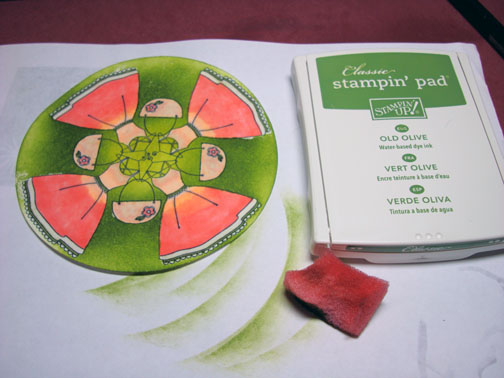
Sponged in a circular motion, Old Olive ink, not covering the Lettuce ink entirely.
Sponged in a circular motion, Always Artichoke ink at the edge of the card stock.
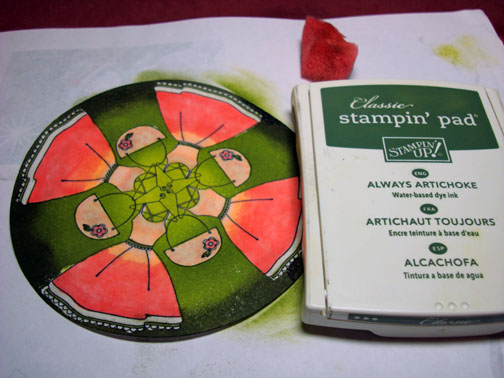
Wanted the edge to be very dark, so I sponged Black ink at the edge. Be careful when you are using black ink over embossed images, it will turn your light colors gray, yuck! If you do get it on the light colors, wipe it off immediately.
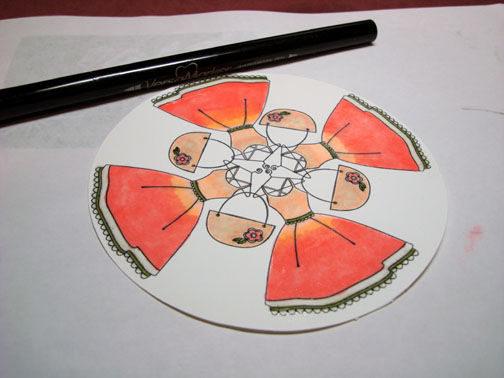
Now my image looks flat and I want to give it some life. Using the brush point of a Stampin’ Up Going Grey marker, I traced a thick line at both sides of the dresses and under the purses creating a shadow.
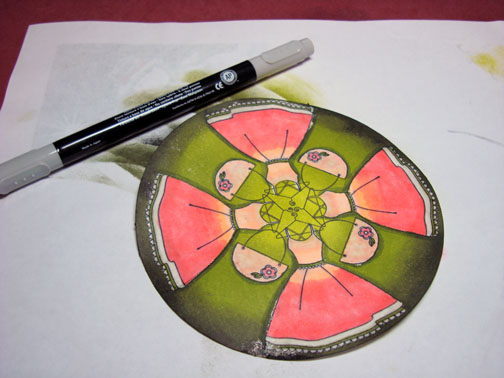
To bring the images forward more, I traced a line down the sides of the dresses and under the purses. Now that added some more life.

Can’t forget the bling, assembled the card and added some Brenda Walton Adhesive olive colored Rhinestones that I got from GinaKDesigns.com.

Put dotes in the corners of the card with a white gel pen.
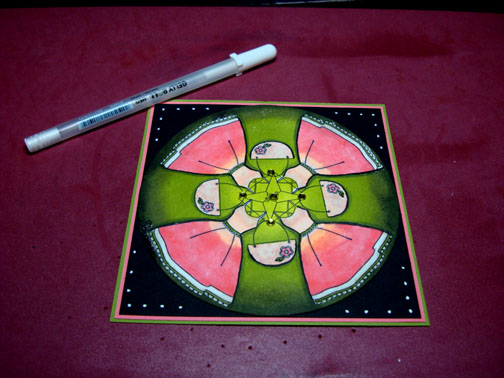
Here is the card all finished measuring 5.25″ x 5.25″
Hope you will try this emboss resist tutorial.
May your day be filled with fireworks and party dresses.
Until my next post. . . . . .
Michelle
22 responses to “Party Dresses – Tutorial”