
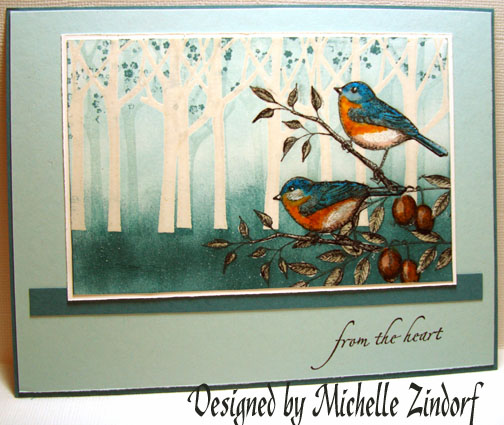
Hi Everyone! I’m apparently still in the mood for birds. Here is another one only using Stampin’ Up’s set Touch of Nature & Trees Three. I hope they bring the Trees Three set back in the next catty. It is definitely one of my favorites. Funny that it is because the first time I seen it, I really disliked the way the trees are chopped off at the top and waited until the last second to order it.
Yesterday for me was one of home improvements. My husband and I installed a split rail fence in front of our home. Let me say, both of us are pretty sore from all the physical labor. Now I remember why I don’t do Physical labor!
Enough ramblings from me. Let’s get started! 🙂
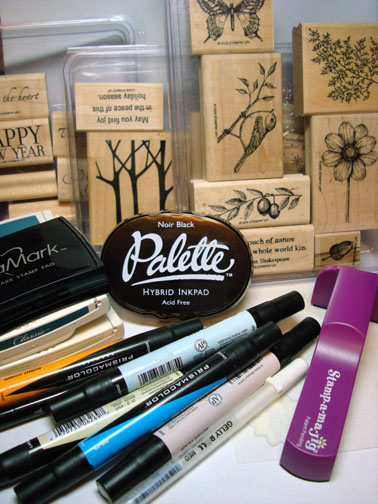
Supplies:
| Stamps: Stampin’ Up Touch of Nature, Trees Three & Holidays & Wishes |
| Paper: Stampin’ Up Whisper White, Soft Sky, Blue Bayou |
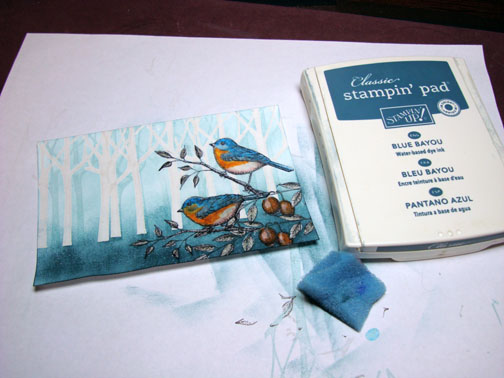
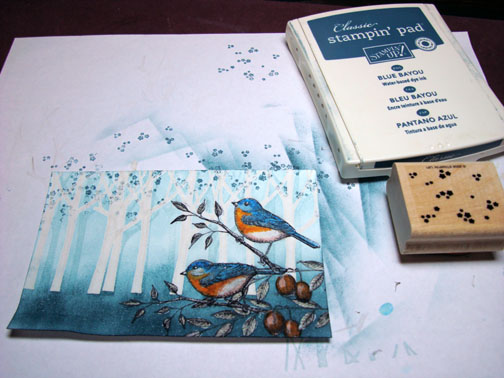
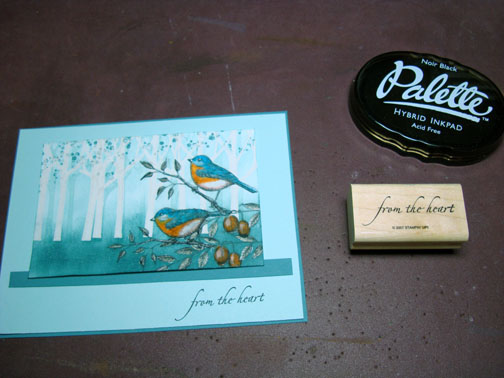
| Ink: Stampin’ Up Soft Sky & Blue Bayou, Palette Noir Black |
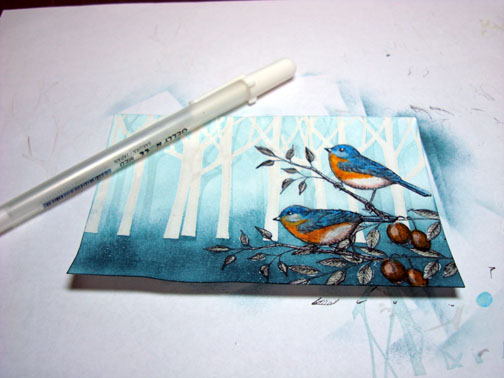
| Accessories: Versamark Pad & Marker, White Gel Pen, Clear embossing powder, heat gun, Stamp-a-ma-jig, Prismacolor markers – Wheat, Burnt Ochre, Light Cerulean Blue, True Blue & Light Walnut, Sponge. |
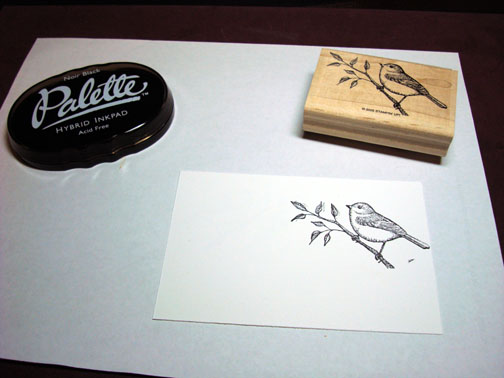
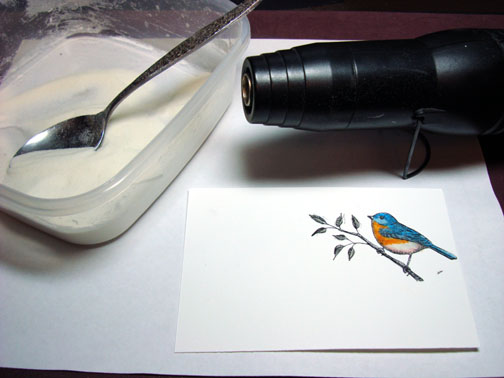
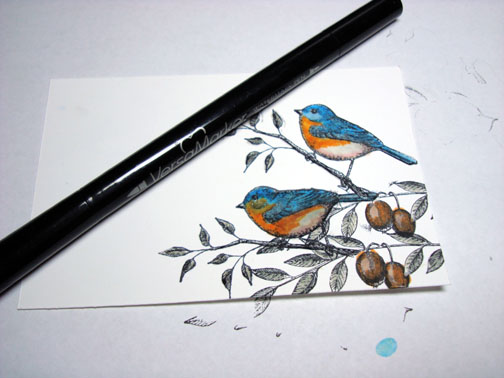
Stamped bird with Palette Noir Black ink on Whisper White card stock.
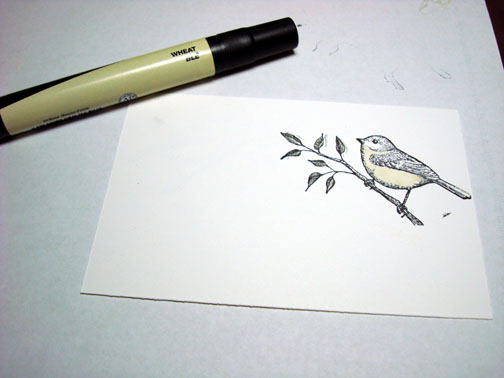
Colored his chest and the leaves with a Prismacolor Wheat marker.
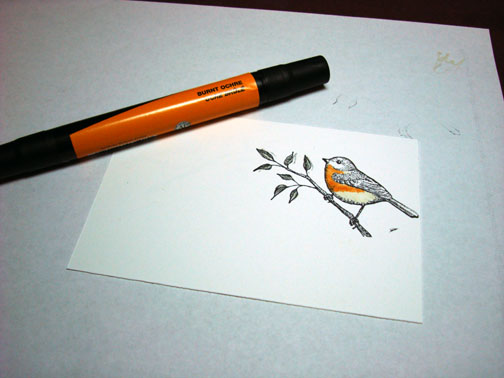
Colored his upper chest with a Prismacolor Burnt Ochre marker.
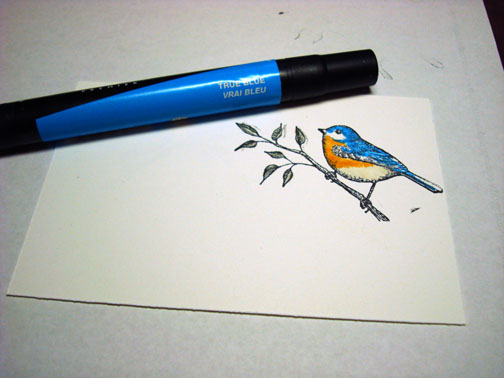
Colored his upper body with a Prismacolor True Blue Marker, leaving some white space.
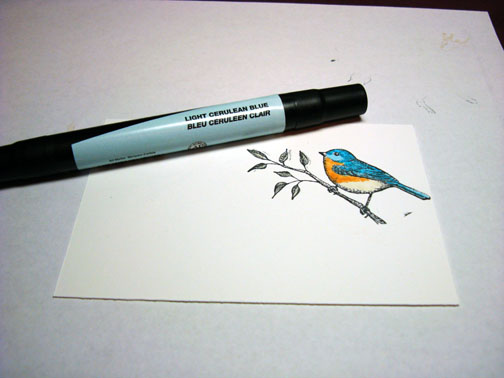
Colored in the white spaces of his upper body with a Prismacolor Light Cerulean Blue marker.
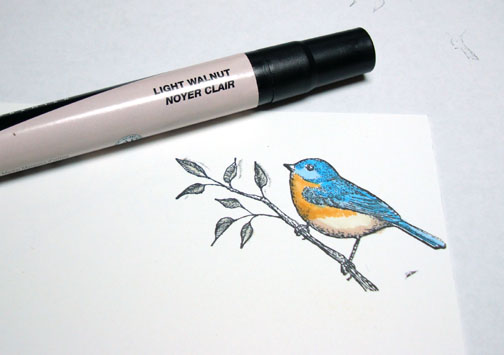
Colored a little Prismacolor Light Walnut marker on the underside of his belly.
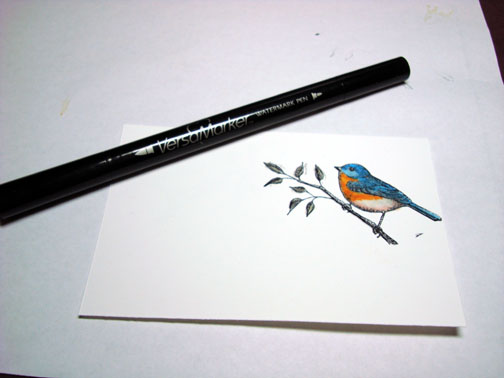
Colored over the bird and the leaves with a Versamark marker and heat embossed using clear embossing powder and a heat gun.
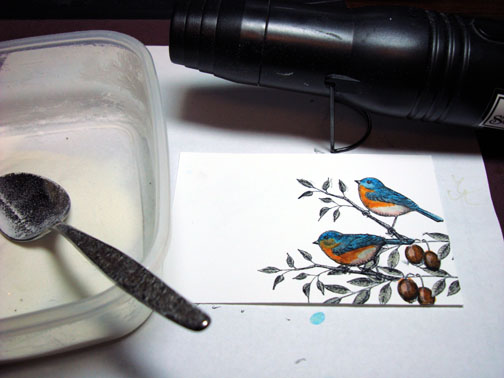
Stamped a second bird, using a Stamp-a-ma-jig for placement and Palette Noir Black ink. Colored, Over colored with a Versamark marker and heat embossed this bird the same way as the first bird.
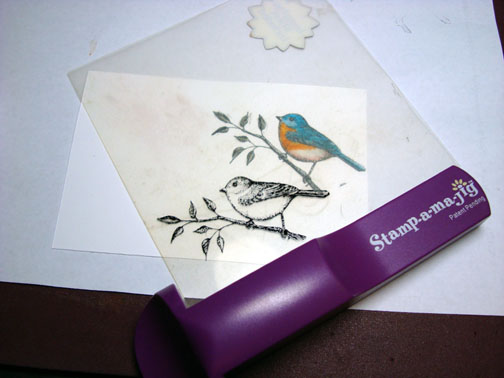

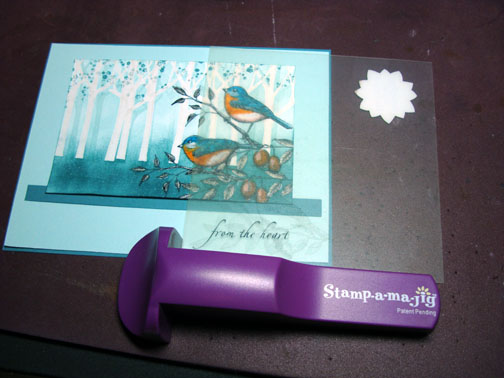
I wanted to disguise the fact that the branches just end under the birds so I stamped a couple of branches using Black ink and the Stamp-a-ma-jig for placement.
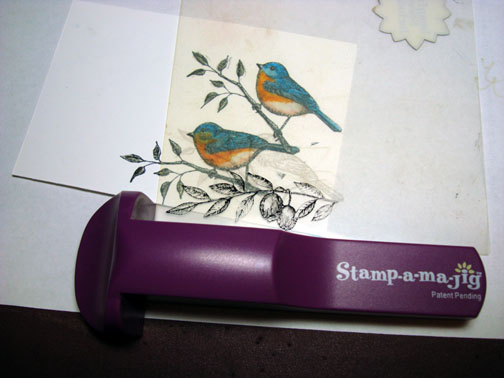
Colored the Berries with a Prismacolor Light Walnut marker and then went over the dark areas of the berries with a Prismacolor Burnt Ochre marker.

Colored the leaves with a Prismacolor Wheat marker.
Colored over the berries and leaves with a Versamark marker and heat embossed using clear embossing powder and a heat gun.
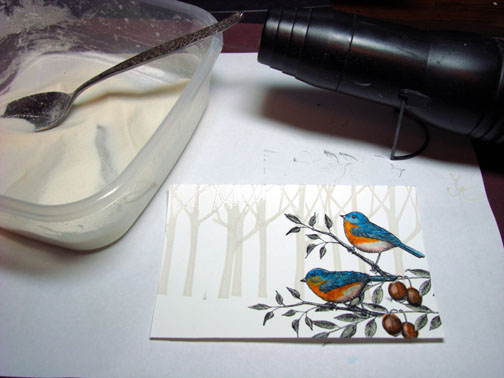
Stamped Trees by loading the stamp with a Versamark pad. Heat embossed trees using clear embossing powder and a heat gun.

Sponged Soft Sky ink on the background using a circular motion.
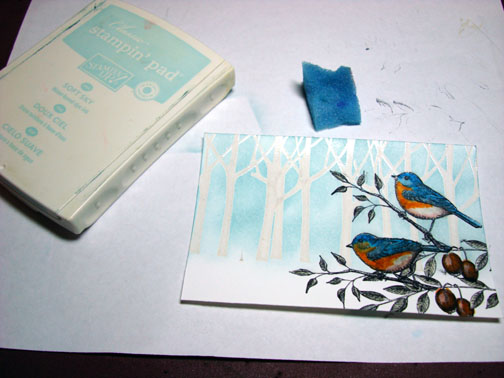
Over stamped embossed trees with tree stamp and Soft Sky ink.
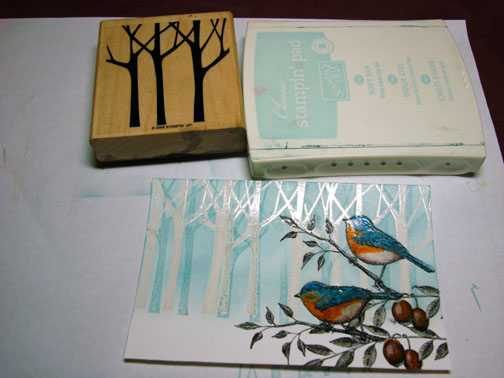
Wiped ink from embossed images with a rag.
Sponged Blue Bayou ink on using a swiping motion from bottom of card stock toward the top to create the appearance of some grasses.
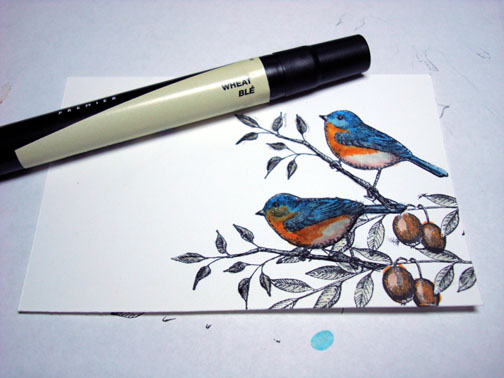
Used a white gel pen to make some highlights on the bird, such as a dot on their eyes, beak and colored a bit on their bellies.
Stamped the blossoms at the top of the trees with Blue Bayou ink.
As I was figuring out the layout I wanted to use, I stamped the sentiment using a Stamp-a-ma-jig for placement and Blue Bayou ink. I like to stamp my sentiment before I glue everything together just in case I mess up and stamp it crooked. Believe me this has happened more than once, lol.
Assembled card and here it is finished measuring 5″ x “6.5”.
This is tutorial number 60! Are you all still out there following along?
Hope your day is filled with singing birds and blossoming trees.
Until my next post. . . . . . .
Michelle
Pingback: alaska beauty salons