
When I first layed eyes on this Stampin’ Up Ocean Commotion stamp set I knew I had to get it. Usually the ocean life sets are cartoony and I just don’t do well working with them. But now that we have a set that is more realistic, hmmmm the possibilities are endless for me. I heat embossed every image on this project with clear embossing powder. This is not a quick project, lol. I was happy with the way it turned out, especially since this is my first time using this set. My trial run, so to speak.
Let’s get started.
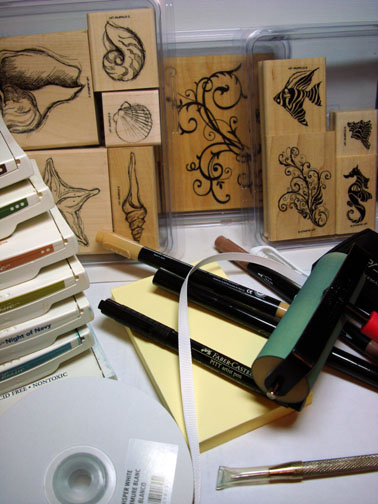
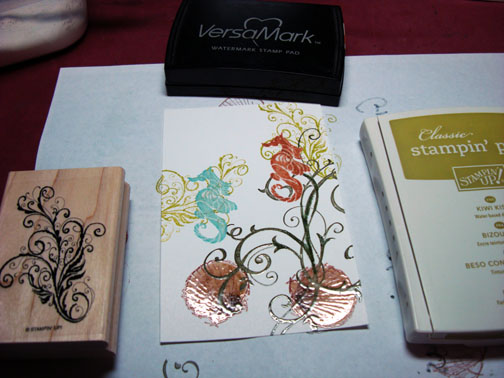
Supplies:
| Stamps: Stampin’ Up Ocean Commotion, Seaside & Baroque Motifs |
| Paper: Stampin’ Up Whisper White, Not Quite Navy & Kiwi Kiss |
| Ink: Stampin’ Up Not Quite Navy, Baja Breeze, Night of Navy, Kiwi Kiss, Creamy Caramel, Always Artichoke & Close to Cocoa |
| Accessories: Stampin’ Up markers, White Gel Pen, Faber Castell Black marker, Brayer, Versamark pad and Marker, Post it note, White Ribbon, Brads, Clear embossing powder and a Heat Gun, Piercing Tool |
Please don’t forget you can order your Stampin’ Up products from me 24-7 from this link: https://michellezindorf.stampinup.net or e-mail me at [email protected] if you are within the United States.
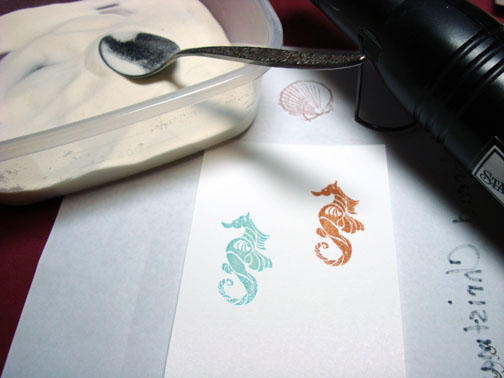
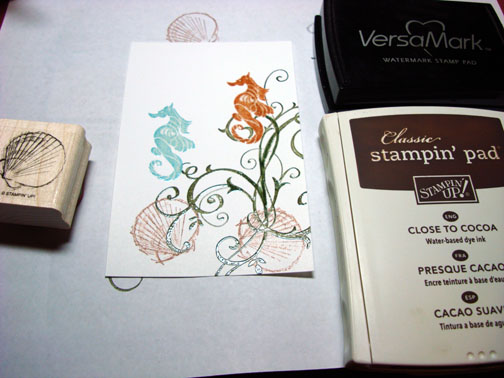
Stamp the seahorse twice by first loading my stamp with Versamark and then the ink before stamping. I stamped them in Creamy Caramel and Baja Breeze ink on a 3.25″ x 5″ piece of Whisper White Card stock.
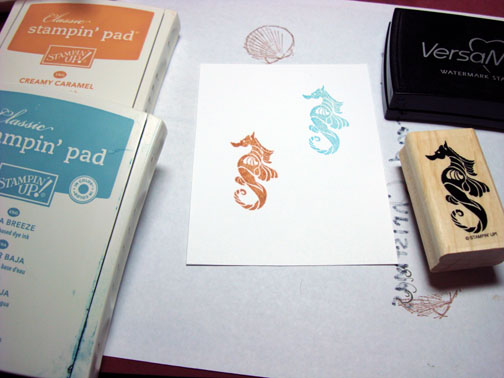
Heat embossed the seahorses with clear embossing powder and a heat gun.
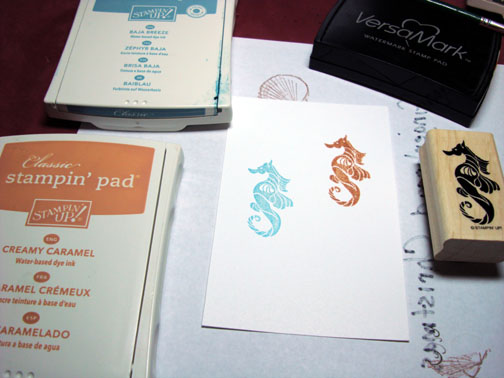
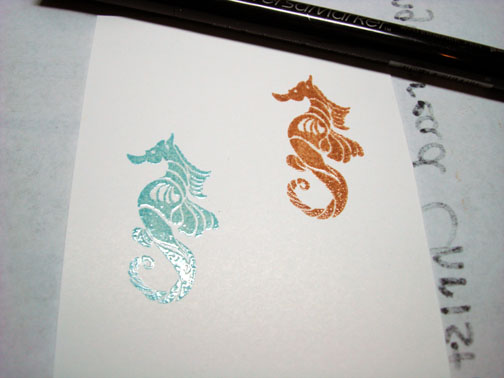
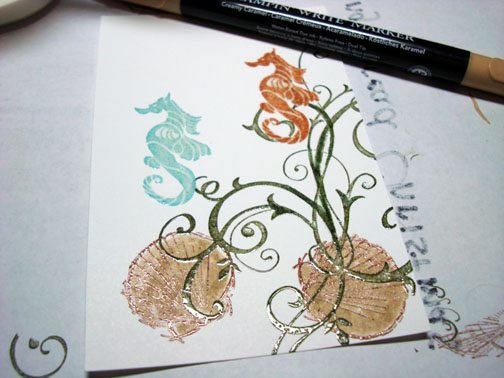
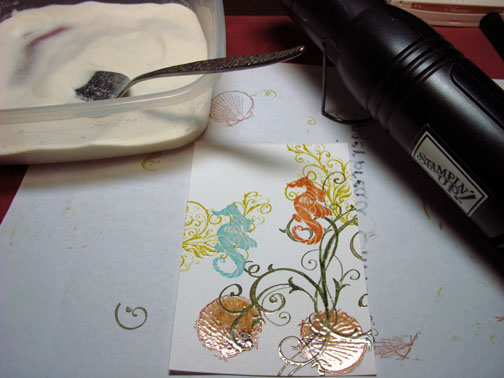
Colored over the seahorses using a Versamark marker and then heat embossed the images using clear embossing powder and a heat gun. I did this step so I would not lose the white details in the image when I later apply the ink for the background.
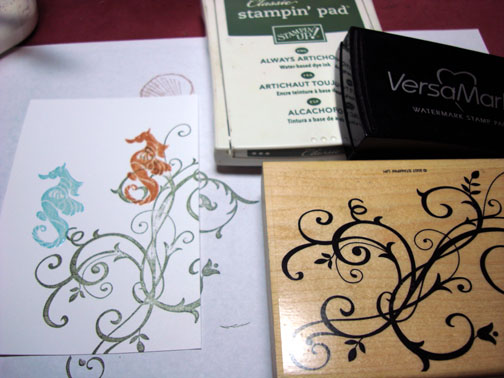
Stamped the Baroque Motifs Flourish stamp by first loading the stamp with Versamark and then loading the stamp with Always Artichoke before stamping it. I then heat embossed the image using clear embossing powder and a heat gun.
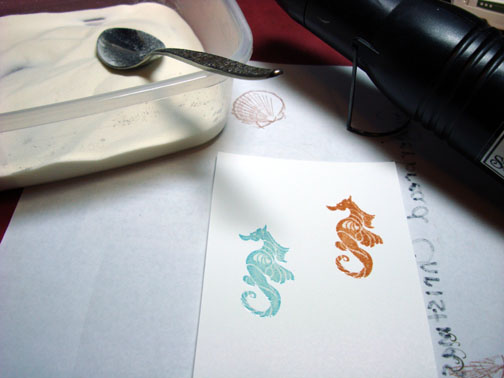
Stamped the shells by first loading the stamp with Versamark and then Close to Cocoa ink before stamping them. I heat embossed the images using clear embossing powder and a heat gun.
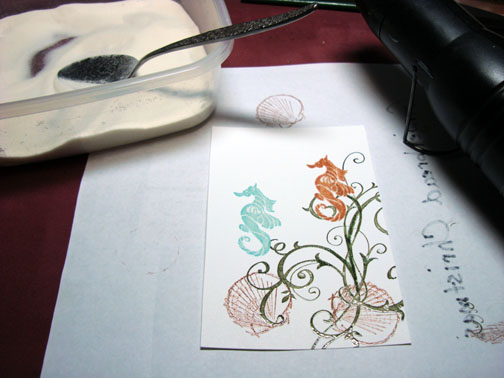
Colored the shells with a Creamy Caramel marker.
Added Close to Cocoa marker to the shells.

Colored over the shells with a Versamark marker and then heat embossed them using clear embossing powder and a heat gun.
Stamped the Ocean Commotion Flourish by first loading my stamp with Versamark and then Kiwi Kiss ink before stamping it. Heat embossed the images using clear embossing powder and a heat gun.
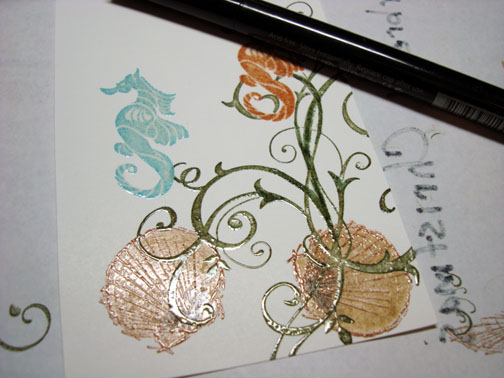
Note: When you over stamp an embossed image with another one you don’t have to worry about cleaning off of the first embossed image. The ink will resist and melt right off when you heat the second embossed image. Clear as mud, lol?
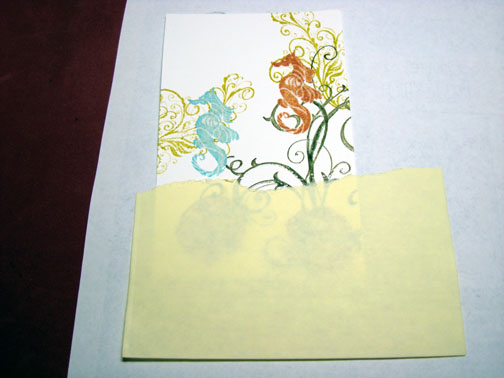
Tear a post it note through the stick part and use it as a mask for the ocean floor.
Brayer on Not Quite Navy ink.
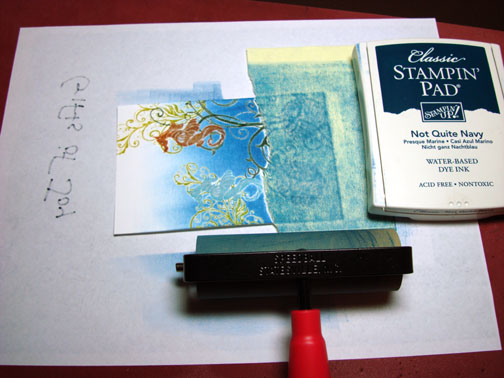
Flip the card stock around and Brayer Baja Breeze ink at the top of the card stock.
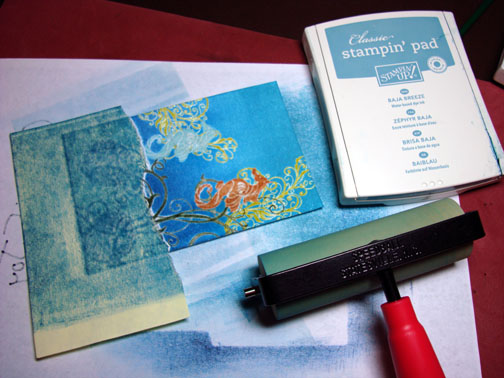
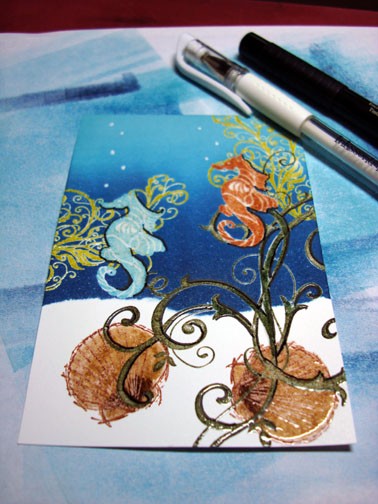
The Not Quite Navy was not dark enough and my Baja Breeze seahorse was not showing up well so I flip the card stock back around and Brayered Night of Navy ink over the Not Quite Navy ink. Now that is better. 🙂
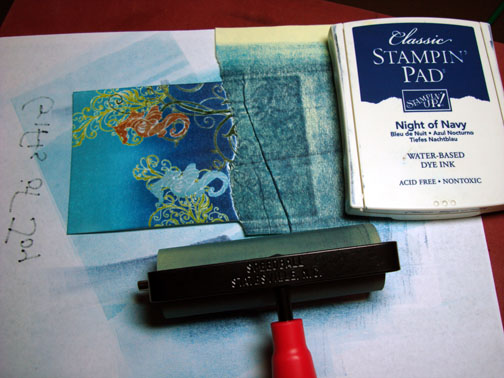
Wiped the brayered ink from the embossed images with a cotton rag.
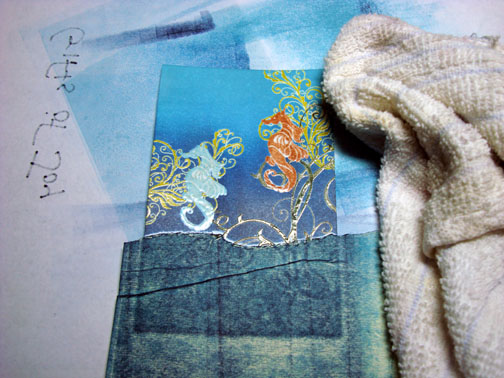
Removed the mask.
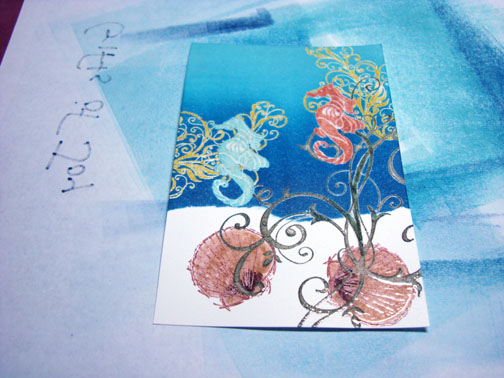
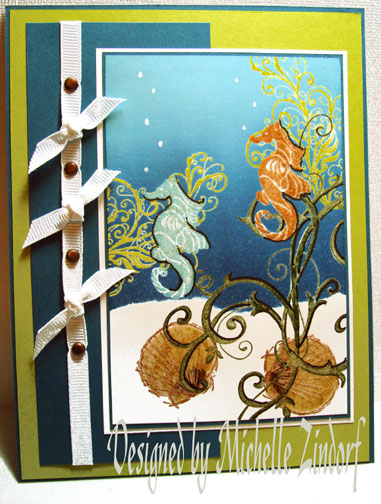
Outlined the Baroque Motifs flourish on the right side of the image using a Faber Castell black marker. I also outlined the Baja Breeze seahorse and the right side of the Creamy Carmel seahorse. Added White dots as bubbles with a White Gel Pen.
Assembled my card front. Used a Piercing tool to start my holes for my brads.
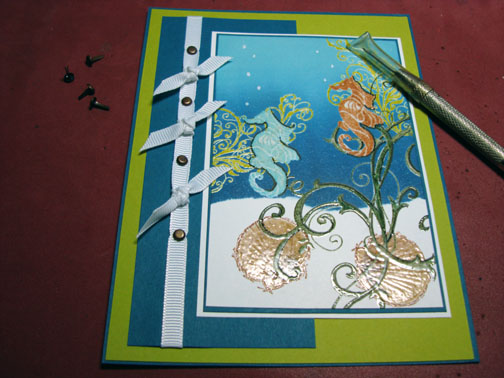
Here is the finished card measuring 5″ x 6.5″.
I hope this tutorial has inspired you to try a multi-layered emboss resist scene.
May your ocean today be smooth and peaceful.
Until my next post. . . . . . . . . .
Hugs,
Michelle
Get ready for Brayer Workshops! I am coming to:

Wheaton, Illinois
Fort Smith, Arkansas
Dayton, Ohio
Savannah, Georgia
Covington, Indiana
Buffalo, Minnesota
Webster, New York
Stoughton, Wisconsin
Here is a link to my workshop calendar where you can see all of my travel schedule and to get info on beginner and advanced Brayer workshops: https://zindorf.splitcoaststampers.com/workshop-calendar
Link to my Stampin’ Up website were you can order all of your must have Stampin’ Up products from me 24-7: https://michellezindorf.stampinup.net
Here is a link to all of my tutorials: https://zindorf.splitcoaststampers.com/tutorials-ive-written/
Frequently asked questions answers: https://zindorf.splitcoaststampers.com/frequently-asked-questions/
Pingback: Embossed Ocean Commotion - Tutorial #181 | Tutorials | Scrapbook Faves