
Hello everyone and happy Thursday! 🙂
Just a quick note before we get into the tutorial. I have scheduled a Brayer workshop on September 13th in Dayton, OH at Marco Paper to accommodate the people that wanted to get into the September 6th workshops but were unable to because they filled up so very fast. There are a few spots left. If you wish to sign up and have some fun while taking the mystery out of using your brayer, please contact Marco Paper at 937-433-7030 or 1-888-433-5239 or website at https://marcopaper.com/index.html
Today’s tutorial features stamps by Fire Cracker Designs by Pamela. Here is a link to their online store if you wish to check them out: https://www.safesecurestore.com/stores/merchant.mvc?Screen=SFNT&Store_Code=firecrackerdesignsbypamela
I started this card brayering from an angle and really like the light effects it created.
Let’s get started. 🙂
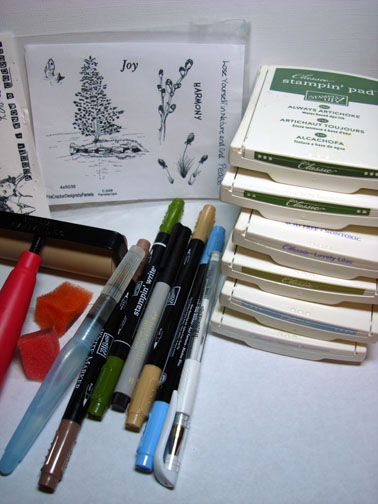
Supplies:
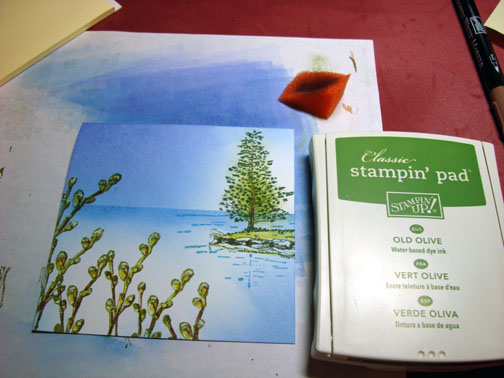
| Stamps: Fire Cracker Designs by Pamela |
| Paper: Stampin’ Up Whisper White, Bliss Blue & Old Olive |
| Ink: Stampin’ Up Always Artichoke, Old Olive, Kiwi Kiss, Lovely Lilac & Bashful Blue |
| Accessories: Stampin’ UP markers, Faber Castel Grey marker, White Gel Pen, Brayer, Aqua Painter, Sponges |
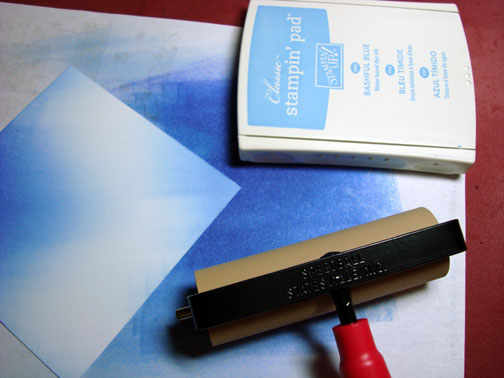
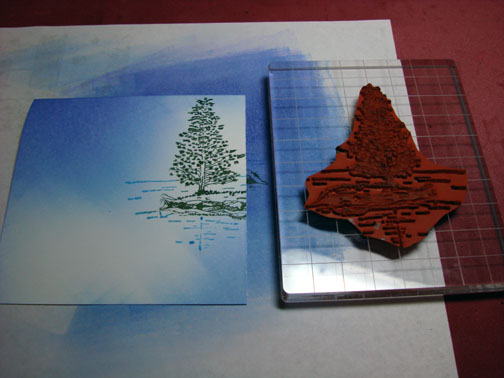
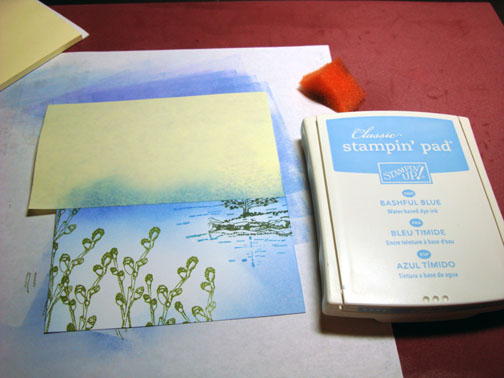
Brayered Bashful Blue ink at an angle, across one corner of a 4.5″ x 4.5″ piece of Whisper White card stock.

Flipped the card stock around and brayered a small amount of Bashful Blue ink on the opposite corner.
Colored the tree and ground below it with an Always Artichoke marker.
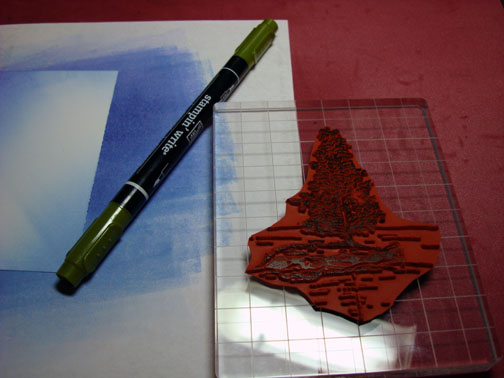
Colored the water lines on the stamp with a Bliss Blue marker.
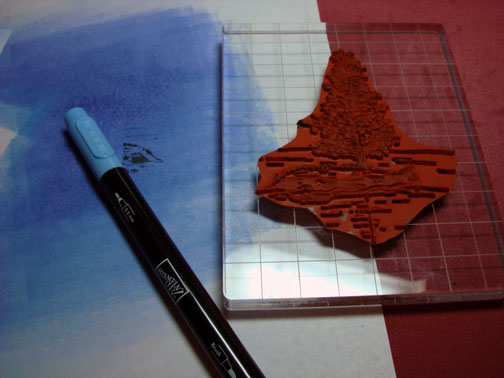
Huffed on the stamp to moisten the color and then stamped it on my panel.
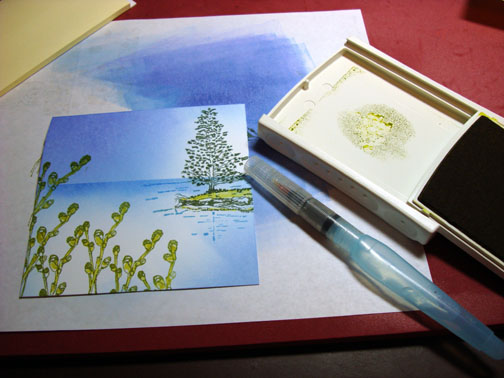
Stamped the Willow Branches with Old Olive ink.
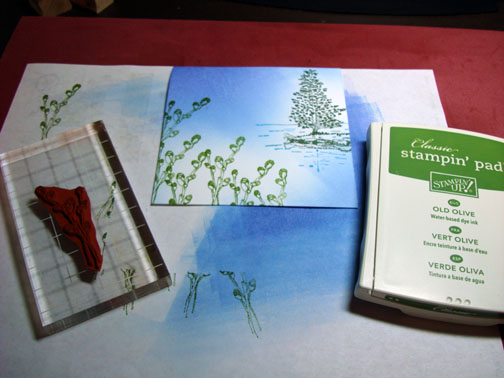
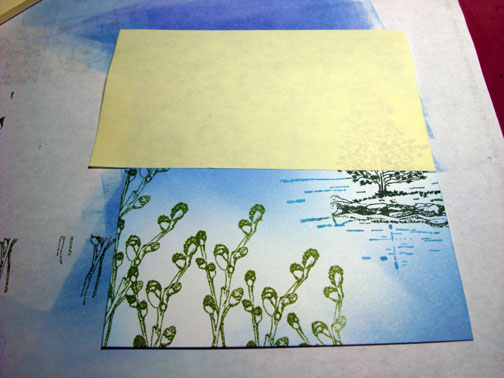
Masked off the sky area with a Post it Note.
Sponged in a circular motion Bashful Blue ink at the edge of the Post it Note Mask. This creates my Horizon Line.
Squeezed the Kiwi Kiss stamp pad while it was closed to create a pool of ink on the lid of the stamp pad. Used the pool of ink to water color with an Aqua Painter the Willow Branches and the ground under the tree.
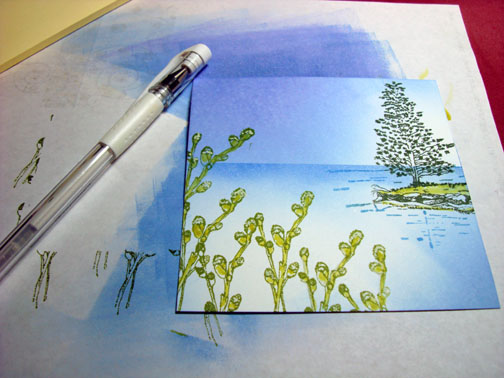
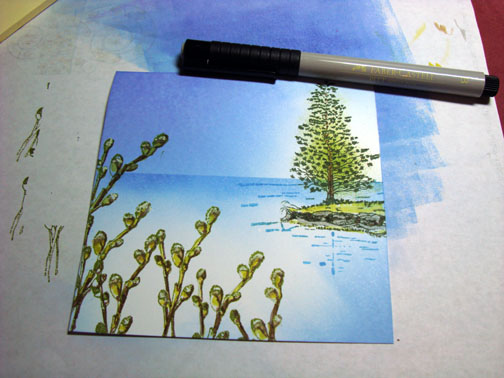
Added white Gel pen to the tops of the Willow Branches.
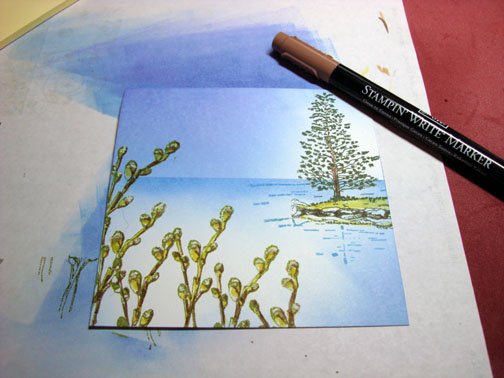
Used the fine point side of a Close to Cocoa marker and drew along the right sides of all of the Willow Branches to create some depth. Also colored in the tree trunk and around the rocks under the tree with the same marker.
Sponged Old Olive ink on the tree.
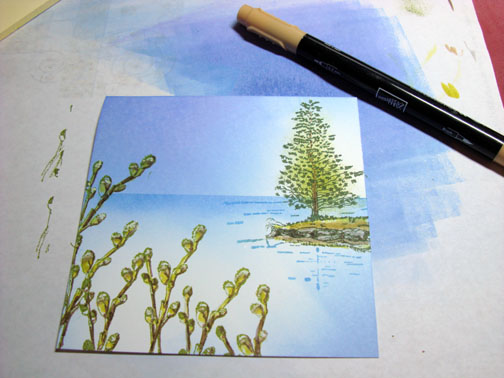
Used a gray marker to color in the rocks.
Colored the ground above the rocks with a Creamy Caramel marker, leaving some of the Kiwi Kiss ink showing at the top of the ground.
With a White gel pen, added some white dashes in the water area to create some highlights.
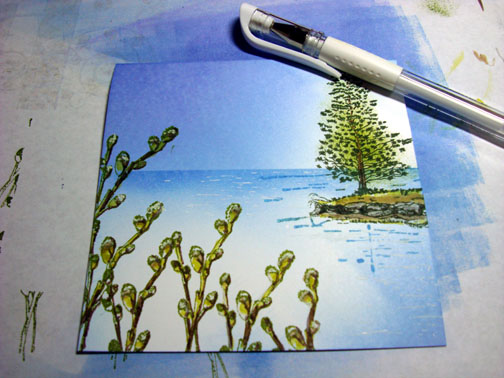
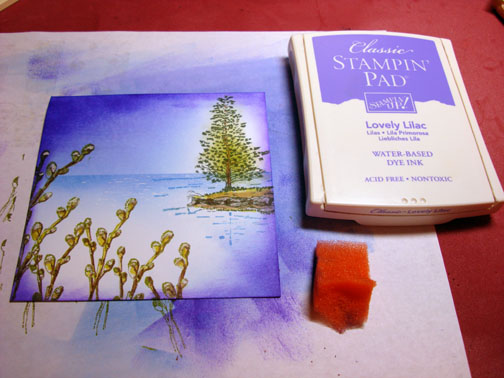
Sponged Lovely Lilac ink around the entire edge of the panel, being more heavy at the top left and bottom right corners.
Sponged Always Artichoke ink in the very center of the tree and sponged a bit under the tree in the water area to create a shadow for the tree.

Added more White Gel pen dashed so the water area over the Lovely Lilac ink.

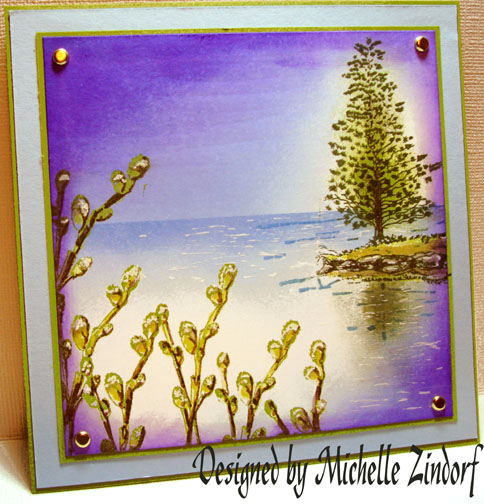
Assembled card and here it is completed measuring 5.25″ x 5.25″.
You can fine a complete listing of all my tutorials at this link:
https://zindorf.splitcoaststampers.com/tutorials-ive-written/
I hope you have been inspired to try using your brayer at a different angle to see what fun light effects you will achieve.
May your day be filled with the peaceful sounds of nature.
Until my next post. . . . . . . . . . . . .
Hugs,
Michelle
36 responses to “Willow Lake – Tutorial #110”