
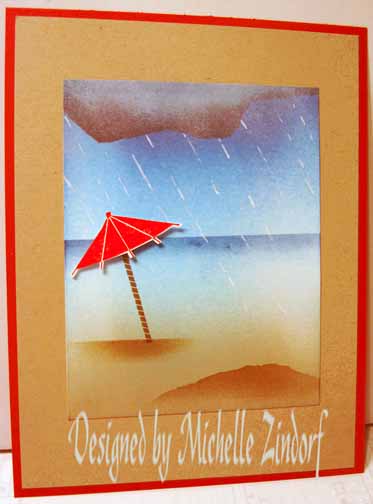
How about a little stormy scene today. I think I am doing the rain dance today so I don’t have to go out and water my gardens in this heat, lol. Think rain, think rain, think rain.. . . . . . . . . . . . . .
Let’s get started. . . .
Supplies:
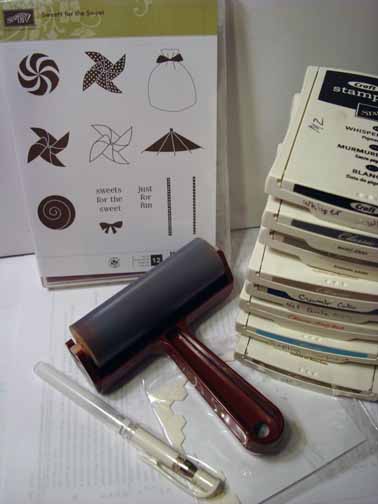
| Stamps: Stampin’ Up! Sweets for the Sweet |
| Paper: Stampin’ Up! Whisper White, Crumb Cake and Real Red |
| Ink: Stampin’ Up! Real Red, Tempting Turquoise, Soft Suede, Whisper White, Basic Gray, Sahara Sand, Crumb Cake, Not Quite Navy |
| Accessories: Stampin’ Up! Sponges, Brayer, White Gel Pen, Paper Snips, Stampin’ Dimensionals |
| Techniques: Brayering, Masking |
Get your copy of the new 2011-2012 Stampin’ Up! Idea Book & Catalog by sending $9.95 to me at P.O. box 116, West Alexandria, Ohio 45381 or via paypal to [email protected], shipping is free. Want a free copy of the new Summer Mini Catalog ? E-mail your mailing address to [email protected] and I will get one in the mail to you. ![]() Are you getting inspiration from this blog? One way you can help support it is to order your Stampin’ Up products through me. Click HERE to place an order. Want to become a Stampin’ Up Demonstrator , receive a 20% discount on product and earn instant income on orders? Consider being part of my Stampin’ Up Team and start your own business or become a Hobby Demo just for the discount. Click HERE for more information.
Are you getting inspiration from this blog? One way you can help support it is to order your Stampin’ Up products through me. Click HERE to place an order. Want to become a Stampin’ Up Demonstrator , receive a 20% discount on product and earn instant income on orders? Consider being part of my Stampin’ Up Team and start your own business or become a Hobby Demo just for the discount. Click HERE for more information.
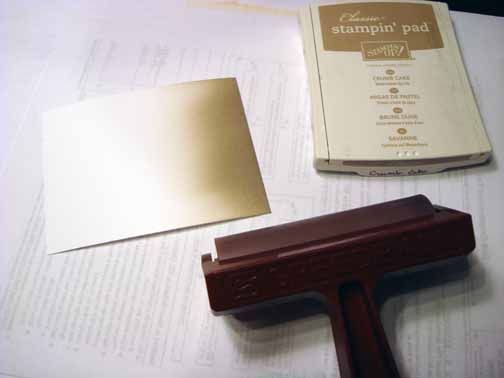
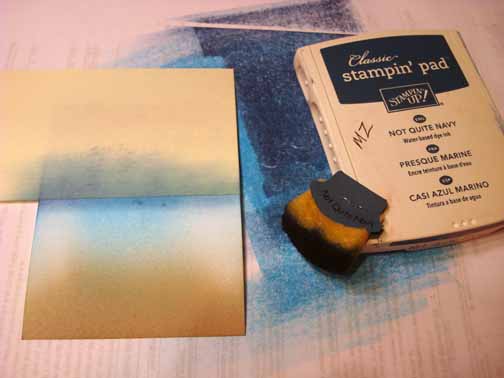
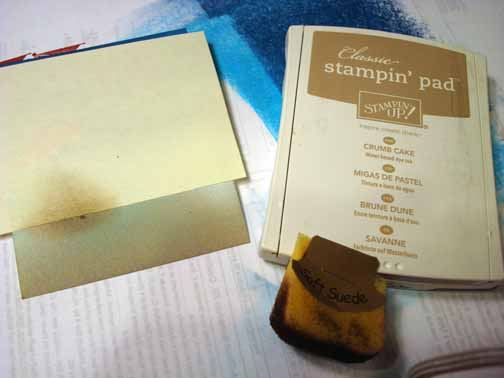
Brayered Crumb Cake ink at the bottom of a 3.5″ x 4.5″ piece of Whisper White card stock.
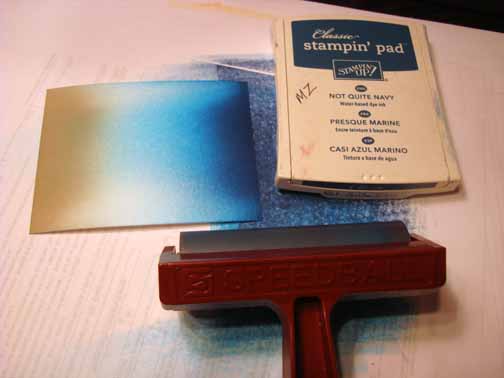
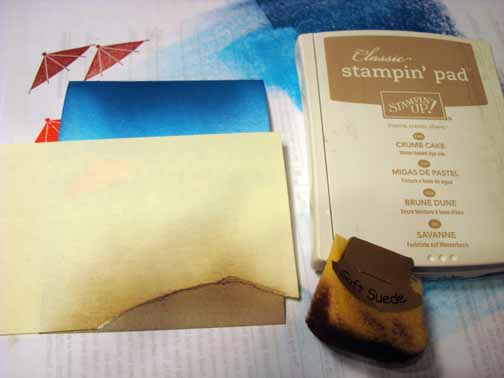
Brayered Tempting Turquoise ink at the top of the card stock.

Brayered Not Quite Navy at the top of the card stock, not covering the Tempting Turquoise ink entirely.
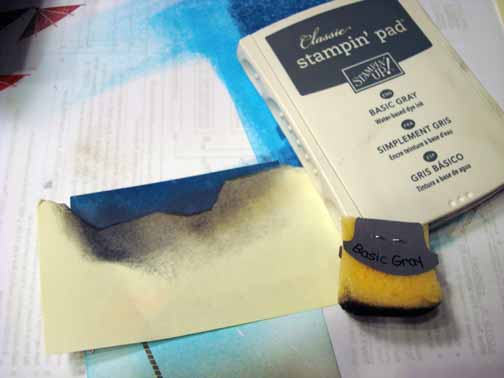
Masked the sky area with a post it note and sponged Not Quite Navy ink at the post it note edge.
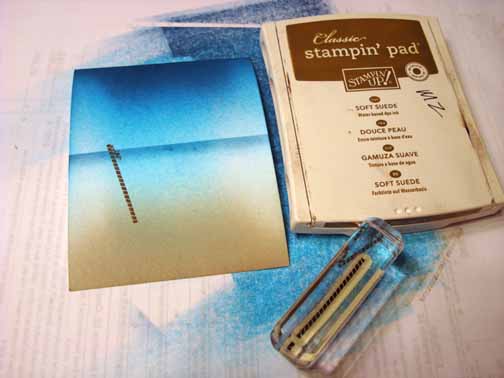
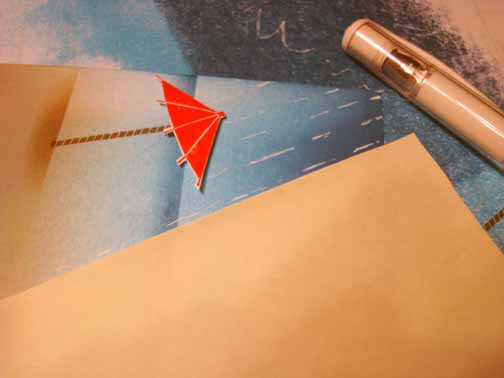
Stamped the pole using Soft Suede ink.
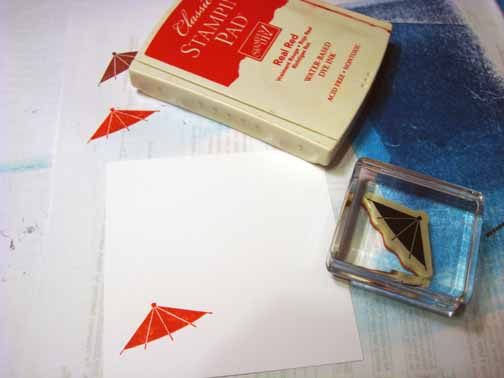
Stamped the umbrella top on a scrap piece of Whisper White card stock using Real Red ink.
Cut out the image and adhered it to the main image panel using Stampin’ Dimensionals.
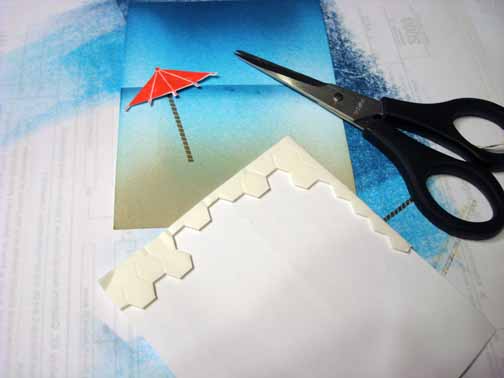
Mask over the umbrella with a post it note and sponge Crumb Cake ink below the umbrella to create a shadow.
Ripped a hill in the post it note and sponged Crumb Cake ink in the hill shape to create a mound of sand.
Using the edge of a post it note at a slant on the card stock, made white gel pen dashes along the post it note edge to create the rain. Kept moving the post it note until I had rain all the way across the card stock.
Ripped a cloud shape in a post it note and put it at the top of the card stock. Sponged Sahara Sand ink in the cloud shape.

Added Basic Black ink right at the post it note edge.
Removed the mask and sponged Whisper White ink over the cloud to tone it down a bit.
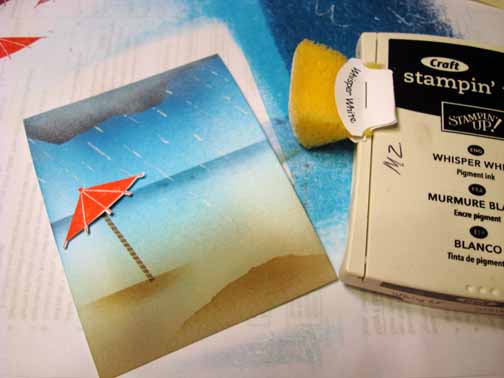
Added a crumb Cake panel and Real Red panel. Wanted to keep this lay out clean and simple. Here is the finished card that measures 5″ x 6.5″.
May your day be more cheerful than this. 🙂
Until my next post. . . . . .
Huge Hugs from me and my Grand Daughter, Hailie Jade. We are off to play now.
Michelle
 Get ready for Brayer Workshops! I am coming to the following locations, click the location name for more information.
Jefferson, Louisiana (New Orleans Area)
Here is a link to my workshop calendar where you can see all of my travel schedule and to get info on beginner and advanced Brayer workshops: https://zindorf.splitcoaststampers.com/workshop-calendar
Don’t see a workshop in your State? Interested in hosting the workshops in your area in 2012? Click HERE to get hostess information.
Link to my Stampin’ Up website where you can order all of your must have Stampin’ Up products from me 24-7: https://michellezindorf.stampinup.net
9 responses to “Rainy Day at the Beach – Tutorial #440”