
Whew, folks I am running behind today. Ever feel like you are running, running, running and not getting any where? Well that is me right now. Really, I’m getting some things done but nothing that has been on my to do list. It’s probably just the Monday morning feeling.
I did completely take the weekend off. It was the first weekend I’ve had home in over six weeks so it was well deserved. Patting myself on the back for that one, pat, pat, pat. 🙂 Russ kept looking at me with that puzzled look on this face, like “don’t you have some where to go.” LOL Really, we spent every moment together. Now back to the real world. Time for a stamping tutorial. . . . .
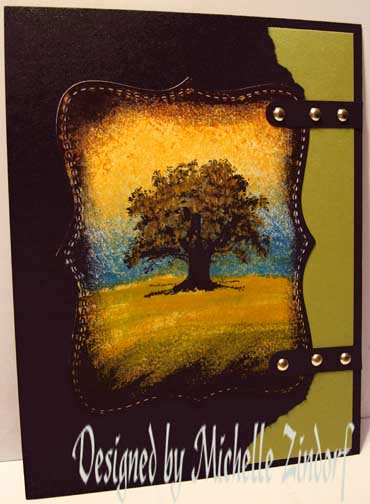
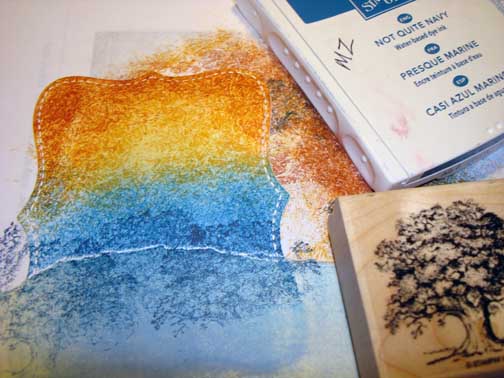
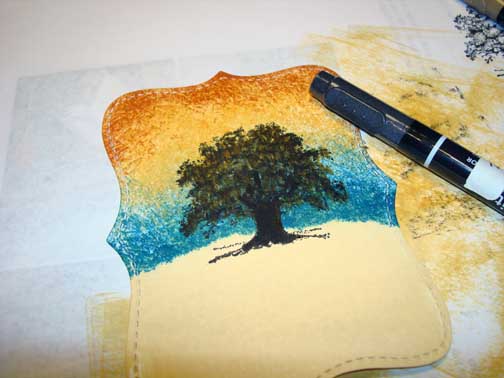
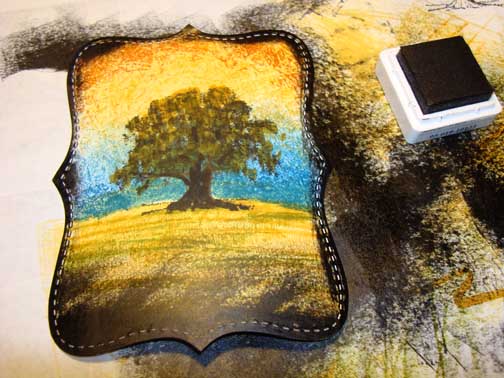
Today’s card was designed for my Stampin’ Up Down Line Team Technique Swap. I needed to use the crumpled Plastic Wrap technique. I used it in this scene and it gave the background a painted look. I maybe on to something here. Note, my photo above does not show the texture that the project has in real life. You can see it better in the photos of the last few steps of this project.
Let’s get started. . . . .
Supplies:
| Stamps: Stampin’ Up! Lovely As a Tree |
| Paper: Stampin’ Up! Basic Black, Whisper White and Old Olive |
| Ink: Stampin’ Up! Basic Black, Old Olive, More Mustard, So Saffron, Not Quite Navy, Cajun Craze and Bashful Blue |
| Accessories: Stampin’ Up! Markers – More Mustard, Soft Suede and Basic Black, Brayer, Silver Brads, Post it Note, Word Window Punch |
| Techniques: Crumpled Plastic Wrap, Brayer, Direct to Paper |
The Stampin’ Up USA Idea book and Catalog is here. For your copy, please send a check for $9.95 to Michelle Zindorf, P.O. Box 116, West Alexandria, OH 45381 or send it via paypal to [email protected] USA only. My current customers will receive a new Occasions Mini Catalog automatically from me. Not a current customer and want a free copy of the new Occasions Mini Catalog ? E-mail your mailing address to [email protected] and I will get one in the mail to you. ![]() Are you getting inspiration from this blog? One way you can help support it is to order your Stampin’ Up products through me. Click HERE to place an order. Want to become a Stampin’ Up Demonstrator , receive a 20% discount on product and earn instant income on orders? Consider being part of my Stampin’ Up Team and start your own business or become a Hobby Demo just for the discount. Click HERE for more information.
Are you getting inspiration from this blog? One way you can help support it is to order your Stampin’ Up products through me. Click HERE to place an order. Want to become a Stampin’ Up Demonstrator , receive a 20% discount on product and earn instant income on orders? Consider being part of my Stampin’ Up Team and start your own business or become a Hobby Demo just for the discount. Click HERE for more information.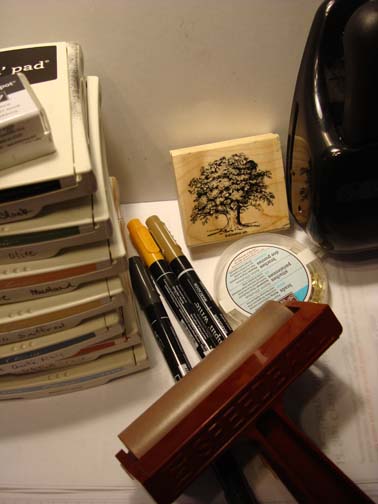
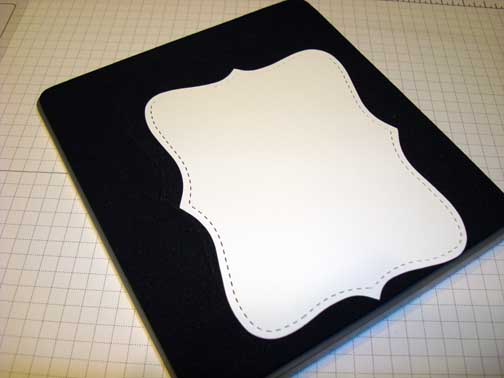
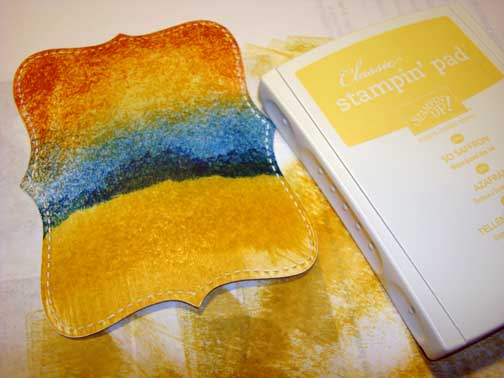
Die cut a Top Note Die out of Whisper White card stock using the Big Shot Machine.
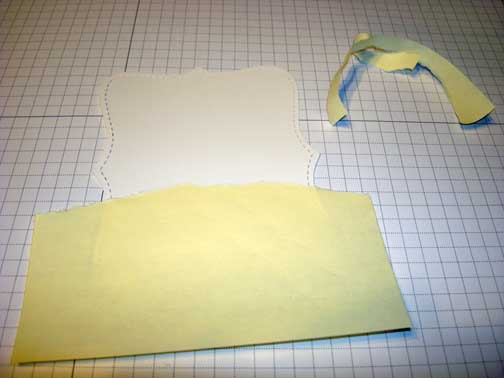
Ripped the edge off of a post it note and used it as a mask for the ground.
Brayered Bashful Blue ink at the bottom of the sky area.

Brayered So Saffron ink at the top of the sky area.
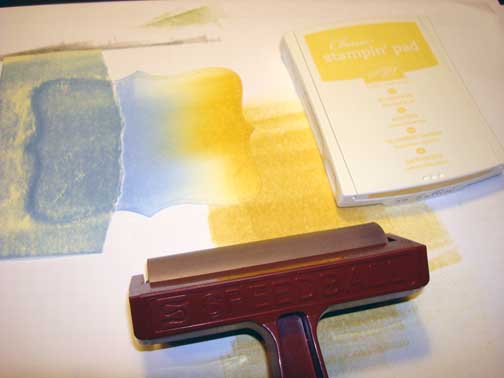
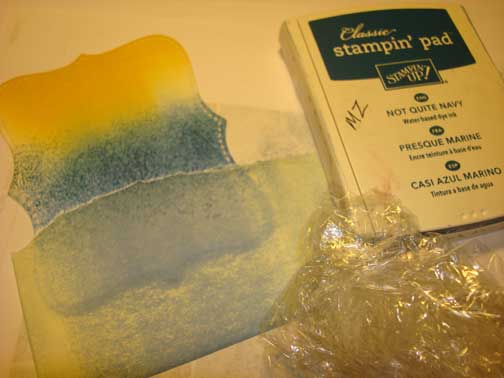
Crumpled a piece of plastic wrap and dabbed it into Not Quite Navy ink and then on the Bashful Blue area of the card stock.
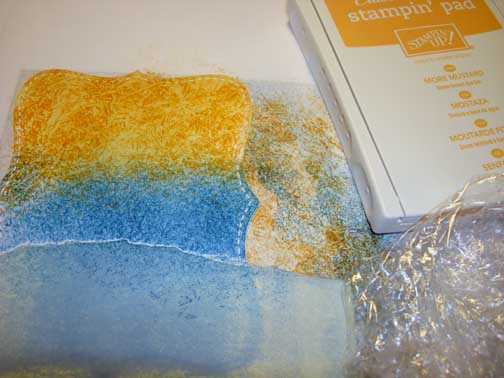
Used another piece of plastic wrap and crumpled it and pounced on More Mustard ink the in the So Saffron area of the sky area.
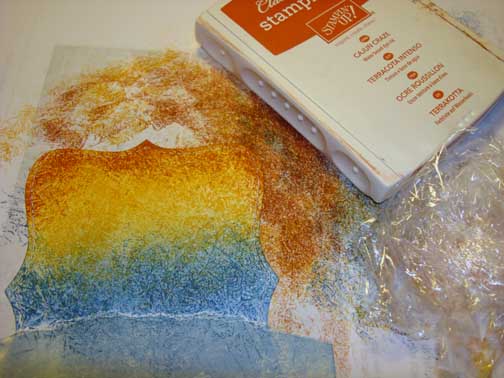
Using the same plastic Wrap, pounced on Cajun Craze ink at the top of the card stock.
Stamped the top of the tree using Not Quite Navy ink right above the post it note to create bushes.
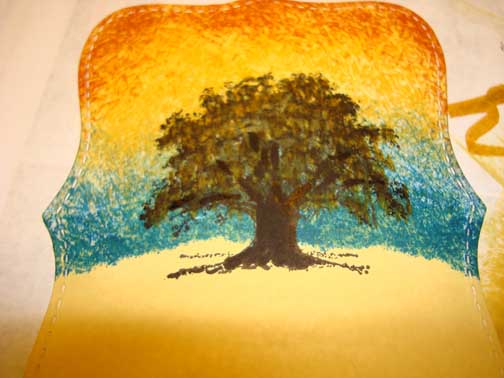
Removed the post it note mask. Using the edge of the So Saffron ink pad, smeared ink from the top of the bushed to the bottom of the card stock. I put it over the bushes to create another color of free. Blue and yellow make green. 🙂
Stamped the tree using Basic Black ink.
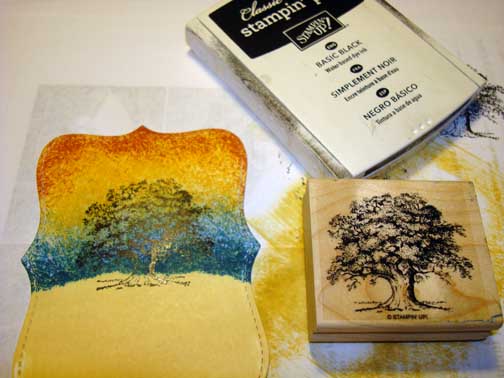
Using the side of the brush end of a Soft Suede marker, dabbed the color in the leafy area of the tree, not coloring it completely.
Using the side of the brush end of a More Mustard marker, dabbed it on the leafy area of the tree fillng it in the rest of the way.

Colored in the tree trunk with a Basic Black marker. Added a bit to the leafy area to create the look of limbs.
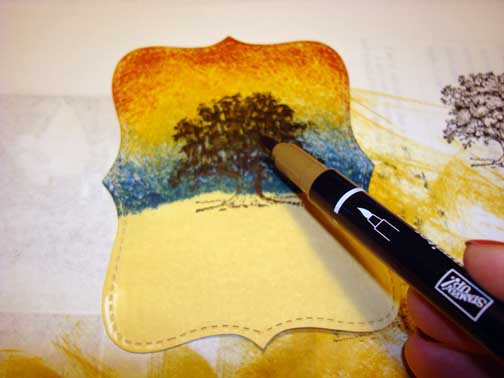
Used the edge of a More Mustard ink pad and short strokes to create the look of grasses.
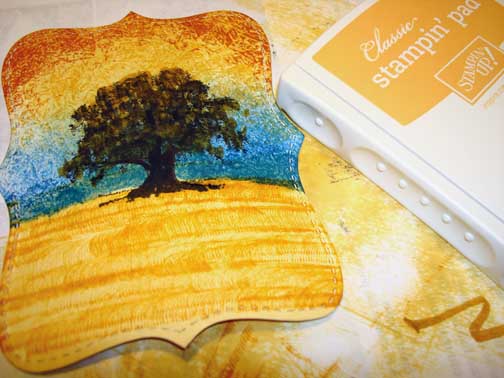
Used the edge of an Old Olive ink pad and short strokes first to create short grasses in the field. Then added longer grasses with the edge of the ink pad in the foreground using longer strokes.
Using the edge of a Basic Black ink spot, added longer grasses in the foreground.

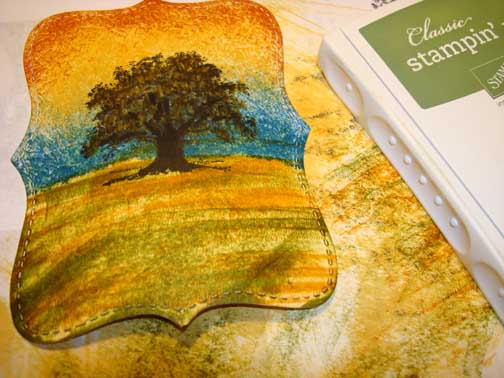
Smeared basic Black ink around the ege of the card stock. This really made the stitches in the die cut stand out.
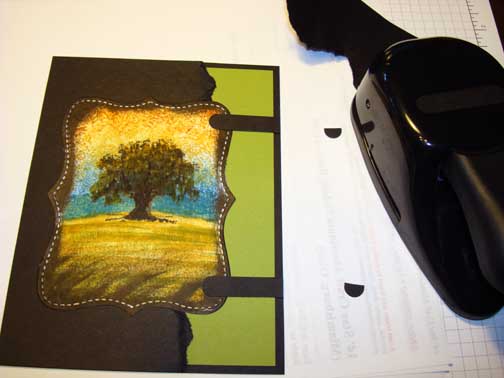
Added a 5″ x 6.5″ Basic Black panel, a 4.75″ 6.25″ Old Olive Panel, another 5″ x 6.5″ Basic Black panel with the right side of the card stock torn off, 2 Word Window punches with the right ends cut off.
 .
.
Added 6 silver brads and here is the finish card measuring 5″ x 6.5″.
May your Monday be very productive.
Until my next post. . . . . . .
Hugs,
Michelle
 Get ready for Brayer Workshops! I am coming to the following locations, click the location name for more information.
Owings Mills, Maryland (Baltimore Area)
Staley , North Carolina (South of Greensboro)
Jefferson, Louisiana (New Orleans Area)
Here is a link to my workshop calendar where you can see all of my travel schedule and to get info on beginner and advanced Brayer workshops: https://zindorf.splitcoaststampers.com/workshop-calendar
Don’t see a workshop in your State? Interested in hosting the workshops in your area in 2012? Click HERE to get hostess information.
Link to my Stampin’ Up website where you can order all of your must have Stampin’ Up products from me 24-7: https://michellezindorf.stampinup.net
Link to my Scentsy website where you can order the best smelling, safest wickless candles from me 24-7: https://zindorf.scentsy.us/Home
Pingback: Plastic Wrap Textured Sky – Tutorial #414
Pingback: A Look at the Leading Brands of Bb Guns Daisy Produces