
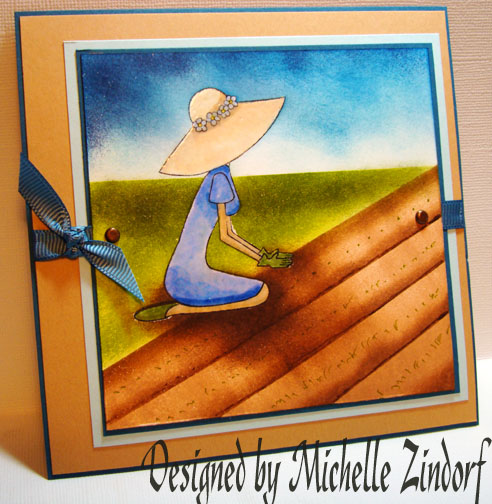
Happy Weekend everyone! I finally got a moment to use this new set, Can You Dig It from My Favorite Things. Cute, cute images! Of course I’m a sucker for gardening images this time of year.
Before we get started on this tutorial, I need to apologize in advance for the first 10 photos being blurry. I was taking photos in the garden and forgot to change my camera setting back again, daaahhh, lol. Stick with the tutorial, I do finally get my act together!
Let’s get started. . . . . . . 🙂
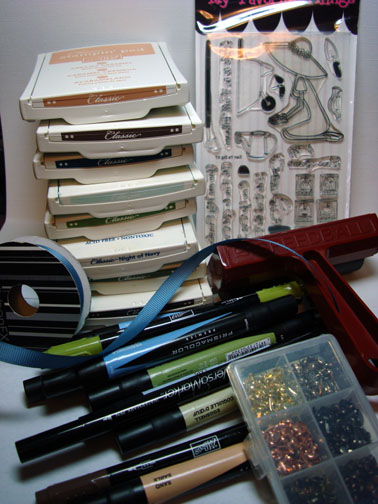
Supplies:
| Stamps: MFT Can you Dig It |
| Paper: Stampin’ Up Whisper White, Soft Sky, Not Quite Navy & Creamy Caramel |
| Ink: Stampin’ Up Creamy Caramel, Chocolate Chip, Close to Cocoa, Not Quite Navy, Soft Sky, Old Olive, Night of Navy & Always Artichoke, Palette Noir Black |
| Accessories: Brayer, Clear Embossing Powder, Heat Gun, Prismacolor markers, Brads, Ribbon, Stampin’ Up Markers, Sponges |
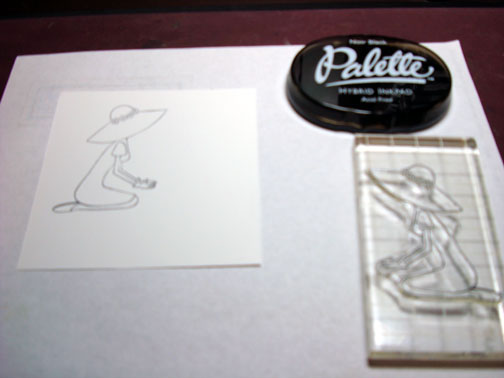
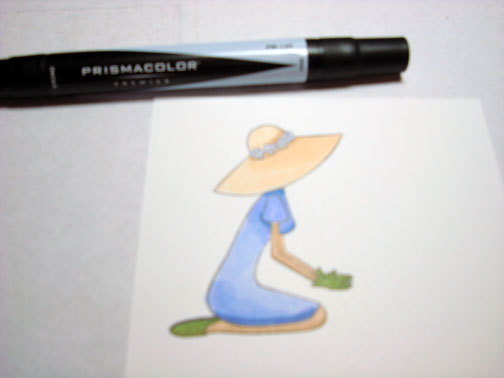
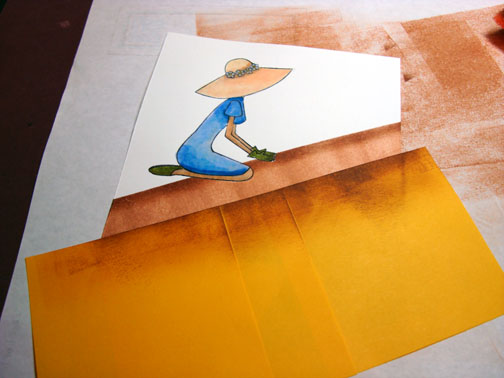
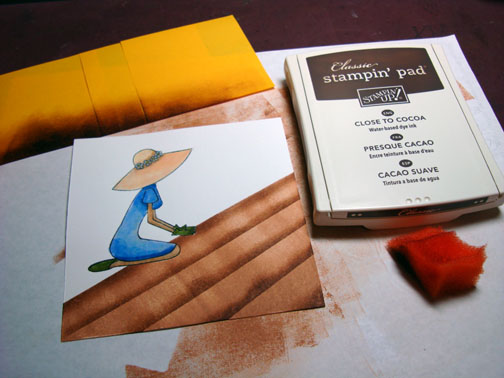
Stamped image with Palette Noir Black ink on Whisper White card stock.
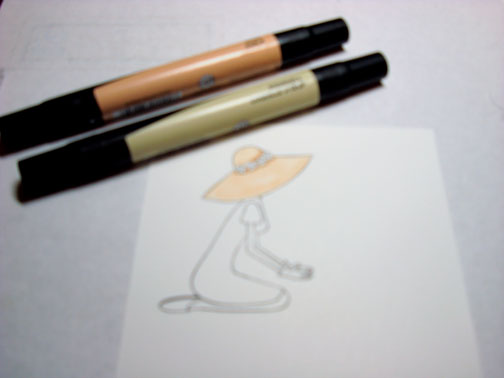
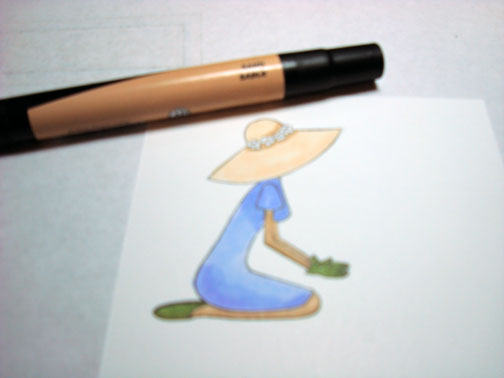
Colored her hat with Prismacolor Eggshell marker and then put in a shadow around the flower band with a Prismacolor Sand marker.
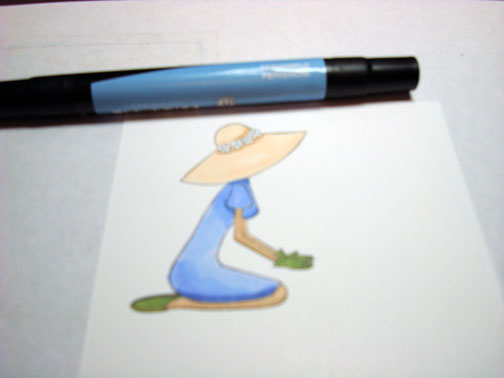
Colored her dress with a Prismacolor Cloud Blue marker.
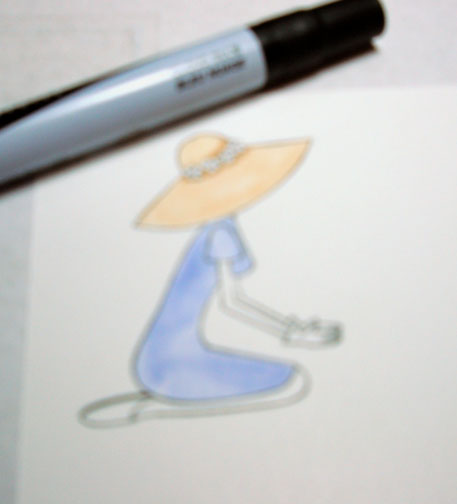
Put shadows on her dress at the top and on the bottom with a Prismacolor Blue Slate marker.
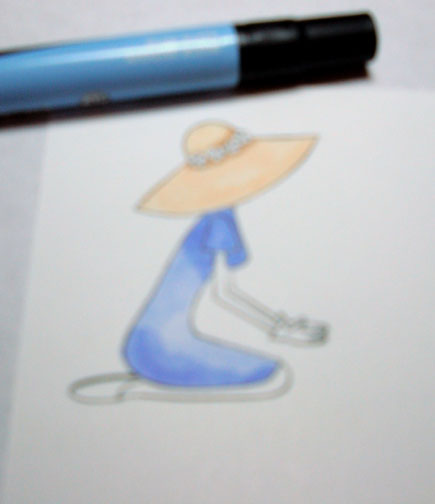
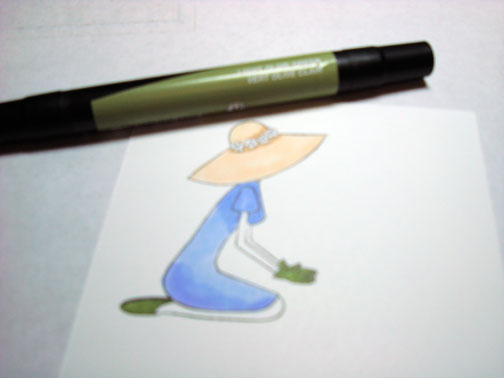
Colored her gloves and shoes with a Prismacolor Light Olive Green marker.
Gave her a tan on her arms and legs with a Prismacolor Sand marker. Don’t we wish tanning was that easy, lol.
Put a little darker shadow at the top of her dress and the very bottom with a Prismacolor Periwinkle marker.
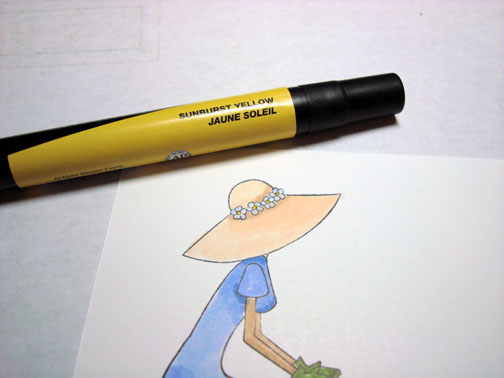
Colored the flowers on her hat with a Prismacolor Blue Slate marker and filled in the centers with a Prismacolor Sunburst Yellow marker.
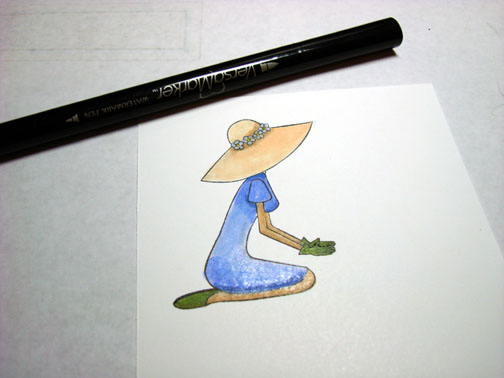
Ok, now we are back in focus, lol.
Colored over the image with a Versamark maker and heat embossed it with clear embossing powder and a heat gun.

Masked upper portion of the card stock at an angle with Post it notes.
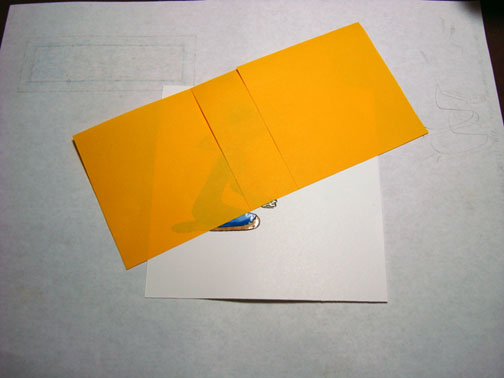
Brayered Creamy Caramel ink on un-masked area.
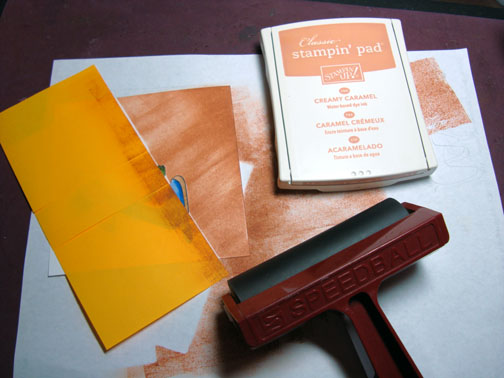
Sponged Close to Cocoa ink right were the post it note meets the card stock.
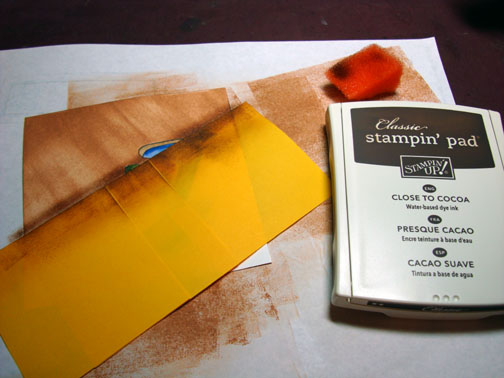
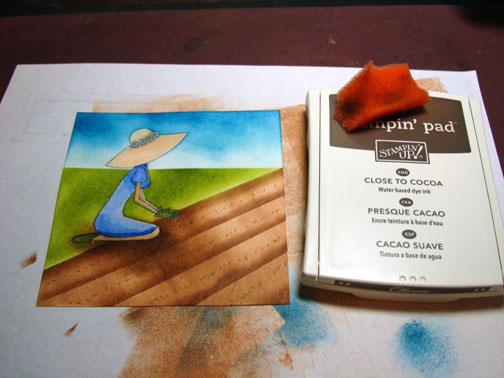
Flipped the post it notes around and lowered them a little. Sponged Close to Cocoa ink right where the post it note meets the card stock.
Continued to move the post it notes down and sponge more Close to Cocoa ink making more lines.
Removed post it notes.
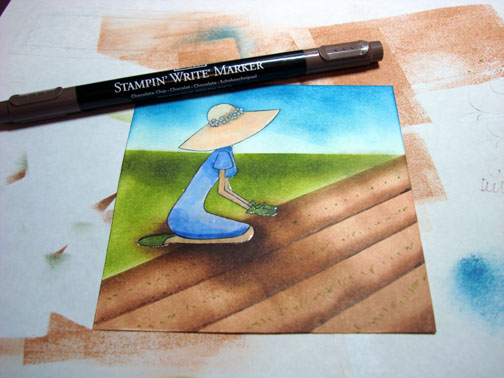
Made dots in the rows of dirt with an Old Olive Maker.
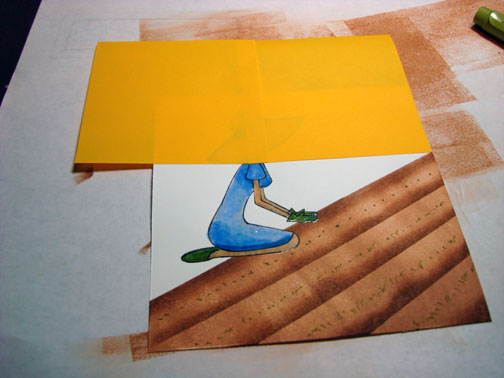
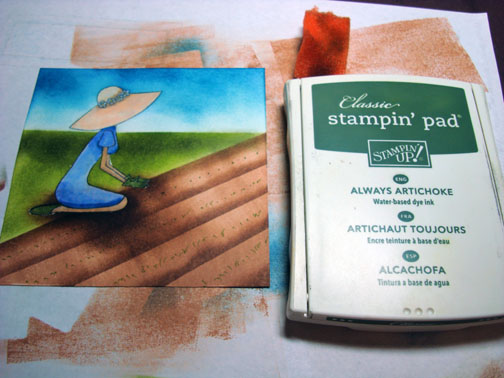
Masked Sky area with new post it notes.
Note: I use new post it notes instead of re-using ones that have ink on them when I change colors, because the ink on the post it notes with mix with the new ink, yuck.
Sponged Old Olive ink on the grass area, using a circular motion.
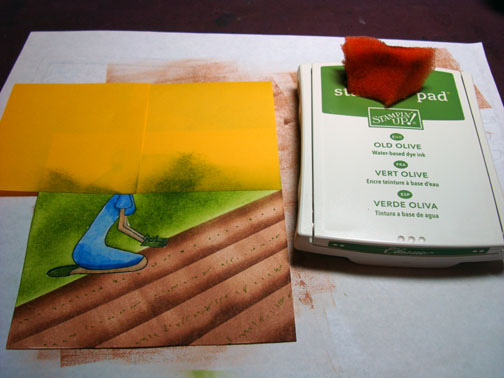
Removed post it note and sponged on Soft Sky ink in a circular motion in the sky area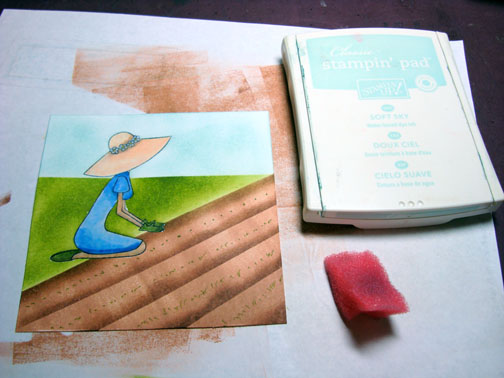 .
.
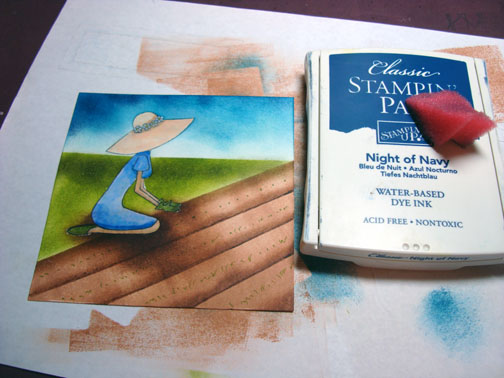
Sponged Not Quite Navy ink at the top of the card stock not covering the Soft Sky ink entirely.

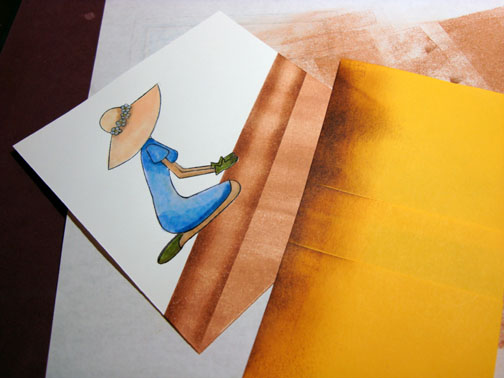
Decided to put a shadow in for the gardener. Sponged Close to Coca ink around the bottom part of her.
Getting darker yet with the shadow, sponge a small amount of Chocolate chip ink right around her leg.

Sponged a little Always Artichoke at the top of the grassy area.
Used a Chocolate Chip marker and put a hard line between the row of dirt to define them a little more.
Sponge a bit of Night of Navy ink at the top of the card stock to create some movement in the sky.
Assembled card and here it is finished measuring 5.5″ x 5.5″.
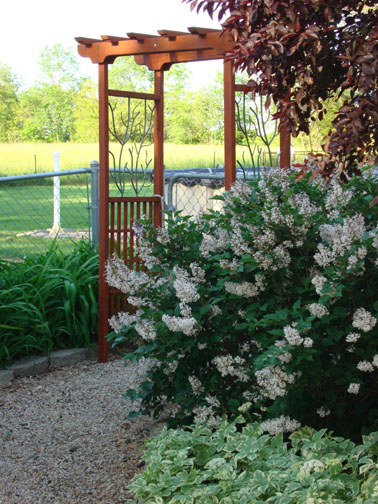
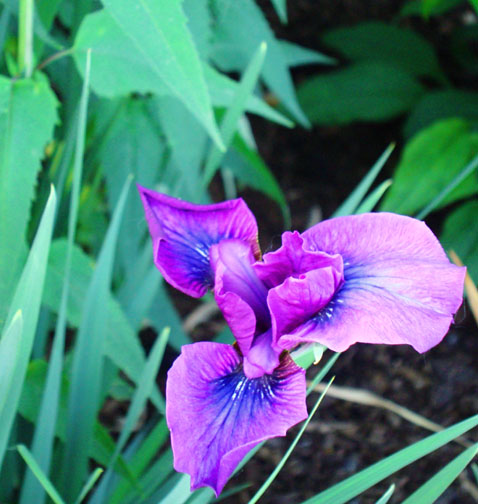
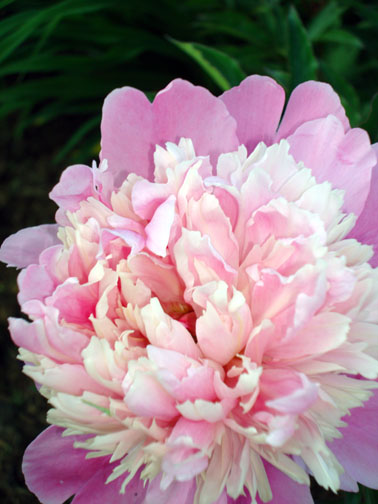
This ends the tutorial, but I have a few photos of my garden to share with you today.
My Lilac bush is in bloom and smells heavenly!
An Iris, I think the colors on this one is unbelievable.
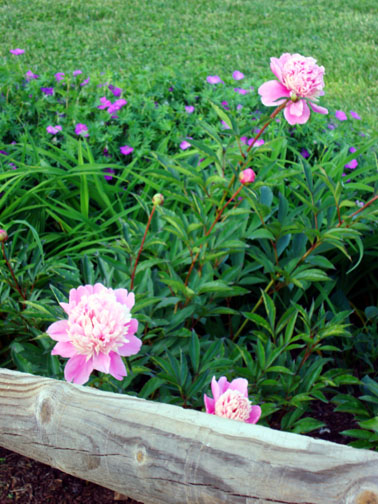
Peonies have made there appearance. These are close to my heart because they have been in my Grandmother’s garden and my Mother’s garden, before coming to me.
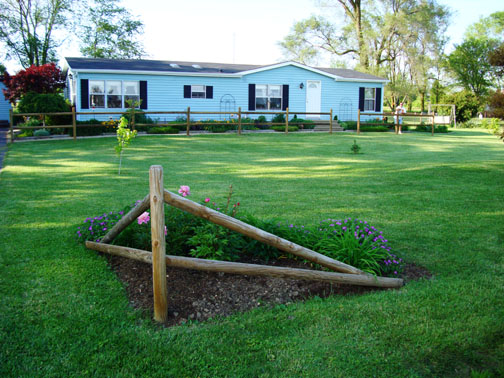
Here is a front view of the house and the split rail fence I was wiening about installing last weekend, lol. Wave hi to my DH, Russ who is leaning on the fence and wondering what the heck his wife is doing, lol. Anyone want to come over and help me dig the flower beds that will go in front of the fence? Just let me know and I will have a shoval all ready for you. 🙂
That’s it for now.
Until my next post. . . . . . .
Michelle
31 responses to “Gardening with MFT – Tutorial”