Monthly Archives: December 2011

Here’s to You – Tutorial #479


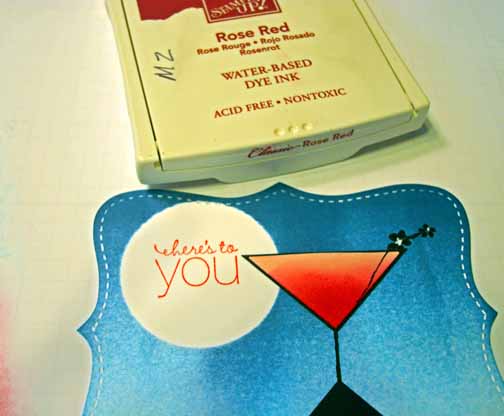
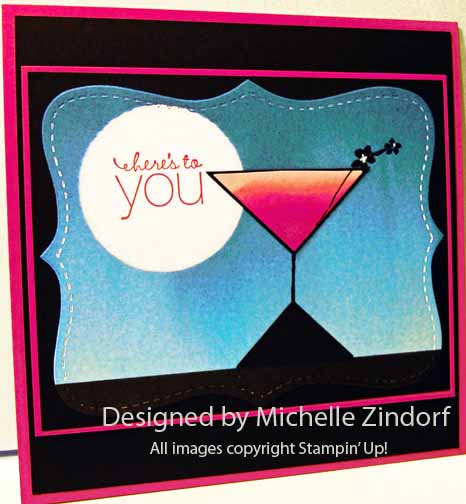
I feel like celebrating this week so here is one of my quicker cards that features a Martini Glass made from triangles.   This project could easily be transformed into a Happy New Year card.   I needed a few girlfriend cards so I kept with a hot pink theme.    Check it out, the tutorial is below.  🙂

********************************************************************

Reminder!

The brand new Stampin’ Up! Occasions Mini Catalog will be out January 4, 2011.   My current customers will automatically get the mini.  If you would like one mailed to you, please e-mail your address to [email protected] and I will pop one in the mail to you.

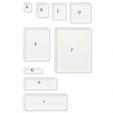
Also,  My customer drawing for December 2011 is a full set of Stampin’ Up! Clear Mount Acrylic Blocks and a rockin’ Stampin’ Up! Clear Block Storage Caddy to store them in.  The block set includes 9 different block sizes.    Total prize package is an $86.90 value.    How do you enter? For the month of December, 2o11, when you place a Stampin’ Up!  order using me as your Demonstrator,  you will receive one entry toward this months prize for each $25 increment in merchandise purchased.  Place an order for $50 and get two chances and so on and so on.    CLICK HERE TO PLACE AN ORDER OR TO BROWSE. Your order will be shipped directly to you from Stampin’ Up!.

Clear Block Bundle - by Stampin' Up!

If you stamp with clear-mount stamps, you’ll need a clear block to adhere your stamps to. Stampin’ Up’s blocks are a clear choice. Made from high-quality, sturdy acrylic, these blocks can hold one stamp or multiple stamps if you want to create a collage of images.

Clear Block Storage Caddy - by Stampin' Up!

This compact storage caddy holds one of each size of our clear-mount blocks. The foam insert securely holds the blocks in place; an additional foam insert sits between the blocks to protect them when the caddy is closed.

■ Opens flat for easy access
■ Locks shut
■ Built-in handle makes it easy to carry
■ 8-1/16″ x 10-5/8″ x 1-13/16″

I will use a random number generator to determine the winner on January 1, 2012.

*****************************************************************************

Now on with the tutorial. . . . .

Supplies:

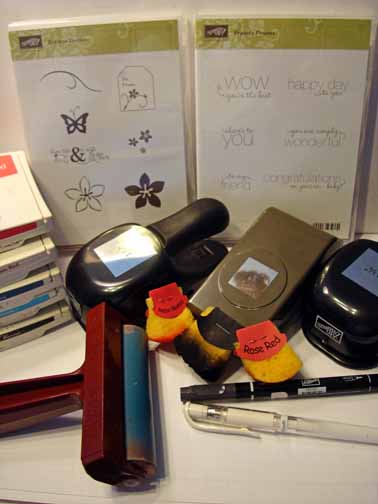
Stamps: Stampin’ Up! Cottage Garden and Friendly Phrases

Card Stock: Stampin’ Up! Melon Mambo, Basic Black and Whisper White

Ink: Stampin’ Up! Melon Mambo, Rose Red, Not Quite Navy, Tempting Turquoise and Basic Black

Accessories: Stampin’ Up!  Top Note Die, Big Shot Machine, Brayer, White Gel Pen, Basic Black marker, Sponges 1 3/8″ circle punch and  1 3/8″, 1″, 1 1/4″ Square punches.

Want a free copy of the current Stampin’ Up! Mini Catalog?  Just e-mail your address to [email protected] and I will get one right out to you.  Get your copy of the 2011-2012 Stampin’ Up! Idea Book & Catalog by sending $9.95 to me at P.O. box 116, West Alexandria, Ohio 45381 or via paypal to [email protected], shipping is free. Are you getting inspiration from this blog?   One way you can help support it is to order your Stampin’ Up products through me.   Click HEREto place an order and have your order delivered directly to your door step from Stampin’ Up!    Want to become a Stampin’ Up Demonstrator , receive a 20% discount on product and earn instant income on orders, get to purchase products before they are released to the public?  Consider being part of my Stampin’ Up Team and start your own business or become a Hobby Demo just for the discount.  Click HERE for more information.


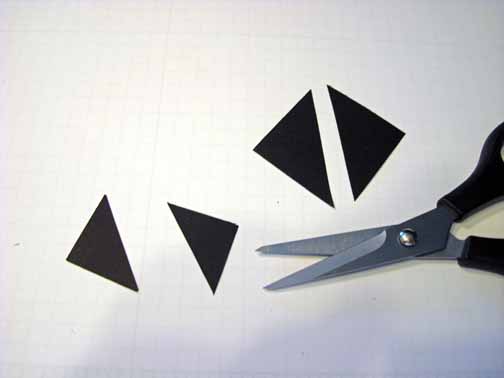
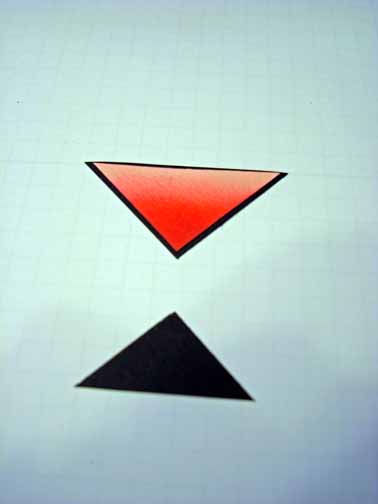
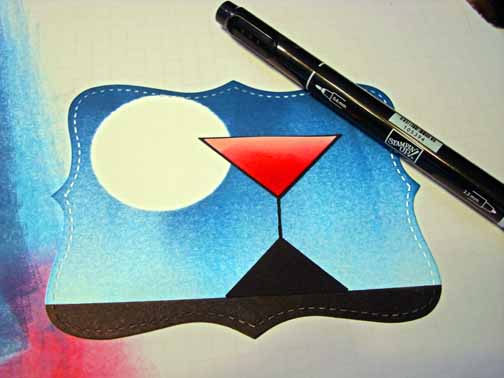
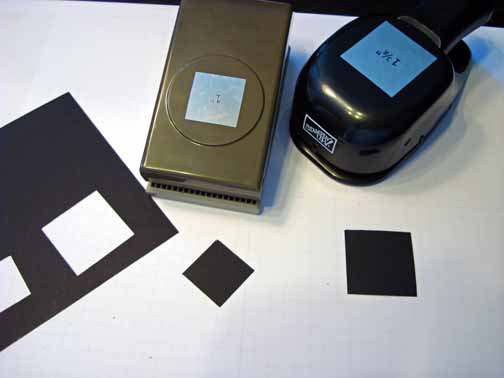
Punched a 1 3/8″ square and a 1″ square from Basic Black card stock.   Cut the two squares in half.


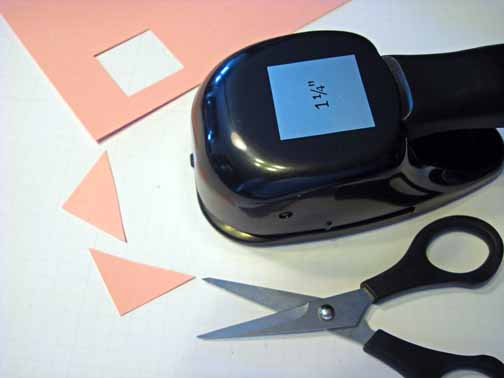
Punched a 1 1/4″ square from Pretty in Pink card stock and then cut it in half.

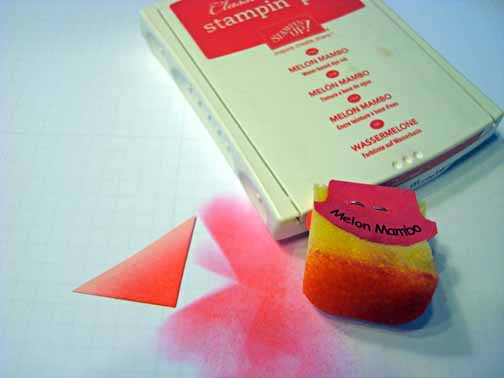
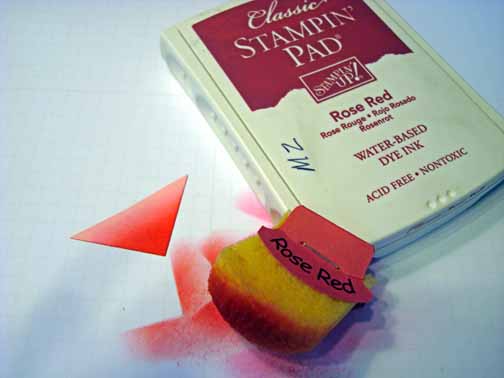
Sponged Melon Mambo and then Rose Red on the triangle of Pretty in Pink.


Glued the colored triangle onto the largest Basic Black triangle.

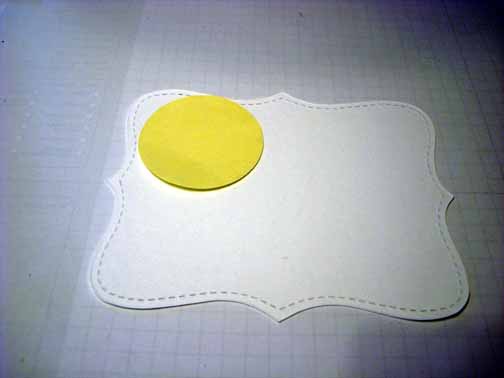
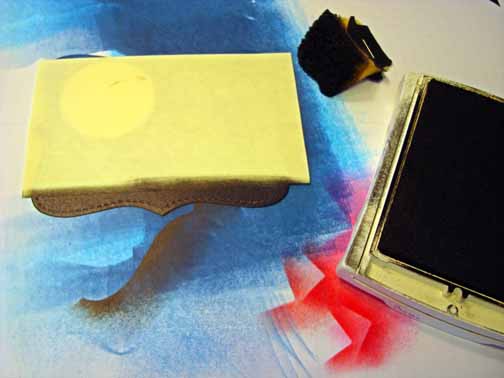
Die cut a Top note from Whisper White card stock using the Big Shot Machine.  Punched a 1 3/8″ circle from the sticky part of a post it note and used it as a mask for my moon.

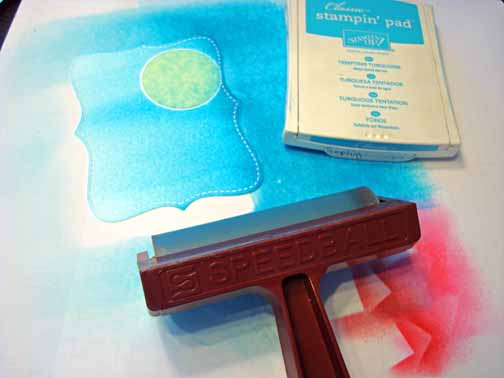
Brayered Tempting Turquoise on the card stock.

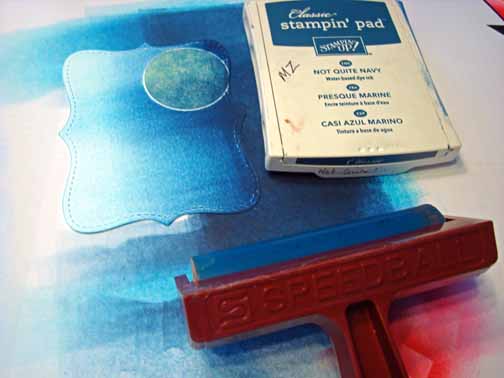
Brayered Not Quite Navy ink at the top of the card stock, not covering the Tempting Turquoise ink entirely.


Removed the moon mask and put a 3″ x 5″ post it note on so only about 1/2″ of the top note is showing at the bottom.  Sponged Basic Black ink on the un-masked portion of the card stock.


Adhered my two triangles on the top note and drew a line for the glass stem using a Basic Black marker.


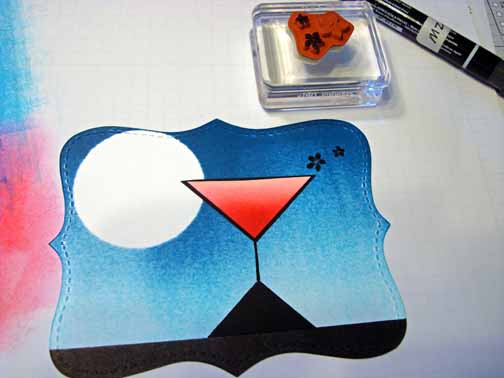
Stamped two small flowers on using a Basic Blacker marker to load my stamp.


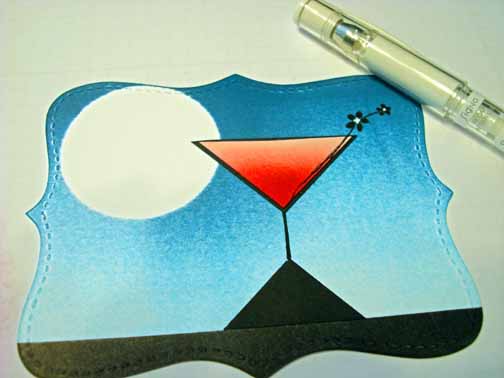
Added a stem for my flowers using a Basic Black marker and then added centers to the flowers using a White Gel Pen.


Stamped my sentiment using Rose Red ink.

Added 2 Melon Mambo panels and 2 Basic Black panels.

Here is the finished card measuring 5.25″ square.

May you have many things to toast about in the coming year!

Until my next post. . . . . . .

Hugs,
Get ready for Brayer and Direct to Paper Workshops!  I am coming to the following locations, click the location name for more information.

Dayton, Ohio – Direct to Paper Workshops

Dayton, Ohio – Brayer Workshops

Las Vegas, Nevada

Austin, Texas

Seattle, Washington

Greeneville, Tennessee

Indianapolis, Indiana

Indiana, Pennsylvania

Sparta, New Jersey

Piedmont, Alabama

Post Falls, Idaho (outside of Coeurd’Alene)

Sand Lake, Michigan (just North of Grand Rapids)

Lawrence, Kansas

Elizabethtown, Kentucky

West Bend, Wisconsin

Longmont (Gunbarrel), Colorado

Orange, Massachusetts

Sacramento, California

Staley, North Carolina


Here is a link to my workshop calendar where you can see all of my travel schedule and to get info on beginner and advanced Brayer workshops, along with the newly added Direct to Paper Workshop: https://zindorf.splitcoaststampers.com/workshop-calendar

Don’t see a workshop in your State?  Interested in hosting the workshops in your area   Click HERE to get hostess information.

Link to my Stampin’ Up website where you can order all of your must have Stampin’ Up products from me 24-7: https://michellezindorf.stampinup.net



Tea Shoppe Sneak Peek – Tutorial #478


Hey There,

I hope you have had a wonderful holiday.   I sure did.  It was spent with family, celebrating and eating great food.  🙂  We did have something extra special to celebrate, my youngest son, Mitch proposed to his lovely, lovely girlfriend, Jamie and she said “YES”.

The happy couple. . . . . .  . .

I heard the news and cried tears of joy!     Jamie has already won all of us over and has been a part of this family from the day we met her.  I’m looking forward to them making it official.

Now, with the personal stuff set aside, I’m happy to bring you a tutorial today.   I took a little hiatus from stamping to have some spare time to prepare for the holidays and just have some general down time.   But now I’m back and was anxious to get back into my office to create.   I received my pre-order from Stampin’ Up! which included stamps from the up and coming Stampin’ Up! Occasions Mini Catalog.   The catalog will be in effect January 4 – April 30, 2012.   My current Stampin’ Up! customers will receive this mini catalog automatically from me.  If you would like an Occasions Mini Catalog, please e-mail your address to: [email protected] and I will get one in the mail to you.   You won’t want to miss out on the exceptionally wonderful things in this mini!

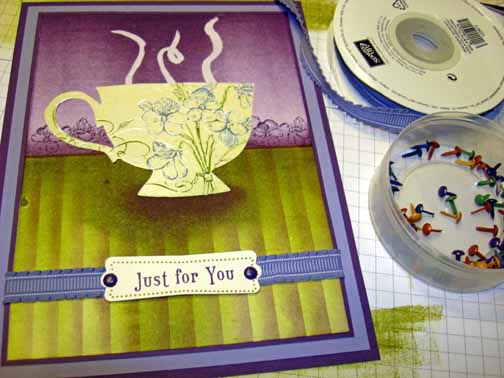
As the title of this post suggests, I am giving you a sneak peek of a project using a new set from the new mini.   The set name is Tea Shoppe and it’s right up my ally, I’m a tea drinker.

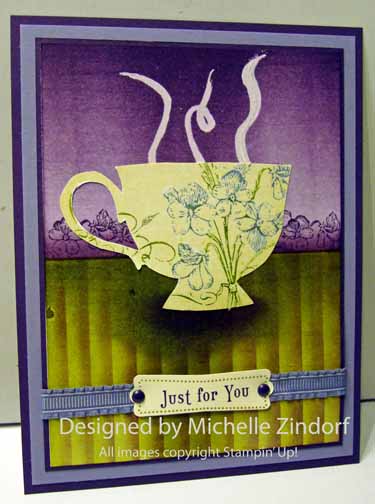
The tutorial below gives you instructions on how to create a stenciled wall, striped table cloth and embossed teacup.  Check it out below and then put this stamp set on your list of stamps you must have in 2012.


********************************************************************

Reminder!

My customer drawing for December 2011 is a full set of Stampin’ Up! Clear Mount Acrylic Blocks and a rockin’ Stampin’ Up! Clear Block Storage Caddy to store them in.  The block set includes 9 different block sizes.    Total prize package is an $86.90 value.    How do you enter? For the month of December, 2o11, when you place a Stampin’ Up!  order using me as your Demonstrator,  you will receive one entry toward this months prize for each $25 increment in merchandise purchased.  Place an order for $50 and get two chances and so on and so on.    CLICK HERE TO PLACE AN ORDER OR TO BROWSE. Your order will be shipped directly to you from Stampin’ Up!.

Clear Block Bundle - by Stampin' Up!

If you stamp with clear-mount stamps, you’ll need a clear block to adhere your stamps to. Stampin’ Up’s blocks are a clear choice. Made from high-quality, sturdy acrylic, these blocks can hold one stamp or multiple stamps if you want to create a collage of images.

Clear Block Storage Caddy - by Stampin' Up!

This compact storage caddy holds one of each size of our clear-mount blocks. The foam insert securely holds the blocks in place; an additional foam insert sits between the blocks to protect them when the caddy is closed.

■ Opens flat for easy access
■ Locks shut
■ Built-in handle makes it easy to carry
■ 8-1/16″ x 10-5/8″ x 1-13/16″

I will use a random number generator to determine the winner on January 1, 2012.

*****************************************************************************

Now on with the tutorial. . . . .

Supplies:

Stamps: Stampin’ Up!  Tea Shoppe

Card Stock: Stampin’ Up! Elegant Eggplant, Wisteria Wonder, Very Vanilla and Whisper White

Ink: Stampin’ Up! Old Olive, Always Artichoke, Elegant Eggplant and River Rock

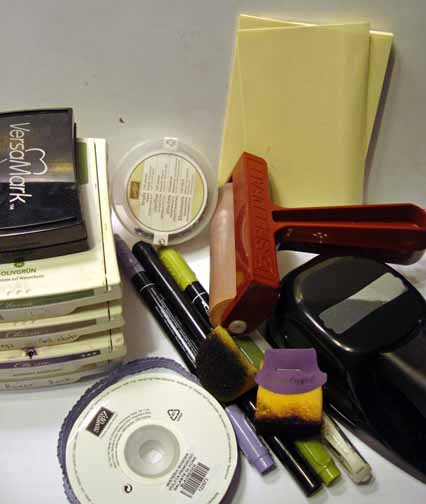
Accessories: Stampin’ Up!  Old Olive and Wisteria Wonder Markers, Wisteria Wonder Ribbon, Elegant Eggplant brads, Brayer, Clear embossing powder, heat gun, sponges, Versamark Pad and marker, Label punch, scissors, post it notes.

Want a free copy of the current Stampin’ Up! Mini Catalog?  Just e-mail your address to [email protected] and I will get one right out to you.  Get your copy of the 2011-2012 Stampin’ Up! Idea Book & Catalog by sending $9.95 to me at P.O. box 116, West Alexandria, Ohio 45381 or via paypal to [email protected], shipping is free. Are you getting inspiration from this blog?   One way you can help support it is to order your Stampin’ Up products through me.   Click HEREto place an order and have your order delivered directly to your door step from Stampin’ Up!    Want to become a Stampin’ Up Demonstrator , receive a 20% discount on product and earn instant income on orders, get to purchase products before they are released to the public?  Consider being part of my Stampin’ Up Team and start your own business or become a Hobby Demo just for the discount.  Click HERE for more information.


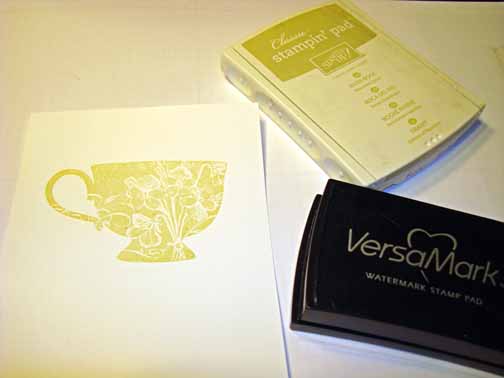
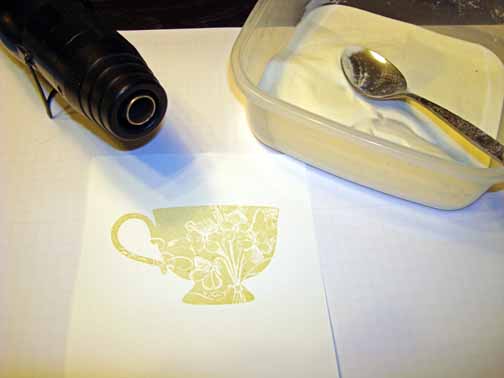
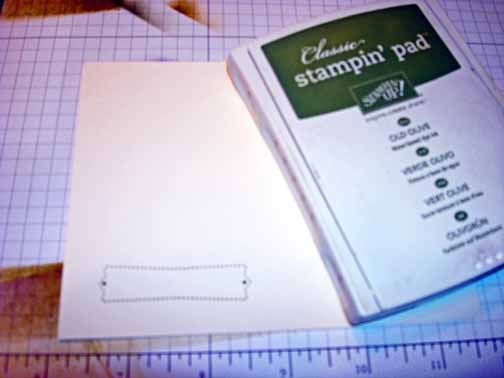
Stamped the teacup by loading it with Versamark and then with River Rock before stamping it on Whisper White card stock.

Heat embossed the image using clear embossing powder and a heat gun.

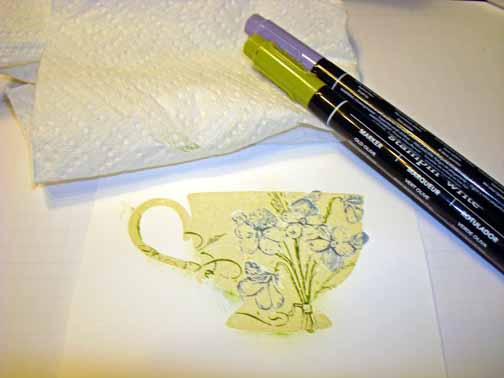
Colored the openings in the cup design using a Wisteria Wonder and Olive markers.   Wiped the excess marker off of the embossed image using a paper towel.


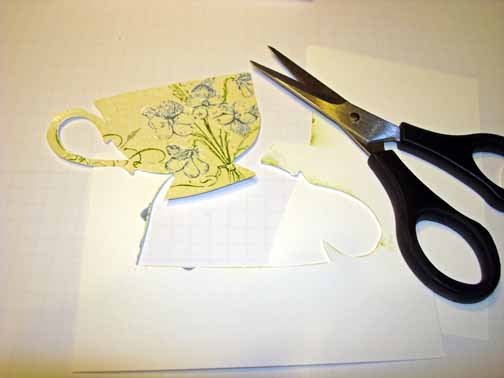
Cut the cup out.


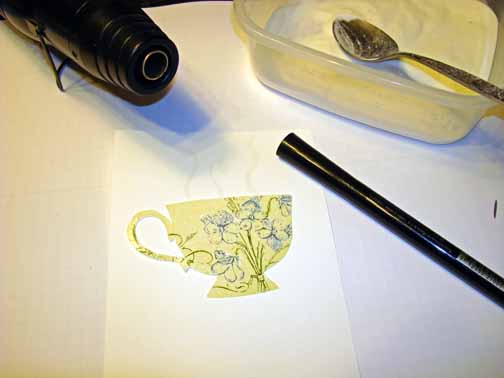
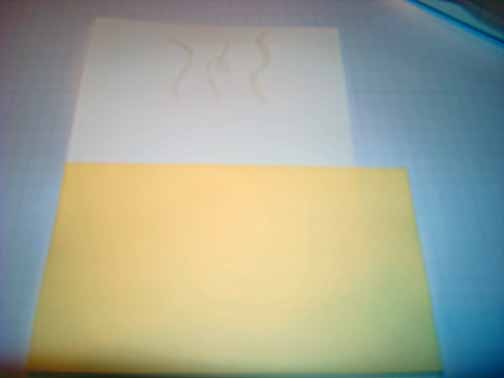
Laid my cup (don’t adhere yet ) on a 4.25″ x 5.75″ piece of Whisper White card stock and then added a few steam lines using my Versamark marker above the cup.  Heat embossed the steam lines using clear embossing powder and a heat gun.

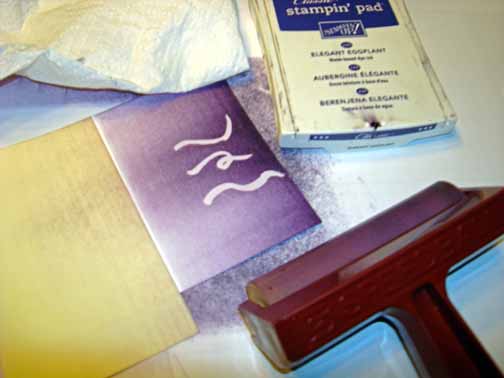
Masked the bottom of the card stock using a post it note.

Brayered Elegant Eggplant ink at the top of the card stock.

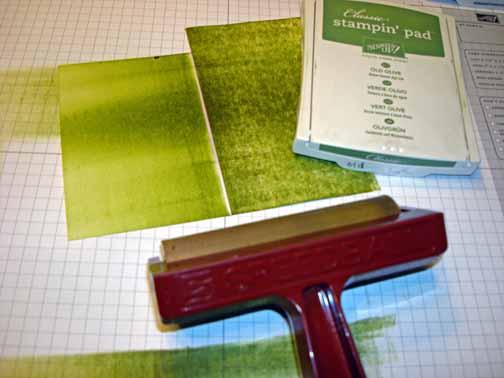
Unmasked the bottom of the card stock and masked the top of the card stock.  Brayered Old Olive ink at the bottom of the card stock.

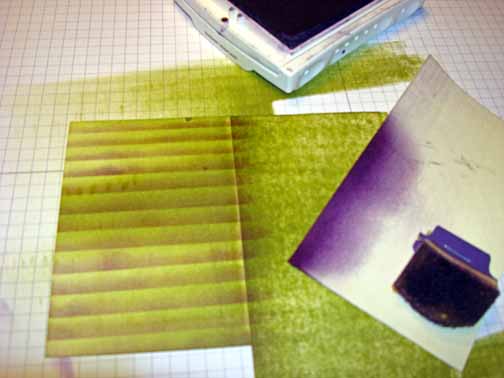
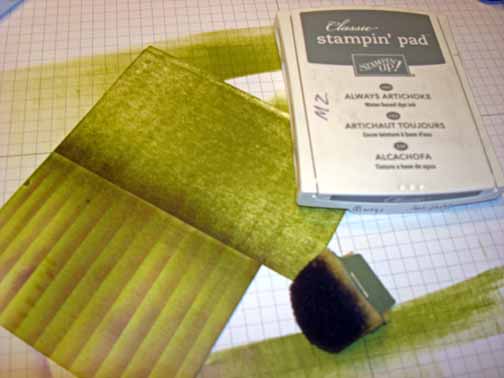
Using another post it note, sponged in stripes on the table cloth using Elegant Eggplant ink.  Sponged at the post it note edge and then moved a bit down for the next stripe.

Continue until you have the whole table cloth striped.

Sponged Always Artichoke at the top of the table cloth.

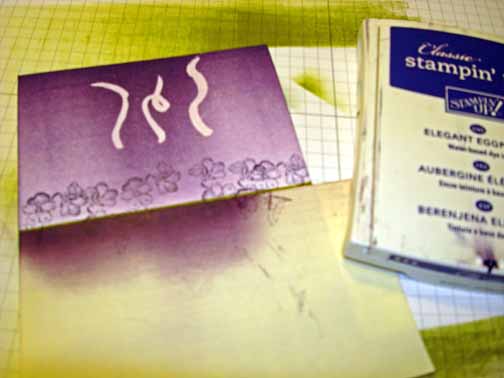
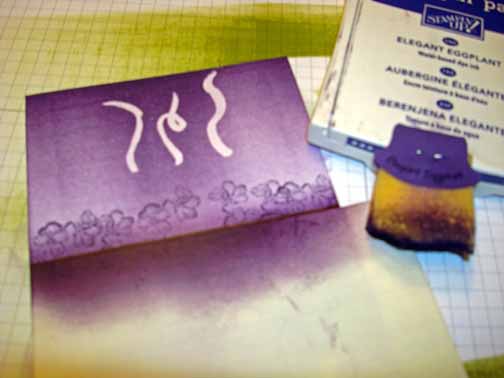
Remasked the bottom of the card stock and stamped the pansy stamp repeatedly across the bottom of the wall using Elegant Eggplant ink.

Sponged Elegant Eggplant ink at the bottom of the wall at the post it note edge.

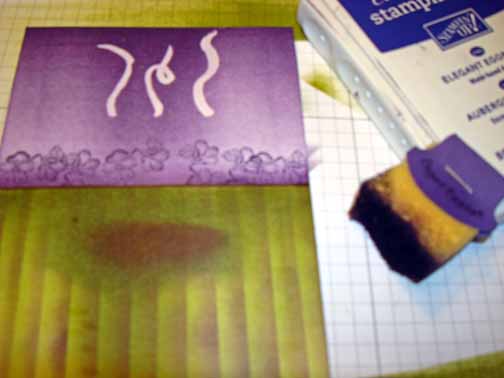
Created a shadow for the cup by sponging a spot of Always Artichoke ink and then inside that spot sponged a spot of Elegant Eggplant ink.

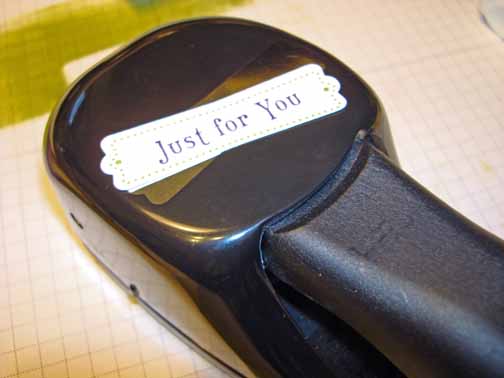
On a scrap of Very Vanilla card stock stamp the label outline stamp using Old Olive ink.

Stamped the sentiment inside of the label stamp using Elegant Eggplant ink.

Punched the image out.

Added two Elegant Eggplant panels, one Wisteria Wonder panel, my tea cup, Wisteria Wonder ribbon, my label and Elegant Eggplant brads.


Here is the finished card measuring 5″ x 6.5″.

May your day be as warm and inviting as a good cup of tea!

Until my next post. . . . . . .

Hugs,

Get ready for Brayer and Direct to Paper Workshops!  I am coming to the following locations, click the location name for more information.

Dayton, Ohio – Direct to Paper Workshops

Dayton, Ohio – Brayer Workshops

Las Vegas, Nevada

Austin, Texas

Seattle, Washington

Greeneville, Tennessee

Indianapolis, Indiana

Indiana, Pennsylvania

Sparta, New Jersey

Piedmont, Alabama

Post Falls, Idaho (outside of Coeurd’Alene)

Sand Lake, Michigan (just North of Grand Rapids)

Lawrence, Kansas

Elizabethtown, Kentucky

West Bend, Wisconsin

Longmont (Gunbarrel), Colorado

Orange, Massachusetts

Sacramento, California

Staley, North Carolina


Here is a link to my workshop calendar where you can see all of my travel schedule and to get info on beginner and advanced Brayer workshops, along with the newly added Direct to Paper Workshop: https://zindorf.splitcoaststampers.com/workshop-calendar

Don’t see a workshop in your State?  Interested in hosting the workshops in your area   Click HERE to get hostess information.

Link to my Stampin’ Up website where you can order all of your must have Stampin’ Up products from me 24-7: https://michellezindorf.stampinup.net


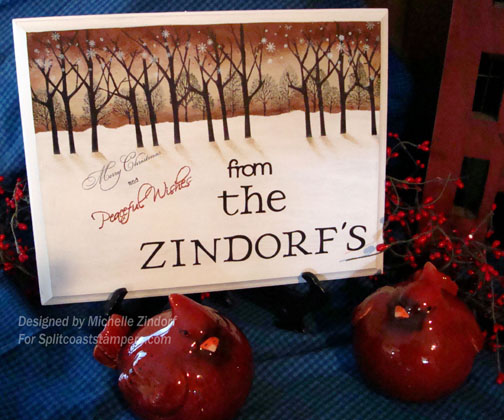
Merry Christmas!

holiday-plaque.jpg

May you and your family have a safe and wonderful Christmas.

Much Love,

Chilly Friends – Tutorial #477


Hey There,

Well we are down to just a 8 more days until Christmas.   Do you have your cards in the mail?  Are they still in pieces, lol?  Maybe still in your mind?   I have a few in each state.  With that being said, I’ve decided to take a bit of time off from blogging to catch up on some projects I have in the works and to try to just enjoy the holidays.    I will be available via e-mail and of course, by phone should you have Stampin’ Up! business or wish to register for my up coming Brayer Workshops and Direct to Paper Workshops.  I’m always here for you.  🙂

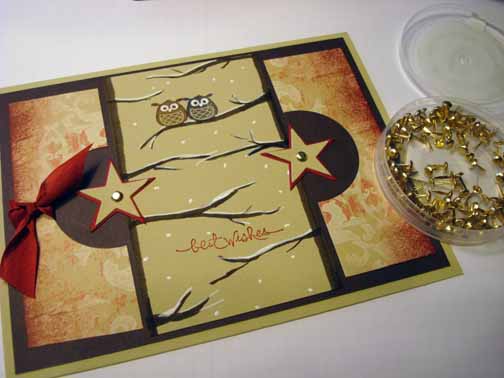
So, until after Christmas I am leaving you with this chilly scene and the tutorial below.

********************************************************************

Reminder!

My customer drawing for December 2011 is a full set of Stampin’ Up! Clear Mount Acrylic Blocks and a rockin’ Stampin’ Up! Clear Block Storage Caddy to store them in.  The block set includes 9 different block sizes.    Total prize package is an $86.90 value.    How do you enter? For the month of December, 2o11, when you place a Stampin’ Up!  order using me as your Demonstrator,  you will receive one entry toward this months prize for each $25 increment in merchandise purchased.  Place an order for $50 and get two chances and so on and so on.    CLICK HERE TO PLACE AN ORDER OR TO BROWSE. Your order will be shipped directly to you from Stampin’ Up!.

Clear Block Bundle - by Stampin' Up!

If you stamp with clear-mount stamps, you’ll need a clear block to adhere your stamps to. Stampin’ Up’s blocks are a clear choice. Made from high-quality, sturdy acrylic, these blocks can hold one stamp or multiple stamps if you want to create a collage of images.

Clear Block Storage Caddy - by Stampin' Up!

This compact storage caddy holds one of each size of our clear-mount blocks. The foam insert securely holds the blocks in place; an additional foam insert sits between the blocks to protect them when the caddy is closed.

■ Opens flat for easy access
■ Locks shut
■ Built-in handle makes it easy to carry
■ 8-1/16″ x 10-5/8″ x 1-13/16″

I will use a random number generator to determine the winner on January 1, 2012.

*****************************************************************************

Now on with the tutorial. . . . .

Supplies:

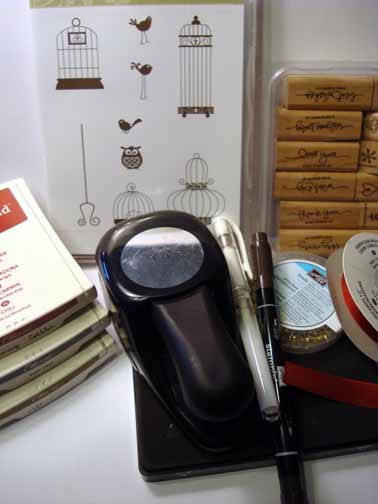
Stamps: Stampin’ Up!  Aviary and Short & Sweet

Card Stock: Stampin’ Up! River Rock, Early Espresso and Stampin’ Up! Well Worn Designer Series Paper

Ink: Stampin’ Up! Cherry Cobbler, Basic Gray and Soft Suede

Accessories: Stampin’ Up!  Cherry Cobbler ribbon, Star Die, Big Shot Machine, 1 3/4″ circle punch, Gold Brads, White Gel Pen, Early Espresso Marker

Want a free copy of the current Stampin’ Up! Mini Catalog?  Just e-mail your address to [email protected] and I will get one right out to you.  Get your copy of the new 2011-2012 Stampin’ Up! Idea Book & Catalog by sending $9.95 to me at P.O. box 116, West Alexandria, Ohio 45381 or via paypal to [email protected], shipping is free. Are you getting inspiration from this blog?   One way you can help support it is to order your Stampin’ Up products through me.   Click HEREto place an order and have your order delivered directly to your door step from Stampin’ Up!    Want to become a Stampin’ Up Demonstrator , receive a 20% discount on product and earn instant income on orders?  Consider being part of my Stampin’ Up Team and start your own business or become a Hobby Demo just for the discount.  Click HERE for more information.


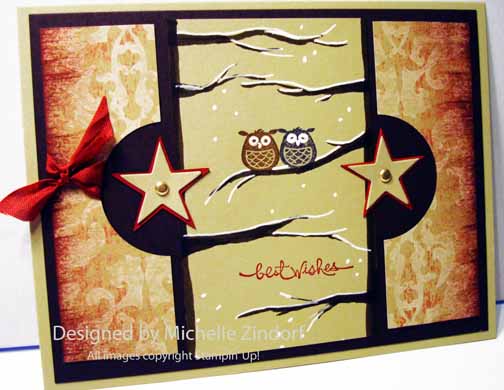
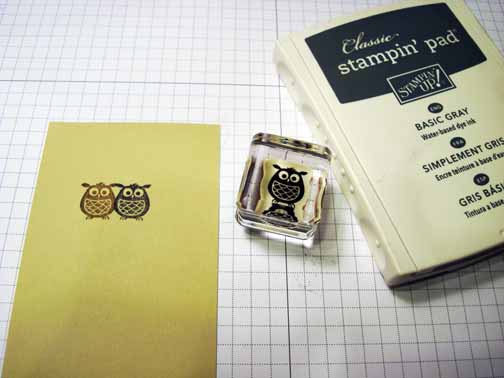
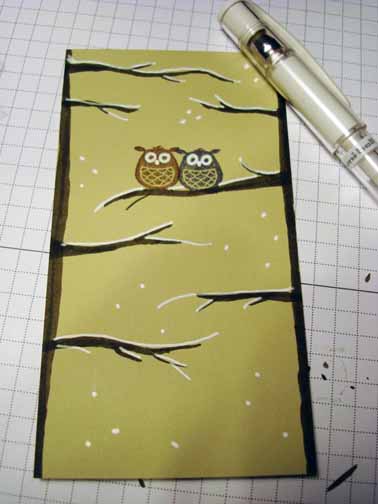
Stamped one owl in Basic Gray ink and another one in Soft Suede ink on a 2.75″ x 4.5″ River Rock card stock.

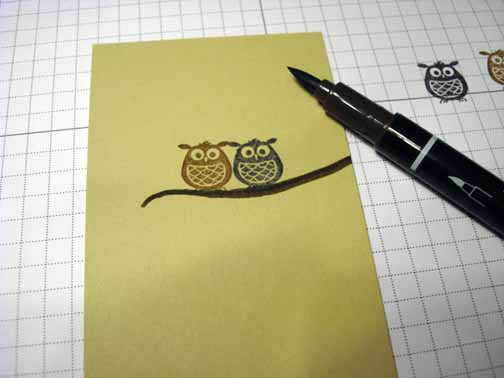
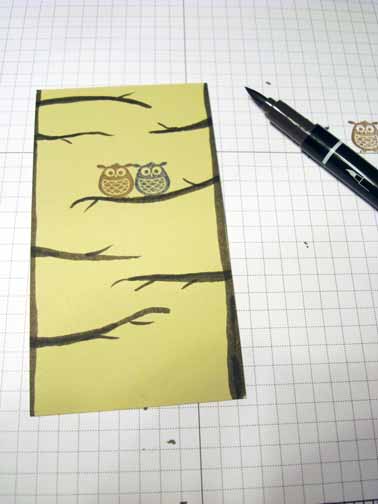
Drew in some rough branches using an Early Espresso marker.


Added snow to the branches, colored in the whites of the owls eyes, colored in the owl’s beak and added dots for snow using a white gel pen.


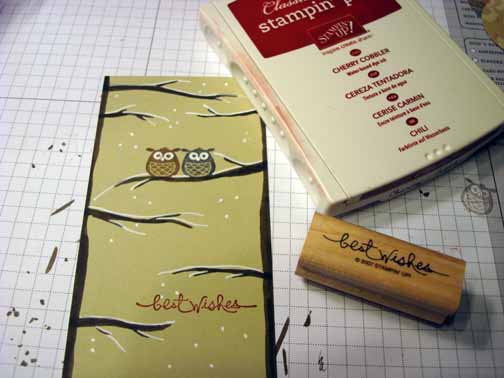
Stamped the sentiment from the Stampin’ Up! set Short & Sweet using Cherry Cobbler ink.


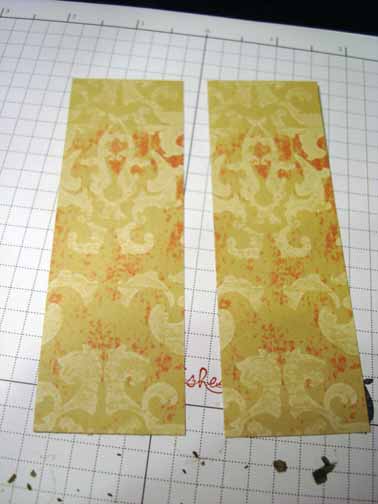
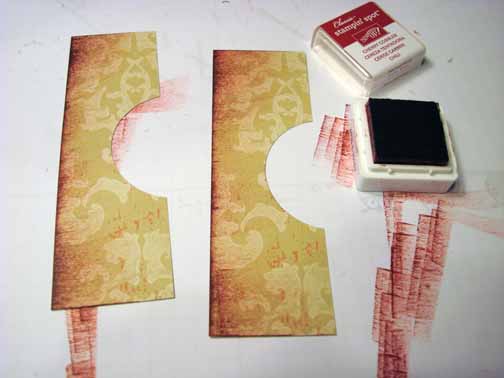
Cut two strips 1.5″ x 4.5″ from Designer Series paper.


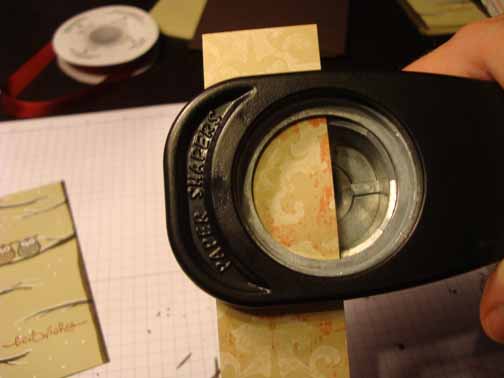
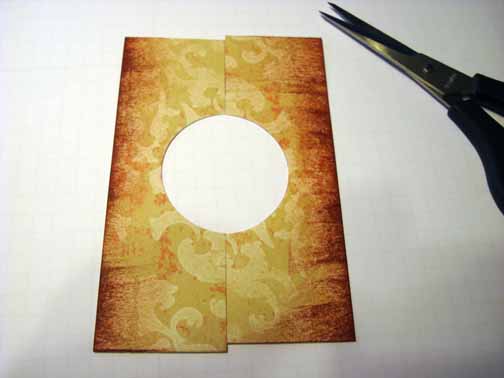
Held them together and punched half of a 1 3/4″ circle from the paper.


Smeared Cherry Cobbler ink on the edge of the strips.

Trimmed up the strips where they over lapped when you put the circle edges together.

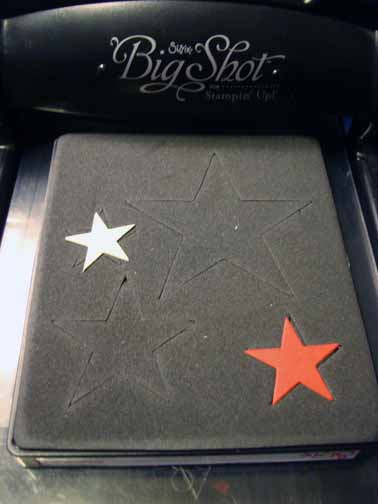
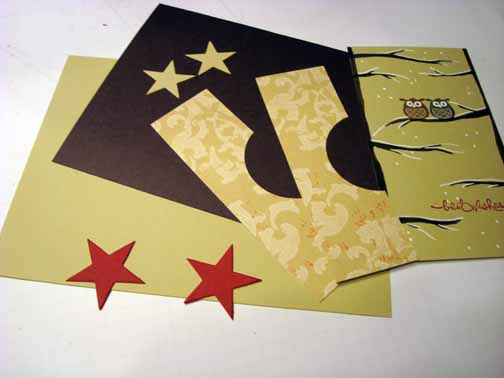
Cut 2 River Rock stars and 2 Cherry Cobbler stars using the Star die cut and the Big Shot Machine.   River Rock are the smallest star and Cherry Cobber is the next size up.

Added a River Rock 5″ x 6.5″ panel and a Early Espresso 4.75″ x 6.25″ panel.


Assembled the card adding gold brads and Cherry Cobbler ribbon.


Here is the finished card measuring 5″ x 6.5″.


May your holidays be filled with love and laughter from the ones you hold most dear.

Also, please be stay safe!


Until my next post. . . . . . . Happy Holiday!!!!!

Hugs,

Get ready for Brayer and Direct to Paper Workshops!  I am coming to the following locations, click the location name for more information.

Dayton, Ohio – Direct to Paper Workshops

Dayton, Ohio – Brayer Workshops

Las Vegas, Nevada

Austin, Texas

Seattle, Washington

Greeneville, Tennessee

Indianapolis, Indiana

Indiana, Pennsylvania

Sparta, New Jersey

Piedmont, Alabama

Post Falls, Idaho (outside of Coeurd’Alene)

Sand Lake, Michigan (just North of Grand Rapids)

Lawrence, Kansas

Elizabethtown, Kentucky

West Bend, Wisconsin

Longmont (Gunbarrel), Colorado

Orange, Massachusetts

Sacramento, California

Staley, North Carolina


Here is a link to my workshop calendar where you can see all of my travel schedule and to get info on beginner and advanced Brayer workshops, along with the newly added Direct to Paper Workshop: https://zindorf.splitcoaststampers.com/workshop-calendar

Don’t see a workshop in your State?  Interested in hosting the workshops in your area   Click HERE to get hostess information.

Link to my Stampin’ Up website where you can order all of your must have Stampin’ Up products from me 24-7: https://michellezindorf.stampinup.net
The Winner of the Winter Red Bird Card Blog Candy Is.. . . .

The Winner of the Winter Red Bird Card Blog Candy Is.. . . .

Lori Auge-O’Hara, who wrote  “Wow, how fun……I love anything birds so this really is exciting to get a chance to win this one. It looks fabulous! Please put me in the drawing, thank you!”

Lori, Congratulations!  The random number generator smiled on you today.   Please e-mail your shipping address to me at [email protected] within 30 days and I’ll get this card in the mail to you.

Thank you to those who played along.

********************************************************************

Reminder!

My customer drawing for December 2011 is a full set of Stampin’ Up! Clear Mount Acrylic Blocks and a rockin’ Stampin’ Up! Clear Block Storage Caddy to store them in.  The block set includes 9 different block sizes.    Total prize package is an $86.90 value.    How do you enter? For the month of December, 2o11, when you place a Stampin’ Up!  order using me as your Demonstrator,  you will receive one entry toward this months prize for each $25 increment in merchandise purchased.  Place an order for $50 and get two chances and so on and so on.    CLICK HERE TO PLACE AN ORDER OR TO BROWSE. Your order will be shipped directly to you from Stampin’ Up!.

Clear Block Bundle - by Stampin' Up!

If you stamp with clear-mount stamps, you’ll need a clear block to adhere your stamps to. Stampin’ Up’s blocks are a clear choice. Made from high-quality, sturdy acrylic, these blocks can hold one stamp or multiple stamps if you want to create a collage of images.

Clear Block Storage Caddy - by Stampin' Up!

This compact storage caddy holds one of each size of our clear-mount blocks. The foam insert securely holds the blocks in place; an additional foam insert sits between the blocks to protect them when the caddy is closed.

■ Opens flat for easy access
■ Locks shut
■ Built-in handle makes it easy to carry
■ 8-1/16″ x 10-5/8″ x 1-13/16″

I will use a random number generator to determine the winner on January 1, 2012.

*****************************************************************************

May your day be totally delightful!

Until my next post. . . . . . .

Hugs,

Get ready for Brayer and Direct to Paper Workshops!  I am coming to the following locations, click the location name for more information.

Dayton, Ohio – Direct to Paper Workshops

Dayton, Ohio – Brayer Workshops

Las Vegas, Nevada

Austin, Texas

Seattle, Washington

Greeneville, Tennessee

Indianapolis, Indiana

Indiana, Pennsylvania

Sparta, New Jersey

Piedmont, Alabama

Post Falls, Idaho (outside of Coeurd’Alene)

Sand Lake, Michigan (just North of Grand Rapids)

Lawrence, Kansas

Elizabethtown, Kentucky

West Bend, Wisconsin

Longmont (Gunbarrel), Colorado

Orange, Massachusetts

Sacramento, California

Staley, North Carolina


Here is a link to my workshop calendar where you can see all of my travel schedule and to get info on beginner and advanced Brayer workshops, along with the newly added Direct to Paper Workshop: https://zindorf.splitcoaststampers.com/workshop-calendar

Don’t see a workshop in your State?  Interested in hosting the workshops in your area   Click HERE to get hostess information.

Link to my Stampin’ Up website where you can order all of your must have Stampin’ Up products from me 24-7: https://michellezindorf.stampinup.net


Trendy Night to Day – Tutorial #476

Hey There,

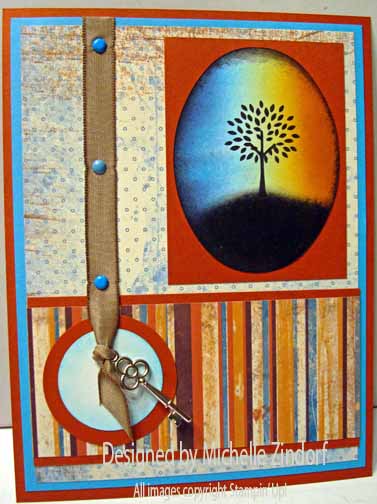
Today’s tutorial shows how you can have a scene go from Day to Night.  Check it out in the tutorial below.

My post it short and sweet today.  Time to decorate my home for Christmas. 

********************************************************************

Reminder!

My customer drawing for December 2011 is a full set of Stampin’ Up! Clear Mount Acrylic Blocks and a rockin’ Stampin’ Up! Clear Block Storage Caddy to store them in.  The block set includes 9 different block sizes.    Total prize package is an $86.90 value.    How do you enter?   For the month of December, 2o11, when you place a Stampin’ Up!  order using me as your Demonstrator,  you will receive one entry toward this months prize for each $25 increment in merchandise purchased.  Place an order for $50 and get two chances and so on and so on.    CLICK HERE TO PLACE AN ORDER OR TO BROWSE.   Your order will be shipped directly to you from Stampin’ Up!.

Clear Block Bundle - by Stampin' Up!

If you stamp with clear-mount stamps, you’ll need a clear block to adhere your stamps to. Stampin’ Up’s blocks are a clear choice. Made from high-quality, sturdy acrylic, these blocks can hold one stamp or multiple stamps if you want to create a collage of images.

Clear Block Storage Caddy - by Stampin' Up!

This compact storage caddy holds one of each size of our clear-mount blocks. The foam insert securely holds the blocks in place; an additional foam insert sits between the blocks to protect them when the caddy is closed.

■ Opens flat for easy access
■ Locks shut
■ Built-in handle makes it easy to carry
■ 8-1/16″ x 10-5/8″ x 1-13/16″

I will use a random number generator to determine the winner on January 1, 2012.

*****************************************************************************

Now on with the tutorial. . . . .

Supplies:

Stamps:  Stampin’ Up!  Trendy Trees

Card Stock: Stampin’ Up! Cajun Craze, Whisper White, Tempting Turquoise and Autumn Meadows Designer Series Papers

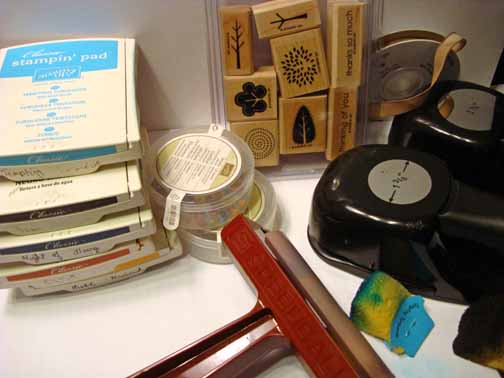
Ink:  Stampin’ Up! Basic Black, More Mustard, Cajun Craze, Tempting Turquoise and Night of Navy

Accessories:  Stampin’ Up!  Tempting Turquoise Brads, Brayer, Trinket Key, Oval Die, Big Shot Machine, 1 3/4″ & 1 3/8″ circle punches, Sponges, Soft Suede Ribbon.

Want a free copy of the current Stampin’ Up! Mini Catalog?  Just e-mail your address to [email protected] and I will get one right out to you.  Get your copy of the new 2011-2012 Stampin’ Up! Idea Book & Catalog by sending $9.95 to me at P.O. box 116, West Alexandria, Ohio 45381 or via paypal to [email protected], shipping is free.      Are you getting inspiration from this blog?   One way you can help support it is to order your Stampin’ Up products through me.   Click HEREto place an order and have your order delivered directly to your door step from Stampin’ Up!    Want to become a Stampin’ Up Demonstrator , receive a 20% discount on product and earn instant income on orders?  Consider being part of my Stampin’ Up Team and start your own business or become a Hobby Demo just for the discount.  Click HERE for more information.

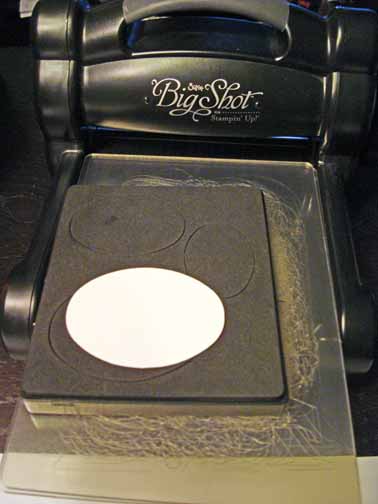
Cut an oval using the Stampin’ Up! Ovals Die (Largest Oval on the Die) out of Whisper White card stock using the Big Shot Machine.

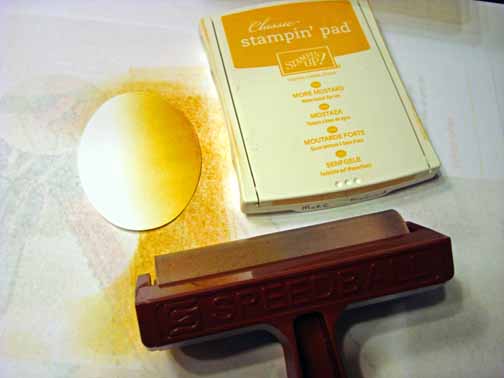
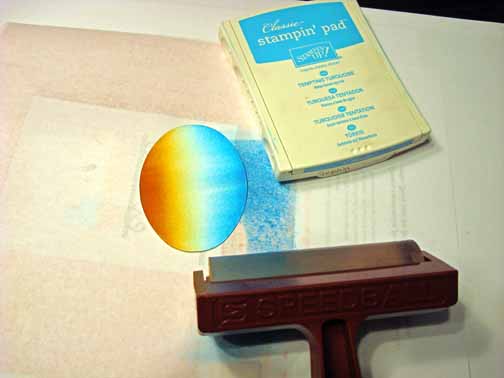
Brayered More Mustard on one half of the oval.

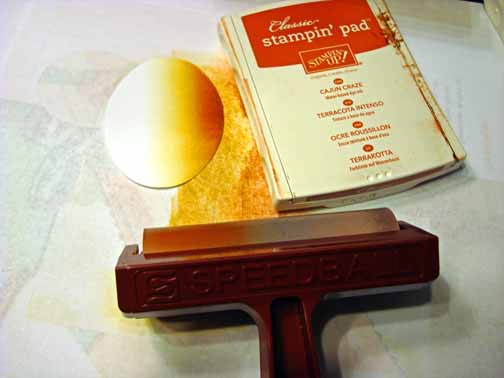
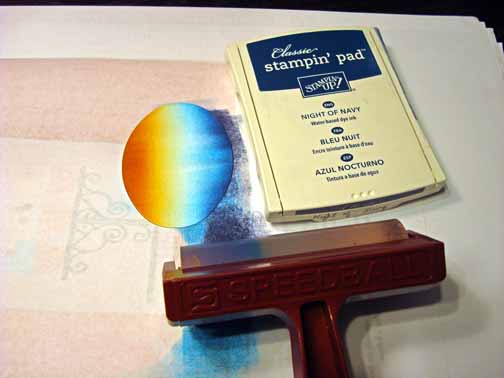
Brayered Cajun Craze ink on the More Mustard ink, not covering it entirely.

Brayed Tempting Turquoise ink on the other half of the card stock.

Brayered Night to Navy ink over the Tempting Turquoise ink, not covering it entirely.

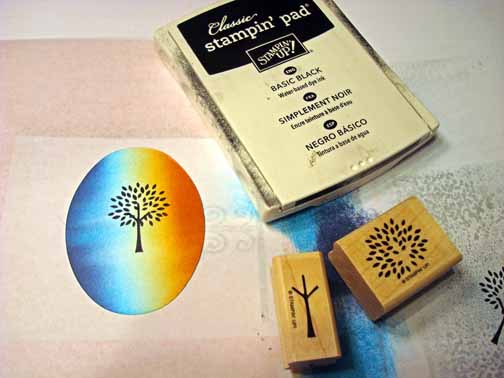
Stamped the leaves and trunk of the tree using Basic Black ink.

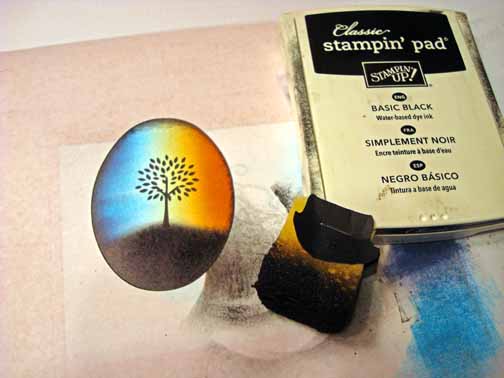
Sponged Basic Black ink in for the ground and around the edges of the card stock.

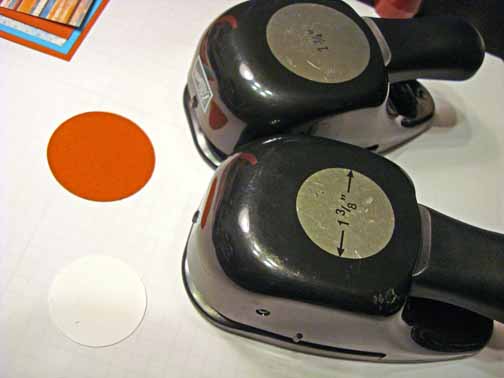
Punched a 1 3/4″ circle from Cajun Craze and a 1 3/8″ circle from Whisper White.

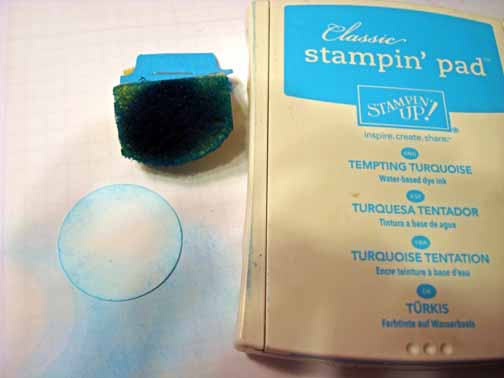
Sponged Tempting Turquoise ink around the edges of the Whisper White circle.

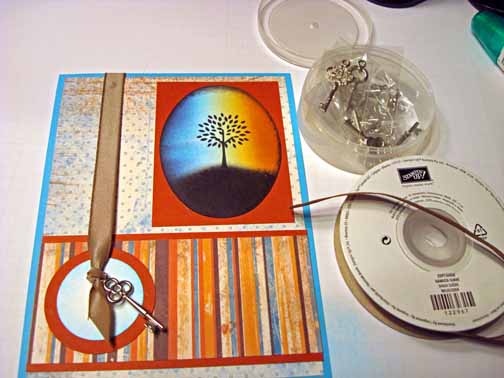
Added a Tempting Turquoise panel, 2 Cajun Craze panels, 2 panels from Autumn Meadows designer paper, Soft Suede Ribbon and Key Trinket.

Added Tempting Turquoise brads and another Cajun Craze card stock panel.

Here is the finished card measuring 5″ x 6.5″.

May your day be filled with light.

Until my next post. . . . . . .

Hugs,

   Get ready for Brayer and Direct to Paper Workshops!  I am coming to the following locations, click the location name for more information.    


Dayton, Ohio – Direct to Paper Workshops 

Dayton, Ohio – Brayer Workshops

Las Vegas, Nevada    

Austin, Texas 

Seattle, Washington

 Greeneville, Tennessee 

Indianapolis, Indiana 

Indiana, Pennsylvania 

Sparta, New Jersey 

Piedmont, Alabama

Post Falls, Idaho (outside of Coeurd’Alene)

 Sand Lake, Michigan (just North of Grand Rapids)

Lawrence, Kansas 

Elizabethtown, Kentucky

West Bend, Wisconsin 

Longmont (Gunbarrel), Colorado 

Orange, Massachusetts

Sacramento, California

Staley, North Carolina

 
Here is a link to my workshop calendar where you can see all of my travel schedule and to get info on beginner and advanced Brayer workshops, along with the newly added Direct to Paper Workshop: https://zindorf.splitcoaststampers.com/workshop-calendar   


Don’t see a workshop in your State?  Interested in hosting the workshops in your area   Click HERE to get hostess information.       
 

Link to my Stampin’ Up website where you can order all of your must have Stampin’ Up products from me 24-7:  https://michellezindorf.stampinup.net
Winter Red Bird Card Blog Candy and Tutorial #475

Hey there,

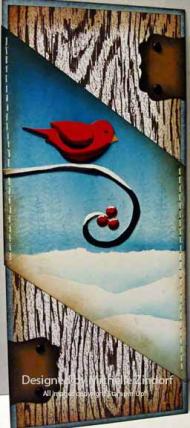
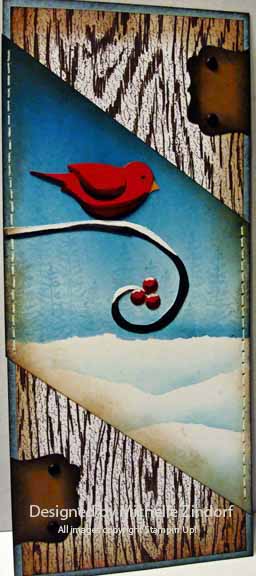
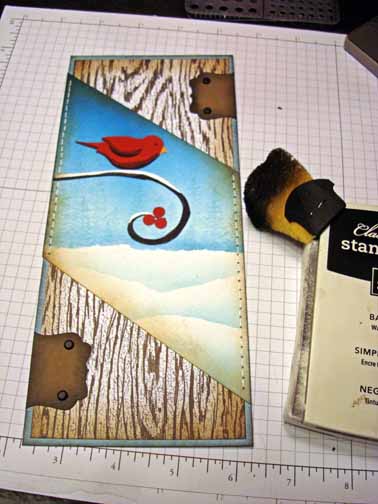
I put together a rustic Winter scene for you today.  I was gearing this card more towards manly than feminine so, I left off any form of frill, such as, ribbon and glitter.    I also, left off any type of sentiment since this scene could be used for so many occasions and I don’t know what the user would be using it for.

Follow along with the tutorial below to make one of these cards or you could leave a comment at the bottom of this blog post telling me to put your name into the blog candy drawing and try to win this one.  🙂   I’m putting this card up for blog candy and will use a random number generator on Wednesday, December 14, 2011.   If you are getting this blog post via e-mail, please CLICK HERE, and then leave a comment.  Please no e-mail entries.

Good Luck!

**********************************************************************

Reminder!

My customer drawing for December 2011 is a full set of Stampin’ Up! Clear Mount Acrylic Blocks and a rockin’ Stampin’ Up! Clear Block Storage Caddy to store them in.  The block set includes 9 different block sizes.    Total prize package is an $86.90 value.    How do you enter?   For the month of December, 2o11, when you place a Stampin’ Up!  order using me as your Demonstrator,  you will receive one entry toward this months prize for each $25 increment in merchandise purchased.  Place an order for $50 and get two chances and so on and so on.    CLICK HERE TO PLACE AN ORDER OR TO BROWSE.   Your order will be shipped directly to you from Stampin’ Up!.
Clear Block Bundle - by Stampin' Up!

If you stamp with clear-mount stamps, you’ll need a clear block to adhere your stamps to. Stampin’ Up’s blocks are a clear choice. Made from high-quality, sturdy acrylic, these blocks can hold one stamp or multiple stamps if you want to create a collage of images.

Clear Block Storage Caddy - by Stampin' Up!

This compact storage caddy holds one of each size of our clear-mount blocks. The foam insert securely holds the blocks in place; an additional foam insert sits between the blocks to protect them when the caddy is closed.

■ Opens flat for easy access
■ Locks shut
■ Built-in handle makes it easy to carry
■ 8-1/16″ x 10-5/8″ x 1-13/16″

I will use a random number generator to determine the winner on January 1, 2012.

*****************************************************************************

Now on with the tutorial. . . . .

Supplies:

Stamps:  Stampin’ Up!  Plant Hope

Card Stock: Stampin’ Up! Baja Breeze, Soft Suede, Cherry Cobbler and Whisper White

Ink:  Stampin’ Up! Basic Black, Soft Suede, Baja Breeze and Not Quite Navy

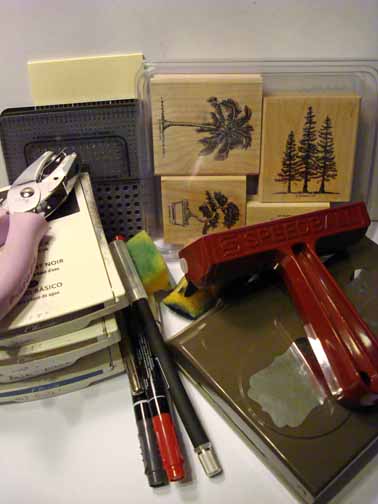
Accessories:  Stampin’ Up!  Basic Black Brads, Brayer, Bird and Decorative Label Punches, Mat Pack, Piercing Tool, White Gel Pen, Hole Punch, Sponges, Craft Knife, Cherry Cobbler and Basic Black markers, Stampin’ Up! Frostwood Lodge Designer Series paper, Glass Mat and post it notes.

Want a free copy of the Stampin’ Up! Holiday Mini Catalog?  Just e-mail your address to [email protected] and I will get one right out to you.  Get your copy of the new 2011-2012 Stampin’ Up! Idea Book & Catalog by sending $9.95 to me at P.O. box 116, West Alexandria, Ohio 45381 or via paypal to [email protected], shipping is free.      Are you getting inspiration from this blog?   One way you can help support it is to order your Stampin’ Up products through me.   Click HEREto place an order and have your order delivered directly to your door step from Stampin’ Up!    Want to become a Stampin’ Up Demonstrator , receive a 20% discount on product and earn instant income on orders?  Consider being part of my Stampin’ Up Team and start your own business or become a Hobby Demo just for the discount.  Click HERE for more information.

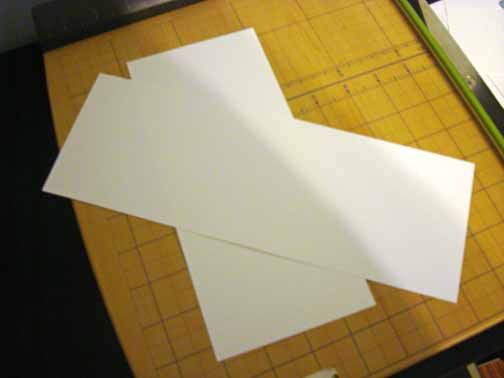
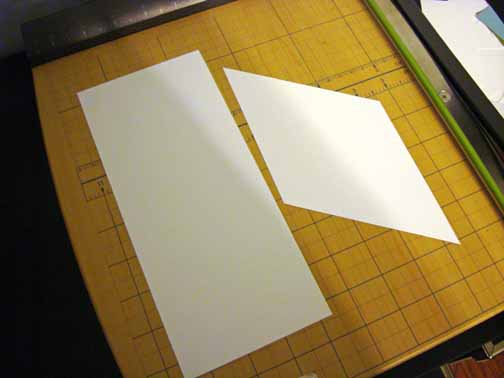
Cut 2 4″ x 9″ piece of Whisper White.  I know I want my main image panel to cross over my card at a diagonal so I held the card stock the way I wanted the main image panel to appear in the finished card and then cut the sides off of it using a paper cutter.

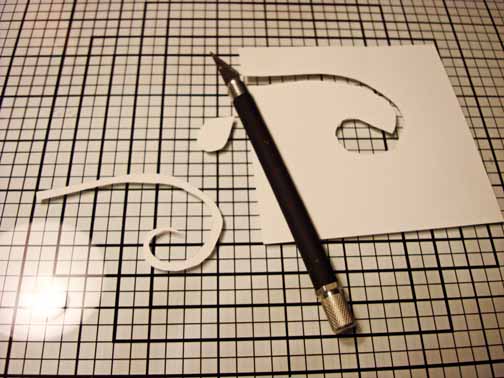
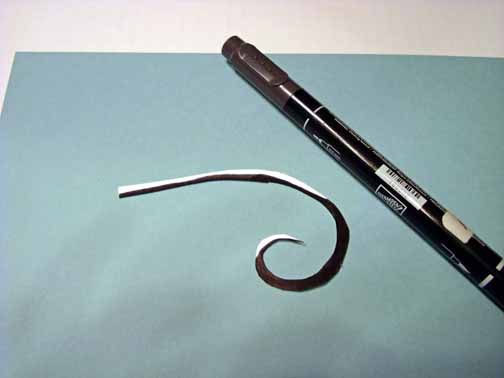
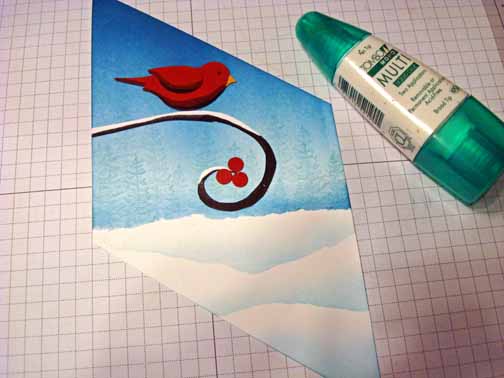
Using a glass mat and a craft knife, cut out a curly branch from Whisper White card stock.  Note:  when using a craft knife, move the card stock, not the knife when cutting.  This gives you better control and not such choppy lines.

Colored part of the branch using a Basic Black marker, leaving the areas that I wanted snow to appear white.

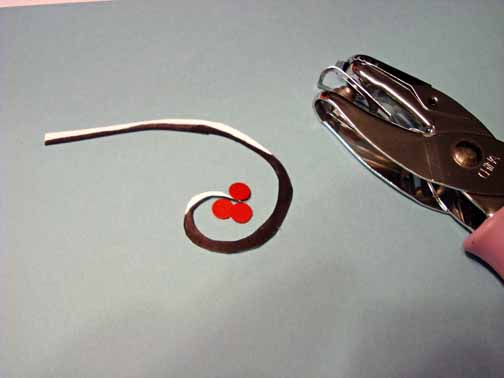
Punched 3 berries using a hole punch and Cherry Cobbler card stock.

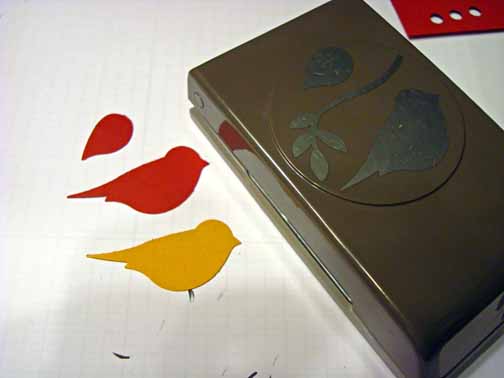
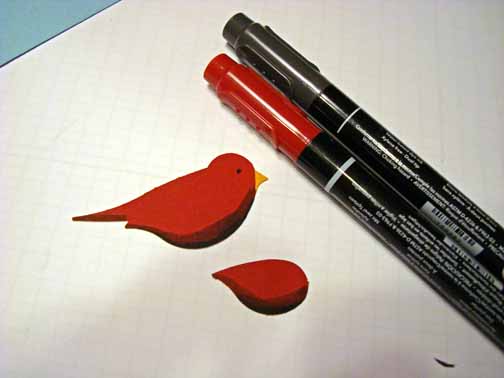
Punched 2 birds, one from More Mustard card stock and one from Cherry Cobbler card stock.

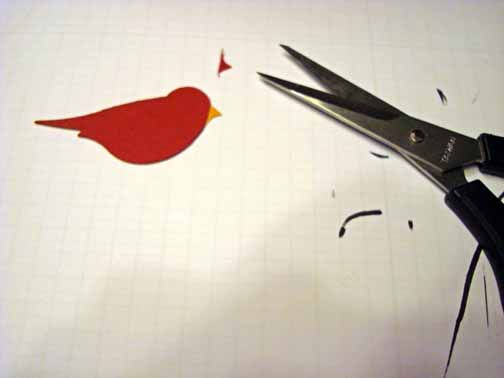
Cut the beak off of the Cherry Cobbler bird and layered it over the More Mustard bird.

Added Cherry Cobbler marker to the bottom of the bird and the bird’s wing.   Followed up with a bit of Basic Black marker at the very bottom edge of the bird and the bird’s wing.  Also added a Basic Black dot for the bird’s eye. 

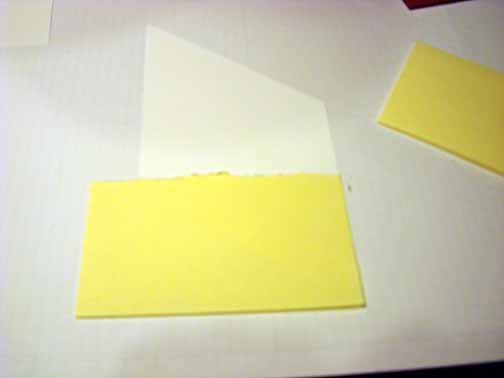
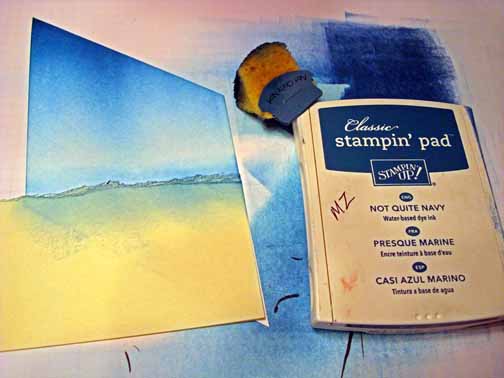
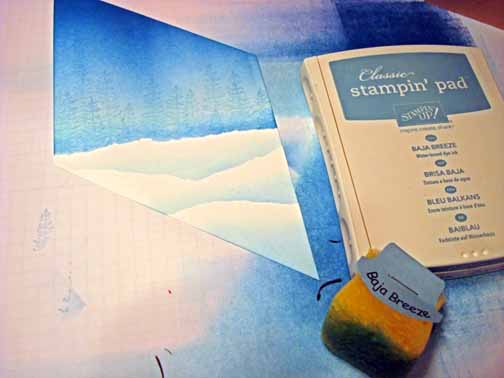
Now back to our main image panel.  Masked the bottom of the card stock using a post it note with a ripped jagged edge.  This mask is masking our snow area.

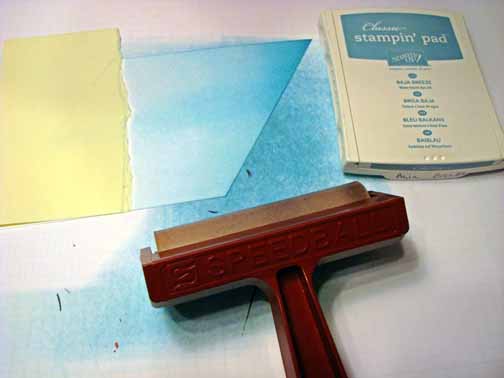
Brayered Baja Breeze ink in the sky area.

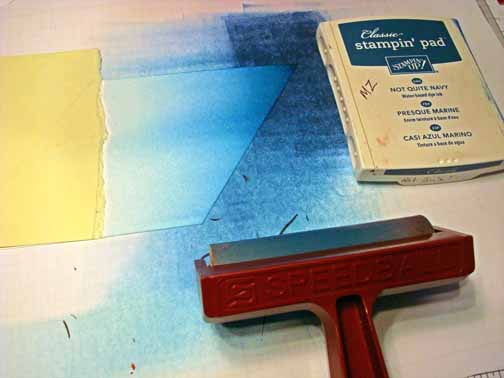
Brayered Not Quite Navy ink at the top of the card stock, not covering the Baja Breeze ink entirely.

Sponged a hint of Not Quite Navy at the horizon line (post it note edge).

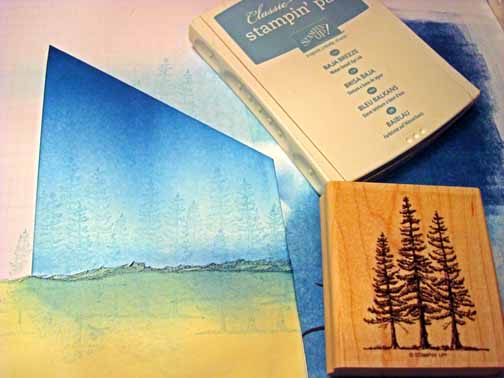
Stamped a hint of trees in the distances using Baja Breeze ink and the pines from Stampin’ Up! set Plant Hope.

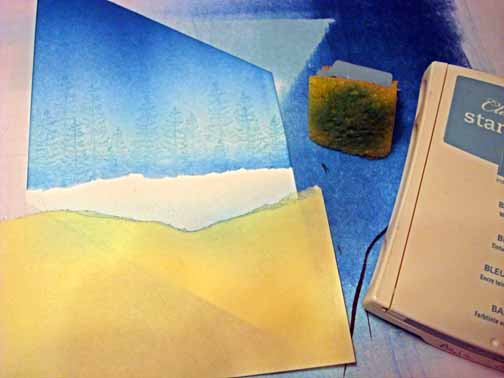
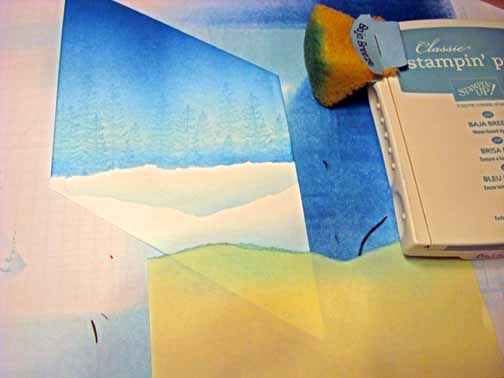
Removed the post it note mask and put a new one on that has a hill ripped into it.  Sponged Baja Breeze ink at the post it note edge.

Move the post it note down and over and sponged in another drift using Baja Breeze ink.

Removed the post it note and sponge Baja Breeze ink at the very bottom of the card stock.

Assembled my bird, branch and berries onto the main image panel.

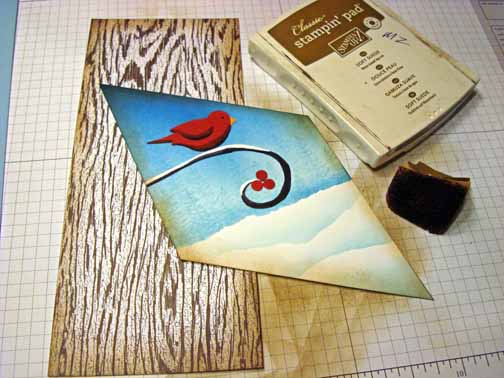
Cut a 3.75″ x 8.75″ piece of Stampin’ Up! Frostwood Lodge Designer Series Paper and then sponged Soft Suede ink around the edges of the both the paper and the main image panel.

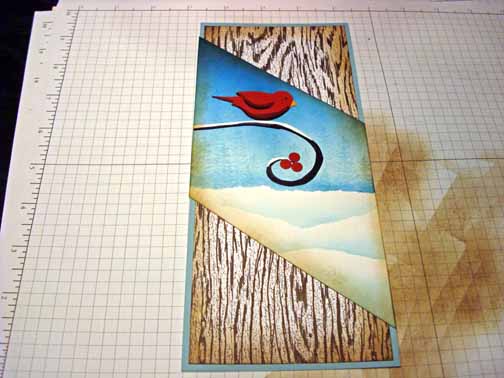
Added a 4″ x 9″ Baja Breeze card stock panel and assembled.

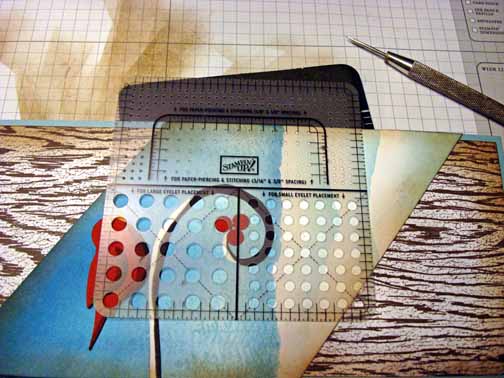
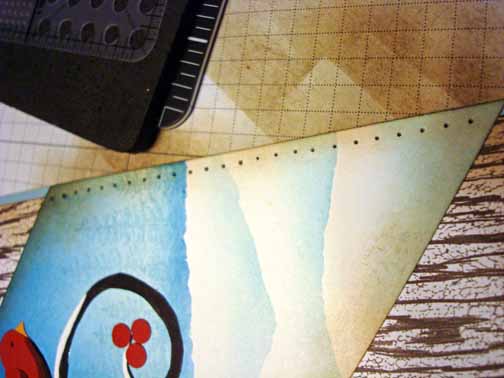
Using the mat pack and piercing tool, pierced holes along the edge of the main image panel on both sides.  

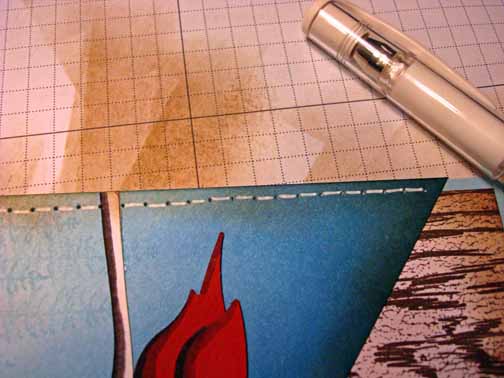
Added a dash of White gel pen from one hole to the next to create faux stitching.

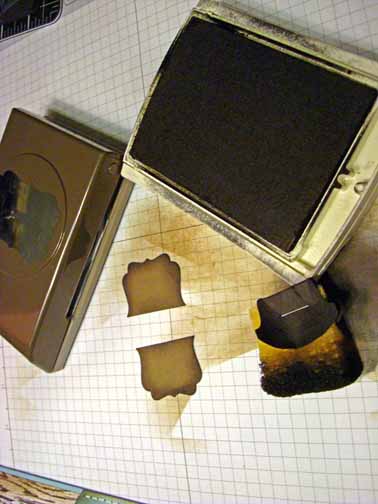
Punched a decortive lable punch from Soft Suede card stock and then cut it in half.  Sponged Basic Black ink around the edges of each piece.

Added them to my card front along with 4 Basic Black brads.  Sponged Basic Black ink all around the card front edges.

Added a white gel pen highlight to the top of each berry and a Cherry Cobbler marker shadow to the bottom of each berry.

Here is the finished card measuring 4″ x 9″.

May your day be filled with love and laughter.

Until my next post. . . . . . .

Hugs,

   Get ready for Brayer and Direct to Paper Workshops!  I am coming to the following locations, click the location name for more information.    


Dayton, Ohio – Direct to Paper Workshops 

Dayton, Ohio – Brayer Workshops

Las Vegas, Nevada    

Austin, Texas 

Seattle, Washington

 Greeneville, Tennessee 

Indianapolis, Indiana 

Indiana, Pennsylvania 

Sparta, New Jersey 

Piedmont, Alabama

Post Falls, Idaho (outside of Coeurd’Alene)

 Sand Lake, Michigan (just North of Grand Rapids)

Lawrence, Kansas 

Elizabethtown, Kentucky

West Bend, Wisconsin 

Longmont (Gunbarrel), Colorado 

Orange, Massachusetts

Sacramento, California

Staley, North Carolina

 
Here is a link to my workshop calendar where you can see all of my travel schedule and to get info on beginner and advanced Brayer workshops, along with the newly added Direct to Paper Workshop: https://zindorf.splitcoaststampers.com/workshop-calendar   


Don’t see a workshop in your State?  Interested in hosting the workshops in your area   Click HERE to get hostess information.       
 

Link to my Stampin’ Up website where you can order all of your must have Stampin’ Up products from me 24-7:  https://michellezindorf.stampinup.net