
Hey All. .. . . .
How about some coloring today? You can get some depth in your scenes by layering Stampin’ Up! markers and creating shadows around your images. Hang out a moment and check out this tutorial.
Let’s get started. . . . . .
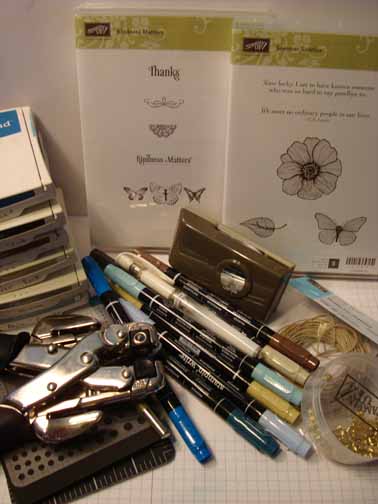
Supplies:
| Stamps: Stampin’ Up! Summer Solstice & Kindness Matters |
| Paper: Stampin’ Up! Whisper White, Baja Breeze, Not Quite Navy, River Rock, First Edition Designer Series Paper |
| Ink: Stampin’ Up! Pacific Point, Basic Black, Soft Suede, River Rock, Sahara Sand, Baja Breeze |
| Accessories: Stampin’ Up Markers (Chocolate Chip, Sahara Sand, Basic Black, Baja Breeze, River Rock, Bashful Blue, Not Quite Navy, Pacific Point), Mat Pack, Piercing Tool, 3/4″ x 15/16″ oval punch, Crop-o-dile, Hemp Twine, gold eyelets, White Gel Pen, Sponge |
Get your copy of the new 2011-2012 Stampin’ Up! Idea Book & Catalog by sending $9.95 to me at P.O. box 116, West Alexandria, Ohio 45381 or via paypal to [email protected], shipping is free. Want a free copy of the new Summer Mini Catalog ? E-mail your mailing address to [email protected] and I will get one in the mail to you. ![]() Are you getting inspiration from this blog? One way you can help support it is to order your Stampin’ Up products through me. Click HERE to place an order. Want to become a Stampin’ Up Demonstrator , receive a 20% discount on product and earn instant income on orders? Consider being part of my Stampin’ Up Team and start your own business or become a Hobby Demo just for the discount. Click HERE for more information.
Are you getting inspiration from this blog? One way you can help support it is to order your Stampin’ Up products through me. Click HERE to place an order. Want to become a Stampin’ Up Demonstrator , receive a 20% discount on product and earn instant income on orders? Consider being part of my Stampin’ Up Team and start your own business or become a Hobby Demo just for the discount. Click HERE for more information.
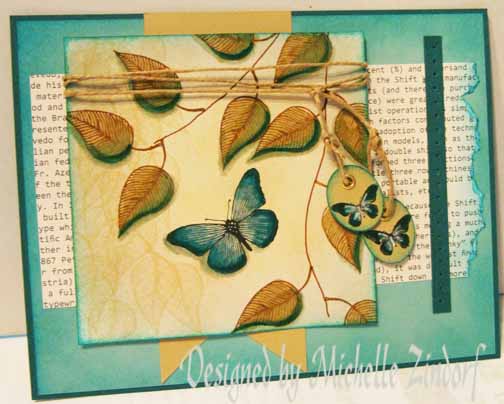
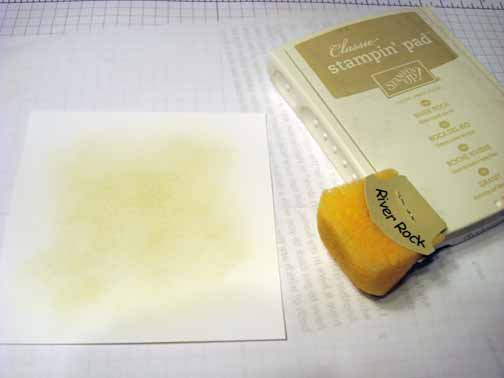
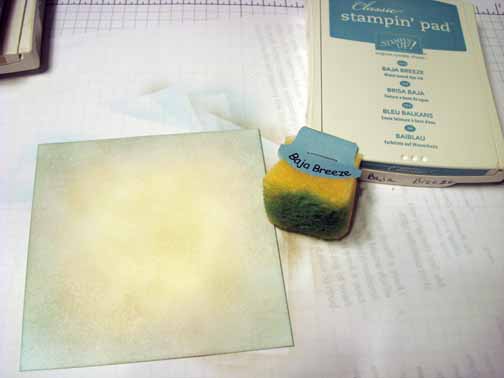
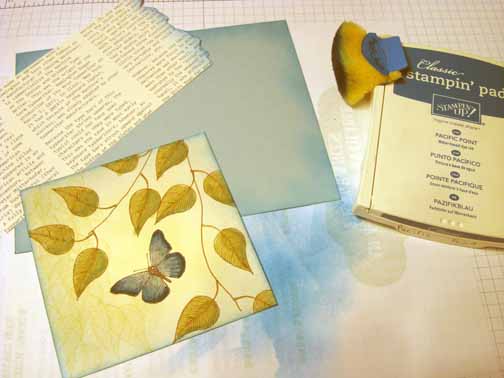
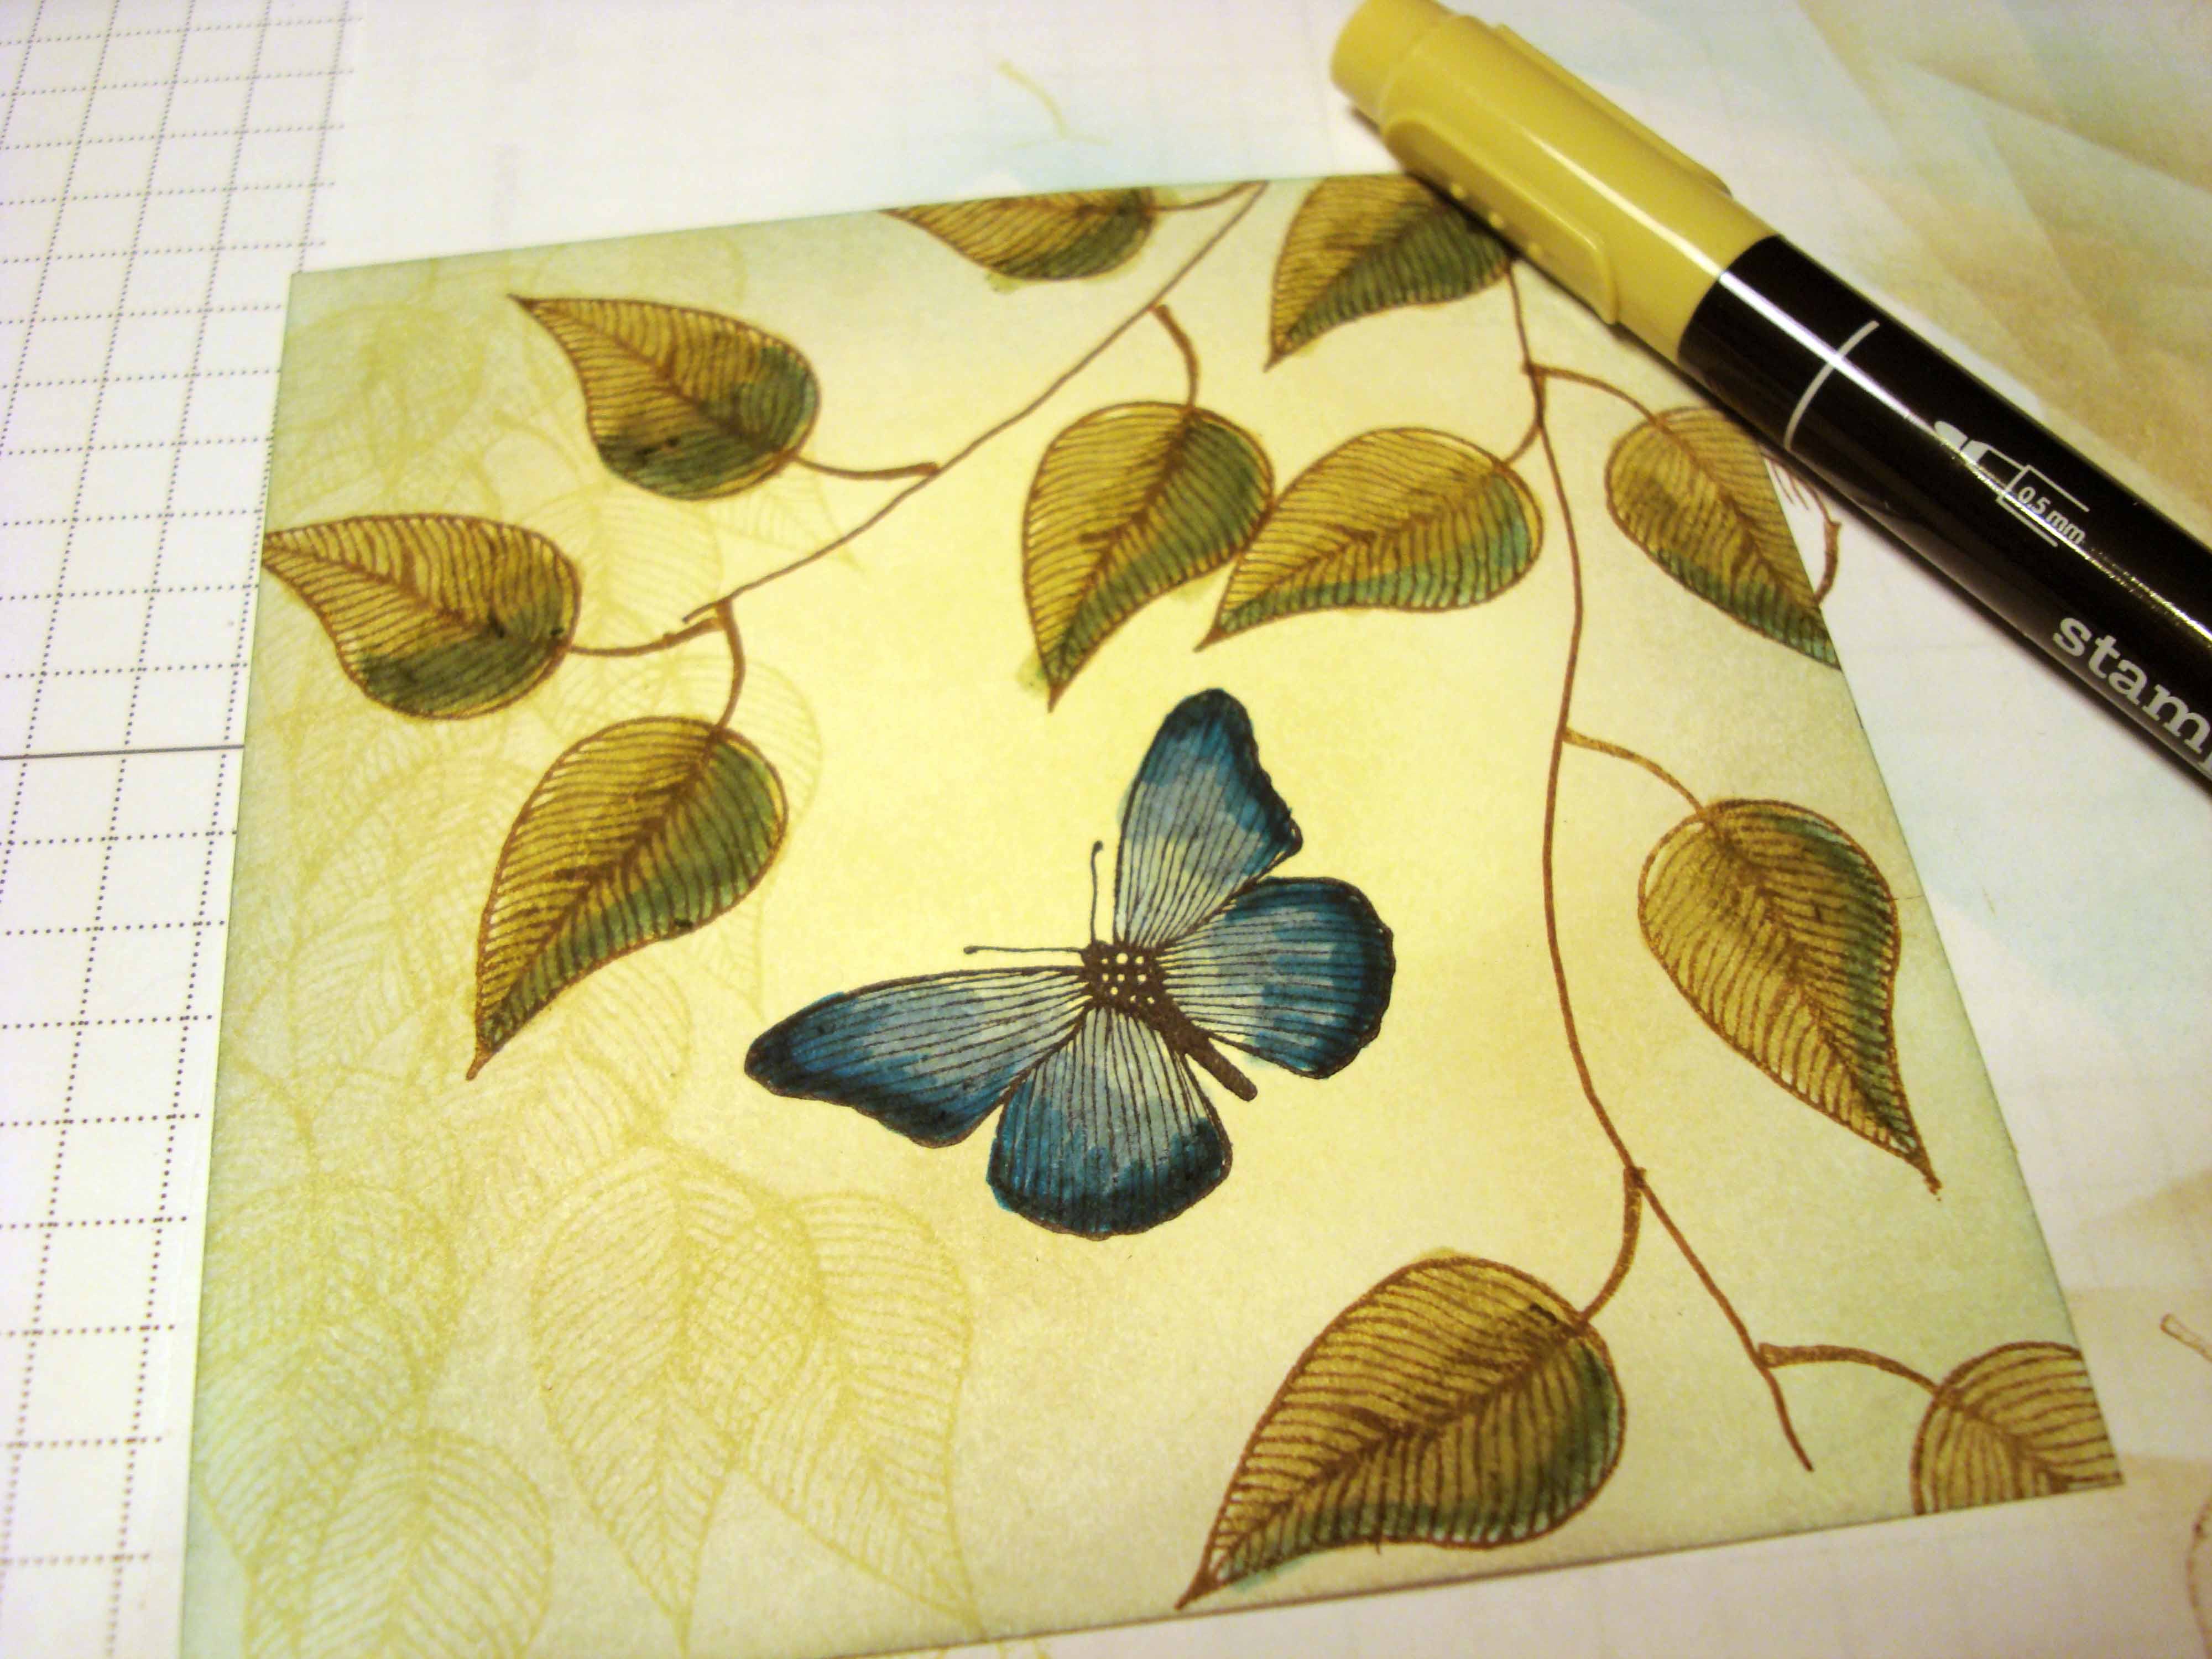
Sponge River Rock ink in the middle of a 4″ square piece of Whisper White card stock.
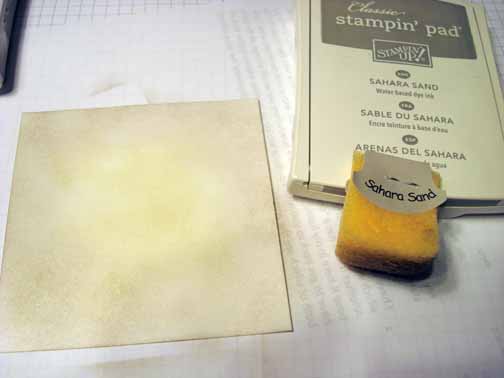
Sponged Sahara Sand ink around the outside of the River Rock ink.
Sponged Baja Breeze ink around the edges of the card stock.
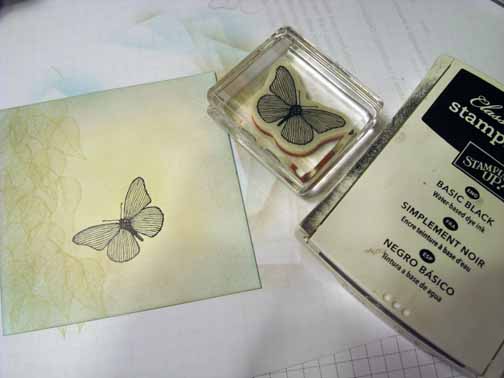
Stamped the leaf from the Stampin’ Up! set Summer Solstice using River Rock ink.

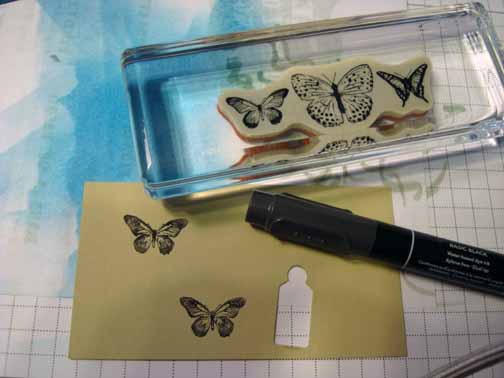
Stamped the Butterfly from the Stampin’ Up! set Summer Solstice using Basic Black ink.
Drew to lines using a Chocolate Chip marker. These will be the branches for the leaves.
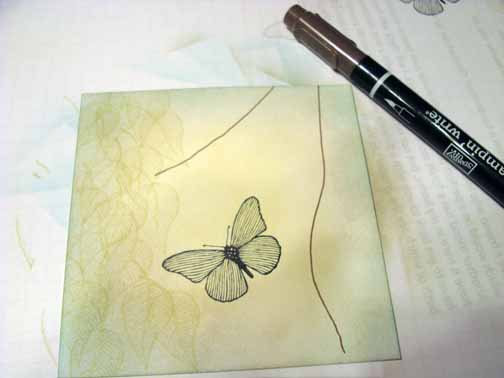
Stamped the leaves so the stems met the branchs using Soft Suede ink.
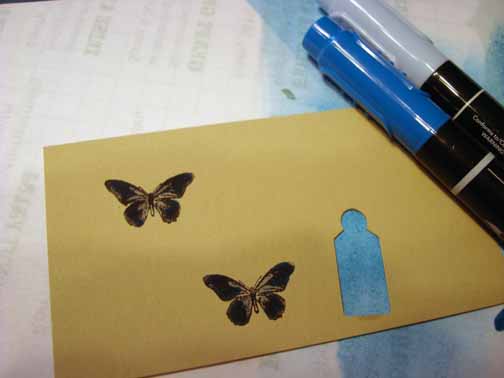
Colored in the butterfly using a Bashful Blue marker.
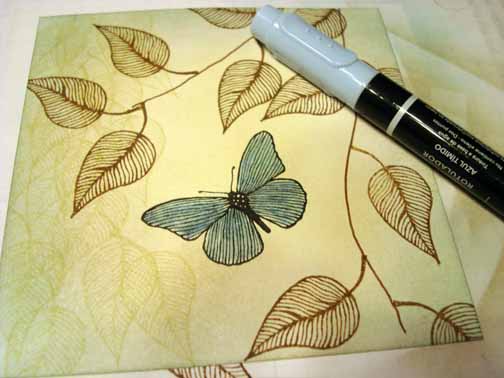
Added Pacific Point marker to the wings.
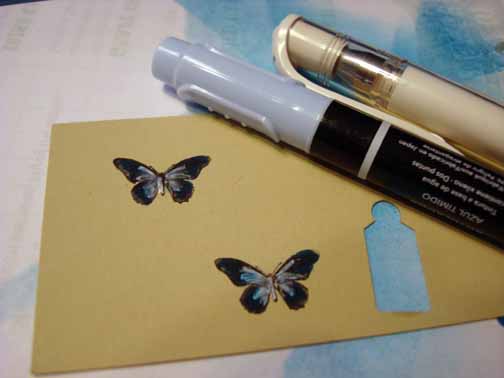
Blended the two colors together by coloring over them using the Bashful Blue marker again.

Added a bit of Not Quite Navy marker to the edges of the wings.

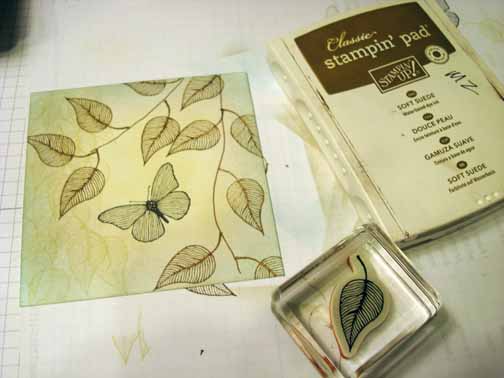
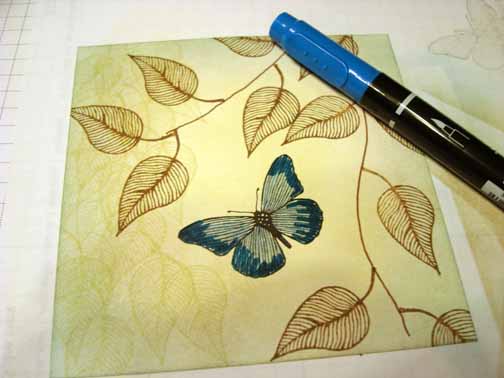
Colored the leaves in using a River Rock marker.
Added Baja Breeze marker to the leaves.

Colored over the leaves again using the River Rock marker to blend.
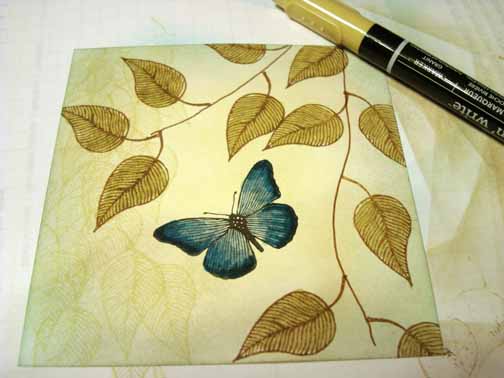
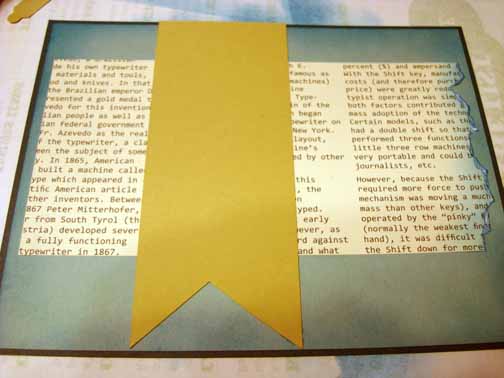
Cut a 4 7/8″ x 6.4″ Baja Breeze card stock, a 3″ x 4.75″ piece of Designer Series Paper (ripped on the right side), sponged Pacific Point ink on the edges of the panels and main image panel.
Added Pacific Point marker to the leaves.
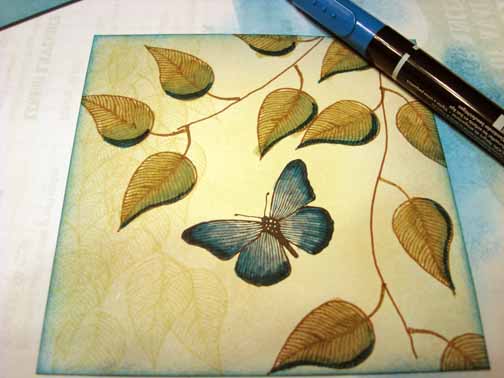
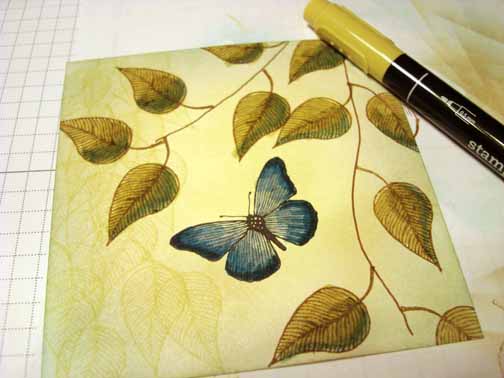
Added a shadow using the Sahara Sand marker.

Layered a Not Quite Navy panel, the Baja Breeze Panel, designer series panel and a River Rock panel that has been cut into a “V” at the end.
Added Hemp Twine to the main image panel and popped up the panel using Stampin’ Demensionals.
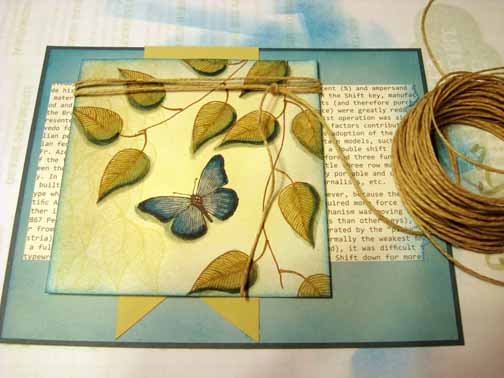
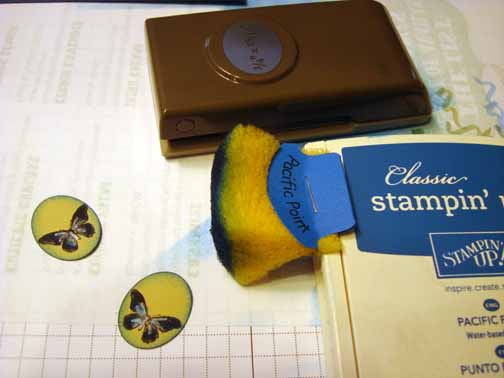
Stamped one of the butterflies on River Rock card stock, twice using a Basic Black marker to load the image.
Added Bashful Blue and Pacific Point marker to the butterflies.
I wanted the middle of the butterflies to be lighter so I colored in the middles using a White Gel pen and then colored over the white gel pen using the Bashful Blue marker.
Punched out the butterflies using a 3/4″ x 15/16″ oval punch. Sponged Pacific Point ink around the edges of each.
Using the Crop-o-dile, added gold eyes.
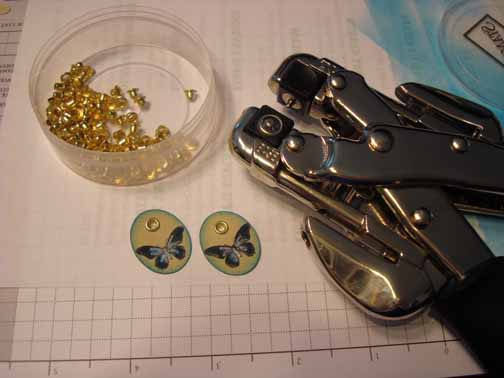
Tied the tags onto the twine ends and then popped up the tags using Stampin’ Demensionals.
Added a strip of Not Quite Navy card stock to the right hand side of the card and pierced holes in the strip using the Stampin’ Up! mat pack and piercing tool.

Here is the finished card measuring 5″ x 6.5″.
May your day be filled with fun and laughter.
Until my next post. . . . . .
Hugs,
Michelle
 Get ready for Brayer Workshops! I am coming to the following locations, click the location name for more information.
Staley , North Carolina (South of Greensboro)
Jefferson, Louisiana (New Orleans Area)
Here is a link to my workshop calendar where you can see all of my travel schedule and to get info on beginner and advanced Brayer workshops: https://zindorf.splitcoaststampers.com/workshop-calendar
Don’t see a workshop in your State? Interested in hosting the workshops in your area in 2012? Click HERE to get hostess information.
Link to my Stampin’ Up website where you can order all of your must have Stampin’ Up products from me 24-7: https://michellezindorf.stampinup.net
Pingback: Leaves & Butterfly – Tutorial #438