
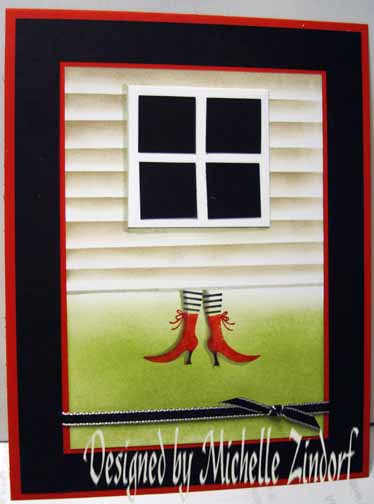
Today’s tutorial uses the Stampin’ Up! set Wicked Cool. Now this image of the witch’s feet have been rattling around in my head and I just got around to putting this scene down on paper. Does the Wizard of Oz come to mind, lol.
Let’s see who can come up with the best sentiment for this card, LOL. Who would you send it to?
I use to work with a women that I could easily send this to. 🙂 Awww, now that wasn’t too nice of me.
Let’s get started on the tutorial. . . . .
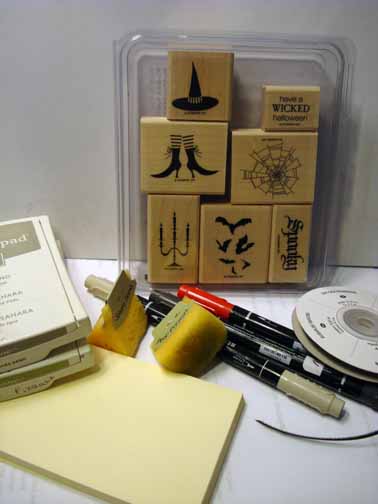
Supplies:
| Stamps: Stampin’ Up! Wicked Cool |
| Paper: Stampin’ Up! Basic Black, Real Red and Whisper White |
| Ink: Stampin’ Up! Sahara Sand & Pear Pizzazz |
| Accessories: Stampin’ Up! Sponges, Basic Black Taffeta Ribbon, Basic Black, Real Red & Sahara Sand Markers, Post it note |
| Techniques: Masking |
Want a free copy of the new Summer Mini Catalog ? E-mail your mailing address to [email protected] and I will get one in the mail to you. ![]() Are you getting inspiration from this blog? One way you can help support it is to order your Stampin’ Up products through me. Click HERE to place an order. Want to become a Stampin’ Up Demonstrator , receive a 20% discount on product and earn instant income on orders? Consider being part of my Stampin’ Up Team and start your own business or become a Hobby Demo just for the discount. Click HERE for more information.
Are you getting inspiration from this blog? One way you can help support it is to order your Stampin’ Up products through me. Click HERE to place an order. Want to become a Stampin’ Up Demonstrator , receive a 20% discount on product and earn instant income on orders? Consider being part of my Stampin’ Up Team and start your own business or become a Hobby Demo just for the discount. Click HERE for more information.
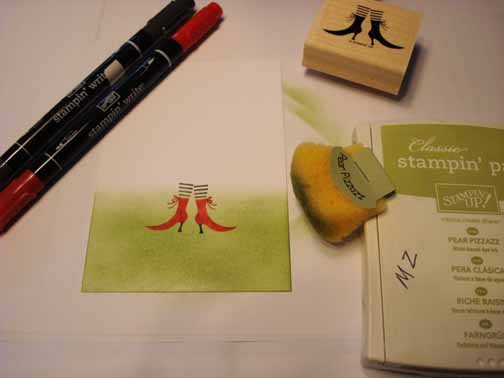
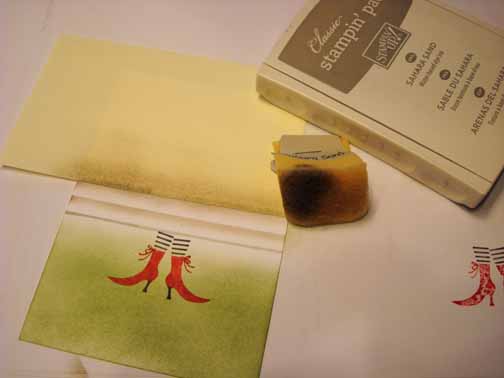
Sponged Pear Pizzazz ink at the bottom of a 3.5″ x 5″. Stamped the Witch’s feet on the card stock after loading it with Basic Black & Real Red marker.
Mask the top of the card stock using a post it note. Drew a line of Sahara Sand marker at the post it note edge.
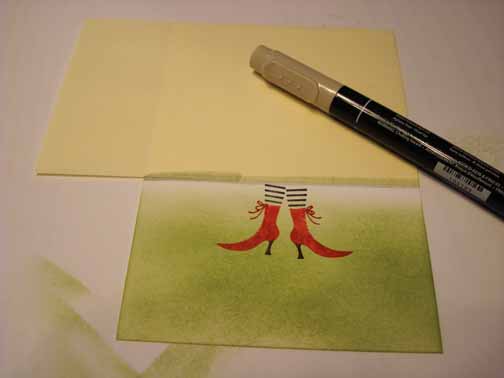
Moved the post it note up a bit and sponged in Sahara Sand ink. Moved the post it note up again a bit and sponged in Sahara Sand ink. Repeated until the lines run to the top of the card stock.

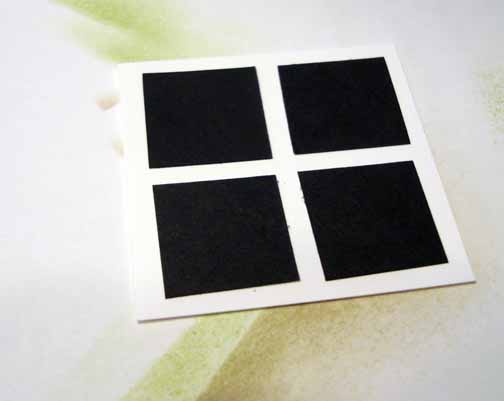
Cut a 1 7/8″ square of Whisper White card stock. Added 4 – 7/8″ squares of Basic Black card stock.
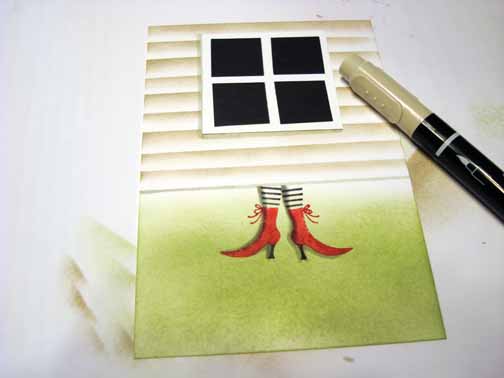
Added the window to the scene. Outlined the left side and bottom of the Window and feet to create a shadow.
Added 2 Real Red panels and 1 Basic Black panel. Added Basic Black taffeta ribbon.
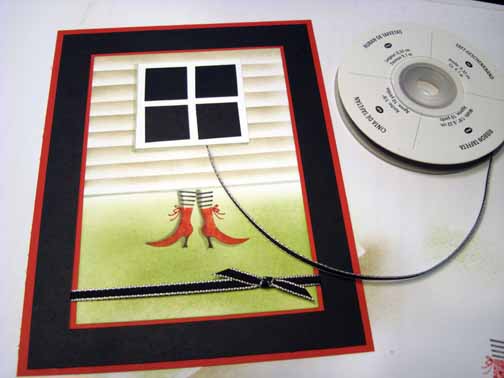
Here is the finished card measuring 5″ x 6.5″.
May your day be Wicked Fun!
I’m off to Owing Mills, Maryland in the morning to teach this weekend.
Until my next post. . . . . . .
Hugs,
 Get ready for Brayer Workshops! I am coming to the following locations, click the location name for more information.
Staley , North Carolina (South of Greensboro)
Jefferson, Louisiana (New Orleans Area)
Here is a link to my workshop calendar where you can see all of my travel schedule and to get info on beginner and advanced Brayer workshops: https://zindorf.splitcoaststampers.com/workshop-calendar
Don’t see a workshop in your State? Interested in hosting the workshops in your area in 2012? Click HERE to get hostess information.
Link to my Stampin’ Up website where you can order all of your must have Stampin’ Up products from me 24-7: https://michellezindorf.stampinup.net
Pingback: Wicked – Tutorial #436