Monthly Archives: November 2009

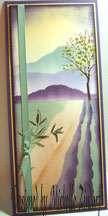
Fall Lake – Tutorial #279

dsc01490.JPG

I noticed last Monday when I was driving to Ohio from Oklahoma that most of the leaves were off of the trees but the grass was still green in a lot of areas.   This tutorial is my interpretation of what I saw. 

Tomorrow morning I will be traveling to Nashville, Indiana to teach my brayer technique there.  Driving from location to location is so very inspiring.  I cannot wait to hit the road once again!

The Stampin’ Up Set, Branch Out is on the dormant list with Stampin’ Up! so it can still be ordered although it is not in the current catalog, item #113200. 

This is one of my longer tutorials so grab a cup of your favorite warm drink and hang out a while.

Supplies:

Stamps: Stampin’ Up Branch Out, En Francais, Falling Leaves Sentiment
Paper: Stampin’ Up! Whisper White & Basic Black
Ink: Stampin’ Up! Basic Black, Old Olive, Apricot Appeal, Bashful Blue, Creamy Caramel, Going Gray & Chocolate Chip
Accessories: Stampin’ Up! Chocolate Chip Ribbon, Bashful Blue Brads, White Gel Pen, Stamp-a-ma-jig, piercing tool & Sponges

Want a free 39 page, Stampin’ Up Mini catalog?  If you are a resident of the United States,  just e-mail your mailing address to me and I will get one in the mail to you.  Are you inspired by this Blog?  One way you can help support this blog is by ordering your Stampin’ Up products through me.   You can order from me 24-7 from this link:  https://michellezindorf.stampinup.net or e-mail me at [email protected].  If you are within the United States.  Want a copy of the brand new 2009-2010 Stampin’ Up Catalog for $9.95 with free shipping, just e-mail me at [email protected] and I will get one in the mail to you.  Want to become a Stampin’ Up Demonstrator and earn instant income?  Consider being part of my Stampin’ Up Team.  Also check out the Stampin’ Up specials, click this link to check it out:  https://www.stampinup.net/esuite/home/michellezindorf/promotions

dsc01493.JPG

I wanted to do a large main image panel for this card.  Started out with a 4.75″ x 6.26″ piece of Whisper White card stock.  Masked over 1/2 of the card stock at the bottom with two large post it notes.

dsc01461.JPG

Brayered Apricot Appeal ink at the bottom of the unmasked area.

dsc01462.JPG

Brayered Bashful Blue at the top of the card stock.

dsc01463.JPG

Brayered Going Gray ink at the top of the card stock, not covering the Bashful Blue ink entirely.    I think I have found another great winter sky color combo.  🙂

dsc01464.JPG

Using the edge of the Old Olive ink pad, streaked in some color at the bottom of the unmasked area.

dsc01465.JPG

Sponged some Chocolate Chip ink over the Old Olive, not covering it entirely.

dsc01466.JPG

Moved the post it note mask down 1/2 inch.

dsc01467.JPG

Streaked in some Old Olive ink in the white unmasked area with the edge of the Old Olive ink pad.

dsc01468.JPG

Sponged some Chocolate Chip ink at the bottom of the unmasked area.

dsc01469.JPG

Sponged some Basic Black ink right at the post it note edge.

dsc01470.JPG

Stamped the tree from the Stampin’ Up Branch Out set across the card stock using Basic Black ink.

dsc01472.JPG

Took the inky post it notes off of the card stock.  Turned the card stock upside down and masked the sky area of the card stock with two clean post it notes.

dsc01473.JPG

Brayered Apricot Appeal ink on the card stock.

dsc01474.JPG

Brayered Bashful Blue ink on the card stock.

dsc01475.JPG

Brayered Going Gray ink over the Bashful Blue ink, not covering it entirely.

dsc01476.JPG

Lightly sponged a bit of Old Olive ink over the Apricot Appeal ink.

dsc01477.JPG

Sponged on a little Chocolate Chip ink at the post it note edge.

dsc01478.JPG

Marked on the side of my wood block with a marker to indicate where the trunk of the tree is so when I stamp it I can line up the reflection tree trunk with the Original stamped images trunk.

dsc01479.JPG

Used the clear plastic sheet that came with my Stamp-a-ma-jig to mask the top of the card stock so I can still see the original stamped trees.

dsc01480.JPG

Stamped the reflection trees using Going Gray ink and lining the tree trunks up with the original trees that are stamped with Basic Black.

dsc01481.JPG

Added White Gel pen streaks in the water area.

dsc01482.JPG

Sponged Basic Black ink around the edge of the card stock.

dsc01483.JPG

Stamped the Stampin’ Up Background stamp, En Francais using Creamy Caramel ink on the left third of the card stock.

dsc01484.JPG

Stamped the “Grateful” sentiment from the Stampin’ Up set Falling Leaves using Chocolate Chip ink.

dsc01485.JPG

Added Chocolate Chip Ribbon and Bashful Blue brads.

dsc01486.JPG

Finished assembling card.  Here it is finished measuring 5″ x 6.5″.

dsc01490.JPG

I hope this tutorial has inspired you to look at what surrounds you so you can put it on paper.  🙂

Until my next post. . . . . . . . .

Huge Hugs,

Michelle
dsc01434.jpg  Get ready for Brayer Workshops!  I am coming to:

Nashville, Indiana

Portland, Michigan

2010

Dayton, Ohio at Marco Paper

Phoenix, Arizona

Monroe, Louisiana

Jacksonville, Florida

 St. Louis, Missouri

Mechanicsville, Virginia

Raleigh, North Carolina 

Colleyville, Texas

Colorado Springs, Colorado

 Boise area of Meridian, Idaho

Riverside, California (Southern California)

Salem, Oregon

Wheaton, Illinois

St. Cloud, Minnesota

Rockville, Maryland

North Chili, New York (near Rochester)

New Johnsonville, Tennessee

Kenova, West Virginia

Helena, Montana

Middleburg Heights, Ohio

Venice, Florida

Grinnell, Iowa

Piedmont, Alabama

Auburn, Washington (near Seattle)

Elk Grove Village, Illinois

Atlanta, Georgia

Soledad, California

Here is a link to my workshop calendar where you can see all of my travel schedule and to get info on beginner and advanced Brayer workshops:   https://zindorf.splitcoaststampers.com/workshop-calendar 

Link to my Stampin’ Up website where you can order all of your must have Stampin’ Up products from me 24-7:  https://michellezindorf.stampinup.net

Frequently asked questions answers:  https://zindorf.splitcoaststampers.com/frequently-asked-questions/ 

The Birds – Tutorial #278 and a Blog Candy Winner!

dsc01455.JPG

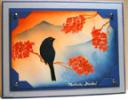
Today’s tutorial has been in my head for a few days.  It turned out a little more Hitchcock looking than I had intended, lol.   I have a few bird feeders around the house.  This project reminds me of what the birds look like when I have not braved the cold to fill the bird feeders.  They will just hang out in the trees waiting for me.  🙂  I hope you enjoy this bright project.

Before we start the tutorial I have a couple of announcements to make.  I will be teaching my brayer workshops in these two great cities in 2010, Atlanta, Georgia on October 16-17, 2010 and Soledad, California on November 13-14, 2010.   Click this link to see where else I will be teaching:  https://zindorf.splitcoaststampers.com/workshop-calendar/

dsc01436.JPG  Also, I have a Blog Candy Winner!  The winner of this very cute Stampin’ Up! set, Note to Self is. . . . .. … . . . . . . . . . . . . . . . . . . . .. . . .

Samantha who wrote “Fun blog candy! The best notes I’ve recently received are those from friends wishing me luck on a craft fair. I love my friends!”

Samantha, congratulations!  Please e-mail your address to [email protected] within 30 days and I will send you this great set. 

Thanks to all who played along. 

Supplies:

Stamps: Stampin’ Up! Graveyard Gala and Bird on a Branch
Paper: Stampin’ Up! Whisper White, Basic Black and More Mustard
Ink: Stampin’ Up! Summer Sun, More Mustard, Pumpkin Pie, Really Rust, Real Red and Basic Black
Accessories: Stampin’ Up Big Shot Machine, Tulipe Die Cuts, Stamp-a-ma-jig, sponge and Silver Brads

Want a free 39 page, Stampin’ Up Mini catalog?  If you are a resident of the United States,  just e-mail your mailing address to me and I will get one in the mail to you.  Are you inspired by this Blog?  One way you can help support this blog is by ordering your Stampin’ Up products through me.   You can order from me 24-7 from this link:  https://michellezindorf.stampinup.net or e-mail me at [email protected].  If you are within the United States.  Want a copy of the brand new 2009-2010 Stampin’ Up Catalog for $9.95 with free shipping, just e-mail me at [email protected] and I will get one in the mail to you.  Want to become a Stampin’ Up Demonstrator and earn instant income?  Consider being part of my Stampin’ Up Team.  Also check out the Stampin’ Up specials, click this link to check it out:  https://www.stampinup.net/esuite/home/michellezindorf/promotions

dsc01456.JPG

Started with a 2 7/8″ x 4 7/8″ piece of Whisper White card stock.   Using just the corner of the Summer Sun ink pad I smeared the ink on the card stock.  I kept turning the ink pad different directions so I would get a very streaked look.

dsc01440.JPG

Using the corner of a More Mustard ink pad I added a bit of ink, not covering the Summer Sun ink entirely.

dsc01441.JPG

Using a corner of a Pumpkin Pie ink pad, added a bit of ink, not covering the More Mustard ink entirely.

dsc01442.JPG

Using a corner of a Really Rust ink pad, added a bit of ink, not covering the Pumpkin Pie ink entirely.

dsc01443.JPG

Lastly added Real Red ink with the corner of the ink pad, not covering the Really Rust ink entirely.

dsc01444.JPG

Stamped the branch from the Stampin’ Up! set, Bird on a Branch with Basic Black ink.

dsc01445.JPG

Using a Stamp-a-ma-jig for placement, stamped the birds with Basic Black ink.

dsc01446.JPG

dsc01447.JPG

Layered by main image panel with Basic Black and More Mustard panels.  Sponged Real Red ink around the edges of the More Mustard Panel.

dsc01450.JPG

Cut two Tulipe die Cuts from Basic Black card stock using my Big Shot Machine.

dsc01448.JPG

Cut part of the design away.

dsc01449.JPG

Glued what was left of the two die cuts on each side of the main image panel.

dsc01451.JPG

Added Silver Brads.  Here is the finished card measuring 5.25″ square.

dsc01455.JPG

I hope you have some time today to get those card ideas you have rolling around in your brain down on paper.  🙂

Until my next post. . . . . . . . . . .

Huge Hugs,

Michelle

dsc01434.jpg  Get ready for Brayer Workshops!  I am coming to:

Nashville, Indiana

Portland, Michigan

2010

Dayton, Ohio at Marco Paper

Phoenix, Arizona

Monroe, Louisiana

Jacksonville, Florida

 St. Louis, Missouri

Mechanicsville, Virginia

Raleigh, North Carolina 

Colleyville, Texas

Colorado Springs, Colorado

 Boise area of Meridian, Idaho

Riverside, California (Southern California)

Salem, Oregon

Wheaton, Illinois

St. Cloud, Minnesota

Rockville, Maryland

North Chili, New York (near Rochester)

New Johnsonville, Tennessee

Kenova, West Virginia

Helena, Montana

Middleburg Heights, Ohio

Venice, Florida

Grinnell, Iowa

Piedmont, Alabama

Auburn, Washington (near Seattle)

Elk Grove Village, Illinois

Atlanta, Georgia

Soledad, California

Here is a link to my workshop calendar where you can see all of my travel schedule and to get info on beginner and advanced Brayer workshops:   https://zindorf.splitcoaststampers.com/workshop-calendar 

Link to my Stampin’ Up website where you can order all of your must have Stampin’ Up products from me 24-7:  https://michellezindorf.stampinup.net

Frequently asked questions answers:  https://zindorf.splitcoaststampers.com/frequently-asked-questions/ 
Note To Self – Blog Candy!!!

dsc01436.JPG

I am currently teaching in Oklahoma but I have some blog candy for you. 

If you wish to throw your hat in the ring to try to win this great Stampin’ Up! set, Note to Self,  please leave a comment telling me about a favorite note you have sent someone or someone has sent to you.  🙂   If you are receiving this blog update via e-mail, you will need to click this link and then leave a comment:   https://zindorf.splitcoaststampers.com/2009/11/07/note-to-self-blog-candy/

I will select the winner using a random number generator on Tuesday, November 10, 2009.

Good luck to all!

Until my next post. . . . .  .

Hugs,

Michelle

Chilly Season’s Greetings – Tutorial #277

dsc01424.JPG

I know I just returned home from Colorado a few days ago, but I’m so very excited!  Tomorrow morning (Friday) 3:00 a.m., I am hitting the road again.  This time I am heading to Moore, Oklahoma to teach my brayer workshops.  It’s a good thing that I like to drive.  🙂  I hope you ladies in Moore, OK are ready to brayer!  Because here I come. . . . . .

dsc01362.JPG

Today’s tutorial is a chilly one.  I used three cool shades of Blue to achieve that chilly look.  You could also use cool shades of purple for this project.   🙂  Did you know there are warm shades and cool shades to every color?  Take a look at your Blue ink pads that you have.  Can you guess which are warm and which are cool?   How about your red shades?  I bet you can.     Now you may not have as many ink pads as I have, because I am a bit sick.  But I bet you have a few, or maybe you have more ink than I have.  I just never know with you stampers.  🙂  Hmmm, I see some empty spots I need to fill.

dsc06118.JPG

Oh yeah, the tutorial, sorry I got a bit off track there. 

Let’s get started. . . . . . .  .

Supplies:

Stamps: Stampin’ Up! Branch Out and Many Merry Messages
Paper: Stampin’ Up! Whisper White, Bordering Blue and Basic Black
Ink: Stampin’ Up! Basic Gray, Night of Navy, Not Quite Navy, Bordering Blue and Basic Black
Accessories: Stampin’ Up! Ticket Corner Punch and Word Window Punch, Basic Black Marker, White Gel Pen, Sponge, Brayer, Post it notes, Big Shot Die Cut Machine and Flourish Texturz Plate, Silver Brads

Want a free 39 page, Stampin’ Up Mini catalog?  If you are a resident of the United States,  just e-mail your mailing address to me and I will get one in the mail to you.  Are you inspired by this Blog?  One way you can help support this blog is by ordering your Stampin’ Up products through me.   You can order from me 24-7 from this link:  https://michellezindorf.stampinup.net or e-mail me at [email protected].  If you are within the United States.  Want a copy of the brand new 2009-2010 Stampin’ Up Catalog for $9.95 with free shipping, just e-mail me at [email protected] and I will get one in the mail to you.  Want to become a Stampin’ Up Demonstrator and earn instant income?  Consider being part of my Stampin’ Up Team.  Also check out the Stampin’ Up specials, click this link to check it out:  https://www.stampinup.net/esuite/home/michellezindorf/promotions

dsc01433.JPG

Starting with a 3.5″ x 5.5″ piece of Whisper White Card stock.  I masked the bottom 1/3 of the card stock with a post it note and brayered Bordering Blue ink on the unmasked area.

dsc01404.JPG

Brayered Not Quite Navy at the top of the card stock, not covering the Bordering Blue ink entirely.

dsc01405.JPG

Brayered Night of Navy ink at the top of the card stock, not covering the Not Quite Navy ink entirely.

dsc01406.JPG

Removed the post it note mask and brayered Bordering Blue ink at the bottom of the card stock.

dsc01407.JPG

Stamped the tree from the Stampin’ Up! set Branch Out with Basic Grey ink.

dsc01408.JPG

Ripped a couple of hills in the edge of a post it note and used it to create some mounds of snow in the scene.  This was done by sponging Bordering Blue ink at the post it note edge and then moving it and sponging again for each mound.

dsc01410.JPG

dsc01411.JPG

Sponged Basic Black ink around the edges of the card stock.  Heavier at the top.

dsc01412.JPG

Added White Gel pen to the tree and the mounds of snow.

dsc01413.JPG

Added a shadow in the tree by outlining the right sides to some of the branches and the trunk.

dsc01414.JPG

Ran a 4 7/8″ x 6 3/4″ Bordering Blue Panel through my Big Shot Machine using the Flourish Texture Plate.

dsc01415.JPG

Brayered Bordering Blue ink on the panel to bring out the dry embossing further.

dsc01416.JPG

Sponge Basic Black ink around the outside edges.

dsc01417.JPG

Used the Stampin’ Up! Ticket Corner Punch on a Whisper White Panel and on the main image panel.

dsc01418.JPG

Stamped a lone bird in the tree using Basic Black ink.

dsc01419.JPG

Punched to word windows out of Basic Black card stock.  Cut one end off of each of them.  Adhered them with glue and added a silver brads to each one.

dsc01420.JPG

Stamped the sentiment from the Stampin’ Up! set Many Merry Messages using Basic Black ink.

dsc01422.JPG

Here is the finished card measuring 5″ x 6.5″.

dsc01424.JPG

May your day be filled with peace and harmony.  Please wish me safe travels.

Until my next post. . . . . . . . .

Hugs,
Michelle

dsc01434.jpg  Get ready for Brayer Workshops!  I am coming to:

Moore, Oklahoma

Nashville, Indiana

Portland, Michigan

2010

Dayton, Ohio at Marco Paper

Phoenix, Arizona

Monroe, Louisiana

Jacksonville, Florida

 St. Louis, Missouri

Mechanicsville, Virginia

Raleigh, North Carolina 

Colleyville, Texas

Colorado Springs, Colorado

 Boise area of Meridian, Idaho

Riverside, California (Southern California)

Salem, Oregon

Wheaton, Illinois

St. Cloud, Minnesota

Rockville, Maryland

North Chili, New York (near Rochester)

New Johnsonville, Tennessee

Kenova, West Virginia

Helena, Montana

Middleburg Heights, Ohio

Venice, Florida

Grinnell, Iowa

Piedmont, Alabama

Auburn, Washington (near Seattle)

Elk Grove Village, Illinois

Here is a link to my workshop calendar where you can see all of my travel schedule and to get info on beginner and advanced Brayer workshops:   https://zindorf.splitcoaststampers.com/workshop-calendar 

Link to my Stampin’ Up website where you can order all of your must have Stampin’ Up products from me 24-7:  https://michellezindorf.stampinup.net

Frequently asked questions answers:  https://zindorf.splitcoaststampers.com/frequently-asked-questions/ 
Golden Morning – Tutorial #276

dsc01402.JPG

The birds in this project are from the Halloween Stampin’ Up Set “Graveyard Gala”.    I try very hard not to categorize my stamps by season, holiday etc. because so many stamps in the sets can be used all through the year.  It helps me think outside of the box to have a reference sheet for each set in a binder so I can easily flip through the binder to find an image I would like to use in a scene.  For instance, I knew I wanted to put birds on the ground in this scene so I flipped through the binder to find some birds that were the right size.  When I put them in this scene they don’t look scary at all, but instead look like they are just soaking up the morning rays.  🙂

Here is a link to a an earlier post I did on my stamp storage:  https://zindorf.splitcoaststampers.com/2008/03/14/my-stampin-up-stamp-storage-a-glimps-into-my-world-part-ii/

Let’s get started on the tutorial:

Supplies:

Stamps: Stampin’ Up Graveyard Gala and Pocket Silhouettes
Paper: Stampin’ Up Designer Paper and More Mustard, Whisper White and Basic Black Card Stock
Ink: Stampin’ Up Basic Black, More Mustard, Creay Caramel and So Saffron
Accessories: White Gel Pen, Brayer, White Ribbon, Brads, Photo Corner Punch, Big Shot Die Cut Machine, Damask Texture Plate and a Sponge

Want a free 39 page, Stampin’ Up Mini catalog?  If you are a resident of the United States,  just e-mail your mailing address to me and I will get one in the mail to you.  Are you inspired by this Blog?  One way you can help support this blog is by ordering your Stampin’ Up products through me.   You can order from me 24-7 from this link:  https://michellezindorf.stampinup.net or e-mail me at [email protected].  If you are within the United States.  Want a copy of the brand new 2009-2010 Stampin’ Up Catalog for $9.95 with free shipping, just e-mail me at [email protected] and I will get one in the mail to you.  Want to become a Stampin’ Up Demonstrator and earn instant income?  Consider being part of my Stampin’ Up Team.  Also check out the Stampin’ Up specials, click this link to check it out:  https://www.stampinup.net/esuite/home/michellezindorf/promotions

dsc01403.JPG

Started out with a 3.5″ piece of Whisper White card stock and sponged So Saffron ink all over it.

dsc01383.JPG

Punched a 1 1/4″ circle from the sticky part of a post it note and added to the card stock.  Sponged More Mustard ink around the edge of the post it note to define the sun.  Also sponged More Mustard ink at the top and bottom of the card stock.

dsc01384.JPG

dsc01385.JPG

Sponged Creamy Caramel ink on the bottom of the card stock, not covering the More Mustard ink entirely.

dsc01386.JPG

Stamped the two birds using Basic Black ink.  Removed the sun mask.

dsc01387.JPG

Stamped the plant stamp a few times using Basic Black ink.

dsc01388.JPG

Using just the very edge of the ink Basic Black pad and a half of a “C” motion, (that would be the top half of the “C”) I direct to papered some grasses in the scene.  Practice this on scrap paper before trying it on your card stock.  🙂  Also leave some of the background colors showing through on the ground. 

dsc01390.JPG

Sponged Black ink around the edge of the card stock.

dsc01391.JPG

Added some White gel pen highlights to the plants, tops of the birds and the grasses.

dsc01392.JPG

Adhered a torn piece of Stampin’ Up Designer paper to a piece of More Mustard card stock and then ran both of them through my Big Shot Die Cut machine using the Damask Texture Plate.

dsc01393.JPG

dsc01394.JPG

Brayered More Mustard ink over the top of the card stock to define the texture more and to add a bit of grunge.

dsc01395.JPG

Grunged the card stock up more by sponging Basic Black ink around the edges.

dsc01396.JPG

Assembled the card front and added small black photo corners, brads and white ribbon.

dsc01397.JPG

Here is the finished card measuring 5″ x 6.5″.

dsc01402.JPG

I hope this tutorial has inspired you to look at your holiday stamps in a different light.

May your day be golden.

Until my next post. . . . . . . .  .

Hugs,

Michelle

tiny-bird.jpg  Get ready for Brayer Workshops!  I am coming to:

Moore, Oklahoma

Nashville, Indiana

Portland, Michigan

2010

Dayton, Ohio at Marco Paper

Phoenix, Arizona

Monroe, Louisiana

Jacksonville, Florida

 St. Louis, Missouri

Mechanicsville, Virginia

Raleigh, North Carolina 

Colleyville, Texas

Colorado Springs, Colorado

 Boise area of Meridian, Idaho

Riverside, California (Southern California)

Salem, Oregon

Wheaton, Illinois

St. Cloud, Minnesota

Rockville, Maryland

North Chili, New York (near Rochester)

New Johnsonville, Tennessee

Kenova, West Virginia

Helena, Montana

Middleburg Heights, Ohio

Venice, Florida

Grinnell, Iowa

Piedmont, Alabama

Auburn, Washington (near Seattle)

Elk Grove Village, Illinois

Here is a link to my workshop calendar where you can see all of my travel schedule and to get info on beginner and advanced Brayer workshops:   https://zindorf.splitcoaststampers.com/workshop-calendar Link to my Stampin’ Up website where you can order all of your must have Stampin’ Up products from me 24-7:  https://michellezindorf.stampinup.netFrequently asked questions answers:  https://zindorf.splitcoaststampers.com/frequently-asked-questions/ 
Christmas Card Time – Tutorial #275

dsc01277.jpg

It’s that time of year when my friend Claire shows up wanting to make Christmas cards.  Claire is my Dear, Evil, Friend that got me into stamping, but does not stamp, lol.  But that is a whole different story.  

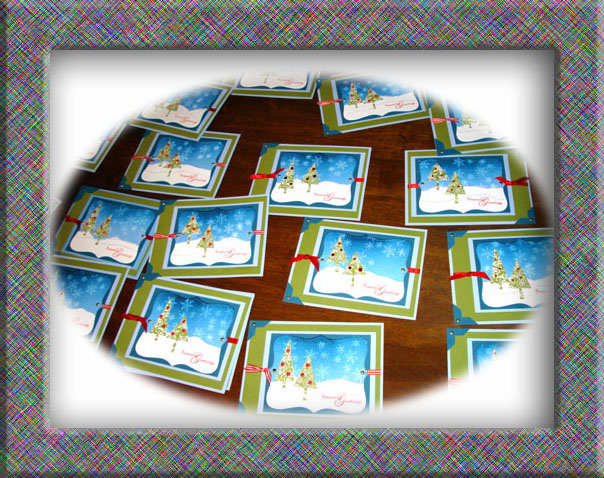
A couple of weekends ago we got together and mass produced 40 of these cards in a day, less the time it took us to go out to lunch, gab, harass each other, tease my husband etc, etc.  🙂  I always tailor the card we make each year to what Claire likes and so it varies a bit from my usual style.  Claire likes layers and do-dads.  Things she can feel on a card.  Me, I tend to not care about the do-dads, lol. 

Anyway, here is a tutorial on this years card.  The tutorial may be missing a couple of pictures.  Hard to remember to pick up the camera when you are having a tremendous amount of fun with a friend.

dsc01380.jpg

Supplies:

Stamps: Stampin’ Up Patterned Pines, Snow Swirled & Serene Snowflakes
Paper: Stampin’ Up Whisper White, Bashful Blue, Not Quite Navy and Old Olive
Ink: Stampin’ Up Old Olive, Whisper White and Not Quite Navy
Accessories: Stampin’ Up Real Red Gingham Ribbon, Real Red & Gold Brads, Dazzling Diamonds Glitter, Brayer, Big Shot Die Cut Machine, Top Note Die, Flourish Texture Plate and the Photo Corner Punch

Want a free 39 page, Stampin’ Up Mini catalog?  If you are a resident of the United States,  just e-mail your mailing address to me and I will get one in the mail to you.  Are you inspired by this Blog?  One way you can help support this blog is by ordering your Stampin’ Up products through me.   You can order from me 24-7 from this link:  https://michellezindorf.stampinup.net or e-mail me at [email protected]  If you are within the United States.  Want a copy of the brand new 2009-2010 Stampin’ Up Catalog for $9.95 with free shipping, just e-mail me at [email protected] and I will get one in the mail to you.  Want to become a Stampin’ Up Demonstrator and earn instant income?  Consider being part of my Stampin’ Up Team.  Also check out the Stampin’ Up specials, click this link to check it out:  https://www.stampinup.net/esuite/home/michellezindorf/promotions

Started out using my Big Shot Die Cut Machine and Top Note Die.  Cut one Whisper White Top Note and one Bashful Blue Top Note.

dsc01281.JPG

Stamped the Greeting from the Stampin’ Up Set Snow Swirled with Real Red ink on the White Top Note.

dsc01282.JPG

Brayered Not Quite Navy ink at the top of the Bashful Blue Top Note.

dsc01283.JPG

Ran the Bashful Blue Top Note through the Big Shot Machine using the Flourish Texture Plate.

dsc01284.JPG

Tore the top and the bottom off of the Whisper White Top Note, discarding the middle portion.  Stacked the two tore pieces at the bottom of the Bashful Blue Top Note to create the snow.

dsc01285.JPG

Used a Heat Gun to dry the brayered on ink and stamped the snowflake stamp from the Stampin’ Up set Serene Snowflakes in the sky area of the Bashful Blue Top Note.

Note:  If you stamp the snowflakes before the Brayered on ink is dry your snowflakes will disappear.  Learned this the hard way, lol.

dsc01286.JPG

Stamped the Tree stamp from the Stampin’ Up set Patterned Pines with Old Olive ink on Whisper White Card stock.

dsc01287.JPG

Cut two of the trees out and adhered them to the front of the card.

dsc01288.JPG

dsc01289.JPG

Assembled Bashful Blue, Old Olive and Not Quite Navy layers, added Real Red Gingham ribbon, Not Quite Navy Photo Corner Punches and Gold Brads.  Also added three Real Red brads to each tree.   It is hard to see, but there is Dazzling Diamonds Glitter on the top of each layer of the snow.

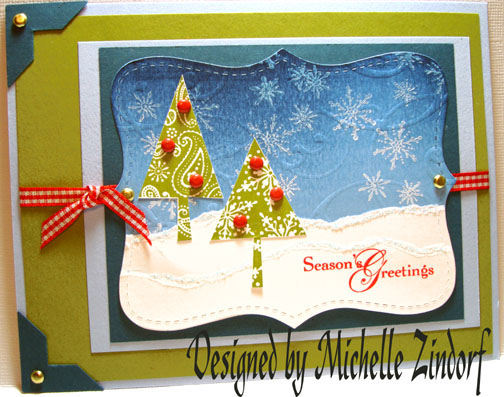
Here is the finished card measuring 5″ x 6.5″.

dsc01380.jpg

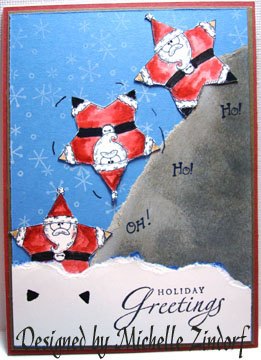
Now for a giggle, I was going through a card stash I have.  You know the card stash, we all have one.  Don’t deny it, lol.

Anyhow, found this old card I created back in 2006.  I had to look way back in my Split Coast Stampers gallery to see when it was created.  Poor Santa!  The Stampin’ Up stamp set used for this is a retired set, Star Santa.  Don’t you just love looking at your old stuff.  It always makes me laugh.

dsc01378.jpg

May your day be filled with fond memories.

Huge Hugs,

Michelle

tiny-bird.jpg  Get ready for Brayer Workshops!  I am coming to:

Moore, Oklahoma

Nashville, Indiana

Portland, Michigan

2010

Dayton, Ohio at Marco Paper

Phoenix, Arizona

Monroe, Louisiana

Jacksonville, Florida

 St. Louis, Missouri

Mechanicsville, Virginia

Raleigh, North Carolina 

Colleyville, Texas

Colorado Springs, Colorado

 Boise area of Meridian, Idaho

Riverside, California (Southern California)

Salem, Oregon

Wheaton, Illinois

St. Cloud, Minnesota

Rockville, Maryland

North Chili, New York (near Rochester)

New Johnsonville, Tennessee

Kenova, West Virginia

Helena, Montana

Middleburg Heights, Ohio

Venice, Florida

Grinnell, Iowa

Piedmont, Alabama

Auburn, Washington (near Seattle)

Elk Grove Village, IllinoisHere is a link to my workshop calendar where you can see all of my travel schedule and to get info on beginner and advanced Brayer workshops:   https://zindorf.splitcoaststampers.com/workshop-calendar 

Link to my Stampin’ Up website where you can order all of your must have Stampin’ Up products from me 24-7:  https://michellezindorf.stampinup.net

Frequently asked questions answers:  https://zindorf.splitcoaststampers.com/frequently-asked-questions/ 
Birds on a Wire – Tutorial #274

dsc01358.JPG

 Happy Sunday!  I am hiding out in my stamp room this morning while my husband assembles the treadmill that we purchased yesterday.  The sales person told us that it is very easy to assemble, but when the box was opened up when we got it home we are finding it has a bunch of parts.  Hence I am hiding, lol.  This may sound mean but couples can get divorced over putting together projects such as this.  🙂 

Anyhow, enough with my ramblings.  Today’s tutorial shows how you can color and stamp just one part of a stamp image to omit parts that you do not want in your scene.  🙂

Let’s get started. . . .

Supplies:

Stamps: Stampin’ Up Friends 24-7
Paper: Stampin’ Up Designer Series paper “Autumn Meadows”, Basic Black and Whisper White
Ink: Stampin’ UP Crushed Curry, Bermuda Bay, Taken with Teal, Not Quite Navy and Basic Black
Accessories: Versamark marker & Pad, Chocolate Chip Ribbon, Gold Brads, Photo Corner Punch, Sponge, Ruler, Piercing Tool, Stampin’ Up markers Creamy Caramel & Basic Black, White Gel Pen, Clear embossin powder and heat gun.

Want a free 39 page, Stampin’ Up Mini catalog?  If you are a resident of the United States,  just e-mail your mailing address to me and I will get one in the mail to you.  Are you inspired by this Blog?  One way you can help support this blog is by ordering your Stampin’ Up products through me.   You can order from me 24-7 from this link:  https://michellezindorf.stampinup.net or e-mail me at [email protected]  If you are within the United States.  Want a copy of the brand new 2009-2010 Stampin’ Up Catalog for $9.95 with free shipping, just e-mail me at [email protected] and I will get one in the mail to you.  Want to become a Stampin’ Up Demonstrator and earn instant income?  Consider being part of my Stampin’ Up Team.  Also check out the Stampin’ Up specials, click this link to check it out:  https://www.stampinup.net/esuite/home/michellezindorf/promotions

dsc01361.JPG

On a 4.5″ x 3.5″ piece of Whisper White card stock, stamped the flourish stamp from the Stampin’ Up set “Friends 24-7” by first loading the stamp with Versamark and then with Crushed Curry ink before stamping it.  Heat embossed the image using clear embossing powder and a heat gun.

dsc01334.JPG

dsc01335.JPG

Colored just the bird on the Bird stamp from the Stampin’ Up set “Friends 24-7” in with a Versamark marker and then with a Basic Black marker.  Huffed my breath on the stamp to moisten and then stamped it on the card stock.    I then heat embossed the bird using clear embossing powder and a heat gun. 

I repeated this process 3 times.

dsc01337.JPG

dsc01336.JPG

dsc01338.JPG

Drew a line for the birds to be sitting on with a ruler and a Versamark marker.  Heat embossed the line with clear embossing powder and a heat gun.

dsc01339.JPG

dsc01340.JPG

Added Creamy Caramel marker to the birds.

dsc01341.JPG

Colored over all three birds with a Versamark marker and heat embossed them with clear embossing powder and a heat gun.  All of the images are now heat embossed entirely.

dsc01342.JPG

dsc01343.JPG

Sponged Crushed Curry in the upper left corner of the card stock.

dsc01344.JPG

Sponge Bermuda Bay ink on the card stock working from the right side in.

dsc01345.JPG

Sponged Taken with Teal ink on the right side of the card stock, not covering the Bermuda Bay ink entirely.

dsc01346.JPG

Sponged Not Quite Navy ink on the right side of the card stock, not covering the Taken with Teal ink entirely.

dsc01347.JPG

Sponged Basic Black ink on the bottom right corner of the card stock and all around the edges.

dsc01348.JPG

Wiped off my embossed images with a clean cotton towel.

dsc01350.JPG

Added a black outline to the right sides of the Crushed Curry flourish and bottom of the wire the birds are sitting on to add a shadow.

dsc01353.JPG

Added White gel pen highlights to the tops of the birds, bellies of the birds and flourish.

dsc01354.JPG

Added Chocolate chip small corner punches to the left side of the main image panel.  Chocolate Chip ribbon and gold brads.  My Design paper panel is from the Stampin’ Up Design Series Paper Pack “Autumn Meadows”.

dsc01355.JPG

Here is the finished card measuring 5″ x 6.5″.

dsc01358.JPG

May you have a day free of assembly.  🙂

Hugs,

Michelle

tiny-bird.jpg  Get ready for Brayer Workshops!  I am coming to:

Moore, Oklahoma

Nashville, Indiana

Portland, Michigan

2010

Dayton, Ohio at Marco Paper

Phoenix, Arizona

Monroe, Louisiana

Jacksonville, Florida

 St. Louis, Missouri

Mechanicsville, Virginia

Raleigh, North Carolina 

Colleyville, Texas

Colorado Springs, Colorado

 Boise area of Meridian, Idaho

Riverside, California (Southern California)

Salem, Oregon

Wheaton, Illinois

St. Cloud, Minnesota

Rockville, Maryland

North Chili, New York (near Rochester)New Johnsonville, TennesseeKenova, West VirginiaHelena, MontanaMiddleburg Heights, OhioVenice, Florida

Grinnell, Iowa

Piedmont, Alabama

Auburn, Washington (near Seattle)

Elk Grove Village, Illinois

Here is a link to my workshop calendar where you can see all of my travel schedule and to get info on beginner and advanced Brayer workshops:   https://zindorf.splitcoaststampers.com/workshop-calendar 

Link to my Stampin’ Up website where you can order all of your must have Stampin’ Up products from me 24-7:  https://michellezindorf.stampinup.net

Frequently asked questions answers:  https://zindorf.splitcoaststampers.com/frequently-asked-questions/