
The Holidays are approaching fast, once again. Didn’t we just have Christmas, lol.
I have a card for you today that will help you invite friends and family to one of your holiday feasts. Don’t forget to invite me, lol.
Let’s get started. . . . .
Supplies:
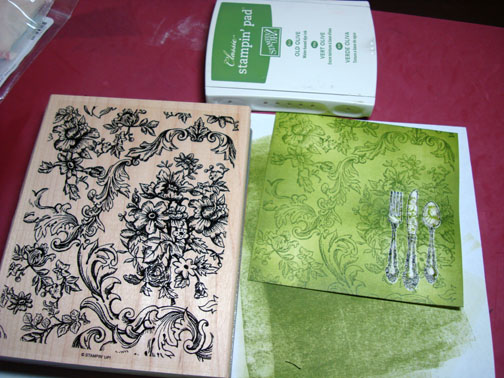
| Stamps: Stampin’ Up! Compliments to the Chef, Christmas Classics & Bella Toile Background |
| Paper: Stampin’ Up! Whisper White, Bravo Burgundy & Always Artichoke |
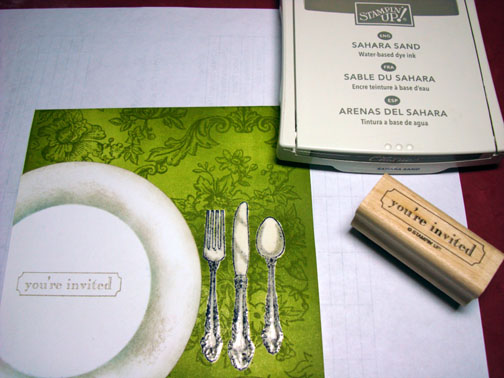
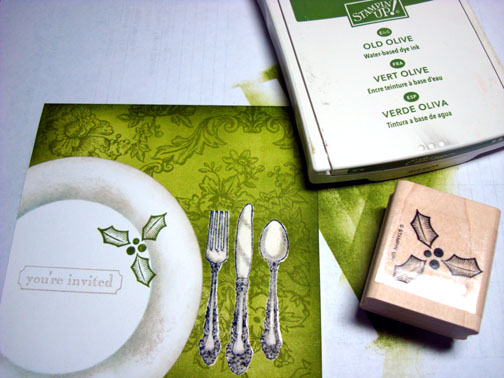
| Ink: Stampin’ Up! Basic Gray, Old Olive and Sahara Sand |
| Accessories: Stampin’ Up markers Certainly Celery, Sahara Sand, Real Red & Basic Black, Versamark marker & pad, Clear embossing powder, heat gun, Sponge, piercing tool, silver brads, Circle Scissors, Bravo Burgundy ribbon |
Want a free 39 page, Stampin’ Up Mini catalog? If you are a resident of the United States, just e-mail your mailing address to me and I will get one in the mail to you. Are you inspired by this Blog? One way you can help support this blog is by ordering your Stampin’ Up products through me. You can order from me 24-7 from this link: https://michellezindorf.stampinup.net or e-mail me at [email protected] If you are within the United States. Want a copy of the brand new 2009-2010 Stampin’ Up Catalog for $9.95 with free shipping, just e-mail me at [email protected] and I will get one in the mail to you. Want to become a Stampin’ Up Demonstrator and earn instant income? Consider being part of my Stampin’ Up Team. Also check out the Stampin’ Up specials, click this link to check it out: https://www.stampinup.net/esuite/home/michellezindorf/promotions

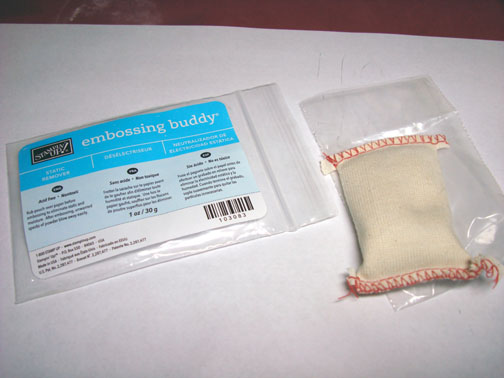
Sometimes I can be stubborn, now if you know me well like friends and family do, you are snorting and exclaiming SOMETIMES! Anyway, I have had an Embossing Buddy for a long time now and it is still new and in the package, at least, until today. This morning I got my Embossing Buddy out and actually used it. I have to omit it is a handy little tool. What you do is rub the little Embossing Buddy bag over your card stock before you stamp on it when you want to heat emboss an image. What this does is help keep your card stock from attracting stray embossing powder. Check it out, like Martha says “it’s a good thing”.
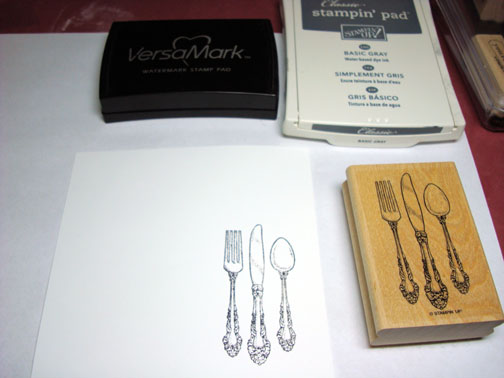
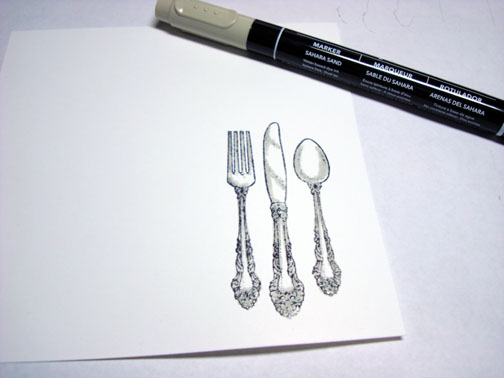
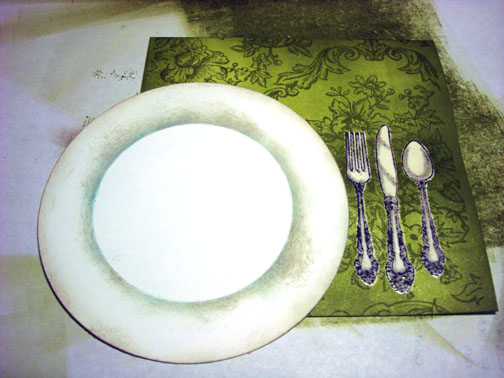
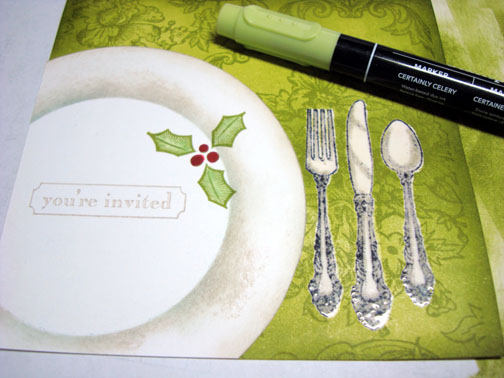
After using my Embossing Buddy on the card stock, I loaded my silverware stamp from the Stampin’ Up set Compliments to the Chef with Versamark and then with Basic Gray ink before stamping it on a 4.75″ square piece of Whisper White card stock.
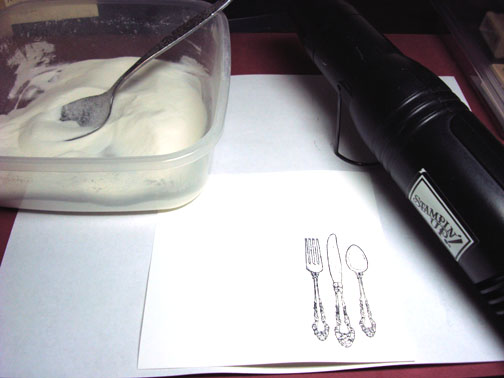
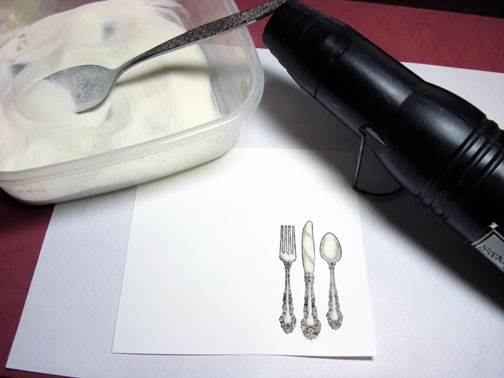
Heat embossed the image using clear embossing powder and a heat gun.
Colored the darker parts of the silverware image with a Sahara Sand marker.
Colored over the entire image with a Versamark marker being careful to stay within the embossed lines.
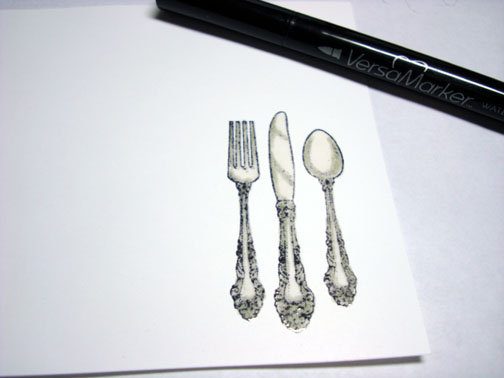
Heat embossed the image again with clear embossing powder and a heat gun. Now my image is protected and will resist any ink put over it.
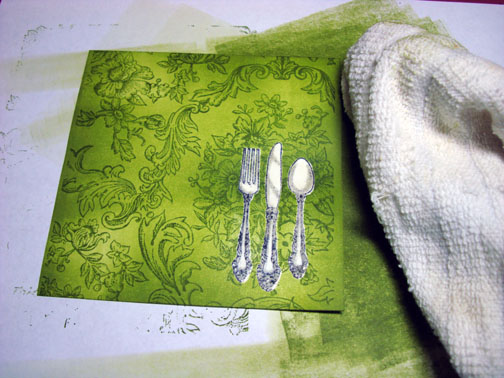
Brayered Old Olive ink on the card stock, working from each side.
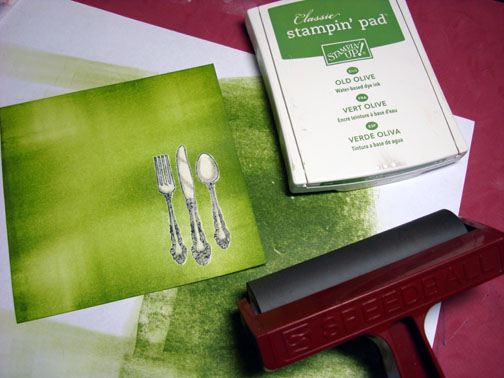
Stamped the Stampin’ Up background stamp with Old Olive ink.
Took and old cloth and wiped off the Old Olive ink from my embossed image.
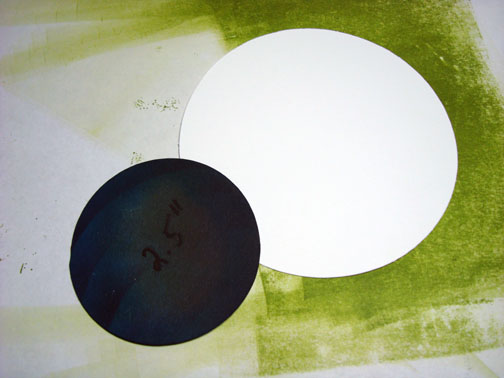
Cut a 4.25″ circle out of Whisper White card stock with my Stampin’ Up Circle Scissors.
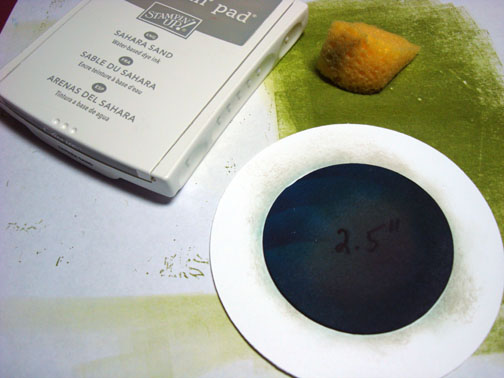
Cut another circle that is 2.5″ out of a scrap piece of card stock.
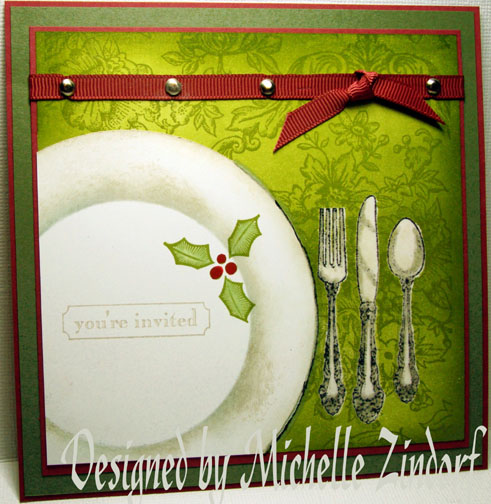
Put the small circle in the center of the large circle and sponged Sahara Sand ink around the edge of the small circle to create the look of a plate. Also sponged some Sahara Sand ink around the outside edge of the large circle.
Glued the plate on the main image panel and then trimmed the excess plate off of the left and bottom sides.
Stamped the You’re Invited stamp from the Stampin’ Up set Compliments to the Chef with Sahara Sand ink.
Note: I did use a Stamp-a-ma-jig for placement of the sentiment.
Stamped the Holly leaf from the Stampin’ Up set Christmas Classics with Old Olive ink.
Sponged around the outside edge of the main image panel with Old Olive ink, omitting the area that has the plate on it.
Colored in the berries on the image with a Real Red marker.
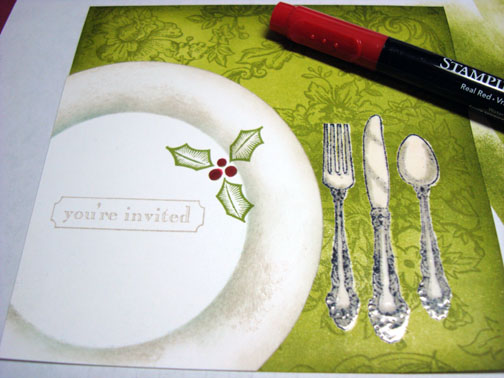
Colored in the holly leaves with a Certainly Celery marker.
Added two panels of Bravo Burgundy and an Always Artichoke panel, Bravo Burgundy ribbon and 4 silver brads. I started my brads with a piercing tool.

Added a shadow on the right side of the plate by outlining it with the brush end of the Sahara sand marker and the fine line end of a Basic Black marker.
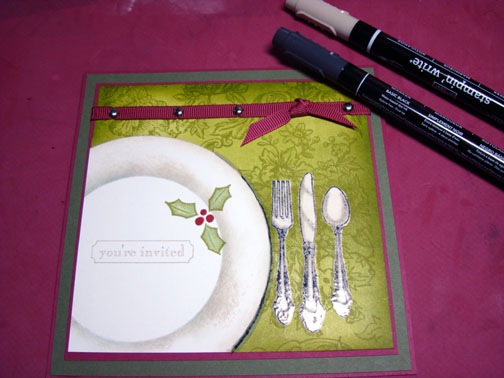
Here is the finished card measuring 5 3/8″ square.
Before I close today, I have to pass on something that my Aunt sent to me.
NOW THIS IS “FUNNY”. I DON’T CARE WHAT ANYBODY SAYS.
I GOT THIS NEW DEODORANT TODAY. THE INSTRUCTIONS SAID REMOVE CAP AND PUSH UP BOTTOM. I CAN BARELY WALK, BUT WHENEVER I FART, THE ROOM SMELLS AWESOME!Sorry folks, that just cracked me up. May your day be full of grins and giggles.Until my next post. . . . . . . . . . Hugs, Michelle
 Get ready for Brayer Workshops! I am coming to:
Broomfield, Colorado
Moore, Oklahoma Nashville, Indiana Portland, Michigan2010
Dayton, Ohio at Marco Paper
Phoenix, Arizona
Monroe, Louisiana
Jacksonville, Florida
St. Louis, Missouri
Mechanicsville, Virginia
Raleigh, North Carolina
Colleyville, Texas
Colorado Springs, Colorado
Boise area of Meridian, Idaho
Riverside, California (Southern California)
Salem, Oregon
Wheaton, Illinois
St. Cloud, Minnesota
Rockville, Maryland
North Chili, New York (near Rochester)
New Johnsonville, Tennessee
Kenova, West Virginia
Helena, Montana
Middleburg Heights, Ohio
Venice, Florida
Ginnell, Iowa
Piedmont, Alabama
Auburn, Washington (near Seattle)
Elk Grove Village, Illinois
Here is a link to my workshop calendar where you can see all of my travel schedule and to get info on beginner and advanced Brayer workshops: https://zindorf.splitcoaststampers.com/workshop-calendar
Link to my Stampin’ Up website where you can order all of your must have Stampin’ Up products from me 24-7: https://michellezindorf.stampinup.net
Frequently asked questions answers: https://zindorf.splitcoaststampers.com/frequently-asked-questions/
Pingback: y Blog Picks and Posts from Here and There Around the Web #12 « Rogue Thoughts…Jean's Stamping Studio in the Rogue Valley