
I woke up this morning with this card rattling around in my head so I started stamping at 5:00 a.m. so I can move on with my day and not forget this idea. But before we get into the tutorial I have a couple of announcements to make.
You Northern Ohio Readers have requested it so here it is, for one day only I will be teaching my brayer workshops in Fairlawn, Ohio near Akron October 10, 2009.
I will also be returning to the Rochester, New York area in North Chili on June 26-27, 2010. 🙂 For those of you who recently attended my New York workshops and requested I come back and teach two more advanced workshops, you got it. On June 27th I will be teaching two advanced workshops that will have different projects and kits in each workshop. Be sure to register early to get a spot. 🙂 If you have never taken one of my workshops, I will be teaching my Beginner workshop there on June 26th.
Now back to the regularly schedule tutorial program, lol.
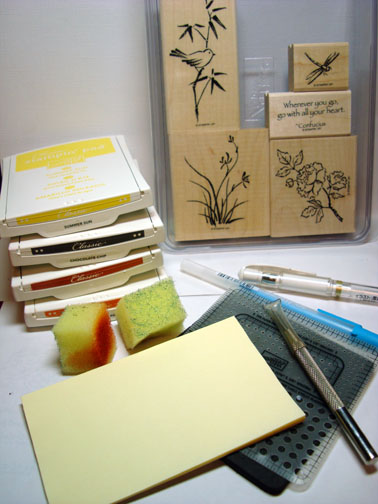
Supplies:
| Stamps: Stampin’ Up Asian Artistry (hostess set) |
| Paper: Stampin’ Up Whisper White, Bashful Blue and Chocolate Chip |
| Ink: Stampin’ Up Summer Sun, Chocolate Chip, Dusty Durango, Pumpkin Pie |
| Accessories: Stampin’ Up Piercing Tool and Mat set, Top Note Die, Big Shot, White Gel Pen, Sponges, Silver Brads, Souffle Sakura Light Blue Pen |
Are you inspired by this Blog? One way you can help support this blog is by ordering your Stampin’ Up products through me. You can order from me 24-7 from this link: https://michellezindorf.stampinup.net or e-mail me at [email protected] if you are within the United States. Want a copy of the brand new 2009-2010 Stampin’ Up Catalog for $9.95, just e-mail me at [email protected] and I will get one in the mail to you. Want to become a Stampin’ Up Demonstrator and earn instant income? Consider being part of my Stampin’ Up Team. Through August 31 you can become a Stampin’ Up Demonstrator for as little as $85 with the mini kit. ![]()
Also Stampin’ Up is now having a weekly special, click this link to check it out:
https://www.stampinup.net/esuite/home/michellezindorf/promotions
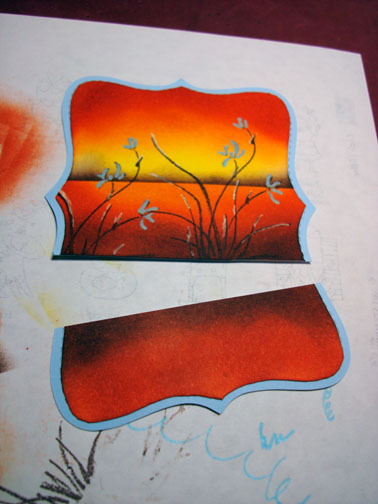
Used my Big Shot and Top Note Die to cut this Top Note out of Whisper White card stock.
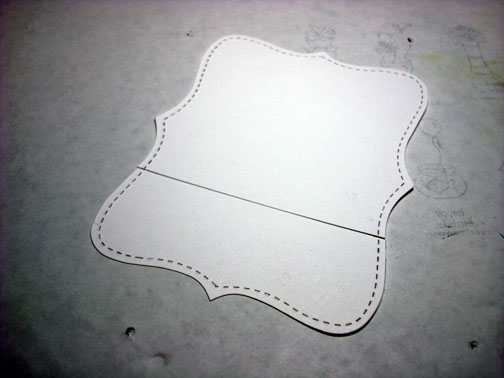
I then cut 1.25″ of it off at one end.

Trimmed the outer edge off of both pieces with scissors.

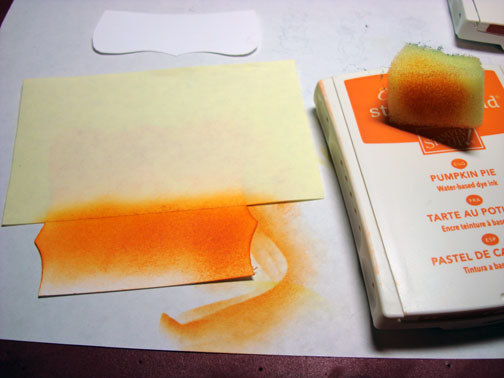
Sponged on Summer Sun ink.
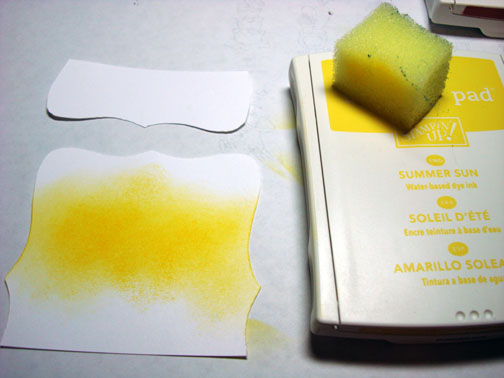
Sponged on Pumpkin Pie ink.

Masked the top of the card stock with a Post it Note.

Sponged Pumpkin Pie ink on the unmasked area.
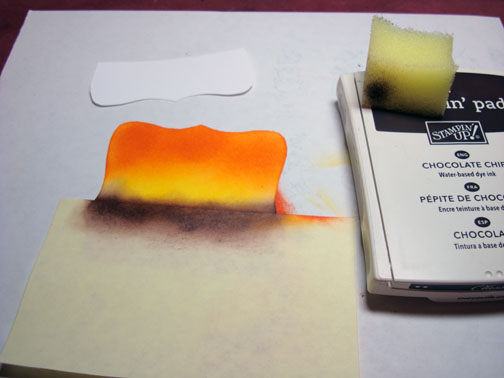
Sponged Dusty Durango ink (another great new In Color by Stampin’ Up) on the bottom of the card stock, not covering the Pumpkin Pie ink entirely.

Took the Post it note off and turned it around so it is masking the bottom of the card stock and sponged a bit of Chocolate Chip ink at the Post it note edge.
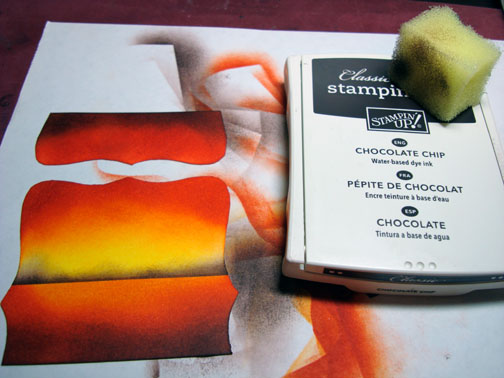
Removed the Post it note and Sponged Dusy Durango on the small piece of card stock and the very top of the larger one.

Sponged Chocolate Chip ink at the bottom of the large piece and top of the small piece of card stock.
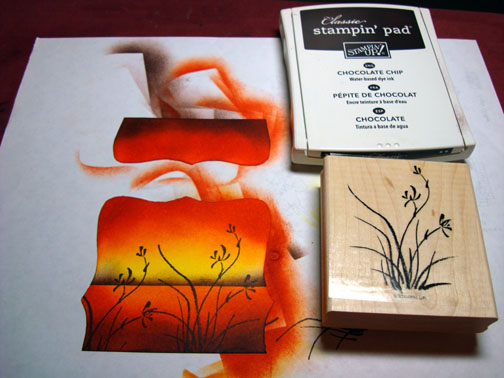
Stamped the Asian Artistry flower twice with Chocolate Chip ink.
I have a bunch of these Sakura Souffle pens and this is the first time I have used one in a tutorial, but I bet you will see this again in the future. These pens can be used on dark colored card stock and stand out great! They don’t sink into the card stock put stay raised.
Use the light blue Souffle Sakura pen on the flower portion of the image. It is hard to see it until it dries completely.
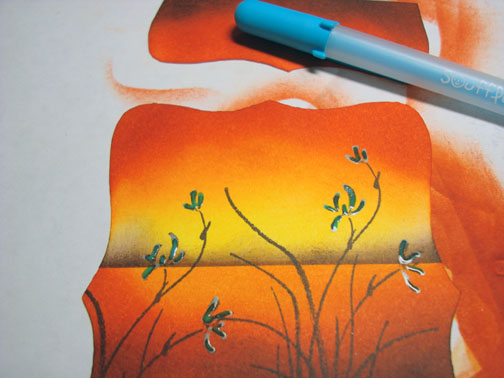
Added White gel pen highlights to the foliage.

Cut another Top Note out of Bashful Blue card stock.

Glued the main image panel pieces to the Bashful Blue Top Note and then cut it apart.

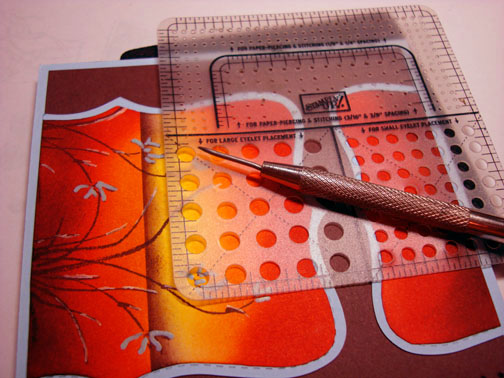
Assembled part of the card front and added piercings down the right and left side using the Stampin’ Up Piercing tools and mat kit.
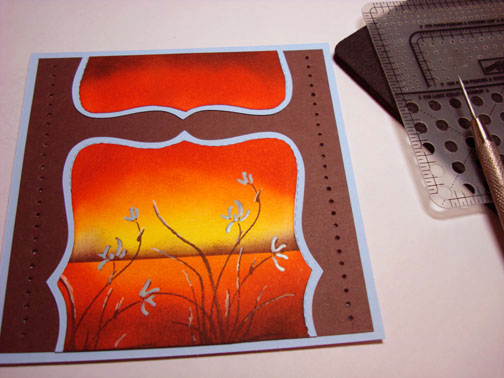
Added White Gel Pen from one piercing whole to the next to create faux stitching.
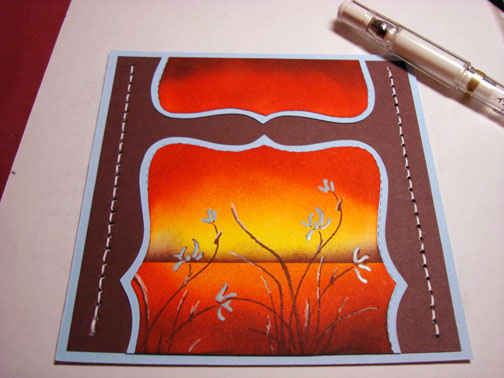
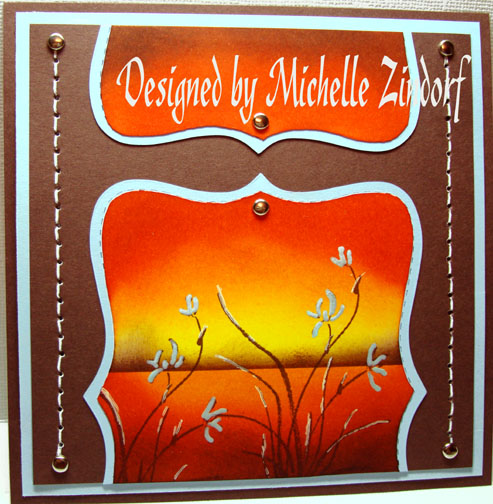
Added Silver brads and assembled the card the rest of the way. Here it is finished measuring 5.25″ square.
I hope this tutorial has inspired you to create a scene today.
Until my next post. . . . . . . . . . . . . . . . .
Huge Hugs,
Michelle
 Get ready for Brayer Workshops! I am coming to:
New Johnsonville, Tennessee
Stoughton, Wisconsin
Dayton, Ohio
Columbia, Missouri
Lynchburg, Virginia
Greenwood, Indiana
Castro Valley, California
Yardley, Pennsylvania (near Philadelphia)
Knox, Maine
Akron, Ohio
Broomfield, Colorado
Moore, Oklahoma
Nashville, Indiana
Portland, Michigan
2010
Phoenix, Arizona
Monroe, Louisiana
Jacksonville, Florida
Mechanicsville, Virginia
Raleigh, North Carolina
Colleyville, Texas
Colorado Springs, Colorado
Salem, Oregon
Wheaton, Illinois
Rockville, Maryland
North Chili, New York (near Rochester)
Here is a link to my workshop calendar where you can see all of my travel schedule and to get info on beginner and advanced Brayer workshops: https://zindorf.splitcoaststampers.com/workshop-calendar
Link to my Stampin’ Up website were you can order all of your must have Stampin’ Up products from me 24-7: https://michellezindorf.stampinup.net
Frequently asked questions answers: https://zindorf.splitcoaststampers.com/frequently-asked-questions/
19 responses to “Top Note Floral Sunrise – Tutorial #232”