
HAPPY FRIDAY!!!
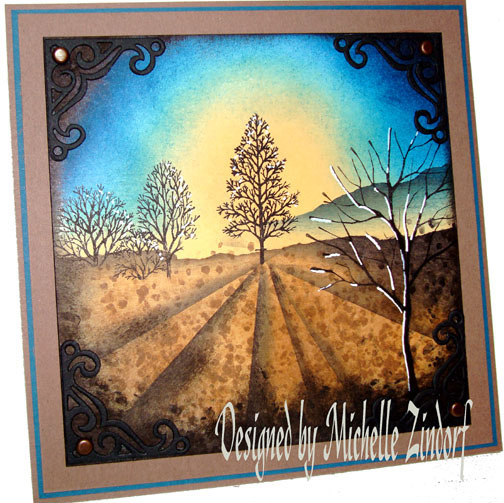
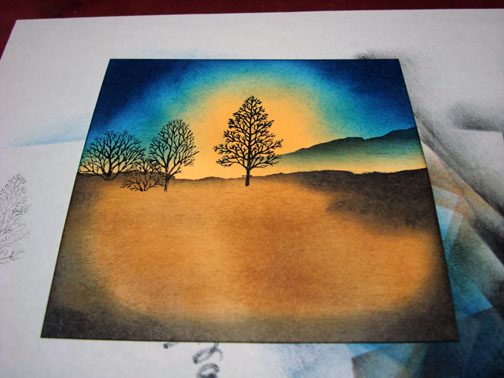
This time of year, in my neck of the woods you see a lot of fields being turned over in preparation for planting. I think there is nothing more beautiful than farm land during sunrise. That was the inspiration for this tutorial today.
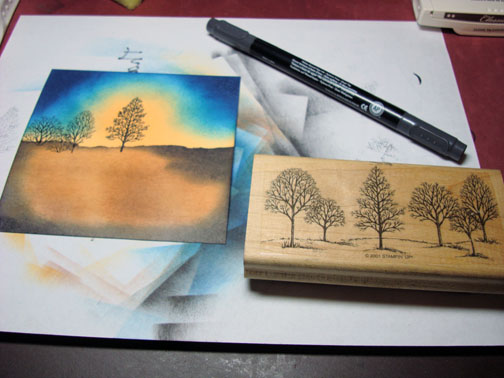
Stampin’ Up came out with some terrific tree stamps this year. I used one of the new sets Branch Out and then an old time favorite of mine, Lovely As a Tree to create this scene.
For you people that love to sponge on ink, this tutorial is for you.
Let’s get started. 🙂
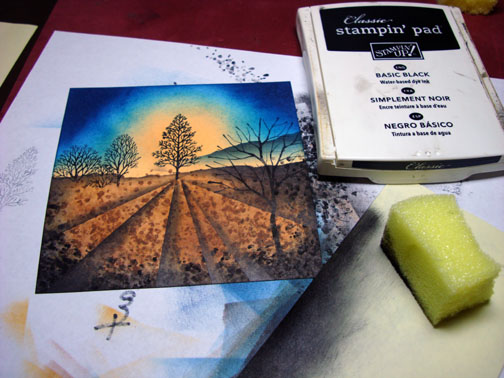
Supplies:
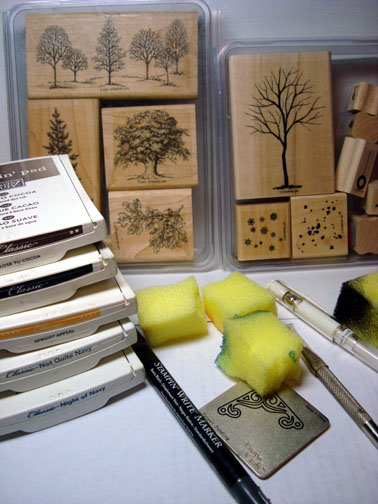
Stamps: Stampin’ Up Branch Out and Lovely as a Tree
Cardstock: Stampin’ Up Whisper White, Close to Cocoa and Not Quite Navy
Ink: Stampin’ Up Close to Cocoa, Basic Black, Apricot Appeal, Not Quite Navy and Night of Navy
Accessories: White Gel Pen, Piercing Tool, Cuttlebug Die, Sponges
Please don’t forget you can order your Stampin’ Up products from me 24-7 from this link: https://michellezindorf.stampinup.net or e-mail me at [email protected] if you are within the United States. Also, please consider being part of my Stampin’ Up Team. We have valuable monthly meetings in Miamisburg, Ohio.
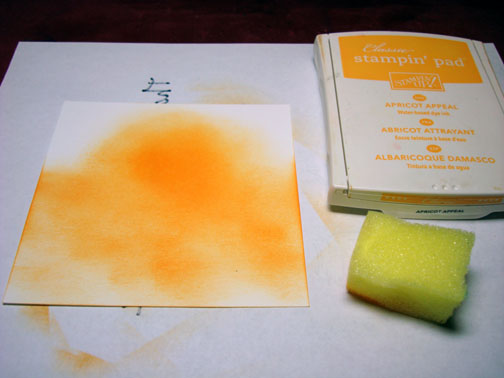
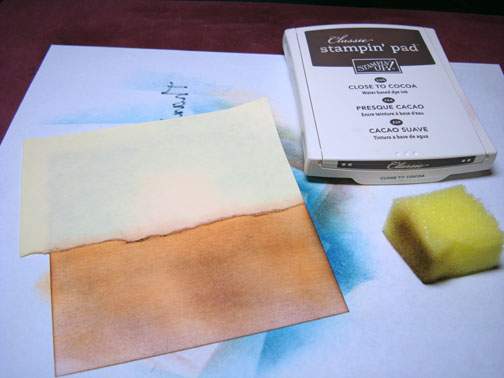
Sponged Apricot Appeal ink on a 4.5″ square piece of Whisper White Card stock.
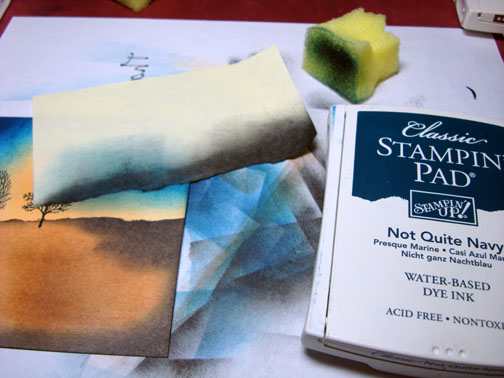
Sponged Not Quite Navy At the top of the card stock, getting darker towards the outside of the card stock.

Sponged Night of Navy ink in each of the top corners.
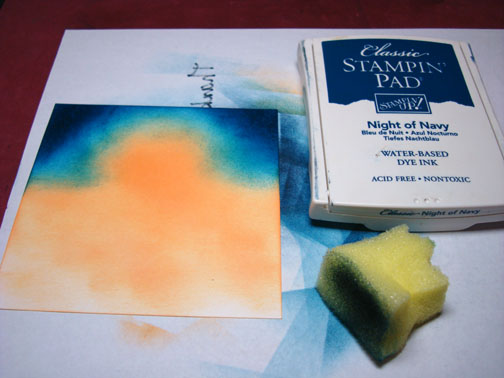
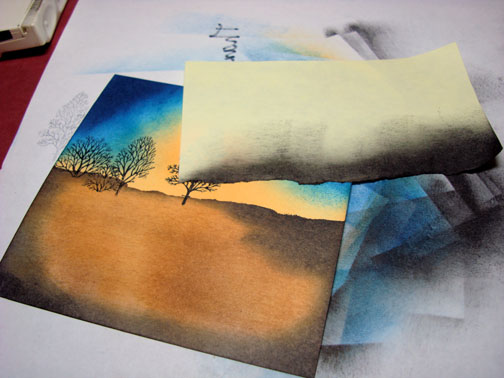
Tore a Post it note through the stick edge and used it as a mask to mask my sky area. I was sure to mask some of the Apricot area under the Not Quite Navy ink so the Apricot Appeal ink would show all across the card stock in the finished piece.
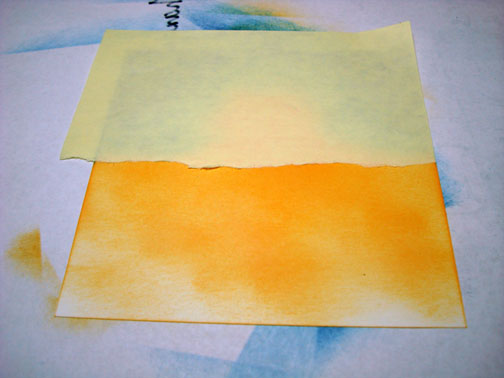
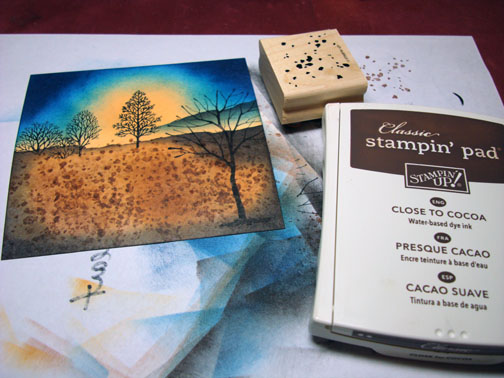
Sponged on Close to Cocoa ink, using a back and forth motion across the card-stock, letting some of the Apricot Appeal ink show through.
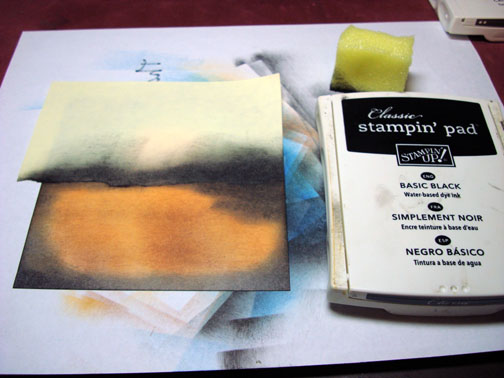
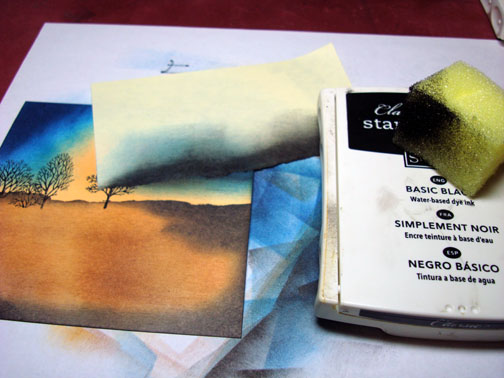
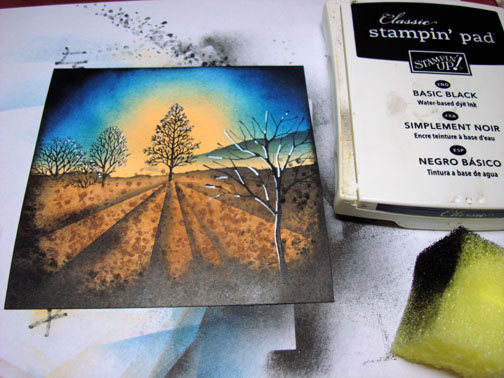
Sponged Black all around the unmasked area.
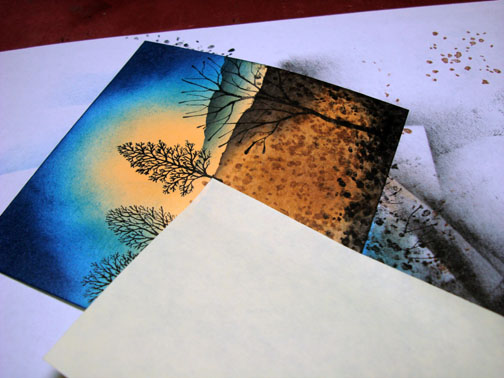
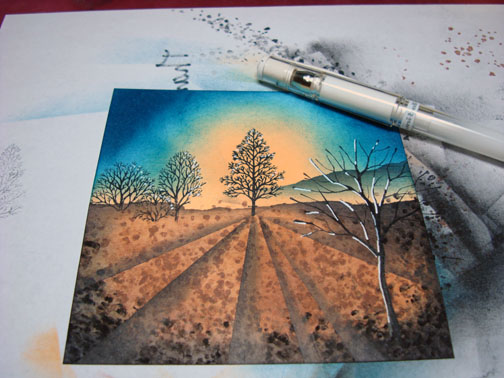
Colored directly on the stamp with a Black marker, just the center tree. Huffed on the stamp and stamped it on the card stock.
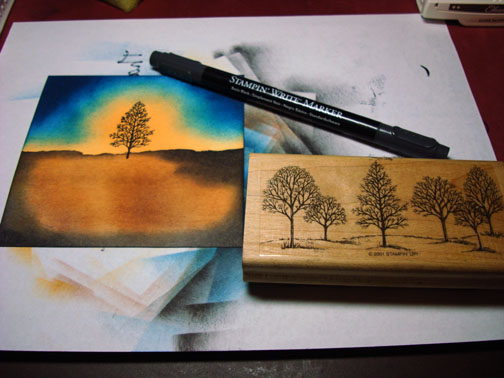
Colored directly on the stamp again, just the three left trees, huffed on the stamp and stamped it on the card stock.
Remember, you don’t always have to use the entire stamped image. 🙂
Used the tore Post it Note Mask again to create a hill in the distance.
Sponged Not Quite Navy ink along the torn post it note edge.
Added a bit of Basic Black ink with a sponge, right at the post it note edge, not covering the Not Quite Navy ink entirely.
Removed mask.
Stamped Branched Out Tree in the foreground with Basic Black ink.

Stamped the leaf stamp from the Branched out set on the ground area with Close to Cocoa ink.
Stamped the same stamp again only with Basic Black ink at the bottom of the card stock.

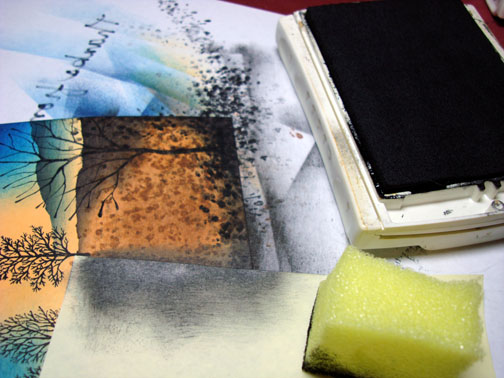
Used a post it note to create the shadows on the ground.
Sponged Basic Black ink lightly at the post it note edge and repeated over and over by moving the post it note to create all of the shadows I wanted.
Highlighted the left side of the large tree with a White Gel pen. I also added a few dots in the small trees for highlights.
Sponged Black ink all the way around the card stock edge.
Although you cannot see the Cuttlebug Die cut corners in the photos they are there, lol. I put one in each corner of the main image panel.
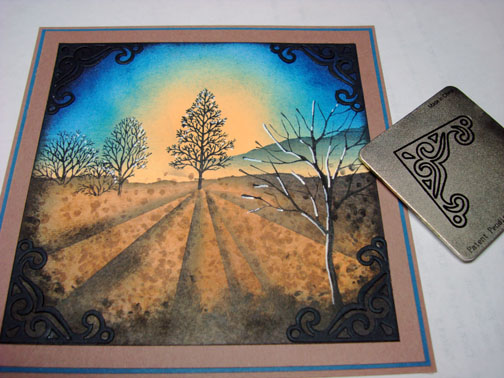
I also put a copper brad on each Cuttlebug corner.
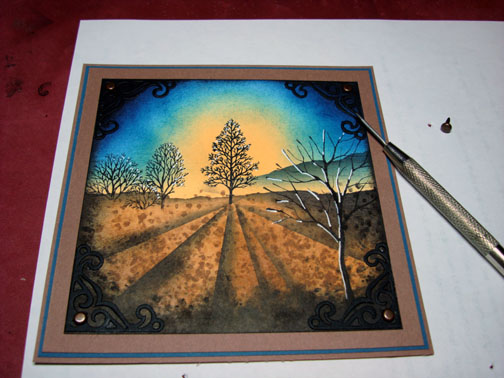
Here is a not so good photo of the finished card. I am in my PJ’s and it is raining outside so I will try later to take a decent photo. 🙂
May you catch a glimpse of a beautiful sunrise in your neck of the woods.
Until my next post. . . . . . . . . . . . .
Hugs,
Michelle
Get ready for Brayer Workshops! I am coming to:

Fort Smith, Arkansas
Dayton, Ohio
Savannah, Georgia
Covington, Indiana
Buffalo, Minnesota
Webster, New York
New Johnsonville, Tennessee
Stoughton, Wisconsin
Castro Valley, California
Yardley, Pennsylvania (near Philadelphia)
Knox, Maine
Broomfield, Colorado
Lynchburg, Virginia
Columbia, Missouri
Portland, Michigan
Here is a link to my workshop calendar where you can see all of my travel schedule and to get info on beginner and advanced Brayer workshops: https://zindorf.splitcoaststampers.com/workshop-calendar
Link to my Stampin’ Up website were you can order all of your must have Stampin’ Up products from me 24-7: https://michellezindorf.stampinup.net
Here is a link to all of my tutorials: https://zindorf.splitcoaststampers.com/tutorials-ive-written/
Frequently asked questions answers: https://zindorf.splitcoaststampers.com/frequently-asked-questions/
35 responses to “Sunrise Field – Tutorial #195”