
I’m packing things up for my beginner brayer workshops in Austin, Texas this weekend on September 20 & 21. If you would like join me there are a few spots available, no prior brayer experience necessary and you will leave the workshop feeling you have mastered this mystery tool. If interested, please contact Lisa Itatani to sign up at [email protected] or https://flatfishpaperarts.blogspot.com/
I’ve never been to Texas before and I’m very excited to have this opportunity to visit this great state. I even get to meet a few of my fellow Split Coast Stamper Dirty Dozen Alumi that have signed up for my workshops, way kewl!
Anyhow, between packing things up for my trip I managed to get this card tutorial completed for your viewing and hopefully doing pleasure. 🙂
Let’s get started. . . . .
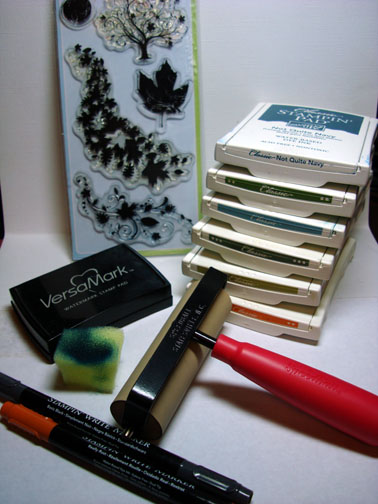
Supplies:
| Stamps: Inkadinkado “Fall Season” |
| Paper: Stampin’ Up Whisper White, Soft Sky, Not Quite Navy, Old Olive |
| Ink: Stampin’ Up Pumpkin Pie, Kiwi Kiss, Always Artichoke, Baja Breeze, Old Olive & Not Quite Navy |
| Accessories: Versamark pad, fine detail clear embossing powder, heat gun, Curvy Cutter & glass mat, Sponges, Brayer, Stampin’ Up markers Really Rust & Black, copper brads |
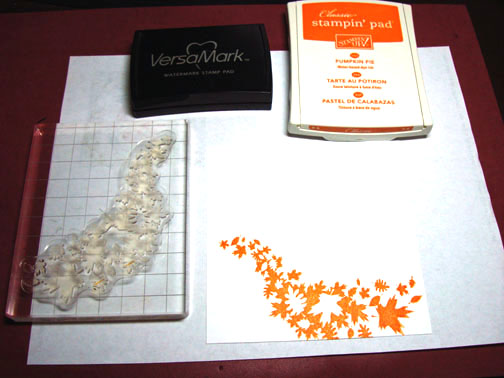
Stamped Leaves by first loading stamp with Versamark and then with Pumpkin Pie ink before stamping.
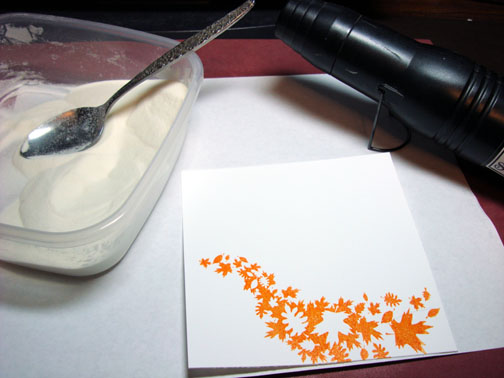
Heat embossed the image using fine detail clear embossing powder and a heat gun.
Stamped Tree by first loading the stamp with Versamark, then Old Olive ink, then I colored the leaves on the stamp with a Really Rust marker and the trunk on the stamp with a Black marker before stamping.
Note: It helps to huff your breath on the stamp before stamping to moisten all the ink a bit when coloring the stamp in with markers. 🙂
Heat embossed the tree image using clear embossing powder and a heat gun.

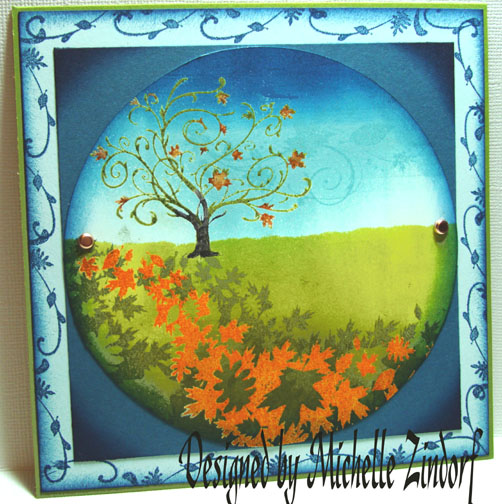
Tore a post it note along the sticky edge and used it to mask the sky area of the card stock. Brayered on Kiwi Kiss ink in the unmasked area.
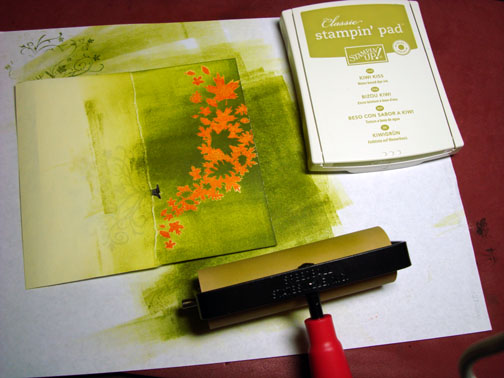
Brayered Always Artichoke ink at the bottom of the card stock.
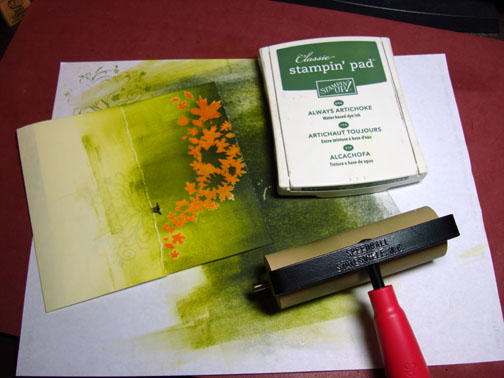
With the post it note mask still in place, stamped leaves image two more times, but this time stamped them using Always Artichoke ink only.
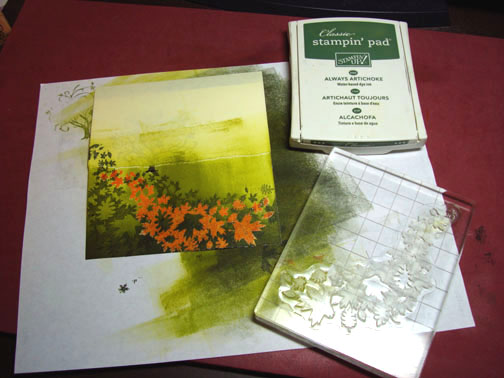
Took post it note off.

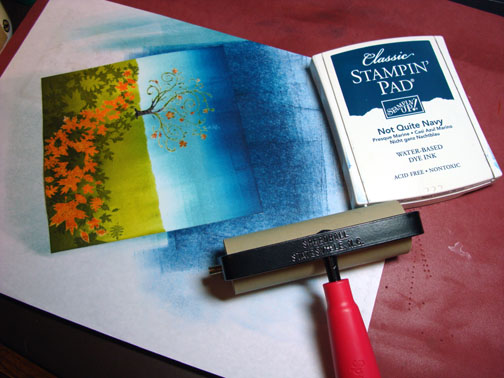
Brayered Baja Breeze ink at top of the card stock.
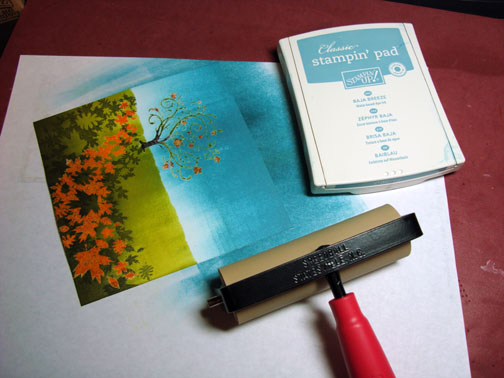
Brayered Not Quite Navy ink at the very top of the card stock, not covering the Baja Breeze ink entirely.
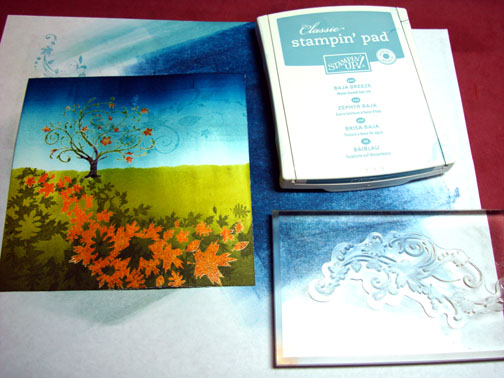
Stamped Leaf flourish stamp with Baja Breeze in the sky area.
Now for a little Curvy Cutter lesson. 🙂
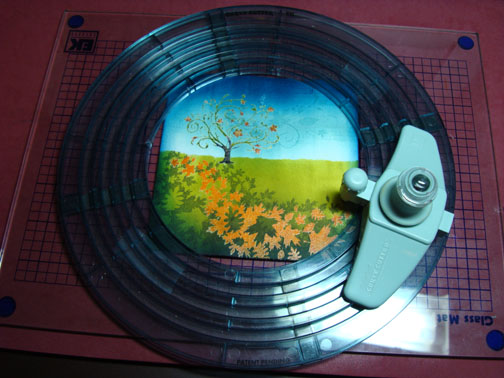
Taped my main image panel down on a glass mat.
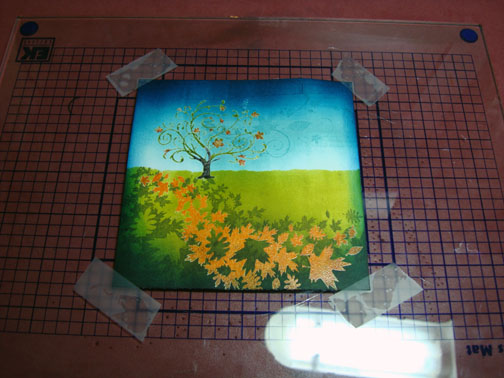
Put my Curvy Cutter over the card stock and determined where I wanted my cut to be.
The cutter comes with this template so you can see exactly where your cut will be when you line up your cutter tip.
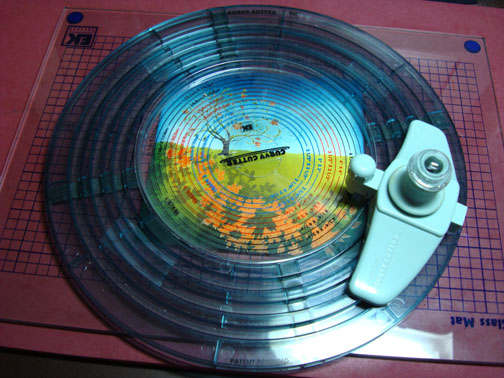
Removed the inside template without moving my cutter and made my cut by moving my cutter around the track on the Curvy Cutter.
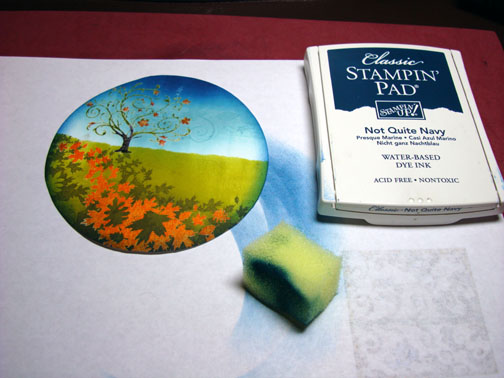
Sponged the edge of the card stock with Not Quite Navy ink.
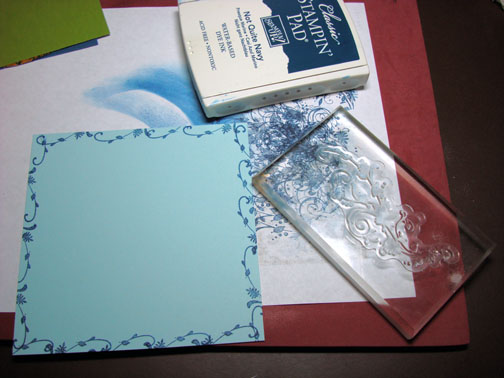
Stamped part of the leaf flourish stamp around the edge of a Soft Sky card stock panel using Not Quite Navy ink.
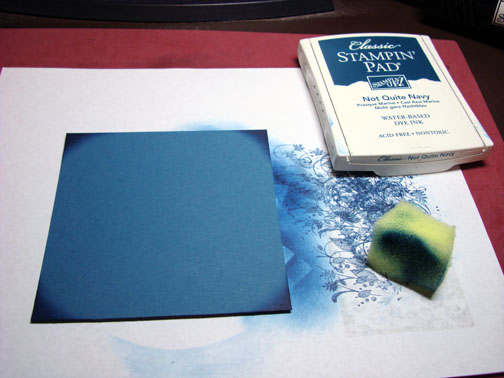
Sponged Not Quite Navy around the edge of the panel.

Sponged Not Quite Navy ink on the corners of a 4 5/8″ square Not Quite Navy Panel.
Assembled card and here it is measuring 5.5″ x 5.5″.
Hope this tutorial has inspired you to MAKE A SCENE today.
May your day be filled with all that your heart desires.
Until my next post. . . . . . . . . .
Hugs,
Michelle
Note: Links to all my tutorials can be found here: https://zindorf.splitcoaststampers.com/tutorials-ive-written/
Here is a link to my workshop calendar if you want to get info on beginner and advanced Brayer workshops: https://zindorf.splitcoaststampers.com/workshop-calendar/
43 responses to “Autumn Day – Tutorial #120”