
Wow! Did I ever have fun reading all of the comments left on yesterdays post telling me where all you readers are from. May I say, I just want to hop in a car, boat or airplane and visit each and everyone of you. Thank you so much for your comments. I now feel like I know a little about all of you. The Internet sure does make the world a little smaller.
And now for the grand announcement! The winner, out of 428 entries, for Wednesday’s blog candy is, drum roll, please. . . . . . . . . . . . . . . . . . .
Beth Greco, who was comment number 317 and who left this comment:
This is yet another lovely card. Thanks for sharing on such a regular basis. I have saved a whole bunch of your tutorials onto my laptop so I can take you with me when I go on holidays ![]() I tried my hand at the Northern Lights one last night and it turned out pretty well.
I tried my hand at the Northern Lights one last night and it turned out pretty well.
Thanks for Sharing!
 Beth e-mail me at [email protected] your mailing address and I will get these in the mail to you.
Thanks to all for playing along!
Now, I do have a tutorial for you today.
Let’s get started. 🙂
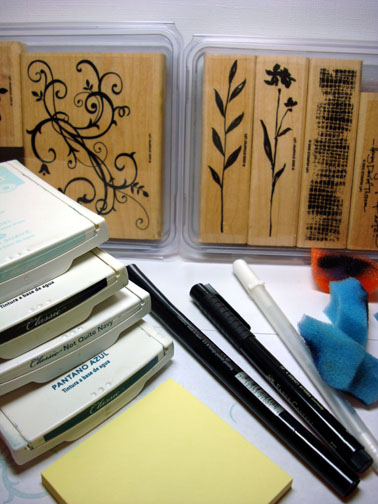
Supplies:
| Stamps: Stampin’ Up Art of Life & Baroque Motifs |
| Paper: Stampin’ Up Whisper White, Soft Sky and Not Quite Navy |
| Ink: Stampin’ Up Soft Sky, Blue Bayou, Not Quite Navy and Basic Black |
| Accessories: Sponges, Black marker, White Gel Pen, Versamark marker |
Sponged Soft Sky ink on a 4″ x 4.5″ piece of Whisper White Card stock. I sponged a bit darker on the right side of the card stock.
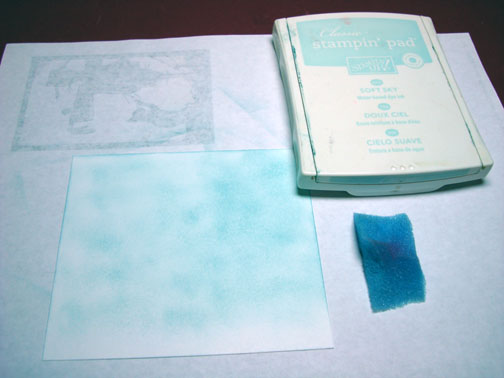
Sponged Blue Bayou ink at the top and right side of the card stock.

Stamped flowers with Not Quite Navy ink.
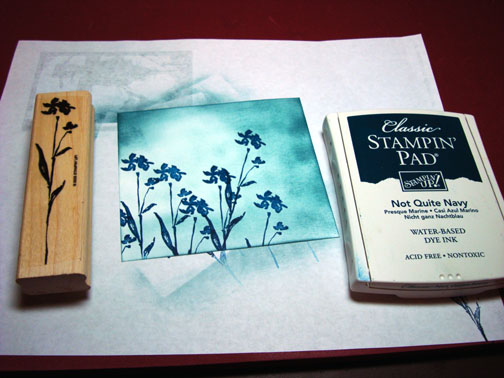
Sponged some Not Quite Navy ink at the top of the card stock.

Tore through the sticky part of two post it notes to create a mask for the sky area.
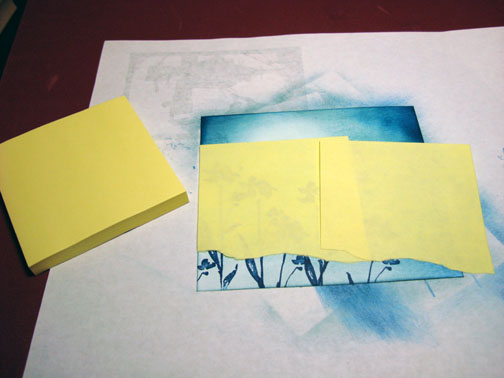
Sponge Not Quite Navy ink heavily on the un-masked ground area.
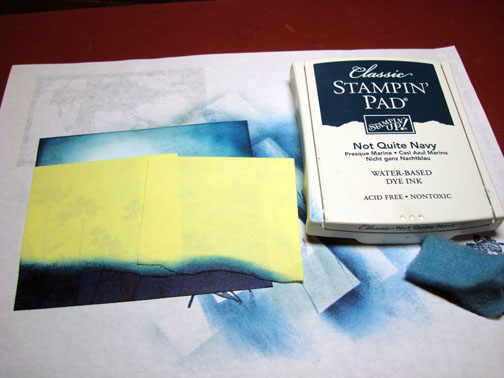
Added some Basic Black in at the bottom of the card stock with a sponge.

Darkened the right side of the flowers and stems with a Faber Castell black marker.

Put White Gel pen highlights at the top of the flowers and along the left side of the stems and leaves.

Assembled card front and stamped flourishes with Soft Sky ink.
Note: When stamping over multiple layers of card stock your image will have gaps in it, see photo. I was able to correct the gaps with a Versamark marker since the design was stamp with Soft Sky ink on Soft Sky card stock.
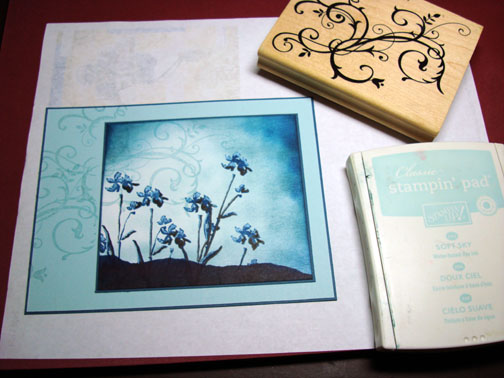
Now that the image gaps are fixed, I highlighted the flourish with a White Gel pen on the left sides of the design.
Note: All of my highlighting with the gel pen was done on the left side of the flowers and flourishes and then along the top of the ground to try to create a sense of where my light source was coming from (right side).
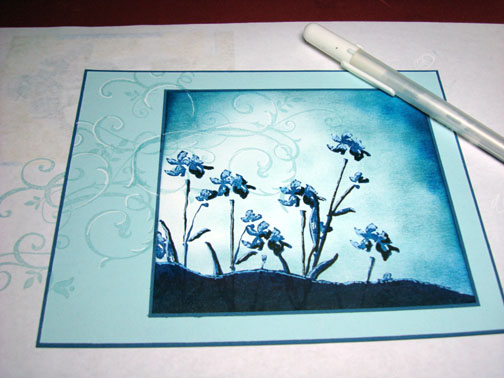
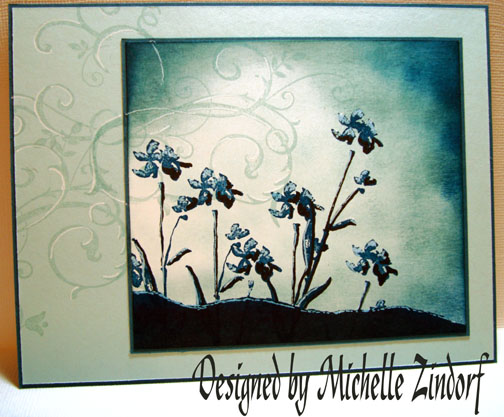
Here is the finished card measuring 5″ x 6.5″.
Note: I will not be posting this weekend due to my, soon to be 5 year old, Grand Daughter’s visit from Fort Campbell, Kentucky. We are traveling today to get her.
May your weekend be filled with gentle breezes and the sweet smell of flowers.
Until my next post. . . . . . . .
Hugs to all!
Michelle
Pingback: find florists in us